Advertisement
Quick Links
Advertisement

Related Manuals for Connect SmartHome CSH-ODCAM


Summary of Contents for Connect SmartHome CSH-ODCAM
- Page 1 Quick Start Guide OUTDOOR SMART SECURITY CAMERA Model: CSH-ODCAM...
-
Page 2: What's Included
Welcome Thank you for choosing our security camera. Getting started is easy. What’s Included Alignment Sticker Antenna Security Camera Tight Line Wall Mount Screw Sets Power Adapter Waterproof Kit Quick Start Guide... -
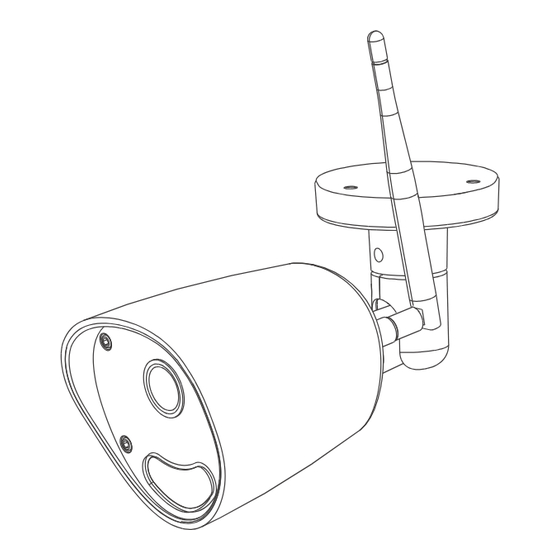
Page 3: Product Details
Product Details Antenna Micro SD card slot Microphone Lens Light sensor Infrared lights 1. Connection Preparation Make sure that the security camera and phone are within range of your router. - Page 4 2. Download the App and create an account For the best experience, please download the "Connect Smarthome" APP to your smartphone from App Store or Google Play, or you can also scan the QR code below, the APP icon will be displayed after installed...
-
Page 5: Insert The Micro Sd Card (Optional)
3. Insert the Micro SD card (optional) Unscrew these two screws at the back of the camera; Unscrew these screws... - Page 6 Take away the cover and insert the SD card gently. Restore the cover with screws for waterproof. Micro SD card slot 4. Connect the power to the camera Connect the power to the camera by DC12V/1A Power Adapter. Reset Button RJ45 Port DC...
- Page 7 5. Set up your camera Press the Reset button from the tight line cable for about 5 seconds, then release the button, the camera will reset. Launch the app from your smartphone and click the Sign Up button. Follow the on-screen instructions. Click "Add Device"...
- Page 8 6. Place or Mount Your Camera You can place your camera on a shelf or other flat surface, or you can mount it to the wall. To mount your camera to the wall: Fasten the mounting screw into the wall, and then mount the camera from the screw.
- Page 9 Mounting on Wall Mounting on Ceiling...
-
Page 10: You're Done
You’re done! Congratulations! Your camera is set up and ready to go. E4651 All trademarks are used for reference purposes only. Thanks again for choosing our security camera! - Page 11 WARRANTY AGAINST DEFECTS Laser Corporation Pty Ltd (“Laser”) warrants your new product to be free from defects in materials and workmanship for 12 months, from the date of purchase, provided that the product is used in accordance with accompanying recommendations or instructions where provided.