Husqvarna 535RX Operator's Manual
Hide thumbs
Also See for 535RX:
- Operator's manual (100 pages) ,
- Operator's manual (36 pages) ,
- Operator's manual (44 pages)
Table of Contents
Advertisement
Advertisement
Table of Contents

Related Manuals for Husqvarna 535RX


Summary of Contents for Husqvarna 535RX
- Page 1 535RX, 535RXT Operator's manual 2-30...
-
Page 2: Table Of Contents
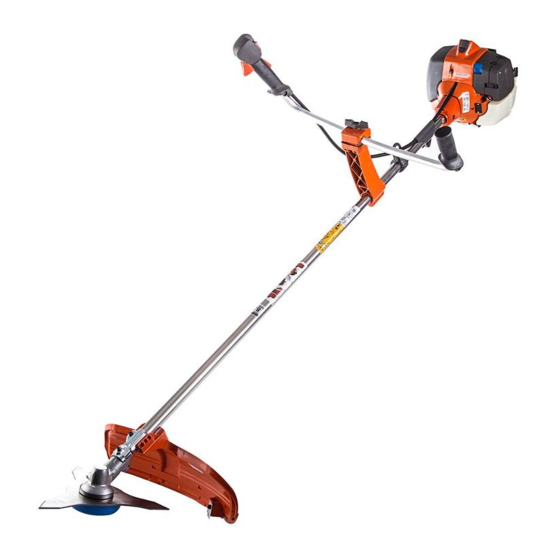
Technical data.............. 28 Operation..............14 Accessories..............29 Maintenance..............21 EC Declaration of Conformity........30 Introduction Product overview 535RX 535RXT 1. Trimmer head 15. Air purge bulb 2. Grease filler cap, bevel gear 16. Air filter cover 3. Bevel gear 17. Handle adjustment 4. - Page 3 29. Spark plug cap and spark plug Keep a minimum of 15 m distance to 30. Start throttle button persons and animals during operation of the 31. Throttle wire adjustment product. 32. Spark plug wrench 33. Guard extension Risk of blade thrust if the cutting equipment touches an object that it does not Product description immediately cut.
-
Page 4: Safety
• the product is not repaired at an approved service center or by an approved authority. Safety Safety definitions Safety instructions for assembly Warnings, cautions and notes are used to point out WARNING: Read, understand and obey specially important parts of the manual. these instructions carefully before you use the product. - Page 5 are hit by objects that are ejected from the cutting • Be careful when you remove material from around attachment. the cutting equipment. The bevel gear gets hot during operation and can cause burn injuries. • Examine the work area. Remove all loose objects, such as stones, broken glass, nails, steel wire and •...
- Page 6 • Do not use a product with defective safety devices. Do a check of and do maintenance on the safety devices regularly. If the safety devices are defective, speak to your Husqvarna service agent. 1069 - 005 -...
- Page 7 2. Push down the throttle trigger lockout and make sure Stop switch that it goes back to its initial position when you Start the engine. Make sure that the engine stops when release it. you move the stop switch to the stop position. 3.
- Page 8 To do a check of the vibration damping system 2. Do a visual check for damage for example, cracks. 3. Release and attach the quick-release mechanism to WARNING: An incorrectly wound cord or an make sure that it operates correctly. incorrect cutting attachment increases the Safety instructions level of vibration.
- Page 9 If the maintenance is not done correctly and regularly, there is an increased risk of injury and damage to the product. • Only do the maintenance as this operator's manual recommends. Let an approved Husqvarna service agent do all other servicing. 1069 - 005 -...
-
Page 10: Assembly
• Let an approved Husqvarna service agent do • Do not put warm objects near the fuel or the engine. servicing on the product regularly. • Do not add the fuel when the engine is on. • Replace damaged, worn or broken parts. - Page 11 To assemble the handlebar 4. Adjust the handlebar to put the product in a good operation position. 1. Put the handlebar into the bracket. 2. Make sure that the holes for the screws align. 5. Tighten the knob fully. 3. Attach the 4 screws but do not tighten fully. To assemble the cutting equipment 4.
- Page 12 3. Turn the output shaft to align one of the holes in the To attach the grass blade and the grass blade drive disc with the related hole in the gear housing. guard/combination guard 4. Put the locking pin (C) in the hole to lock the shaft. 1.
- Page 13 8. Tighten the nut with the socket wrench. Hold the a) Make sure that you operate the socket wrench in shaft of the socket wrench near the blade guard. the identified area when you loosen or tighten the Tighten in the opposite direction to how the cutting saw blade nut.
-
Page 14: Operation
2. Push the 2 parts of the breastplate together. 6. Adjust the height of the suspension point. For forestry clearing, the correct height of the suspension is approximately 10 cm below your hip. Correct balance of the product on page 16 . Refer to Quick release function of the harness WARNING: Do not use the harness if the... - Page 15 This extends the life of the engine. Husqvarna alkylate fuel is not available in all markets. Two-stroke oil...
- Page 16 3. Fill the fuel tank. • If Husqvarna two-stroke oil is not available, use a 4. Tighten the fuel tank cap carefully. different two-stroke oil of good quality for air-cooled engines. Speak to your servicing dealer to select the 5.
- Page 17 For grass clearing, the product is correctly balanced 2. Hold the body of the product on the ground with your when the blade is at cutting height near the ground. left hand. CAUTION: Do not use your feet! 3. Hold the starter rope handle. 4.
- Page 18 • Move in a direction where the wind makes the cut vegetation fall in the cleared area. CAUTION: The stop switch automatically goes back to run position. Blade thrust A blade thrust is when the product moves to the side quickly and with force.
- Page 19 3. Tilt the saw blade and push it with force diagonally 4. Cut through the tree from the other side. up and to the right. At the same time, push the tree with the blade guard. To fell a tree forward CAUTION: If the saw blade becomes blocked, do not pull the product with a To fell forward, push the bottom of the tree rearward.
- Page 20 Grass clearing with a grass blade 3. Decrease the engine speed to decrease the risk of damage to plants. CAUTION: Do not use grass blades and 4. Use 80 % throttle when you cut grass near objects. grass knives on wood. Use grass blades and grass knives for long or heavy grass only.
-
Page 21: Maintenance
To cut the grass To sweep the grass 1. Make sure that the trimmer line is parallel to the The airflow from the rotating trimmer line can be used to remove cut grass from an area. ground when you cut the grass. 1. -
Page 22: Cylinder Cover
Maintenance Daily Weekly Monthly Clean the air filter. Replace if it is necessary. Make sure that the blade is sharp and put correctly in the center, look for cracks. If the blade is not put correctly, it can cause damage to the product. Examine the cutting attachment guard for damages and cracks. - Page 23 To apply oil to the air filter CAUTION: Always use Husqvarna special air-filter oil. Do not use other types of oil. 3. If your product has a special spark arrester screen, clean the spark arrester screen weekly.
- Page 24 5 again 3 times. WARNING: When you loosen and tighten the locknut, there is a risk of 7. Let your Husqvarna dealer adjust/repair the product injury from the blade. You must always if the engine does not operate correctly after you make sure that the blade guard prevents have done all these steps.
- Page 25 To adjust the idle speed WARNING: Always discard a blade that is Your Husqvarna product is designed and made to damaged. Do not try to make a bent or specifications that decrease harmful emissions. twisted blade straight and use it again.
-
Page 26: Troubleshooting
• Make sure that the product and blade has sufficient Note: Sharpen the edges of the teeth with a flat file if support when you sharpen it. the blade is heavily worn. Continue to sharpen with a round file. • Sharpen all edges equally to keep the blade balanced. -
Page 27: Transportation, Storage And Disposal
• When the product is no longer in use, send it to a • Ensure that the product is cleaned and that a Husqvarna dealer or discard it at a recycling complete service is carried out before long-term location. storage. -
Page 28: Technical Data
Technical data Technical data 535RX 535RXT Engine Cylinder displacement, cm 34.6 24.6 Cylinder bore, mm 38.0 38.0 Stroke, mm 30.5 30.5 Idle speed, rpm 2900 2900 Recommended max. speed, rpm 11500 11500 Speed of output shaft, rpm 8220 8220 Max. engine output, according to ISO 8893, kW/rpm 1.60/8400... -
Page 29: Accessories
Equipped with trimmer head (original), left/right 3.0/3.4 2.4/3.1 Equipped with grass blade (original), left/right 3.4/4.1 2.5/2.7 Accessories Accessories 535RX Approved accessories Accessory type Cutting attachment guard, art. no. Center hole in blades/knives, Ø 25.4 Output shaft thread M12 Multi 255-3 (Ø 255 3 teeth) 537 33 16-01 Grass 255-4 (Ø... -
Page 30: Ec Declaration Of Conformity
EC Declaration of Conformity Husqvarna AB, SE-561 82 Huskvarna, Sweden, tel: +46-36-146500, declares that the brush cutters Husqvarna 535RX, 535RXT and with serial numbers dating from 2016 onwards (the year is clearly stated on the rating plate, followed by the serial number), comply with the requirements of the COUNCIL’S DIRECTIVE:... - Page 31 1069 - 005 -...
- Page 33 8,5 m 10 cm 4" 4,2 m "Clic" 15 cm 6"...
- Page 34 4,25 m 4,25 m 15 cm 6" 15 cm 6"...
- Page 35 T35, T35x 8,5 m 10 cm 4" 4,3 m "Clic" 15 cm 6"...
- Page 36 T45, T45x 10 m 10 cm 4" 4,3 m 15 cm "Clic" 6"...
- Page 37 Auto 55 >1,1 Kw <1,1 Kw 2,7 mm - 9,0 m 3,0 mm - 7,5 m 3,3 mm - 6,0 m 15 cm 6" 15 cm 6" 15 cm 15 cm 6" 6"...
- Page 38 Trimmy SII 7,0 m 12 cm 5" ~ 3,5 m ~ 15 cm "Clic" 35-50 NM...
- Page 40 Original instructions 1156004-26 2019-10-08...