Table of Contents
Advertisement
Advertisement
Table of Contents

Related Manuals for Teac MC-DV600


Summary of Contents for Teac MC-DV600
- Page 1 41010013 MC-DV600...
- Page 2 CAUTION: TO REDUCE THE RISK OF ELECTRIC SHOCK, DO NOT REMOVE COVER (OR BACK). NO USER-SERVICEABLE PARTS INSIDE. REFER SERVICING TO QUALIFIED SERVICE PERSONNEL. The lightning flash with arrowhead symbol, within an equilateral triangle, is intended to alert the user to the presence of uninsulated “dangerous voltage”...
- Page 3 THE ELECTRONICS. NO USER SERVICEABLE PARTS ARE WITHIN. IF YOU ARE EXPERIENCING PROBLEMS WITH THIS PRODUCT, CONTACT TEAC FOR A SERVICE REFERRAL. DO NOT USE THE PRODUCT UNTIL IT HAS BEEN REPAIRED. USE OF CONTROLS OR ADJUSTMENTS OR PERFORMANCE OF PROCEDURES OTHER THAN THOSE SPECIFIED HEREIN MAY RESULT IN HAZARDOUS RADIATION EXPOSURE.
-
Page 4: Table Of Contents
Thank you for choosing TEAC. Read this manual carefully to get the best performance from this unit. Before Use ........... . 5 Discs . -
Page 5: Before Use
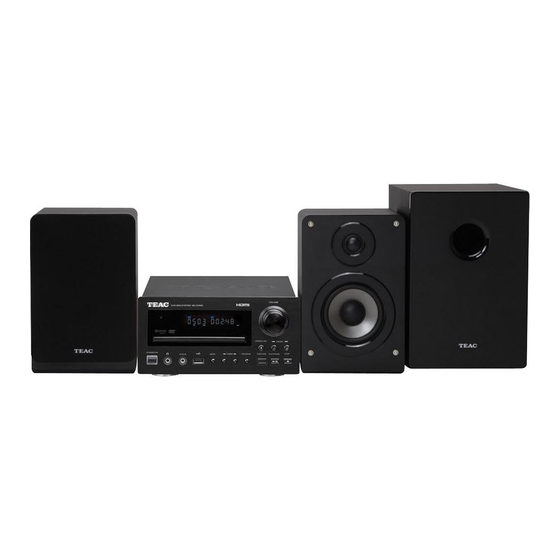
Confirm the supplied standard accessories. Remote control unit (RC-1271) x 1 Batteries (AAA, R03, UM-4) for remote control unit x 2 Speaker x 2/Subwoofer x 1 RCA video cable x 1 FM antenna x 1 Owner’s manual (this document) x 1 Keep this manual in a safe place for future reference. -
Page 6: Discs
CD standard may not play back correctly in this player. If you model use such discs in this unit, TEAC Corporation and its subsidiaries cannot be responsible for any consequences or guarantee the quality of reproduction. If you experience problems with such non-standard... - Page 7 This unit can play following files recorded on a CD-R, CD-RW, DVD-R, DVD-RW or USB memory device: MP3 files Windows Media-formatted audio files JPEG files File names should be alphanumeric characters. This unit cannot display symbols and full-size or double-byte characters (such as Japanese, Chinese, etc.) correctly.
-
Page 8: Usb Memory Device Compatibility
USB memory device compatibility Only USB flash memory can be used. Do NOT use a high-capacity USB hard disc with this unit. Some flash memory players that charge from an USB terminal cannot be played back. Hard disk drives, CD/DVD drives, and other devices than flash memory connected via USB cannot be used. -
Page 9: Speaker Connection
After all connections are complete, connect the power cord’s plug to the AC wall socket. Read the instructions of each component you intend to use with this unit. Be sure to connect each plug securely. To prevent hum and noise, do not bundle the connection cords. Subwoofer Check the impedance of your speakers. -
Page 10: Connection To A Tv
After all connections are complete, connect the power cord’s plug to the AC wall socket. Read the instructions of each component you intend to use with this unit. Be sure to connect each plug securely. To prevent hum and noise, do not bundle the connection cords. Connection to a TV Connect only one of these cables. - Page 11 Adjust the video aspect ratio to match that of the TV (page 34). This unit adopts analog copy protection features. If the unit is connected to a TV through a VCR (video cassette recorder), the resulting playback may be affected. Connect the unit directly to the TV.
-
Page 12: Connection To Audio Equipments Etc
Connection to Audio Equipments etc. Digital audio device (CD recorder, MD deck, etc.) Wall socket CD player, etc. Cassette tape deck, etc. - Page 13 After all connections are complete, connect the power cord’s plug to the AC wall socket. Read the instructions of each component you intend to use with this unit. Be sure to connect each plug securely. To prevent hum and noise, do not bundle the connection cords. Digital audio from DVD-Video, CD and video CD is output from this terminal.
-
Page 14: Identifying The Parts (Main Unit)
Identifying the Parts (Main Unit) - Page 15 Remote sensor Receives signals from the remote control unit. Point the remote control unit at this sensor when operating the remote control unit. Display Disc tray VOLUME Turn this knob to adjust the volume level. Skip ( )/PRESET In FM mode, use these buttons to select a preset channel. In DISC or USB mode, use these buttons to skip tracks/files.
-
Page 16: Identifying The Parts (Remote Control Unit)
Identifying the Parts (Remote Control Unit) STANDBY/ON Use this button to turn the unit on and standby. Source Use these buttons to select a source. PRESET EQ (Preset Equalizer) Use this button to select a Preset Equalizer (Classic, Jazz, Rock, Pop and flat (off) modes). -
Page 17: Front Panel Display
S.BASS Use this button to boost the bass. LOUDNESS Use this button to compensate for the loss of bass at low volumes. AUDIO Use this button to select the audio for playback. ZOOM In DISC or USB mode, use this button to enlarge the image. MENU In DISC mode, use this button with menu-enabled DVD discs to bring up the DVD menu. -
Page 18: Remote Control Unit
The provided Remote Control Unit allows the unit to be operated from a distance. When operating the remote control unit, point it towards the remote sensor on the front panel of the unit. Even if the remote control unit is operated within the effective range (16 ft/5 m), remote control operation may be impossible if there are any obstacles between the unit and the remote control. -
Page 19: Setting The Clock
When you connect the power cord into the wall socket and turn on the unit for the first time, set the clock. If the unit is on, press the STANDBY/ON button to put it in the standby mode. Press the CLOCK button. If “- -:- -”... -
Page 20: Basic Operation
This chapter describes the basic operation which is available in every mode. When you use the unit for the first time, set the clock and the setting of the unit. (see previous page for “Setting the Clock” and page 33 for “Settings”). - Page 21 You can record the sound of a disc or USB memory device onto a CD or a cassette tape connected to the DIGITAL OUT terminal or the LINE OUT jacks. The sound of other sources does not come out of the terminal or jacks.
-
Page 22: Listening To A Disc
Press the FUNCTION button to select “DISC Source”. When no disc is loaded in the disc tray, “NO DISC” is displayed. Press the OPEN/CLOSE ( ) button to open the tray. Insert the disc label side up. In the case of double-sided discs, the side to be played should be face down. -
Page 23: Listening To An Usb Memory Device
Listening to an USB Memory Device For about USB memory device compatibility, see page 8. Press the FUNCTION button to select “USB Source”. Plug your USB memory device into the USB connector. It takes a few seconds for the unit to load the USB memory device. - Page 24 When a Video CD (Version 2.0) or Super Video CD with Playback Control functions (PBC) is loaded, a menu will appear on the screen. Select an item using the Number buttons to start playback. If the track or chapter number is less than 9, press the 0-9 number buttons.
- Page 25 Press the MENU button to switch between the folder list and the file list. When you select the file list, you can select a file without selecting the folder. If you want to return to the parent folder, display the folder list using the MENU button, select “...”...
-
Page 26: Pausing Playback (Freezing A Picture)
Pausing Playback (Freezing a Picture) Press the Play/Pause ( / ) button to pause audio playback. Any DVD or video CD image is frozen. Press the Play/Pause ( / ) button again to restart playback. CAUTION Do not leave player in the pause mode for extended periods of time. -
Page 27: Selecting A Chapter Or Track
Selecting a Chapter or Track DVD, Video CD and CD Use the Number buttons to select tracks or chapters for playback. For instance, to select track number 35, press “+10”, “+10”, “+10” and “5”. The Number buttons do not work during PBC playback of video CDs (page 24). -
Page 28: Repeat And Shuffle Playback
Each time the Repeat ( This feature is not available for some discs. The “prohibit” mark is shown on the screen in such cases. If one of the following buttons is pressed, repeat mode will be canceled: CHAPTER TITLE CHAPTER The currently selected chapter will be played repeatedly. -
Page 29: Changing The Display Mode
Changing the Display Mode Each time the DISPLAY button is pressed during playback, following information appears on the screen. CD/Video CD Time Search (VCD/CD) You can start playback from the specified hour/minute/second. During playback, press the GO TO button. To search within the entire disc Press the GO TO button once. -
Page 30: Time Search (Mp3/Wma)
Time Search (MP3/WMA) You can start playback from the specified minute/second. During playback, press the GO TO button twice. Press twice “- - : - -” is highlighted on the screen. Within 7 seconds, enter your desired minute and second using the Number buttons. -
Page 31: Programmed Playback (Dvd, Vcd, Cd)
Programmed Playback (DVD, VCD, CD) Up to 20 chapters/tracks can be programmed in the desired order. If another source is selected, press the DVD button to select “DISC Source”. You can also select “DISC Source” by using the FUNCTION button on the main unit. -
Page 32: Programmed Playback (Mp3, Wma)
Programmed Playback (MP3, WMA) If another source is selected, press the DVD or USB button to select “DISC Source” or “USB Source”. You can also select “DISC Source” or “USB Source” by using the FUNCTION button on the main unit. Select a file using the Cursor buttons, then press the PROGRAM button. -
Page 33: Settings (Introduction)
This chapter describes how to use the SETUP menu. Most settings and adjustments are required to be set when you first use the system. Using the SETUP menu, you can adjust the picture size, set a preferred language for audio, the OSD (On Screen Displays), and limit playback by children, etc. -
Page 34: Settings (General Setup)
The shape of the TV or monitor may not match the shape of the movie frame. To avoid distortion on older TVs, you may need to change the way in which the image is displayed. TVs use a 4:3 aspect ratio;... -
Page 35: Settings (Audio Setup)
You can select the audio signal output suitable for the connected device when playing the digital source. Select this when you do not use the DIGITAL OUT or HDMI out terminal. No signal is output from these terminals. Select this when the unit is connected to an audio component equipped with a built-in digital audio decoder via the DIGITAL OUT or the HDMI out terminal. -
Page 36: Settings (Video Setup)
This setting is for selecting the output terminal of the video. You can select “S-VIDEO” (S-video output) or “Y Cb/Pb Cr/Pr” (Component video output). S-VIDEO Select this if you have connected the unit to your TV using S-Video jack. Y Cb/Pb Cr/Pr Select this if you have connected the unit to your TV using Component video jacks. -
Page 37: Settings (Preference) (1
AUTO (Default) Select this to have the signal output when your TV or monitor is connected to the HDMI out terminal. Select this when you do not use the HDMI out terminal. No signal is output from the HDMI out terminal. This setting is available only when your TV is connected to the HDMI terminal, and the HDMI SETUP setting is set to “AUTO”. -
Page 38: Settings (Password Setup)
Settings (PREFERENCE) (2) Playback of some DVD discs can be limited depending on the age of the users. The parental control system allows the playback limitation level to be set by the parent. The default setting is “8”. Notes: The lower the level, the stricter the limitation. If the rating of the loaded DVD disc is higher than the level you set, the system will require a password. -
Page 39: Listening To The Fm Radio
Select “FM Radio” using the FUNCTION button. You can also select “FM Radio” by pressing the FM button on the remote control unit. Hold down the TUNING ( than 1 seconds to select the station you want to listen to (Auto selection). -
Page 40: Preset Tuning
Preset Tuning You can store up to 20 FM stations. Tune in to a station you want to listen to (see previous page). Press the PROGRAM button. Select a preset channel to store the station using the PRESET buttons, and then press the PROGRAM button again. -
Page 41: Sleep Timer
Play the source, and adjust the volume using the VOLUME knob of the MC-DV600 and of the audio player. When using the PHONES jack of your mini player, you must adjust the volume of the mini-player or you may hear no sound from your MC-DV600. -
Page 42: Wake Up Timer
The unit can be programed to turn on at a specified time. Adjust the clock before setting the timer (page 19). If the unit is on, press the STANDBY/ON button to turn it off (standby). Press the TIMER button. Press the TIMER button twice if the unit is in ECO Power Standby mode (page 20). -
Page 43: Troubleshooting
If you have problems with your system, look through this chart and see if you can solve the problem yourself before calling your dealer or TEAC service center. No power. Check the connection to the AC power supply. Check and make sure the AC source is not a switched outlet and that, if it is, the switch is turned on. - Page 44 There is no sound or only a very low-level sound is heard. Adjust the volume. Check the connection to the speakers. Check the DIGITAL AUDIO SETUP (DIGITAL OUTPUT) (page 35). The sound is muted during pause and fast forward/reverse. Press the Play/Pause ( / ) button to resume normal playback.
-
Page 45: Specifications
DVD player Pickup ... . Semiconductor laser, Wave length 650/790 nm Signal system ......... NTSC/PAL Video signal horizontal resolution . - Page 48 7733 Telegraph Road, Montebello, California 90640 U.S.A. Phone: (323) 726-0303 TEAC CANADA LTD. 5939 Wallace Street, Mississauga, Ontario L4Z 1Z8, Canada Phone: (905) 890-8008 TEAC MEXICO, S.A. DE C.V. Río Churubusco 364, Colonia Del Carmen, Delegación Coyoacàn, CP 04100, México DF, México Phone: (5255)5010-6000 TEAC UK LTD.