Table of Contents
Advertisement
Available languages
Available languages
Quick Links
User manual
Original user manual
EN
INSTRUCTION MANUAL
Translation of original user manual
BG
НАРЪЧНИК С ИНСТРУКЦИИ
CS
NÁVOD K OBSLUZE
DA
BETJENINGSVEJLEDNING
DE
BEDIENUNGSANLEITUNG
EL
ΕΓΧΕΙΡΙΔΙΟ ΧΡΗΣΗΣ
ES
MANUAL DE INSTRUCCIONES
ET
KASUTUSJUHEND
FI
KÄYTTÖOHJEET
FR
MANUEL D'INSTRUCTION
HU
FELHASZNÁLÓI KÉZIKÖNYV
IT
MANUALE D'ISTRUZIONE
LT
LIETOŠANAS INSTRUKCIJA
2013-08-29
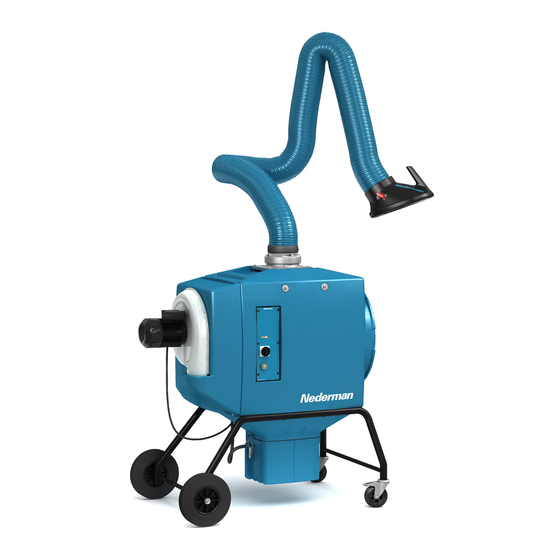
Compact Fume and Dust Extractors
00000975
OK
FilterBox
OK
LV
NAUDOJIMO INSTRUKCIJA
NL
HANDLEIDING
NO
BRUKSANVISNING
PL
INSTRUKCJA UŻYTKOWANIA
PT
MANUAL DE INSTRUÇÕES
RO
MANUAL DE UTILIZARE
RU
РУКОВОДСТВО ПО ЭКСПЛУАТАЦИИ
SK
NÁVOD NA POUŽITIE
SL
NAVODILA ZA UPORABO
SV
ANVÄNDARMANUAL
TR
İŞLETME KILAVUZU
ZH
说明书
144896(04)
Advertisement
Chapters
Table of Contents

Related Manuals for Nederman FilterBox Series


Summary of Contents for Nederman FilterBox Series
- Page 1 User manual Compact Fume and Dust Extractors FilterBox 00000975 Original user manual INSTRUCTION MANUAL Translation of original user manual НАРЪЧНИК С ИНСТРУКЦИИ NAUDOJIMO INSTRUKCIJA NÁVOD K OBSLUZE HANDLEIDING BETJENINGSVEJLEDNING BRUKSANVISNING BEDIENUNGSANLEITUNG INSTRUKCJA UŻYTKOWANIA ΕΓΧΕΙΡΙΔΙΟ ΧΡΗΣΗΣ MANUAL DE INSTRUÇÕES MANUAL DE INSTRUCCIONES MANUAL DE UTILIZARE KASUTUSJUHEND РУКОВОДСТВО ПО ЭКСПЛУАТАЦИИ...
-
Page 2: Table Of Contents
FilterBox Declaration of conformity ................... Figures ................................. English ..............................Български ............................Český ................................Dansk ................................. Deutsch ..............................Ελληνικά .............................. Español ..............................Eesti ................................Suomi ................................. Français ..............................Magyar ..............................Italiano ..............................Lietuvių ..............................Latviski ..............................Nederlands ........................... Norsk ............................... Polski ............................... -
Page 3: Declaration Of Conformity
Magyar Samsvarserklæring Megfelelőségi Nyilatkozat Mi, az AB Ph. Nederman & Co. nevében, felelősségünk tudatában Vi, AB Ph. Nederman & Co, erklærer på eget ansvar at Nedermans produkt: kijelentjük hogy a(z) FilterBox Nederman termék és azon kiegészítői melyekre ez a FilterBox med tilbehør som denne erklæringen gjelder for, er i Nyilatkozat alkalmazható, megfelelnek a következő. - Page 4 Français Latviesu valoda Déclaration de conformité Atbilstības deklarācija Mēs AB Ph. Nederman & Co paziņojam un esam atbildīgi par to, ka Nous, AB Ph. Nederman & Co., déclarons sous notre seule Nederman iztrādājums: responsabilité, que les produits Nederman : FilterBox ar papildaprīkojumu uz ko attiecas šī deklarācija ir saskaņā...
- Page 5 Deklaracija o ustreznosti Prohlášení o shodě My, společnost AB Ph. Společnost Nederman & Co. prohlašuje na Mi, AB Ph. Nederman & Co., s polno odgovornostjo izjavljamo da je svou zodpovědnost, že výrobek Nederman: Nederman proizvod: FilterBox s příslušenstvím, ke kterým se vztahuje prohlášení, jsou v FilterBox s priborom, na katerega se ta deklaracija nanaša, v...
-
Page 6: Figures
FilterBox Figures 00000975 Max. 16 A FilterBox M FilterBox A / eQ... - Page 7 FilterBox [mm (inches)] [mm (inches)] FilterBox N24 fan FilterBox Wall max. 3000 (118) 650 (25.6) 790 (31.1) 590 (23.2) 590 (23.2) 790 (31.1) 360 (14.2) 800 (31.5) 1220 (48.0) 590 (23.2) 790 (31.1) [mm (inches)] FilterBox N27/N29 fan 650 (25.6) 790 (31.1) 590 (23.2) 360 (14.2) 800 (31.5) 1370 (54.0)
- Page 8 FilterBox > 1200 mm > 1200 mm > 700 mm > 700 mm > 2100 N Compressed air feed. Clean air according to: DIN ISO 8573-1, class 5/5/4. (7 bar, 250 l/min). 1/2"...
- Page 9 FilterBox Compressed air feed. Clean air according to: DIN ISO 8573-1, class 5/5/4. (7 bar). 2-3 min...
- Page 10 FilterBox 5 min...
- Page 11 FilterBox FilterBox M 180° 180°...
- Page 12 FilterBox 27–40 kg 60–90 lbs Press OK to edit 1. Fan off delay: 1 2. Auto. cleaning: Off 3. Timer cleaning: On Press OK to change 4. Tmr.clean interval: 0 > 5. A./M. fan start 1. Welding clamp: On 2. Air tool flow: On Press ESC for menu Press OK to select 3.
- Page 13 FilterBox Press OK to select Press ESC for menu Press OK to edit > 1. Start/stop Settings Idling 1. Fan off delay: 1 2. Maintenance > 2. Auto. cleaning: On 3. Timer cleaning: On 4. Tmr.clean interval: 0 Time to service: 5.
- Page 14 FilterBox...
-
Page 15: English
FilterBox English User manual Table of contents Figures ................................1 Preface ................................2 Description ..............................2.1 Function ..............................2.2 Main components ..........................2.3 Control panel ............................2.4 LCD and navigation buttons ......................2.5 Technical data ............................3 Installation ................................ 3.1 Mount FilterBox to wall or floor stand ..................... -
Page 16: Preface
Preface Read this manual carefully before installation, use and service of this product. Replace the manual immediately if lost. Nederman reserves the right, without previous notice, to modify and improve its products including documentation. This product is designed to meet the requirements of relevant EC directives. -
Page 17: Control Panel
FilterBox 2.3 Control panel See figure 2. A,B,C,D: Show how dirty the main filter is. J: Outlet for pneumatic power tools. E: Shows when there is a warning or alarm. K: Outlet (1-phase) for electrical power tools. F: Fan status. L: Main switch. G: LCD and navigation buttons. M: Operation timer. H: Loud speaker for alarms. S1: Button to start or stop the fan. I: Fuses for the electrical outlet K. S2: Start or stop filter cleaning. 2.4 LCD and navigation buttons Navigation button functions • Scroll up in menu (position indicated with ‘>’). • Increase or change setting. • Open submenu. • Open main menu. • Select setting for change (indicated with ‘ ’). • Move backward in the menu. • Confirm change. •... -
Page 18: Attach Fan Package
3.3 Attach collector bin See figure 11. Nederman recommends the use of plastic bags in the collector bin for better dust disposal. When using a plastic bag, a pressure equalization tube must be connected to the collector bin, see figure 11, items 4 and 5. -
Page 19: Use Filterbox
FilterBox Use FilterBox WARNING! Risk of fire and explosion. • Do not use the product for flammable or explosive dust and gases. • Do not use the product in an environment where there is a danger of explosion, or where there is dust or gases in explosive concentrations. •... -
Page 20: Clean Main Filter
FilterBox 4.3 Clean main filter Depending on the FilterBox model used, the need to clean the main filter is indicated by either an audible alarm, or a combination of LEDs, information in the LCD display and an audible alarm. NOTE! If the main filter is not properly clean after repeated cleaning, see the Installation and Service Manual. -
Page 21: Maintenance
• Take apart the product in a well-ventilated room. • Clean the area properly after work is complete. Use only original Nederman spare parts. Please contact your nearest authorized dealer or Nederman for advice on technical services. 5.1... -
Page 22: Recycling
The product has been designed for component materials to be recycled. Its different material types must be handled according to relevant local regulations. Contact the distributor or Nederman if uncertainties arise when scrapping the product at the end of its service life. -
Page 23: Deutsch
FilterBox Deutsch Bedienungsanleitung Inhalt Abbildungen ........................6 1 Vorwort ................................2 Beschreibung ..............................2.1 Funktionsweise ............................2.2 Hauptkomponenten ..........................2.3 Bedienfeld ............................... 2.4 LCD- und Navigationstasten ......................2.5 Technische Daten ..........................3 Installation ................................ 3.1 Montage der FilterBox an Wand oder Bodenständer ............... 3.2 Gebläsepaket anbringen . -
Page 24: Vorwort
Original-Ersatzteilen durchgeführt werden. Wenden Sie sich für Hilfestellung zu technischem Service und für Ersatzteile bitte an Ihren Fachhändler oder direkt an Nederman. Wenn Sie bei Anlieferung des Produktes feststellen, dass Teile beschädigt sind oder fehlen, informieren Sie bitte die Spedition und Ihre Nederman Niederlassung vor Ort. -
Page 25: Bedienfeld
FilterBox 2.3 Bedienfeld Siehe Abbildung 2. A,B,C,D: Zeigen an, wie verschmutzt der J: Anschluss für Druckluftmaschinen. Hauptfilter ist. K: Anschluss (1-phasig) für Elektrowerkzeuge. E: Zeigt vorliegende Warn- und L: Hauptschalter. Alarmmeldungen an. M: Betriebstimer. F: Gebläsestatus. S1: Start- und Stopptaste für das Gebläse. G: LCD- und Navigationstasten. S2: Start- und Stopptaste für die Filterreinigung. H: Lautsprecher für akustische Alarmsignale. I: Sicherungen für den Stromanschluss K. 2.4 LCD- und Navigationstasten Funktion der Navigationstasten • Im Menü nach oben scrollen (Position wird mit > angezeigt). • Einstellungswert erhöhen oder ändern. • Untermenü öffnen. • Hauptmenü öffnen. • Einstellungswert zum Ändern auswählen • Im Menü einen (wird mit angezeigt). Schritt zurück gehen. -
Page 26: Gebläsepaket Anbringen
Richtung, ist der Anschluss von zwei Kabeln zu tauschen. 3.3 Sammelbehälter anbringen Siehe Abbildung 11. Zur besseren Staubentsorgung empfiehlt Nederman die Verwendung von Kunststoffbeuteln im Sammelbehälter. Bei Verwendung eines Kunststoffbeutels muss ein Druckausgleichsrohr angeschlossen werden, siehe Abbildung 11, Punkt 5 und 6. -
Page 27: Bedienung Filterbox
FilterBox Standardmäßig startet das Gebläse der FilterBox automatisch, wenn ein angeschlossenes Gerät eingeschaltet wird. Diese Funktion kann unter Punkt 5 „A/M fan start“ im Menü geändert werden. Um zu verhindern, dass das Gebläse bei kurzen Arbeitsunterbrechungen anhält, kann im Menü „1. Fan off delay“... -
Page 28: Überlastungsschutz
FilterBox 4.2 Überlastungsschutz Die FilterBox ist mit einem Überlastungsschutz versehen, der automatisch die Stromverbindung unterbricht, wenn der Gebläsemotor überlastet wird. Eine Liste mit möglichen Ursachen entnehmen Sie dem Installations- und Wartungshandbuch. 4.2.1 FilterBox M Siehe Abbildung 2. Wird der Überlastungsschutz aktiviert, geht die FilterBox zum OFF-Modus über. -
Page 29: Sammelbehälter Leeren
• Reparieren Sie das Gerät in einem gut belüfteten Raum. • Reinigen Sie den Bereich richtig nach dem die Arbeit abgeschlossen ist. Es dürfen nur Original-Ersatzteile von Nederman verwendet werden. Wenden Sie sich bitte an Ihren autorisierten Händler oder an Nederman, um Hilfestellung zum technischen Service zu erhalten. 5.1... -
Page 30: Ersatzteile
HEPA-Filter gemäß Abbildung 14 wechseln. Sicherstellen, dass der Luftstrom ausreicht. 5.3 Ersatzteile Wenden Sie sich an einen autorisierten Händler oder an Nederman, um Hilfestellung zum technischen Service zu erhalten oder um Ersatzteile zu bestellen. Siehe auch www.nederman.com. Bestellung von Ersatzteilen Bitte geben Sie bei Ersatzteilbestellungen immer Folgendes an: •... - Page 31 FilterBox Français Manuel d’instruction Table des matières Schémas ..........................6 1 Préface ................................2 Description ..............................2.1 Fonctionnement ............................ 2.2 Principaux composants ........................2.3 Panneau de commande ........................2.4 Ecran LCD et boutons de navigation ..................... 2.5 Informations techniques ........................3 Installation ................................ 3.1 Montage du FilterBox mural ou installation au sol ..............3.2 Fixer le kit de ventilateur .
-
Page 32: Préface
Pour conserver les performances, tous les travaux d’ins- tallation, de réparation et de maintenance doivent être effectués en n’utilisant que des pièces de rechange de la marque Nederman. Pour obtenir des conseils techniques et des pièces de rechange, contacter votre distributeur agréé le plus proche ou Nederman. -
Page 33: Panneau De Commande
FilterBox 2.3 Panneau de commande Voir schéma 2. A,B,C,D : Indiquent le niveau d’encrassement J : Sortie pour les outils pneumatiques. du filtre principal. K : Sortie (monophasée) pour les outils E : Indique un avertissement ou une alarme. électriques. F : État du ventilateur. L : Interrupteur principal. G : Ecran LCD et boutons de navigation. M : Programmateur de fonctionnement. H : Haut-parleur pour les alarmes. S1 : Bouton pour démarrer ou arrêter le ventilateur. I : Fusibles pour la sortie électrique K. S2 : Démarrer ou arrêter le nettoyage du filtre. 2.4 Ecran LCD et boutons de navigation Fonctions des boutons de navigation • Faire défiler vers le haut dans le menu (position indiquée par « > »). • Augmenter ou modifier les réglages. • Ouvrir un sous-menu. • Ouvrir le menu principal. -
Page 34: Fixer Le Kit De Ventilateur
2 cables. 3.3 Fixer le bac de recuperation de poussières Voir schéma 11. Nederman recommande d’utiliser des sacs en plastique dans le bac de récupération, afin de mieux éliminer la poussière. Lorsqu’un sac en plastique est utilisé, il convient de connecter un tube d’équilibrage de pression au bac de récupération, voir schéma 11, éléments 5 et 6. -
Page 35: Utilisation Filterbox
FilterBox Par défaut, le ventilateur du FilterBox démarre automatiquement lorsqu’un outil connecté à l’une de ces sorties est utilisé. Cependant, il est possible de désactiver cette fonction dans l’élément 5 « A/M fan start » dans le menu. Afin d’éviter que le ventilateur ne s’arrête pendant les brèves pauses de travail, un délai peut être réglé... -
Page 36: Protection Surintensité
FilterBox 4.2 Protection surintensité Le FilterBox est munie d’une protection surintensité qui coupe automatique- ment l’alimentation électrique si le moteur du ventilateur est en surcharge. Pour une liste des causes possibles, voir le Manuel d’installation et d’entretien. 4.2.1 FilterBox M Voir schéma 2. Si la protection surintensité est activée, le FilterBox se met en mode ARRÊT. -
Page 37: Vider Le Bac De Récupération
• Démonter le produit dans un local bien ventilé. • Nettoyez la zone correctement à la fin des opérations de maintenance. Utiliser uniquement des pièces Nederman d’origine. Pour obtenir des conseils techniques, veuillez contacter votre distributeur agréé le plus proche ou Nederman. -
Page 38: Pièces De Rechange
Les différents types de matériaux le composant doivent être traités confor- mément aux réglementations locales en vigueur. Contacter le distributeur ou Nederman en cas de doute concernant la mise au rebut du produit à la fin de sa durée de service. -
Page 39: Italiano
FilterBox Italiano Manuale d’Istruzione Indice Figure ..........................6 1 Prefazione ..............................2 Descrizione ..............................2.1 Funzione ............................... 2.2 Componenti principali ........................2.3 Pannello di comando ........................2.4 LCD e tasti di navigazione ......................2.4.1 Struttura del menu ....................... 2.5 Dati tecnici ............................3 Installazione ..............................3.1 Montaggio di FilterBox a muro o su supporto da pavimento .......... - Page 40 Contattare il rivenditore più vicino o Nederman per consigli relativi all’assistenza tecnica e per richiedere i ricambi. In caso di componenti danneggiati o mancanti al momento della consegna del prodotto, avvisare immediatamente il corriere o il concessionario Nederman locale.
- Page 41 FilterBox 2.3 Pannello di comando Vedere Fig. 2. A, B, C, D: indicano il livello di sporcizia del filtro J: uscita per utensili elettrici pneumatici. principale. K: uscita (monofase) per utensili elettrici. E: indica la presenza di un avviso o di un allarme. L: interruttore principale. F: stato dell’elettroventilatore. M: timer di funzionamento. G: LCD e tasti di navigazione. S1: interruttore di accensione/spegnimento della H: altoparlante per gli allarmi. ventola. I: fusibili per l’uscita elettrica K. S2: interruttore di avvio/arresto della pulizia del filtro. 2.4 LCD e tasti di navigazione Funzioni dei tasti di navigazione • Scorri il menu in alto (posizione indicata con ‘>’). • Aumenta o modifica l’impostazione. • Apri il sottomenu. • Apri il menu principale. •...
- Page 42 3.3 Collegamento del contenitore di raccolta polvere Vedere Fig. 11. Per un più efficace smaltimento della polvere, Nederman consiglia l’utilizzo di sacchetti di plastica. Se si utilizza un sacchetto di plastica, è necessario collegare al contenitore di raccolta polvere un tubo di equalizzazione della pressione, vedere Fig.
- Page 43 FilterBox Utilizzo di FilterBox AVVERTENZA! Rischio di incendio ed esplosione. • Non utilizzare il prodotto per polveri e gas infiammabili o esplosivi. • Non utilizzare il prodotto in ambienti a rischio di esplosioni o in presenza di polveri o gas in concentrazioni esplosive. •...
- Page 44 FilterBox 4.2.2 FilterBox A FilterBox eQ Vedere Fig. 2, voce F. Il LED F rosso indica che il motore della ventola è sovraccarico. La protezione contro il sovraccarico si ripristina automaticamente dopo pochi minuti. Per ripristinare manualmente la protezione contro il sovraccarico, portare l’interruttore principale L su OFF e quindi su ON.
- Page 45 • Al termine dell’utilizzo, pulire accuratamente l’area di lavoro. L’installazione, le riparazioni e la manutenzione devono essere effettuati da un tecnico certificato Nederman. Utilizzare esclusivamente ricambi originali Nederman. Per assistenza tecnica, si prega di rivolgersi a komsa o a Nederman. 5.1 Sostituzione del filtro principale AVVERTENZA! Rischio di lesioni personali.
- Page 46 Il prodotto è progettato in modo da riciclare i materiali che lo compongono. I differenti tipi di materiali devono essere gestiti in conformità alle normative locali vigenti. In caso di dubbi sullo smaltimento del prodotto al termine della sua vita contattare il rivenditore o Nederman.
- Page 47 www.nederman.com...