
Related Manuals for JLL S300


Summary of Contents for JLL S300
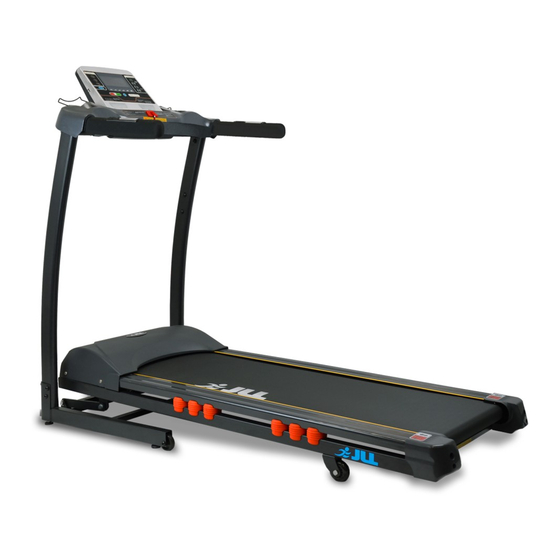
- Page 1 INSTRUCTION MANUAL Please read this book thoroughly before operating the treadmill. Search “ How to assemble JLL S300” on Youtube for a step-by-step video guide on how to assemble your treadmill.
-
Page 2: Table Of Contents
8 Content listing p. 9 Box contents p. 9 Accessories box p. 9 Tools pack p. 9 S300 assembly p. 10 Folding & unfolding the treadmill p. 12 Setup options p. 12 Monitor configuration p. 13 Display information p. 13 LCD brightness adjustment p. - Page 3 Starting the treadmill p. 18 Stopping the treadmill p. 18 Emergency dismount p. 18 Safety key function p. 18 Heart-rate sensors p. 19 Data readouts p. 19 Entertainment p. 19 Play your MP3/Smartphone/Tablet device p. 19 USB audio interface p. 19 Programs p.
-
Page 4: Safety Instructions
Safety Instructions Please pay attention to the following instructions before operating this treadmill. ELECTRICAL PREREQUISITES This treadmill must be earthed and plugged into an appropriate electrical outlet that is properly installed and earthed in accordance with all local codes and ordinances. This treadmill is for use on an earthed, dedicated circuit. -
Page 5: During Use
• Maximum user weight is 120kg/ 23.6 St. • Inspect unit. If damaged, DO NOT USE. • Ensure every bolt and screw is securely tightened. • Place your feet on the side frames when starting or stopping the treadmill. DURING USE: •... -
Page 6: Safety Key
• DO NOT use the treadmill with 2 or more people running at the same time. • Read the instruction manual completely before using the treadmill. • Ensure all users wear appropriate footwear on JLL equipment. ® • Set up and operate the treadmill on a level surface. DO NOT operate in small restricted areas or on plush carpet. -
Page 7: Warning Stickers
WARNING STICKERS Warning stickers indicate a potentially hazardous situation which, if not avoided, could result in death or serious injury. Carefully read the following caution and warning labels before using the unit. WARNING 1. Do not leave the treadmill before ensuring the machine has been locked tightly and properly. -
Page 8: Assembly
Assembly PREPARING THE SITE To find the ideal location to set up this treadmill, ensure that: • Area is well illuminated and well ventilated. • Surface is level. • There is enough space to access the unit and emergency dismount. If it is possible, keep the following clearances: 0.5 m at each side and 2 m at the back. -
Page 9: Content Listing
CONTENT LISTING See diagram (left) and content listing (below) for treadmill box contents. See Customer Service chapter for contact information if any parts are missing. BOX CONTENTS Console Manual Accessories Box Treadmill Main Body Vertical Frames x2 Console Tray ACCESSORIES BOX Safety Key Power cable Item Holder x2... -
Page 10: S300 Assembly
Inside the box you will find a Tools Pack (Hex Allen key, Screwdriver, Wrench, Washers and Bolts). See previous page. To assemble your JLL S300 please follow these easy steps: STEP 1: Raise up the vertical frame bars on both sides. - Page 11 STEP 5: Screw the console to the vertical frame bar. Use 2x black Allen head bolts, arc washers and flat washers. STEP 6: Gently clip safety socket wires together ensuring that you do not catch the wire between the console and the frame. Place the tray onto the console frame.
-
Page 12: Folding & Unfolding The Treadmill
FOLDING & UNFOLDING THE TREADMILL To fold: Hold the end of the running deck, by the side frames/ rails, and lift it until the machine gets an upright position and you hear a click from the hydraulic cylinder. To unfold: Press the hydraulic cylinder with your foot. -
Page 13: Monitor Configuration
MONITOR CONFIGURATION AUDIO CONTROL CONTROL BUTTONS PLAY km/h PAUSE INSTANT SPEED SOUND+ km/h NEXT SOUND- LAST INCLINE DOWN PROGRAM S L O W F A S T STOP START Remove safety key Before starting any when not in use and exercise program store out of reach of consult your... -
Page 14: Lcd Brightness Adjustment
LCD BRIGHTNESS ADJUSTMENT 1. In STANDBY mode, press START and then quickly press STOP. The speed display window will be flashing 2. Adjust the brightness of the LCD display using the FAST or SLOW buttons. 3. Press START to save the adjustments. TESTING THE TREADMILL OPERATION Use the following instructions to test the full speed of the treadmill and to check the belt for proper operation. -
Page 15: Specifications
SPECIFICATIONS Blue backlit 5” LCD Displays: Time, speed, distance, heart-rate, Display calories, incline. Programs 15 running programs. High Powered Speakers, Smartphone/Tablet/MP3 Connectivity, USB Entertainment interface. Storage Foldable and built-in wheels. Quick Buttons Quick Speed: 5, 8 km/h. Emergency safety key, smooth start/stop function, safety handrail with Safety speed and incline buttons, shock absorption system and security lock. -
Page 16: Operation
Operation Read all instructions, warnings and safety procedures located in the Safety chapter before using the treadmill. CONTROL SYMBOLS USED Press to establish the setup parameters. During the middle of the workout press the button once to stop the running belt and pause the workout. STOP This will also display the workout review. -
Page 17: Setup
SETUP SETUP PARAMETERS The treadmill should be completely stopped before accessing the Setup options. 1. On STANDBY mode, press SET button and all the numbers in the display area will become ZERO (0), except SPEED. 2. Press SET button several times to change different settings and the number in the display area will flash. -
Page 18: Starting The Treadmill
STARTING THE TREADMILL Maximum user weight is up to 120 kg, 18.9 St or 265 lb. 1. Switch on the treadmill. 2. Set up your weight to estimate calories burned. 3. Place each of your feet on the side frames located on each side of the running belt. 4. -
Page 19: Heart-Rate Sensors
HEART-RATE SENSORS Hold the sensor plates on the handlebar ensuring that hands are clean. A heart- rate reading will show on the display. Factors that interfere with pulse signal are: • Hand lotions, oils or body powder • Excessive dirt •... -
Page 20: Programs
PROGRAMS Each program is made up of 10 sections of 200m. At each 200m interval the speed/ incline may change. If the Play/Pause button is pressed throughout any program this will stop the program and will not be resumed from it’s current stage. Once the tenth section has been completed the program will loop to start from section one again unless STOP is pressed. - Page 21 PROGRAM 1 PROGRAM 2 PROGRAM 3 MAX.INCLINE MAX.INCLINE MAX.INCLINE MAX. SPEED MAX. SPEED MAX. SPEED 1000 1200 1400 1600 1800 2000 1000 1200 1400 1600 1800 2000 1000 1200 1400 1600 1800 2000 PROGRAM 4 PROGRAM 5 PROGRAM 6 MAX.INCLINE MAX.INCLINE MAX.
- Page 22 PROGRAM 13 PROGRAM 14 PROGRAM 15 MAX. INCLINE MAX. INCLINE MAX. INCLINE 1000 1200 1400 1600 1800 2000 1000 1200 1400 1600 1800 2000 1000 1200 1400 1600 1800 2000 SPEED (KM/H) AND INCLINE RUNNING PROGRAMS Section 1000 1200 1400 1600 1800 2000...
-
Page 23: Maintenance
Maintenance Maintenance must be performed on a regular basis. Performing maintenance actions can aid in providing safe and trouble-free operation of all JLL equipment. ® are not responsible for performing regular inspection and maintenance actions for ® your machine. JLL representatives are available to answer any questions that you may ®... -
Page 24: Treadmill Cleaning
Any rust will indicate there may be moisture in the air and as a result this could impact on the integrity and performance of your machine. WARNING 1. Use only JLL replacement parts. ® 2. Unplug unit and let sit 10 minutes before cleaning or performing maintenance. -
Page 25: Treadmill Balance
When not using product for an extended period of time the product should be disconnected from the power supply. TREADMILL BALANCE Place the treadmill on a level floor to avoid it being off-balance. If that is not possible, adjust the treadmill by adjusting the rubber feet located underneath the frames. Check if the treadmill is balanced: 1. -
Page 26: Adjusting The Running Belt
3. Look at the running board or touch it to check if it is oily or not. In case of dryness, use the lubrication oil provided and apply it on the running deck by spreading a straight line down the side of the deck. Ensure that the middle of the board is lubricated. -
Page 27: Adjusting The Belt When It's Not Centred (Bear Left Or Right)
3. Get back on the treadmill and check the belt (read description above). If it is still loose, re-adjust the belt screws by another quarter until you get the required tension on the belt. 4. Run the machine on its own for 1-2 minutes to see if the belt stays in the middle. -
Page 28: Tightening The Motor Belt
3. An easy way of checking is by touching the drive belt to feel if it is slack. If you can wiggle the belt up and down, it means that the drive belt is loose. 4. You can check this every time you use the treadmill by setting the speed to 2-3 km/h then walking on the machine and try to stop the belt with your feet while holding the handlebars and pulling your body in the opposite direction. -
Page 29: Additional Information
• Always seek professional advice before changing your diet or starting any exercise program. • JLL Fitness Ltd is not liable for any injuries or damages that may occur when assembling or using this treadmill. • Users must be cautious when using the top speeds on this treadmill. - Page 30 WWW.JLLFITNESS.COM @JLLFitness Follow us on Facebook and Twitter © JLL Fitness Ltd . All Rights Reserved.