Advertisement
Quick Links
SV Sound
O
W N E R S
G
U I D E
SVS PB13-Ultra and
PC13-Ultra Subwoofers
Contents:
Chapter 2 Safety instructions
Chapter 3 SVS Welcome
Chapter 4 About your SVS subwoofer
Chapter 5 General subwoofer features
Chapter 6 Setup, integration, and calibration
Chapter 7 Variable tuning feature
Chapter 8 Parametric equalizer (PEQ)
Chapter 9 Room compensation control
Chapter 10 Subwoofer specifications
Chapter 11 Terms and Conditions
'
Last update: 27 April, 2008
Advertisement

Related Manuals for SVS PB13


Summary of Contents for SVS PB13
- Page 1 SV Sound W N E R S U I D E SVS PB13-Ultra and PC13-Ultra Subwoofers Contents: Chapter 2 Safety instructions Chapter 3 SVS Welcome Chapter 4 About your SVS subwoofer Chapter 5 General subwoofer features ...
- Page 2 SV Sound Chapter 2-1 IMPORTANT SAFETY INSTRUCTIONS 1. Read these instructions. 2. Keep these instructions. 3. Heed all warnings. 4. Follow all instructions. 5. Do not use this apparatus near water. 6. Clean only with dry cloth. 7. Do not block any ventilation openings. Install in accordance with the manufacturer's instructions.
- Page 3 17. The mains plug of the power supply cord shall remain readily oper- able. SV Sound The lightning flash with arrowhead symbol within an equilateral triangle, is intended to alert the user to the presence of un-insulated "dangerous voltage "...
- Page 4 SV Subwoofers Chapter 3 SV Sound Page 4 Welcome! At SVS, you can actually hear tireless research and design efforts built in to our subwoofers and speak- ers. Years are spent developing any SVS product — with work typically spanning from our Ohio headquar- ters…...
-
Page 5: About Your Svs Subwoofer
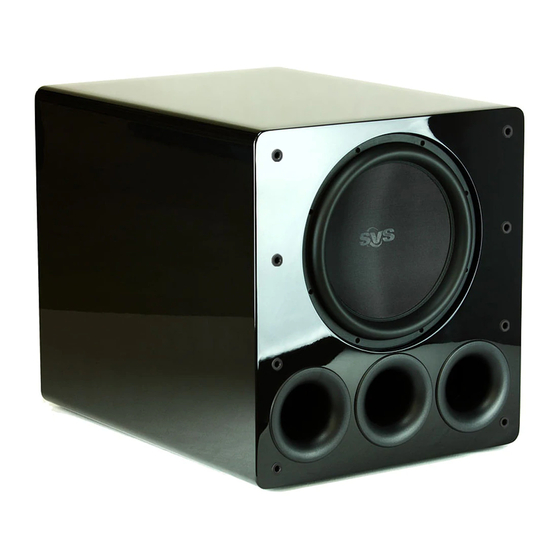
SV Subwoofers SV Sound About your SVS Subwoofer There maybe be other subwoofers that look like them, but virtually none work like them. SVS subwoofers are decidedly different in how they are designed, produced, sold, and the exceptionally high quality components we use. You could have spent much more on other brands and still not come close to the performance our products provide. - Page 6 SV Sound Chapter 5-1 Powered Box Basic Common Features SVS subwoofer amps use the most durable and accurate designs possible. Get familiar with yours! Volume/Gain Use ―gain‖ (in conjunction with your Audio Video Receiver (AVR) subwoofer output level control) to achieve bass level calibration to your liking.
- Page 7 SV Sound Chapter 5.2 Sometimes, with very low listening levels, your subwoofer might not get enough of a bass signal from your AVR to ―trip‖ the Auto- On circuit. Should you ever find this to be the case you may leave this switch to ―On‖, or turn up the AVR’s subwoofer level some (be...
- Page 8 SV Subwoofers SV Sound Setup, calibrating and integration What’s to know? Setup is easy! However, there are key steps which must be done carefully and correctly, read on: Unpacking. Take a few moments to carefully unpack everything. Save the box and shipping materials, just in case you need to return the sub for any reason.
- Page 9 SV Sound SV Sound More Setup, calibrating and integration If you are running a pair of SVS subwoofers (Fig. 2), you will need to use an inexpensive ―Y‖ cable adapter (d.) dard 75 Ohm RCA or XLR signal cable (e.) to each sub, thus ―splitting‖ the Low Frequency Effects (LFE) and other bass from your receiver, and effec- tively feeding both subwoofers with the same signal.
- Page 10 SPL meter reading is still too high, then turn down the sub’s amp volume a little with each run of the test noise signal, as it cycles from speaker to speaker and the subwoofer. sound pressure level (SPL) ® This tool is absolutely essential to proper SV Sound Use a well-shielded...
- Page 11 Page 11 Page 11 SV Sound Chapter 6-4 But what’s “too high”?? Tastes vary, and do movie soundtracks, but your SVS subwoofer is capable of tremendous levels of low distor- tion, low frequency bass — far more than most subs in this size or price class.
- Page 12 ―tuning point‖. NOTE: We strongly recommend you do NOT run a lower subsonic filter point than your port plug configuration would dictate — especially if you are running the subwoofer at high sound pressure levels. SV Sound Subsonic Filter Knob 20Hz 15Hz...
- Page 14 SV Sound Chapter 8-1 Advanced Features: Parametric Equalizer (PEQ). Important Note: Until you are ready to use the PEQ feature set, it should be disabled by setting all three controls to the full counter clock-wise position. Background Information: Direct and reflected bass waves in the listening room will create ―standing waves‖...
- Page 15 SV Sound Chapter 8-2 “Q” Control Effects Measuring The In-Room Frequency Response: In order to use the PEQ effectively, you must measure the in-room FR of the subwoofer at the lis- tening positions. This can be done manually using test tones and an spreadsheet, or it can be accomplished using software such as ―TrueRTA‖,...
- Page 16 SV Sound Chapter 8-3 To set the overall test level, play a 25 Hz frequency and adjust the sub- woofer gain (option 1 below) or the processor master volume (option 2 below) until the SPL meter reads about 75 dB at the listening position.
- Page 17 SV Sound Chapter 8-4 Option 2: Measure the Combined FR of the Speakers and Subwoofer: To measure the combined FR of the front speakers and subwoofer (to in- clude the digital crossover in your processor), connect your sound card output to an analog input on your processor. Make sure the analog input is configured to use the digital crossover between the speakers and the sub- woofer.
- Page 18 SV Sound Chapter 8-5 Set the Frequency control to the approximate center frequency of the largest peak. Set the Q control to HI (narrowest bandwidth), and set the Level control to MAX. Play the test tones again and re-measure and re- plot the affected portion of the FR curve and visually evaluate your re- sults.
- Page 19 Enclosure Person: Jim Farina Shop Company: SV Sound, LLC 5.2.0.350 Jul/15/2005 Use the below chart to help tailor your SVS sub to your room’s size. Vary the room size knob up or down one size should you determine that sound’s best for your music and movies.
-
Page 20: Specifications
SV Sound Specifications Model Name: Configuration: Design: Dimensions: H x W x D Weight: Voltage (fixed): Driver: Frequency Response: (quasi-anechoic) Inputs/Outputs: Controls: Power Handling: Crossover: Enclosure Material: PB13-Ultra Powered Box, front-firing 13‖ woofer Vented, Variable Tune with Sealed Mode 22‖ High x 20.5‖ Wide x 27‖ Deep 56 cm H. - Page 21 SV Sound Specifications Model Name: Configuration: Design: Dimensions: H x Diam. Weight: Voltage (fixed): Driver: Frequency Response: (quasi-anechoic) Inputs/Outputs: Controls: Power Handling: Crossover: Enclosure Material: PC13-Ultra Powered Cylinder, front-firing 13‖ woofer Vented, Variable Tune with Sealed Mode 47‖ High x 16‖ Diameter 119 cm H.
-
Page 22: Terms And Conditions
Chapter 11 SV Sound Terms and Conditions Terms and Conditions: Details are available on request, please contact your Dealer for more. Note that these terms and conditions do not affect your statutory rights. Shipping: When you receive your new subwoofer, please check to en- sure there is no damage.