Table of Contents
Advertisement
248/9502
IMPORTANT - Please read these instructions fully before installing or operating
These instructions contain important information which will help you get the best from
your television and ensure safe and correct installation and operation.
For any help concerning set up and use of your TV please call the
Customer Helpline : 0345 600 3021
Lines open: 9am - 8pm Monday to Saturday and 10am - 4pm Sunday
For any help concerning set up and use for your TV please call the Customer Helpline: 0345 600 3021
Advertisement
Table of Contents

Related Manuals for Bush DVB-T2 PVR MPEG4


Summary of Contents for Bush DVB-T2 PVR MPEG4
- Page 1 248/9502 IMPORTANT - Please read these instructions fully before installing or operating These instructions contain important information which will help you get the best from your television and ensure safe and correct installation and operation. For any help concerning set up and use of your TV please call the Customer Helpline : 0345 600 3021 Lines open: 9am - 8pm Monday to Saturday and 10am - 4pm Sunday For any help concerning set up and use for your TV please call the Customer Helpline: 0345 600 3021...
-
Page 2: Table Of Contents
Contents Safety Precautions ..........3 Power Cord ............3 Overview of the Remote Control ......5 Connections on the Set Top Box ......6 Inserting Batteries in the Remote Control....7 Connecting the Set Top Box to a TV Set ....7 Antenna Connection .......... - Page 3 Features Accessories Please make sure that the following items are included with your device. Batteries 2 X AAA Guides modulations Instruction Book Introduction HDMI cable will guide you through the proper operation of your set top box. Remote Control manual thoroughly. Please keep this manual in a safe place for future reference.
-
Page 4: Safety Precautions
Safety Precautions Power Source Power personnel before operating it any further. the AC adaptor. CAUTION operation. This is not a malfunction. while in operation. Leave a space of 15 cm (minimum) around the AC adaptor. adaptor are provided on the adaptor. disconnect from the power. - Page 5 This equipment has been designed and switch on the equipment and make sure that your manufactured to meet international safety family know how to do this. Special arrangements standards but, like any electrical equipment, care must be taken if you are to obtain the people.DON’T continue to operate the equipment if best results and to ensure its safety.
-
Page 6: Overview Of The Remote Control
Overview of the Remote Control Options Colour ed buttons - 5 -... -
Page 7: Connections On The Set Top Box
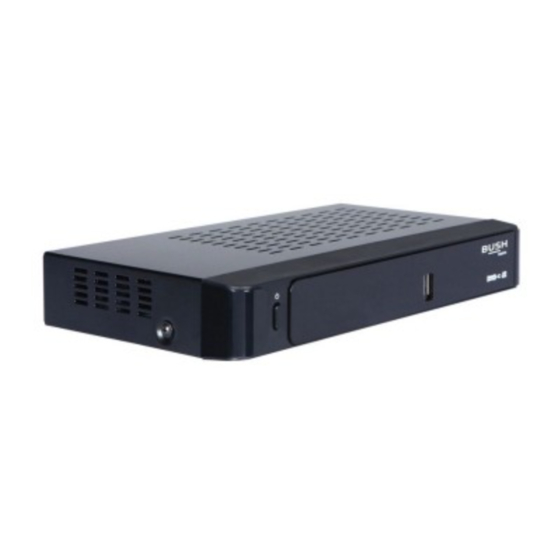
Connections on the Set Top Box FRONT VIEW BACK VIEW 12 V DC 1. USB INPUT: To connect external USB storage devices. 2. OPTICAL AUDIO OUT: You can use this connector to output the digital audio to an external device. See your audio system instruction book for further information. -
Page 8: Inserting Batteries In The Remote Control
Inserting Batteries in the Remote Control control by gently pulling backwards from the indicated part. inside. Place the batteries in the correct direction observing the the front panel of the receiver. Remote range is approximately 7m/23ft. probable that the batteries are exhausted. If so you can still use the local buttons of the receiver. -
Page 9: Antenna Connection
Power Connection MPORTANT: The set-top box is designed to operate on 12 V DC. For this, an adaptor is used which gives 12 V voltage. Connect this adaptor to a system that supplies 220-240V AC,50Hz. to the mains. Antenna Connection This illustration shows how to connect an antenna. - Page 10 Power On-Off Connect all cables before plugging into the mains. After plugging in the AC adaptor for the set top box This product conforms with the latest European Union Power Consumption Regulations and features a low power standby mode. The product enters into the low power standby mode approximately 30 the display will be shut down and light will be red.
-
Page 11: Important - Hard Disk Information
Important - Hard Disk Information one of these options and delete the This Recorder has a built in hard disk (abbreviated recordings. as HDD ) for recording and playback. Beware of the following points when setting up and using the amount may not increase by the amount of deleted Recorder. -
Page 12: First Time Installation
First Time Installation TV Type selection on-screen menu will be displayed: By pressing the “ ”/“ resolution” OSD will appear on the screen.Select your desired resolution by pressing “ ”/“ ” button and press OK. Then “Do you want to start an automatic channel scan?” pop-up menu is displayed. Auto search can be started - 11 -... -
Page 13: Changing Channels
”/“ ” buttons and then press the OK button. the set top box to complete the search to store all available stations. Changing Channels consecutively to enter two or more digits. P +/ P - buttons to move up or down to the next available channel. Adjusting the Volume Volume Up / Down V+ / V- buttons. -
Page 14: Mute
Mute to mute the sound of your set top box. The sound will be muted once this button is pressed. button again or use the V +/- buttons. On-Screen Information INFO button to display on-screen information. Details of the station and current programme will be displayed on the information screen. -
Page 15: Time Shifting (Pause Live Recording)
Time Shifting (Pause Live Recording) be stopped any time. button to timeshift the broadcasting. In the INFO banner the timeshift will commence. PLAY, PAUSE or OK button. The paused recording can be watched in different speeds by means of keys. To cease the timeshifting press STOP button. Menu System Viewing the Main Menu MENU button to view main menu. -
Page 16: Operating The Channel List
Operating the Channel List ”/“ ” button to select the channel that will be processed. ”/“ ” button to select a function on Channel List menu. P+/P- buttons to move page up or down. BLUE YELLOW button to tag/untag a channel. GREEN button to tag all channels. -
Page 17: Adding Locks To Channels
Edit Name option using “ ”/“ ” buttons. Press OK button to continue. ”/“ ” button moves to the previous/next character. Pressing “ ”/“ ” button toggles the current ”. 0...9’ replaces the highlighted character with the characters printed above the button one by one as the button is pressed. - Page 18 ”/“ ”/“ ” buttons. Press OK button to add selected channel to the favourites list. OK button again to remove the selected channel from the list. Button Functions: OK: Adds/removes a station. BLUE YELLOW: Tags/untags a channel. GREEN: Tags/untags all. Viewing Electronic Programme Guide (EPG) You can view the electronic programme guide (EPG) to view information about available programmes.
-
Page 19: Event Options
: Scrolls page right. Text (Search): Displays “Guide Search” menu. (Now) : Shows the current programme. Event Options OK button to enter the “Event Options” menu. Select Channel Highlight it and press OK to switch to the selected programme. Record Programme Highlight it and press OK button to set the programme to recording. - Page 20 Note Select Timers from the main menu and press OK button. YELLOW button on the remote control. Then “Add Timer” window appears. - 19 -...
-
Page 21: Recordings Library
Channel: “ ”/“ ” keys will navigate the user through the TV or Radio list. Record Type: Displays recording type. Date: Starting date is entered via the Left/Right or the numeric buttons. Start: Starting time is entered via the Left/Right or the numeric buttons. End: Ending time is entered via the Left/Right or the numeric buttons. -
Page 22: Play Options
Red bar: Indicates the used space of the recordings on the hard disk. Green bar: Displays the approximate capacity required for the timers currently set. RED button (Delete) :Erases the selected recording. GREEN button (Edit): Makes changes on the selected recording. YELLOW button( Tag): Tag/untag a recorded programme. - Page 23 Manage chapters : playback and enter the “Chapter Options” menu) and begin with playback from the selected chapter. Create archive (Archive management): using the YELLOW OK button to display Play Options and then select Create Archive Play button to start archiving. Edit Recordings Press OK button when Edit Recordings is highlighted.
-
Page 24: Media Browser
Duration Set the duration of the appearance of the main title on the screen. Recording Title Include Skip. Display Duration Displaying Set the duration of the appearance of the Edit recording title menu main title on the screen. Chapter Options MENU Chapter Options menu will be displayed. -
Page 25: Viewing Usb Disk Contents
Viewing USB Disk Contents played from an external Hard Disk Drive. Note: First Time Installation Playing MP3 Files Select USB Drive option from the main media browser screen and press OK button. Select the folder (if OK to play. Playing Video Files Select USB Drive option from the main media browser screen and press OK button. - Page 26 Play ( Pause ( Button) : Pauses the playback Stop ( Rewind ( Button) : Goes backward Fast Foward ( Button) : Goes foward GREEN : Jumps to the selected time LANG : Set subtitle or audio Playing JPEG Files OK: Shows the selected image in full screen.
- Page 27 Pause: Pauses slideshow Play ( button): Resumes the slideshow. Stop ( button): Rotate ( buttons): Rotate the picture using up/down buttons. Previous/Next ( / buttons): Info: Shows/hides the info bar. RED: GREEN: Activates Loop mode. Settings Settings from the main menu by using“ ”/“ ” buttons and press OK button to display. Recordings Recordings - 26 -...
- Page 28 Max Time Shift Select the maximum time allowed for timeshifting. See Time Shifting section for more information on timeshifting Auto Discard Discard: based on this setting. The options are as follows: None: The unit will not discard any recordings and the timer will not record the requested programme. Oldest: Longest: Shortest:...
- Page 29 Active channels use Active channel list setting. Active Channels by using “ ”/“ ” buttons. ”/“ ” button. Available modes are: TV Only, Radio Only, Text Only, Favourites or Show All (if available). MENU button to save the recent changes and exit. Scan Encrypted channels will not be located in automatic search or manual search.
- Page 30 4:3 if you have a standard TV set with 4:3 aspect ratio. 16:9 if you have a widescreen TV. Note TV Out TV SCART connector located on the rear panel. Receiver Upgrade The STB automatically powers up at 3.00 A.M. every day and searches for any new software that may be approximately 30 minutes.
- Page 31 OK to display the “Set PIN” window. Use numeric buttons to enter the new pin number. You will need keep it safe. Menu Lock or the whole menu system. Guidance Guidance setting enables or disables the menu access. Low Power is less then 0.5W (in standby).
-
Page 32: Installation
Relative Volume (Optional) the general volume. Language Language from Setup menu and press OK to continue. Menu: shows the language of the system. Preferred These settings will be used if available. Otherwise current settings will be used. Audio: Sets the preferred audio language. Subtitle: Sets the subtitle language. - Page 33 Automatic Channel Scan / Retune Automatic Channel Scan / Retune by using “ ” or “ ” button and press OK button. Yes or No by using “ ” or “ ” buttons and press OK No cancels automatic search. - 32 -...
-
Page 34: First Time Installation
Manual Channel Scan ” or “ ” button and press OK button. for the channels. of that channel. Format Disk Format Disk option. ALL the data stored on the hard disk will be lost in such a case. OK when the Format Disk should be formatted. -
Page 35: Ip Settings
No by using “ ” or “ ” button to cancel installation. Yes by using “ ” or “ ” button and press OK button First Time Installation” in previous chapters for more information on this process. IP Settings YELLOW button to set static IP settings. BLUE address. -
Page 36: Digital Teletext
Digital Teletext TEXT button. OK button. The operation method may differ depending on the contents of the digital teletext. Follow the instructions displayed on digital teletext screen. TEXT the aspect ratio of the picture viewed previously. TEXT news and other topics. entirely. -
Page 37: No Channels Have Been Added Yet
No Channels Have Been Added Yet navigation will not be available. - 36 -... -
Page 38: File Extensions Supported By The Media Browse
Troubleshooting Problem Possible Reasons What To Do Check if the AC adaptor is plugged into the power socket and STB is Power Adaptor is not connected The LED indicator does not glow. in low power standby mode. Low or low power is disabled. power setting can be modified No picture or sound. -
Page 39: General Characteristics
GENERAL CHARACTERISTICS Power supply for set-top box 12 V DC 2Amp Frequency Band Humidity 25 to 75 % rel Physical dimensions 231x137x43mm HARDWARE CONFIGURATION Main Processor BCM7230 Flash Memory 128 MB DDRRAM 512 MB DIGITAL CAPABILITIES Transmission Standards Frequency Band DEMODULATION COFDM with 2K/8K FFT mode. - Page 40 REMOTE CONTROL Operating Distance 7 m Max. Batteries 2x1.5V Micro (R-03/AAA) TUNERS HARD DISK FRONT PANEL Display Seven segment display AUDIO DIGITAL AUDIO Output Optical SPDIF A / V & DATA IN / OUT Scart TV scart RGB Video Output TV scart Analog Audio Output TV scart...
- Page 41 Guarantee Product Guarantee This product is guaranteed against manufacturing defects for a period of Year This product is guaranteed for twelve months from the date of original purchase. Any defect that arises due to faulty materials or workmanship will either be replaced, refunded or repaired free of charge where possible during this period by the dealer from whom you purchased the unit.
- Page 42 Home Retail Group 489-499 Avebury Boulevard Saxon Gate West Central Milton Keynes 50369061 MK9 2NW...