Table of Contents
Advertisement
Advertisement
Table of Contents

Related Manuals for Bush FREEVIEWHD DV3 T2


Summary of Contents for Bush FREEVIEWHD DV3 T2
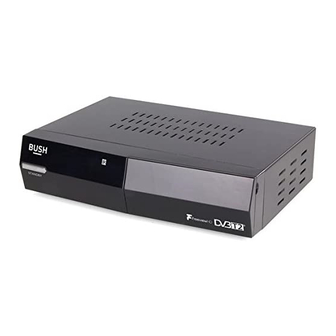
- Page 1 Instruction manual CDVBT2 Set top box...
- Page 2 You’ll soon be enjoying your new Set top box. It all begins here, with your instructions. Don’t worry, there’s nothing too technical coming up. Just simple, step-by-step guidance to get you up and running quickly. Sound good? Then let’s get started. Help and Guidance We’re here to help you get the most from your Set top box.
-
Page 3: Table Of Contents
Contents Safety information Using your Set top box Safety information Changing resolution (HDMI only) Advanced menu options Getting to know your Set top System settings language settings Ready? Let’s begin Video settings Accessories Audio settings Functions and features Advanced settings Preperations Software upgrade Connecting a HD TV... - Page 4 This page is left intentionally blank...
- Page 5 Safety information...
-
Page 6: Safety Information
Safety information Important - Please read these instructions fully before installing or operating Power source Heat build up • This symbol means that this unit is double • During use the unit will heat up, this is not a insulated. An earth connection is not malfunction. -
Page 7: Getting To Know Your Set Top Box
Getting to know your Set top box... -
Page 8: Ready? Let's Begin
Getting to know your Set top box You’ll be up and running in no time Ready? Let’s begin... Please read these instructions carefully. They contain important information which will help you get the best from your Set top box and ensure safe and correct installation and operation. -
Page 9: Functions And Features
Getting to know your Set top box You’ll be up and running in no time STANDBY Use only power supply listed e on in the user instructions in th DC IN RF OUT RF IN ETHERNET SCART STANDBY button: Press to switch the Set top box RF OUT: Coaxial cable to your TV RF input. - Page 10 Getting to know your Set top box You’ll be up and running in no time Standby: Switches the set top Mute: Press to silence the audio box ON or OFF output. Numeric buttons: Enables channels to be selected directly by entering the channel number EPG: Displays the on-screen programme guide...
-
Page 11: Preperations
Getting to know your Set top box You’ll be up and running in no time Preperations To receive Freeview you must have an appropriate TV aerial installed. If your current aerial is unable to provide an adequate signal, it may need to be realigned or replaced for a Freeview compatible aerial. -
Page 12: Connecting A Non-Hd Tv
Getting to know your Set top box You’ll be up and running in no time Connecting a non-HD TV with a Fitting the remote batteries SCART cable If your TV does not have a HDMI input you can connect using a SCART cable. Use only power supply listed in the user instructions DC IN... -
Page 13: Using Your Set Top Box
Using your Set top box... - Page 14 This page is left intentionally blank...
-
Page 15: First Time Installation
Using your Set top box Let’s get started First time installation General usage After making the connections and switching everything The following instructions refer to daily usage, such as on, follow the below instructions to get started. changing channels, viewing programme schedules and basic operations. -
Page 16: Using The Channel List
Using your Set top box Let’s get started Using the channel list Channel banner You can browse channels quickly in channel order Every time you change a channel whether it be TV or using the on-screen channel list function. radio the banner appears along the bottom of the screen that contains information relating to the channel and programme. -
Page 17: Adjusting The Volume
Using your Set top box Let’s get started Adjusting the volume Using the Electronic Program Guide Adjust the volume level using the VOL+/- buttons. Open the guide by pressing the EPG button on the remote. Mute Press the MUTE button to silence audio output. Press again to resume audio output Subtitles and audio descriptions A great number of Freeview channels are broadcast... -
Page 18: Favourites List
Using your Set top box Let’s get started Favourites list Using the favourite list The favourites list allows you to customise channels according to the genre you set. This means that when you view the favourite list you can view only channels you’ve flagged with the ‘Drama’... -
Page 19: Channel Organiser
Using your Set top box Let’s get started Channel organiser Teletext display The channel organiser allows you to remove the ability Press the TEXT button to display the channels teletext to view certain channels. The channels can be added options. Not all channels support this feature. back after performing a scan (see Installation section). -
Page 20: Advanced Menu Options
Using your Set top box Let’s get started Advanced menu options Aspect ratio Adjust the screen aspect ratio. Press the OK button to The following sections cover advanced operations. We store the setting. recommend you read the relevant information carefully before attempting to make changes. -
Page 21: Advanced Settings
Using your Set top box Let’s get started Advanced settings System configuration OSD time out Adjust the amount of time any on-screen menus appear for when they are not being used. Version LPM in stand-by Select this option to display the current software Enabling the LPM mode allows less power to be used version details. -
Page 22: Installation
Using your Set top box Let’s get started Installation Manual scan When using the auto/ smart scan functions the operation can take some time to scan. The manual scan option allows you scan a specific part of the spectrum. After Pressing the OK button you will be asked for Auto scan the default password ‘0000’... -
Page 23: Other Information
Other information... - Page 24 This page is left intentionally blank...
-
Page 25: Technical Specification
Other information Helpful technical information Technical specification Tuner Standard DVBT/T2 Input Frequency 474 ~ 858MHZ Signal Input level -75dBm to -20 dBm Input connector IEC 169-2 Female (PAL) Loop out connector IEC 169-2 Male (PAL) Input impedance Video HDMI Resolution 576i / 576p / 720p / 1080i /1080p SCART CVBS/RGB Aspect ratio... - Page 26 This page is left intentionally blank...
-
Page 27: Product Support
Product support... -
Page 28: Troubleshooting
Product support Help is always at hand Troubleshooting No power. • Ensure the mains adapter is connected to a power supply, and is switched ON. • Make sure there is power to the mains socket. No setup screen. • The set top box may be in standby mode. Press the STANDBY button on the box or remote. •... - Page 29 Product support Help is always at hand The set top box does not work after moving house • The house may be in a different Freeview location and requires re-tuning. See the ‘installation’ section of this manual for details. I’ve changed the password and forgotten it •...
-
Page 30: Help And Assistance
Product support Help is always at hand Help and assistance If you require any technical guidance or find that your Set top box is not operating as intended, a simple solution can often be found in the Troubleshooting section of these instructions or online at www.argos-support.co.uk If you still require further assistance, call one of our experts on 0345 604 0105*. -
Page 31: Disposal
Product support Help is always at hand Disposal • Disposal of your old product. Your product is designed and manufactured with high quality materials and components, which can be recycled and reused • When this crossed out wheeled bin symbol is attached to a product it means the product is covered by the European Directive 2002/96/EC. -
Page 32: Guarantee
Help is always at hand Call us now and activate your 12 month guarantee Thank you for choosing Bush. Your new product is guaranteed against faults and breakdowns for 12 months. Don’t forget to register it with us today so we can provide you with our best possible after-sales service and useful updates. - Page 33 section of these instructions, or online at www.argos-support.co.uk If you still require further assistance, call one of our experts on 0345 604 0105.
- Page 34 If you require any technical guidance or find that your product is not operating as intended, a simple solution can often be found in the Troubleshooting...
- Page 35 section of these instructions, or online at www.argos-support.co.uk If you still require further assistance, call one of our experts on 0345 604 0105.
- Page 36 Contact: www.argos-support.co.uk Helpline: 0345 604 0105...