Advertisement
Owner's Manual & Safety Instructions
Save This Manual
operating, inspection, maintenance and cleaning procedures� Write the product's serial number in the
back of the manual near the assembly diagram (or month and year of purchase if product has no number)�
Keep this manual and the receipt in a safe and dry place for future reference�
email our technical support at: productsupport@harborfreight.com
When unpacking, make sure that the product is intact
and undamaged� If any parts are missing or broken,
please call 1-888-866-5797 as soon as possible�
©
Copyright
2018 by Harbor Freight Tools
No portion of this manual or any artwork contained herein may be reproduced in
any shape or form without the express written consent of Harbor Freight Tools�
Diagrams within this manual may not be drawn proportionally� Due to continuing
improvements, actual product may differ slightly from the product described herein�
Tools required for assembly and service may not be included�
Keep this manual for the safety warnings and precautions, assembly,
Visit our website at: http://www.harborfreight.com
®
� All rights reserved�
Read this material before using this product�
Failure to do so can result in serious injury�
SAVE THIS MANUAL�
18k
64831
Advertisement

Related Manuals for Harbor Freight Tools Haul-Master 64831


Summary of Contents for Harbor Freight Tools Haul-Master 64831
- Page 1 No portion of this manual or any artwork contained herein may be reproduced in Failure to do so can result in serious injury� any shape or form without the express written consent of Harbor Freight Tools� Diagrams within this manual may not be drawn proportionally� Due to continuing SAVE THIS MANUAL�...
-
Page 2: Table Of Contents
table of contents Safety ��������������������������������������������������������� 3 Inspection �������������������������������������������������� 12 Specifications ��������������������������������������������� 6 Parts List and Diagram ������������������������������ 14 Installation �������������������������������������������������� 6 Warranty ���������������������������������������������������� 16 Operation ��������������������������������������������������� 10 WarninG SyMBOlS anD DeFinitiOnS This is the safety alert symbol� It is used to alert you to potential personal injury hazards�... -
Page 3: Safety
iMpOrtant SaFety inFOrMatiOn read all safety warnings and instructions. Failure to follow the warnings and instructions may result in serious injury. Save all warnings and instructions for future reference. DanGer! tO preVent SeriOUS inJUry anD/Or DeatH, attacH a SaFety cHain anD prOperly SecUre HitcH BeFOre lOaDinG Or tOWinG. WarninG! tO preVent SeriOUS inJUry anD/Or DeatH, DO nOt eXceeD MaXiMUM paylOaD capacity OF 600 lB Or 5 MpH MaXiMUM SpeeD. - Page 4 Operation Safety 1� This Trailer is not a toy� 2� Never allow anyone to ride in or on the trailer� Do not allow children to play on or near this item� 3� Do not transport animals in this trailer� Before each Use 1�...
- Page 5 If unreadable or missing, 4� For your safety, service and maintenance should contact Harbor Freight Tools for a replacement� be performed regularly by a qualified technician� 2� Replacement parts and accessories: when servicing, 5�...
-
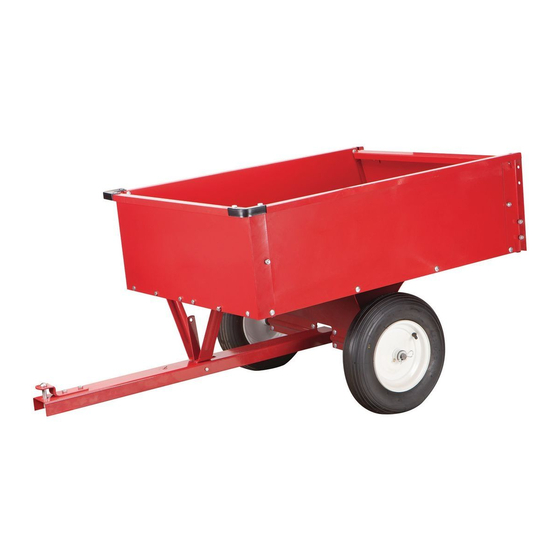
Page 6: Specifications
Specifications Rated Capacity 600 lb Hitch Pin Hole Size 1/2″ (14mm) Tire Pressure 30 PSI assembly Functions tailgate latch Hitch pin Hitch Wheel assembly instructions read the entire iMpOrtant SaFety inFOrMatiOn section at the beginning of this manual including all text under subheadings therein before set up or use of this product. note: For additional information regarding the parts listed in the following pages, refer to Parts List and Diagram on page 14�... - Page 7 4� Attach Hitch Support (3) to Bottom Panel (1) 6� Attach Hitch (9) to Wheel Axle (5) and using two sets of Long Rounded Bolts (19), Lock Wheel Axle Support (4)� See Figure D� Washers (20), and Nuts (21)� Tighten securely� a�...
- Page 8 9� Attach Wheels (6)� See Figure F� 11� Attach Hitch Pin Bracket (10) and Hitch Pin (25) to Hitch� See Figure H� a� Put a Flat Washer (23) on the Wheel Axle (5) and slide a Wheel on� a� Connect Hitch Pin Bracket to Hitch (9) using two sets Hex Bolts (22), Lock Washers (20), b�...
- Page 9 13� Attach Side Panels (13)� See Figure J� (21) a� Connect one Side Panel to the Bottom Panel using three sets of Rounded Bolts, Lock Washers, and Nuts� lock Washer b� Repeat to connect the other Side Panel to (20) the Bottom Panel and tighten connections�...
-
Page 10: Operation
Operating instructions procedures not specifically explained in this manual must be performed only by a qualified technician. tO preVent SeriOUS inJUry : remove any load before performing any inspection, maintenance, or cleaning procedures. tO preVent SeriOUS inJUry FrOM tOOl FailUre: Do not use damaged equipment. - Page 11 tailgate removal/installation 1� Trailer Cart should be on a level surface 2� To remove tailgate, slide it up through the with wheels locked in place (such as using a side slots on the back of the Side Panels� brick behind and in front of each wheel)� 3�...
-
Page 12: Inspection
inspection, Maintenance, and cleaning procedures not specifically explained in this manual must be performed only by a qualified technician. tO preVent SeriOUS inJUry: remove any load before performing any inspection, maintenance, or cleaning procedures. tO preVent SeriOUS inJUry FrOM tOOl FailUre: Do not use damaged equipment. - Page 13 cleaning and Maintenance 1� Repair or replacement of Trailer Cart 3� Clean Trailer Cart using a damp clean components must be performed cloth then dry thoroughly� only by a qualified technician using only identical 4� Lubricate all moving parts regularly using grease� replacement parts with the same rating�...
-
Page 14: Parts List And Diagram
parts list and Diagram pleaSe reaD tHe FOllOWinG careFUlly THE MANUFACTURER AND/OR DISTRIBUTOR HAS PROVIDED THE PARTS LIST AND ASSEMBLY DIAGRAM IN THIS MANUAL AS A REFERENCE TOOL ONLY� NEITHER THE MANUFACTURER OR DISTRIBUTOR MAKES ANY REPRESENTATION OR WARRANTY OF ANY KIND TO THE BUYER THAT HE OR SHE IS QUALIFIED TO MAKE ANY REPAIRS TO THE PRODUCT, OR THAT HE OR SHE IS QUALIFIED TO REPLACE ANY PARTS OF THE PRODUCT�... - Page 15 assembly Diagram Item 64831 For technical questions, please call 1-888-866-5797. Page 15...
-
Page 16: Warranty
90 Day Warranty Harbor Freight Tools Co� makes every effort to assure that its products meet high quality and durability standards, and warrants to the original purchaser that this product is free from defects in materials and workmanship for the period of 90 days from the date of purchase�...