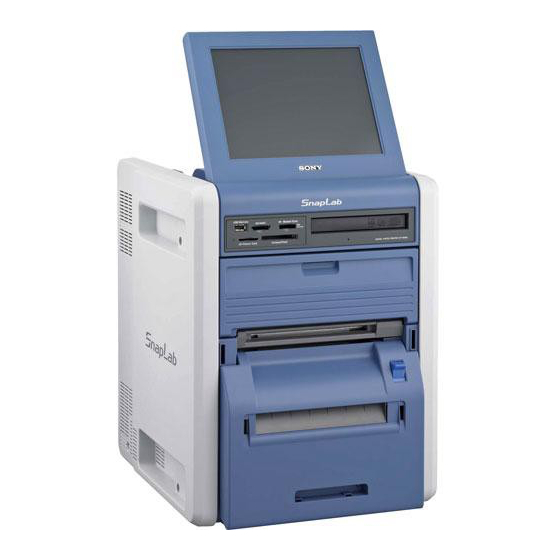
Sony SnapLab UP-CR20L Operating Instructions Manual
Digital photo printer
Hide thumbs
Also See for SnapLab UP-CR20L:
- Connection manual (6 pages) ,
- Basic operation manual (7 pages) ,
- User manual (143 pages)

Related Manuals for Sony SnapLab UP-CR20L


Summary of Contents for Sony SnapLab UP-CR20L
- Page 1 Digital Photo Printer Operating Instructions Before operating the unit, please read this manual thoroughly and retain it for future reference. UP-CR20L © 2008 Sony Corporation 4-116-212-13 (1)
- Page 2 Owner’s Record The model and serial numbers are located at the rear. Record these number in the space provided below. Refer to these numbers whenever you call upon your Sony dealer regarding this product. Model No. ____________________ Serial No. ____________________...
- Page 3 This Class B digital apparatus complies with Canadian ICES-003. For the customers in Europe The manufacturer of this product is Sony Corporation, 1- 7-1 Konan, Minato-ku, Tokyo, Japan. The Authorized Representative for EMC and product safety is Sony Deutschland GmbH, Hedelfinger Strasse 61, 70327 Stuttgart, Germany.
-
Page 4: Table Of Contents
Table of Contents Chapter 1 Outline What This Product Can Do ... 8 Applications for This Printer ...9 Print Services... 10 Information Updates ... 10 Supported Media and File Formats... 11 Chapter 2 Preparations Supplied Accessories ... 12 Controls and Functions ... 13 Installation... - Page 5 Settings in Full Mode and Quick Print Mode... 34 Chapter 4 Advanced Settings Band Pricing... 37 Setting the Maximum Number of Prints ... 38 Using Budget Codes ... 39 Setting Cut Mode ... 40 Watermarking Order Numbers or File Names on Prints ... 41 Using Expansion CompactFlash Cards...
- Page 6 Setting the Printer Image Quality ... 53 Displaying Logs ... 54 Adjusting the Touch Panel ... 56 Restoring the Factory Settings ... 56 Chapter 6 Operation Starting Operation ... 57 Selecting and Printing Images ... 59 Using Border Print... 60 Using Split Image Print ...
- Page 7 Notes on Using Other Types of Memory Cards... 76 Notes on USB Memory ... 77 Notes on CDs and DVDs... 77 Troubleshooting ... 78 Ink Ribbon and Paper... 79 Specifications ... 80 Table of Contents...
-
Page 8: Chapter 1 Outline
Consult your local Sony dealer. For information on supported digital cameras and further details on this unit, please visit the UP-CR20L support page at http://www.sony.net/ snaplab. Printing watermarks for logos and text... -
Page 9: Applications For This Printer
1) The supplied printer driver must be installed on the computer before connecting it to the unit. For the latest information on the printer driver, please visit the UP-CR20L support page at http://www.sony.net/snaplab. Compact, integrated body The display and printer are housed in a single enclosure which does not take up much space and easily fits on a shop counter or similar. -
Page 10: Print Services
3) Can be used for printing when using Cut mode. Images are printed with blank borders. For details, see “Setting Cut Mode” on page 40. Print Services / Information Updates Information Updates For the latest information, please visit the UP-CR20L support page at http://www.sony.net/snaplab. 1) 2) 2) 3) -
Page 11: Supported Media And File Formats
® • The Bluetooth word mark and logos are owned by the Bluetooth SIG, Inc. and any use of such marks by Sony Corporation is under license. • Other product names are the registered trademarks or trademarks of their respective manufacturers. -
Page 12: Supplied Accessories
Preparations Supplied Accessories Make certain you have received the following accessories: Output tray (1) Output tray adapter (1) Cleaning ribbon (1) Ribbon tray Paper adapter (pink) * The paper core is located inside the printer and must be removed when loading or removing paper. For details on removing the core, see “Loading the Paper Roll and Ink Ribbon”... -
Page 13: Controls And Functions
Controls and Functions Front Output tray removed a Display Shows the operation screen. Because the display is a touch screen, the user simply touches the field for the desired operation. The angle of the display can be adjusted for best viewing. -
Page 14: Rear
g Output cover Attach this to the output tray to prevent printouts from ejecting too far out of the output slot when printing. h Output slot Printouts are ejected from here. i Ribbon door (page 21) Open and close this when replacing the ink ribbon. This does not open when the unit is turned on. -
Page 15: Installation
Connecting the Power Cord Connect the power cord to the ~ AC IN connector on the back of the unit, and then connect the plug to a power outlet. UP-CR20L to - AC IN connector AC power cord (not supplied) -
Page 16: Startup And Shutdown
Startup and Shutdown Startup Verify that no memory card is inserted in any of the front-side memory card slots of the unit. Then turn on the POWER switch. The unit starts up, and the Start Guide screen appears. For details on subsequent steps, see “Operation” on page 57. -
Page 17: Loading The Paper Roll And Ink Ribbon
Loading the Paper Roll and Ink Ribbon Handling the paper roll and ink ribbon Notes • Each printing pack contains two sets of the ink ribbon and paper roll combination. Use the ink ribbon and the paper roll in the carton as a set. Do not mix with other varieties of ribbon or paper roll. -
Page 18: Unlocking The Ribbon Door
Be sure to clean the inside of the printer before printing (page 50). Unlocking the Ribbon Door The ribbon door is locked for safety when the unit is turned on. To unlock the door, proceed as follows and display the administration screen. - Page 19 • Be careful that your fingers and clothing are not caught in the paper door or on the protuberance in the opening of the door. Press and lower the paper door lever, hold the paper door at the center portion, and pull the door forward until it locks into the open position.
- Page 20 Paper with 127-mm (5-inch) width: 2UPC-R203/ R205 series Printing Pack Attach the blue paper adapter to the left side of the unit, and the pink paper adapter to the right side. (The unit is factory shipped with the paper adapters attached.) blue Press the portions indicated by the arrows until the tabs at the top lock into place.
- Page 21 Close the paper door, and press the center of the door until it clicks into place. Notes • If you close the door by pressing only its sides, the door may not lock into place properly. • When closing the paper door, be sure that the front edge of the paper is not caught in the door.
-
Page 22: Attaching The Scrap Receptacle
Hold the center of the ribbon tray, and load it into the unit. Notes • Always hold the center of the ribbon tray when loading it into the unit. If you hold the tray by any other part, your fingers may get caught while inserting the tray and injuries may result. - Page 23 Attaching the output tray adapter The output tray adapter prevents printouts from sticking out of the output tray. Use the adapter when printouts curl as shown. Note About 40 printout sheets can be stored in the output tray in most cases. However, this number can vary greatly depending on the amount of curling in printouts.
-
Page 24: Attaching The Output Cover
To remove the output tray Hold the output tray on both sides, and 1 raise the tray while 2 pulling it toward you. Attaching the Output Cover Attach the output cover to the output tray. Doing so prevents minor cuts and injuries that may result from printouts ejecting quickly out of the output slot while printing. -
Page 25: Replacing The Paper Roll And Ink Ribbon
button Displays the number of prints since the last head cleaning. If the “Cleaning is necessary” message appears to the right of the number of prints, touch the button to perform cleaning. Information on additional printers If another printer is connected to this unit, Print Size and Ribbon Remain information for the additional printer appears here. -
Page 26: Removing The Paper Roll And Ink Ribbon
Enter the administrator password using the numeric keypad, and touch [OK]. (The factory default setting for the password is “9999.”) The ribbon door unlocks, and the error message screen returns. The key icon at the top right changes to “!,” indicating that the door is unlocked. -
Page 27: Loading The Paper Roll And Ink Ribbon
Remove the paper roll. Remove the paper core from the paper roll. Note The paper core is reusable. Do not throw it away. Pull the ribbon door toward you to open it. Remove the ribbon tray. Remove the ink ribbon. After removing the ink ribbon, attach the black spool to the white spool. - Page 28 Pull the ribbon on the white spool, attach one edge of a strip of adhesive tape along the entire length of the ribbon’s end, and then attach the other edge of the tape to the ribbon on the black spool. B Attach the adhesive tape along A Wind the the entire length of the white...
-
Page 29: Chapter 3 Setup
Setup Language and operation mode selections, prices, passwords and other settings for setting up the unit are configured from the administration screen. You can also change settings after setting up the unit and perform maintenance from the administration screen. Displaying the Administration Screen Proceed as follows to display the administration screen. -
Page 30: About Operation Modes
(Administration) tab Lets you limit the number of prints per order and make password settings. The print logs and system logs can also be displayed from this tab. (Template) tab Lets you copy data such as templates for border prints onto an expansion CompactFlash card. -
Page 31: Flow Of Operations In Each Mode
Flow of Operations in Each Mode Full mode Touch the screen Select language Select input method • Insert memory card • Insert CD/DVD • Send image data Select print type • Select & Print • Border Print • Split Image •... -
Page 32: Basic Settings Used In All Operation Modes
Basic Settings Used in All Operation Modes This section explains the basic settings that are used in all of the operation modes. Selecting the Language This procedure selects the language that is used for all of the other settings and operations. The factory default setting is English. -
Page 33: Setting The Time
Setting the Time This procedure sets the time for the internal clock. Open the System tab on the administration screen. Touch the [Clock Settings] button. The following screen appears. Date format Select the display format for the date and time from among the following options. -
Page 34: Settings In Full Mode And Quick Print Mode
Settings in Full Mode and Quick Print Mode Setting Prices Set the prices for prints. You can set the price per print for each size. You can also set additional fees for matte finishing and special prints such as index or border prints. You can also set initial fees for each order. - Page 35 On-screen Currency abbreviation US Dollar Hong Kong Dollar South Korean Won Mexican Peso Brazilian Real Colombian Peso Venezuelan Bolivar East Carribbean Dollar Argentinian Peso Chilean Peso Peruvian Nuevo Sol Panama Balboa Ecuador Sucre Jamaican Dollar Uruguayan Peso Polish Zloty Pricing Set prices for each print size, additional fees for special prints, and initial fees that will be added to each order.
-
Page 36: Setting The Passwords
Setting the Passwords When using this unit as a self-service photo kiosk in a store, the store staff needs to verify the number of prints and the charges, accept payment from the customer, and then input a password before the photos can be printed. The password is a four-digit number that is set beforehand on the administration screen. -
Page 37: Chapter 4 Advanced Settings
Advanced Settings Band Pricing You can vary the price per print based on the number of prints ordered. This allows you to offer discounts for large volume printing. Prices can be set for each print size. You can also set additional fees for matte finishing and special prints such as index or border prints. -
Page 38: Setting The Maximum Number Of Prints
Band pricing setting example 1 to 10 prints $ 0.50 11 to 50 prints $ 0.40 51 or more prints $ 0.30 Input example Lower Qty Upper Qty Repeat this process for the other sizes by first touching the size button and then setting the band pricing. Set the additional prices for special prints. -
Page 39: Using Budget Codes
When Rental or Ink Ribbon is selected When you select Rental or Ink Ribbon, Order and Price configurations are also enabled simultaneously. Configure Order and Price settings before selecting Rental or Ink Ribbon when using either of these modes. If you reconfigure Order and Price settings after selecting the Rental or Ink Ribbon mode, be sure to touch the Rental and Ink Ribbon buttons again to reselect them. -
Page 40: Setting Cut Mode
Setting Cut Mode It is possible to print in non-standard sizes when using the 2UPC-R205 series, 2UPC-C26 series, or 2UPC-R206 series printing pack. This function allows you to print several different print sizes without having to replace the printing pack. If Cut mode is set, a print size selection screen appears at the start of the ordering process. -
Page 41: Watermarking Order Numbers Or File Names On Prints
CD-ROM. You will need at least 512 MB of memory in order to copy all of the data stored on the CD-ROM. Sony UPCR20 Watermarking Order Numbers or File Names on Prints / Using Expansion CompactFlash Cards... -
Page 42: Installing A Compactflash Card In The Unit
Installing a CompactFlash Card in the Unit The CompactFlash card that you wish to use as an expansion must be installed in the expansion CompactFlash slot on the unit. Remove the screws securing the cover of the expansion port, and then open the cover. Insert the CompactFlash card in the expansion CompactFlash slot. -
Page 43: Copying User Created Data
CompactFlash card by touching the [Delete All] button in the Template tab of the administration screen. Note All folders and files stored under the “\Sony\UPCR20\” folder on the expansion CompactFlash card will be deleted. This includes folders and files that are read-only. -
Page 44: Adding Borders
You must convert the created designs to a format supported by the unit. For the details on how to create border designs, please visit the UP-CR20L support page at http://www.sony.net/snaplab. To copy a newly created border Make sure that an expansion CompactFlash card has been inserted. - Page 45 Touch the [Text Setting] button. The text input screen appears. Use the [Input] tab to input the text. Use the other tabs to format the text. [Input] tab Touch the keys shown on the screen to enter text. You can enter up to two lines, each containing up to 64 alphanumeric characters.
-
Page 46: Printing With Watermarks (Watermark Lamination)
Logos, text, illustrations, and other custom designs can be printed on photos as watermarks. For details on how to create and use watermark lamination designs, please visit the UP-CR20L support page at http://www.sony.net/snaplab. Note When using the watermark lamination function, you cannot print order numbers or file names on the photos. -
Page 47: Setting Image Preload
Setting Image Preload Expansion CompactFlash card required You can select whether data for ordered images is loaded onto the unit before printing begins. When image preload is enabled, data for ordered images is loaded from a memory card or CD/DVD onto the expansion CompactFlash card immediately before printing begins. -
Page 48: Preparing For Printing Using Bluetooth ® Communication
1) A Silex Technologies SX-WSG1 is required. For details, please visit the UP-CR20L support page at http://www.sony.net/snaplab. You can also configure how the images are processed after they are sent. The following options are available for selection under [Network Option]. - Page 49 • (Save image) Store the sent images on the expansion CompactFlash card. Stored images can be printed from the Save folder. To delete images stored in the Save folder, touch the button. System Settings...
-
Page 50: Chapter 5 Maintenance
Maintenance Cleaning Cleaning the Interior If defects such as white stripes and speckled scratches begin to appear in printouts, you may need to clean the thermal head and rollers. White stripes Speckled scratch You can check whether cleaning is necessary in the confirmation screen for the remaining ink ribbon. - Page 51 Open the ribbon door, and remove the ribbon tray. Remove the ink ribbon, and replace it with the cleaning ribbon. Load the ribbon tray into the printer, and close the ribbon door. Touch the [OK] button in the message. About 20 cm of paper is ejected automatically, and the message to start cleaning appears.
-
Page 52: Cleaning The Ventilation Filter
Note After cleaning is finished, make sure that the cleaning sheet is completely ejected. If any part of the cleaning sheet remains, cut off all portions of the print paper on which the cleaning sheet is still affixed before further operation. -
Page 53: Cleaning The Cabinet
Reattach the filter cover onto the printer. Cleaning the Cabinet If the cabinet is dirty, wipe it using a cloth that has been soaked in water, or mild detergent diluted in water, and thoroughly wrung out. Wipe the cabinet dry using a dry cloth. -
Page 54: Setting The Image Quality For An Expansion Printer
Note For details on adjusting the gray balance on expansion printers, refer to the operating instructions for your expansion printer and please visit the UP-CR20L support page at http://www.sony.net/snaplab. Displaying Logs Displaying Logs The print log and system log can be displayed. -
Page 55: Displaying The Sales Log
Touch this button to reset the print counter. button Upgrade the firmware version. For the latest information on firmware version upgrades, please visit the UP-CR20L support page at http://www.sony.net/snaplab. Note Do not turn off the unit while firmware version upgrade is in progress. -
Page 56: Adjusting The Touch Panel
Adjusting the Touch Panel This function is used to calibrate the touch panel. Open the System tab on the administration screen, and touch the [Touch Panel Adjustment] button. The touch panel adjustment screen appears. A box appears on this adjustment screen. Touch the box that appears on the screen. -
Page 57: Chapter 6 Operation
Operation Starting Operation Applicable modes: All operation modes Touch the screen anywhere. The language selection screen appears. The above screen will not appear in the following circumstances. • When Event mode is set • When only one language is set for use Chapter Touch the desired language. - Page 58 To insert a “Memory Stick” With the label facing up, fully insert the “Memory Stick” in the direction indicated by v. To insert an SD Card, miniSD Card, MultiMediaCard, CompactFlash Card, or an xD-Picture Card With the label facing up, fully insert the card in the direction indicated by v.
-
Page 59: Selecting And Printing Images
Selecting and Printing Images Applicable modes: All operation modes This procedure explains how to select and print the desired images. On the main menu, touch [Select & Print]. The image selection screen appears. [Select All] button: Touch this button to select all images. -
Page 60: Using Border Print
“Specifying the Layout (Crop and Rotate)” on page 65. Once all of the desired images have been selected and the print quantities have been specified, touch the [OK] button. If the unit is in Event mode, printing begins. If the unit is in Full mode or Quick Print mode, the order confirmation screen appears. -
Page 61: Using Split Image Print
If the unit is in Event mode, printing begins. If the unit is in Full mode, the order confirmation screen appears. For details on how to proceed, see “Confirming and Printing the Order” on page 63. Using Split Image Print Applicable modes: Full mode, Event mode This function lets you print multiple images on a single sheet. -
Page 62: Using Index Print
Select the image that you want to assign to the frame, and then touch the [OK] button. The preview screen returns. If the layout that you selected includes multiple images, repeat steps 3 and 4. [+] [–] buttons: Use these buttons to specify the number of prints. -
Page 63: Printing All Images
Printing All Images Applicable mode: All operation modes This function prints one each of all images. From the main menu, touch [Express Print]. The order confirmation screen appears. For details on how to proceed, see “Confirming and Printing the Order” on page 63. Note If the total number of images exceeds the maximum limit on the number of prints that was set by the... -
Page 64: Canceling Print Operations
Touch the [Print Start] button. A numeric keypad appears for inputting the password (budget code). Store staff inputs the password and touches the [OK] key. The staff member uses the numeric keypad displayed on the screen to enter a four-digit password (either the checkout password or the administrator password). -
Page 65: Image Editing
Image Editing Applicable modes: All operation modes (only crop and rotate in Quick Print mode) While selecting or previewing images, touching the button or the [Edit] button causes the editing menu to appear. In Quick Print mode, the crop/rotate screen appears instead of the editing menu. -
Page 66: Inputting Text
Inputting Text You can input text that will appear on top of printed images. On the Edit Menu, touch [Text Input]. The text input screen appears. Touch the keys shown on the [Input] tab screen to enter text. You can enter up to two lines, each containing up to 64 alphanumeric characters. -
Page 67: Adjusting The Image Quality
positioning are automatically adjusted to fit the text entirely within the image. • Text that is positioned flush with the edge of the image may be cut off when the image is printed. Adjusting the Image Quality To adjust the image quality, touch [Color Adjustment] on the editing menu. -
Page 68: Selecting The Print Finish
Use the buttons to adjust the size of the compensation frame, so that the eye is fully within the frame. Perform red eye reduction on one eye at a time. Including both eyes in the compensation frame may result in incorrect compensation. Touch the button. -
Page 69: Printing From Bluetooth-Compatible Devices
Bluetooth-compatible device. When selecting a printer on your Bluetooth- compatible device, select “SONY UP-CR20L ##.” The alpha numeric characters comprising the right side of the Bluetooth address displayed on the printer’s screen appear in place of “##.” “D2” appears in place of “##”... -
Page 70: Printing From Dpof Settings
When the transfer is finished, touch the [OK] button. When transferring multiple images, transfer all of the images before touching the [OK] button. The Main Menu appears. The procedure following the Main Menu is the same as when memory cards are used. See details on print procedures starting on page 59. -
Page 71: Printing With Expansion Printers
UP-CR20L. For details on how to display the confirmation screen for the remaining ink ribbon, see “Checking the Remaining Ink Ribbon” on page 24. -
Page 72: Adjusting The Image Quality For The Expansion Printer
For details on installation, refer to the installation guide and the Readme file on the supplied CD-ROM. Notes • For the latest information on the printer driver, please visit the UP-CR20L support page at http:// www.sony.net/snaplab. • The supplied printer driver does not support printing via a network. -
Page 73: Connecting To A Computer
Connecting to a Computer To print from a computer, you must connect the unit to the computer using a commercially available USB cable. Plug the USB cable into the USB port (device) at the top of the unit. When making the connection, you should also consult the documentation of the computer. -
Page 74: Appendix
• If the unit malfunctions or if a foreign body falls into the cabinet, disconnect the power immediately and consult your Sony service facility or your Sony dealer. • To store a half-used printing pack, replace it in its original packing and reseal the package. If possible, keep the sealed printing pack in a cool, dark location. -
Page 75: Memory Cards
Memory Cards Notes on Using “Memory Stick” Notes • Sony bears no responsibility for damage to your memory card or data while using this unit. • Operation of “Memory Stick” (up to 32 GB) media on this product is confirmed. However, proper operation on all types of the “Memory Stick”... -
Page 76: Notes On Using Other Types Of Memory Cards
Note Be aware that Sony is not liable for any damage to memory cards or loss of data that occurs while using this unit. CompactFlash card The card can only be set in the slot in one direction. -
Page 77: Notes On Usb Memory
xD-Picture Card The card can only be set in the slot in one direction. If the card does not slide into the slot smoothly, do not try to force it in. Instead, make sure that the card is oriented correctly, with the v mark pointing towards the slot. v mark Direction of insertion For details, refer to the user’s manual accompanying your... -
Page 78: Troubleshooting
Troubleshooting Troubleshooting Before sending the unit out for servicing, check the items listed below. If you still cannot solve the problem, contact your Sony Authorized Dealer. Symptom Cause/Remedy The printer does not The printer may be turned off. -
Page 79: Ink Ribbon And Paper
Symptom Cause/Remedy Power does not switch The power cord may not be connected. tMake sure that the power cord is connected (page 15). The POWER switch may not have been pressed correctly. tMake sure to press the POWER switch firmly (page 16). -
Page 80: Specifications
Note However the number of sheets that can be printed may not be guaranteed if you replace the ink ribbon and paper before the ink ribbon and paper run out. Specifications Specifications Power requirements 100 to 240 V AC, 50/60 Hz Input current 6.3 to 3.2 A max. - Page 81 DUE TO FAILURE OF THIS UNIT OR ITS PRINTING MEDIA, ASSOCIATED SOFTWARE, EXTERNAL STORAGE, OR OTHER EXTERNAL DEVICE. • SONY WILL NOT BE LIABLE FOR DAMAGES OF ANY KIND INCLUDING, BUT NOT LIMITED TO, COMPENSATION OR REIMBURSEMENT ON ACCOUNT OF THE LOSS OF PRESENT OR...
- Page 82 Sony Corporation...