Table of Contents
Advertisement
TABLE OF CONTENTS
SAFETY CONSIDERATIONS . . . . . . . . . . . . . . . . . . . 2
AND DIMENSIONS . . . . . . . . . . . . . . . . . . . . . . . . . . . . 2
Rated Indoor Airflow . . . . . . . . . . . . . . . . . . . . . . . . . . 2
INSTALLATION . . . . . . . . . . . . . . . . . . . . . . . . . . . . . . . 8
Jobsite Survey. . . . . . . . . . . . . . . . . . . . . . . . . . . . . . . . .8
Step 1 - Plan for Unit Location . . . . . . . . . . . . . . . . 8
Step 3 - Inspect Unit . . . . . . . . . . . . . . . . . . . . . . . . . 9
Step 4 - Provide Unit Support . . . . . . . . . . . . . . . . . 9
Step 5 - Field Fabricate Ductwork . . . . . . . . . . . . 11
ELECTRIC HEATERS
Step 6 - Rig and Place Unit . . . . . . . . . . . . . . . . . . 11
Ductwork (When Required) . . . . . . . . . . . . . . . . . . . 12
Step 8 - Install Outside Air Hood . . . . . . . . . . . . . 13
HOOD PACKAGE REMOVAL AND SETUP -
FACTORY OPTION
and Line. . . . . . . . . . . . . . . . . . . . . . . . . . . . . . . . . . . . . 14
Step 10 - Make Electrical Connections. . . . . . . . 15
DISCONNECT OR HACR
• ALL UNITS
Manufacturer reserves the right to discontinue, or change at any time, specifications or designs without notice and without incurring obligations.
Catalog No. 04-53500208-01
Cooling Only with Puron
Installation Instructions
Page
Printed in U.S.A.
Form 50HC-7-12-07SI
50HC07-12 WeatherMaster
Single Package Rooftop
®
(R-410-A) Refrigerant
• CONVENIENCE OUTLETS
• HACR AMP RATING
®
®
• ENTHALPY SETTINGS
Smoke Detectors . . . . . . . . . . . . . . . . . . . . . . . . . . . . . 47
Frequency Drive (Factory-Installed Option) . . . . . 48
ComfortLink (Factory-Installed Option). . . . . . . . . 48
PremierLink™ Controller (Factory Option) . . . . . . 48
RTU Open Controller System . . . . . . . . . . . . . . . . . . 48
Controller Options . . . . . . . . . . . . . . . . . . . . . . . . . . . . 48
Step 11 - Adjust Factory-Installed Options . . . . 48
®
Step 12 - Install Accessories . . . . . . . . . . . . . . . . . 49
Step 13 - Check Belt Tension. . . . . . . . . . . . . . . . . 49
UltraTech™ Compressor
(50HC07 Units Only) . . . . . . . . . . . . . . . . . . . . . . . . . . 49
Pre-Start and Start-Up . . . . . . . . . . . . . . . . . . . . . . . . 50
START-UP CHECKLIST . . . . . . . . . . . . . . . . . . . . CL-1
Pg 1
®
Series
11-18
Replaces: 50HC-7-12-06SI
Page
Advertisement
Table of Contents

Related Manuals for Carrier WeatherMaster Series


Summary of Contents for Carrier WeatherMaster Series
-
Page 1: Table Of Contents
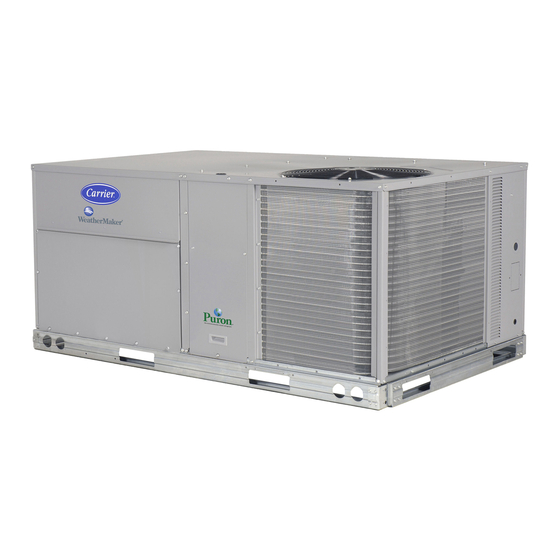
® 50HC07-12 WeatherMaster Series Single Package Rooftop Cooling Only with Puron ® (R-410-A) Refrigerant Installation Instructions Page TABLE OF CONTENTS • CONVENIENCE OUTLETS Page • HACR AMP RATING SAFETY CONSIDERATIONS ....2 •... -
Page 2: Safety Considerations
IMPORTANT: 50HC 11 and 12 size units for installation unit and in instructions or manuals, be alert to the potential in the United States contain use of Carrier's Staged Air for personal injury. Volume (SAV™) 2-speed indoor fan control system. This Understand the signal words DANGER, WARNING, CAU- complies with the U.S. - Page 3 Position: 10 11 12 13 14 15 16 17 18 Example: Unit Heat Type Factory Assigned 50 - Electric Heat 0 - Standard Packaged Rooftop 1 - LTL ® Model Series - WeatherMaster Electrical Options HC - High Efficiency A - None B - HACR Breaker C - Non-Fused Disconnect Heat Options...
- Page 4 Fig. 2 — Unit Dimensional Drawing — Sizes 07-09...
- Page 5 Fig. 2 — Unit Dimensional Drawing — Sizes 07-09 (cont)
- Page 6 Fig. 3 — Unit Dimensional Drawing — Sizes 11 and 12...
- Page 7 Fig. 3 — Unit Dimensional Drawing — Sizes 11 and 12 (cont)
-
Page 8: Installation
LOCATION CONDITION DIMENSION Unit disconnect is mounted on panel 48 in. (1219 mm) No disconnect, convenience outlet option 18 in. (457 mm) Recommended service clearance 18 in. (457 mm) Minimum clearance 12 in. (305 mm) Surface behind servicer is grounded (e.g., metal, masonry wall) 42 in. -
Page 9: Step 2 - Plan For Sequence Of Unit Installation
Table 2 — Operating Weights UNIT WEIGHT LB (KG) 50HC* 11, 12 Base Unit 715 (324) 860 (390) 860 (390) 1025 (466) Economizer Vertical 75 (34) 75 (34) 75 (34) 75 (34) Horizontal 122 (55) 122 (55) 122 (55) 122 (55) Powered Outlet 35 (16) 35 (16) - Page 10 Fig. 6 — Roof Curb Details — Sizes 07-12...
-
Page 11: Alternate Unit Support (In Lieu Of Curb Or Slab Mount)
ALTERNATE UNIT SUPPORT (IN LIEU OF CURB OR Step 6 — Rig and Place Unit SLAB MOUNT) Keep unit upright and do not drop. Spreader bars are re- A non-combustible sleeper rail can be used in the unit curb quired. Rollers may be used to move unit across a roof. Level support area. -
Page 12: Step 7 - Convert To Horizontal And Connect Ductwork (When Required)
DIMENSIONS IN. (MM) UNIT MAX WEIGHT LB (KG) 50HC*(A,B,D,E)07 1130 (514) 88.0 (2235) 43.0 (1090) 41.5 (1055) 50HC*(D,E)08 1340 (609) 88.0 (2235) 43.0 (1090) 49.5 (1255) 50HC*(D,E)09 1340 (609) 88.0 (2235) 43.0 (1090) 49.5 (1255) 50HC*(D,E)11,12 1580 (718) 88.0 (2235) 31.5 (775) 49.5 (1255) NOTES:... -
Page 13: Step 8 - Install Outside Air Hood
SCREWS Hood Parts Plastic Tie Wrap Qty (2) DUCT COVERS SHEET METAL FACE UP Screws for Metal Tray Qty (2) BASEPAN Fig. 12 — Economizer and Two-Position Damper Hood Parts Location Carefully lift the hood assembly (with metal tray) through the filter access opening and assemble per the steps outlined in the Economizer Hood and Two–Posi- tion Hood section, below. -
Page 14: Step 9 - Install External Condensate Trap
Step 9 — Install External Condensate Trap and Line The unit has one -in. condensate drain connection on the PANEL end of the condensate pan and an alternate connection on the bottom. See Fig. 16. Unit airflow configuration does not de- INDOOR COIL termine which drain connection to use. -
Page 15: Step 10 - Make Electrical Connections
Step 10 — Make Electrical Connections Units Without Single Point Box, Disconnect or HACR Option Equip GR Lug WARNING ELECTRICAL SHOCK HAZARD Failure to follow this warning could result in personal injury or death. Disconnect Disconnect Do not use gas piping as an electrical ground. Unit cabinet must have an uninterrupted, unbroken electrical ground to minimize the possibility of personal injury if an electrical 208/230-1-60... -
Page 16: Units With Factory-Installed Non-Fused
UNITS WITH FACTORY-INSTALLED NON-FUSED DIS- CONNECT OR HACR The factory-installed optional non-fused disconnect (NFD) or HACR switch is located in a weatherproof enclo- sure located under the main control box. The manual switch handle and shaft are shipped in the disconnect or HACR en- closure. -
Page 17: Units Without Factory-Installed Non- Fused Disconnect Or Hacr
Operation on improper line voltage or excessive phase imbal- ance constitutes abuse and may cause damage to electrical components. Such operation would invalidate any applicable Carrier warranty. Example: Supply voltage is 230-3-60 AB = 224 v BC = 231 v... - Page 18 CONVENIENCE OUTLETS WARNING Failure to follow this warning could result in personal injury or death. Units with convenience outlet circuits may use multi- ple disconnects. Check convenience outlet for power sta- tus before opening unit for service. Locate its disconnect switch, if appropriate, and open it.
-
Page 19: Factory-Option Thru-Base Connections
The 50HC unit requires an external temperature control device. This device can be a thermostat (field-supplied) or a PremierLink™ controller (available as factory-installed op- tion or as field-installed accessory, for use on a Carrier Com- fort Network ® (CCN) or as a stand-alone control) or the RTU... -
Page 20: Thermostat
THERMOSTAT Unit without Thru-Base Connection Kit Select a Carrier-approved accessory thermostat. When Pass the thermostat control wires through the hole provid- electric heat is installed in the 50HC unit, the thermostat must ed in the end panel (see item “D” in the view labeled “LEFT”... - Page 21 Table 3 — Heater Model Number Bare Heater Model Number Heater Sales Package PN Includes: Bare Heater Carton and packing materials Installation sheet Single Point Boxes and Supplementary Fuses DISCONNECT MOUNTING LOCATION When the unit MOCP device value exceeds 60-A, unit- mounted supplementary fuses are required for each heater circuit.
-
Page 22: Humidi-Mizer ® Control Connections
CONTL BOARD ® ® Fig. 39 — Edge Pro Thermidistat Field To connect the Carrier humidistat (HL38MG029): Connections for Field-Installed Route the humidistat 2-conductor cable (field-supplied) Electric Heat Elec Htr through the hole provided in the unit corner post. Feed wires through the raceway built into the corner post (see Fig. -
Page 23: Typical Control And Power Wiring Diagrams
PNK/BLK lead to the LTLO (low temperature cooling Route the Thermidistat multi-conductor thermostat cable lockout) switch with field-supplied wire nuts. Refer to (field-supplied) through the hole provided in the unit cor- the installation instructions included with the Carrier ner post. Edge ®... - Page 24 Edge Programable Thermostat Unit CTB THERMOSTAT O/W2/B SRTN Humidi-MiZer™ FIOP *Connection not required. ® Fig. 41 — Typical Rooftop Unit with Humidi-MiZer Adaptive Dehumidification System with Edge ® Pro Thermidistat Device...
- Page 25 Fig. 42 — Electro-Mechanical Control Wiring Diagram...
- Page 26 Fig. 43 — Electro-Mechanical Control Wiring Diagram with Humidi-MiZer ® System...
- Page 27 Fig. 44 — Typical ComfortLink Control Wiring Diagram (50HC*08/09 shown)
- Page 28 Fig. 45 — Typical 50HC ComfortLink Control Power Wiring Diagram with Humidi-MiZer ® System (208/230V, 460V-3 Ph-60 Hz shown)
- Page 29 Fig. 46 — Typical PremierLink™ Control Wiring Diagram...
- Page 30 Fig. 47 — Typical PremierLink™ Control Wiring Diagram with Humidi-MiZer ® System Option...
- Page 31 Fig. 48 — Typical RTU Open Controller Wiring Diagram...
- Page 32 ® Fig. 49 — Typical RTU Open Controller Wiring Diagram with Humidi-MiZer System Option...
-
Page 33: Economi$Er ® X (Factory Option)
User Interface ® Economi$er X (Factory Option) Provides status for normal operation, setup parameters, The EconoMi$er X system is an expandable economizer checkout tests, and alarm and error conditions with a 2-line control system, which includes a W7220 economizer module 16 character LCD display and four button keypad. - Page 34 Shipping Temperature Table 5 — Economizer Module - Right Hand Terminal Blocks –40 to 150°F (–40 to 65°C) LABEL TYPE DESCRIPTION Relative Humidity Top Right Terminal Blocks 5% to 95% RH non-condensing The first terminal is not used. Economizer Module Wiring Details Shut Down (SD) or HEAT (W) Use Fig.
-
Page 35: Interface Overview
S-Bus Sensor Wiring Sensor Wiring The labels on the sensors and controller are color coded When using a CO sensor the black and brown common for ease of installation. Orange labeled sensors can only be wires are internally connected and only one is connected to wired to orange terminals on the controller. - Page 36 To use the keypad when working with Setpoints, System Menu Structure and Advanced Settings, Checkout tests and Alarms: Table 8 illustrates the complete hierarchy of menus and Navigate to the desired menu. parameters for the EconoMi$er X system. ® Press the (Enter) button to display the first item in The Menus in display order are: the currently displayed menu.
- Page 37 Table 8 — W7220 Menu Structure* PARAMETER PARAMETER MENU PARAMETER DEFAULT RANGE AND NOTES † VALUE INCREMENT ECONOMIZING AVAILABLE ECON AVAIL YES/NO YES = economizing available; the system can use outside air for free cool- ing when required ECONOMIZING ACTIVE ECONOMIZING YES/NO YES = Outside air being used for 1 stage cooling...
- Page 38 Table 8 — Menu Structure (cont) PARAMETER PARAMETER MENU PARAMETER DEFAULT RANGE AND NOTES † VALUE INCREMENT EXH2 OUT ON/OFF EXHAUST STAGE 2 RELAY OUTPUT Output of AUX1 O terminal Displays ON when damper position reaches programmed percentage setpoint ON = 24 Vac Output, OFF = No Output; displays only if AUX1 O = EXH2 ON/OFF ENERGY RECOVERY UNIT RELAY OUTPUT Output of AUX1 O terminal, ON = 24 Vac Output, OFF = No Output;...
- Page 39 Table 8 — Menu Structure* (cont) PARAMETER PARAMETER MENU PARAMETER DEFAULT RANGE AND NOTES † VALUE INCREMENT INSTALL 01/01/10 Display order = MM/DD/YY Setting order = DD, MM, then YY. UNITS DEG °F °F or °C Sets economizer controller in degrees Fahrenheit or Celsius EQUIPMENT CONV Conventional or HP...
- Page 40 Table 8 — Menu Structure* (cont) PARAMETER PARAMETER MENU PARAMETER DEFAULT RANGE AND NOTES † VALUE INCREMENT MAT T CAL 0.0°F (or °C) ±2.5°F SUPPLY AIR TEMPERATURE CALIBRATION (±1.4°C) Allows the operator to adjust for an out of calibration supply air tempera- ture (SAT) sensor.
- Page 41 Table 8 — Menu Structure* (cont) PARAMETER PARAMETER MENU PARAMETER DEFAULT RANGE AND NOTES † VALUE INCREMENT SHUTDOWN ACTIVE AUX2 IN is programmed for SHUTDOWN and 24 V has been applied to AUX2 IN terminal. DMP CAL RUNNING DAMPER CALIBRATION ROUTINE RUNNING If DCV Auto enable has been programmed, when the W7220 is complet- ing a calibration on the dampers, this alarm will display.
-
Page 42: Sequence Of Operation
For damper minimum position settings and checkout menu readings, see Table 9. Table 9 — Damper Minimum Position Settings and Readings on Checkout Menu DEMAND CONTROLLED VENTILATION FAN SPEED SETPOINTS CHECKOUT SENSOR) MIN POS VMAX – HS MIN POS H VMAX –... - Page 43 Table 12 — Enthalpy Operation, No Demand Controlled Ventilation (DCV) (CO Sensor) — 1 Speed Fan OUTSIDE AIR GOOD TO Y1-I Y2-I FAN SPEED Y1-O Y2-O OCCUPIED UNOCCUPIED ECONOMIZE? High 0-v/Off 0-v/Off MIN POS Closed High 24-v/On 0-v/Off MIN POS Closed High 24-v/On...
- Page 44 Table 15 — Dry Bulb Operation, With Demand Controlled Ventilation (DCV) (CO Sensor) — 2 Speed Fan OUTSIDE AIR GOOD TO Y1-I Y2-I FAN SPEED Y1-O Y2-O OCCUPIED UNOCCUPIED ECONOMIZE? 0-v/Off 0-v/Off VENTMIN L Closed 24-v/On 0-v/Off VENTMIN L Closed High 24-v/On 24-v/On...
-
Page 45: Enthalpy Settings
ENTHALPY SETTINGS When all of the OA conditions are above the selected boundary, the conditions are not good to economize and the When the OA temperature, enthalpy and dew point are be- mode is set to NO. low the respective setpoints, the outdoor air can be used for Fig. -
Page 46: Two-Speed Fan Operation
TWO-SPEED FAN OPERATION Power Loss (Outage or Brownout) All setpoints and advanced settings are restored after any The W7220 controller has the capability to work with a power loss or interruption. All settings are stored in non-volatile system using a 2-speed supply fan. The W7220 does not con- flash memory. -
Page 47: Smoke Detectors
Smoke Detectors RETURN AIR Smoke detectors are available as factory-installed options SMOKE DETECTOR on 50HC models. Smoke detectors may be specified for Sup- (AS SHIPPED) ply Air only or for Return Air without or with economizer or in combination of Supply Air and Return Air. All components necessary for operation are factory-provided and mounted. -
Page 48: Staged Air Volume (Sav™) With Variable Frequency Drive (Factory-Installed Option)
Staged Air Volume (SAV™) with Variable Controller Options Frequency Drive (Factory-Installed Option) LOW AMBIENT CONTROL (FACTORY OPTION) For details on operating 50HC 2 stage cooling units If the unit comes with Electro-Mechanical (EM) control, equipped with the factory-installed Staged Air Volume op- then no adjustment is necessary. -
Page 49: Step 12 - Install Accessories
Step 12 — Install Accessories Available accessories include: • Roof Curb • Thru-base connection kit (must be installed before unit is set on curb) • Manual outside air damper • Two-Position motorized outside air damper • EconoMi$er IV (with control and integrated barometric relief) •... -
Page 50: Pre-Start And Start-Up
Service Manual for detailed pre-start and start-up instructions. Download the latest versions from HVAC Partners (www.hvacpartners.com). © Carrier Corporation 2018 Manufacturer reserves the right to discontinue, or change at any time, specifications or designs without notice and without incurring obligations. Catalog No. 04-53500208-01 Printed in U.S.A. - Page 51 START-UP CHECKLIST FOR 50HC07-12 SINGLE PACKAGE ROOFTOP COOLING ONLY (REMOVE AND USE FOR JOB FILE) NOTE: To avoid injury to personnel and damage to equipment or property when completing the procedures listed in this start-up checklist, use good judgment, follow safe practices, and adhere to the safety considerations/information as outlined in preced- ing sections of this Installation Instruction document.
- Page 52 10. Restore set-points for thermostat and humidistat (Y/N) _____ REPEAT PROCESS FOR 2 COMPRESSOR SYSTEMS. © Carrier Corporation 2018 Manufacturer reserves the right to discontinue, or change at any time, specifications or designs without notice and without incurring obligations. Catalog No. 04-53500208-01 Printed in U.S.A.