Panasonic Lumix H-FSA14140 Operating Instructions Manual
Interchangeable lens for digital camera
Hide thumbs
Also See for Lumix H-FSA14140:
- Owner's manual (26 pages) ,
- Operating instructions manual (72 pages)
Table of Contents
Advertisement
Available languages
Available languages
Quick Links
Advertisement
Chapters
Table of Contents

Related Manuals for Panasonic Lumix H-FSA14140


Summary of Contents for Panasonic Lumix H-FSA14140
- Page 1 Operating Instructions INTERCHANGEABLE LENS FOR DIGITAL CAMERA H-FSA14140 Model No. Please read these instructions carefully before using this product, and save this manual for future use. DVQX1827ZA F0319AR0...
-
Page 2: Table Of Contents
Contents reinsert the battery and/or reconnect the AC adaptor and turn the camera on. Information for Your Safety........2 The lens can be used with a digital camera Precautions............4 compatible with the lens mount standard for the Supplied Accessories ..........5 System”. - Page 3 ENGLISH -If you see this symbol- Disposal of Old Equipment Only for European Union and countries with recycling systems This symbol on the products, packaging, and/or accompanying documents means that used electrical and electronic products must not be mixed with general household waste.
-
Page 4: Precautions
working properly, consult the dealer or your Precautions nearest Service Centre. – Attach to a digital camera that is dust and ∫Lens Care splash resistant. ≥ Do not press the lens with excessive force. – When attaching or removing the lens, be careful so ≥... -
Page 5: Supplied Accessories
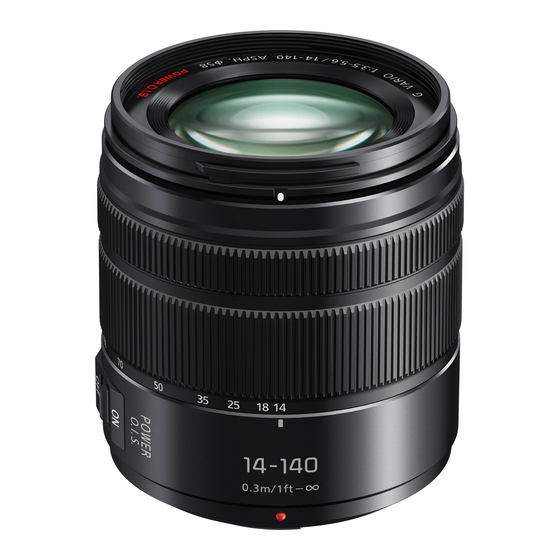
Supplied Accessories Names and Functions of Components Product numbers correct as of March 2019. These may be subject to change. VFC4430 VYC1119 VYF3514 VFC4605 Lens Pouch Lens Hood Lens Cap Lens Rear Cap 1 Lens surface (The lens rear cap and lens cap are attached to 2 Focus ring the interchangeable lens at the time of purchase.) Rotates the focus ring to focus when set to MF... -
Page 6: Attaching/Detaching The Lens
Attaching/Detaching the Lens ≥ We recommend setting the O.I.S. switch to [OFF] when using a tripod. 5 Lens fitting mark ≥ Refer also to the camera’s 6 Contact points operating instructions for attaching and detaching the lens. 7 Lens mount rubber ≥... - Page 7 ∫Detaching the Lens ∫ Attaching the Lens Hood (Supplied Accessory) While pressing on the Hold the lens hood with • Do not hold the lens lens release button B, your fingers placed as hood in a way that twists shown in the picture. or bends it.
- Page 8 ∫Temporarily Storing the Lens Hood ∫ Notes on Filter Use ≥ It is possible to attach the lens cap or the lens 1 Turn the lens hood in the hood with the filter already attached. direction of the arrow to ≥...
-
Page 9: Cautions For Use
Cautions for Use – Near heaters, air conditioners or humidifiers – Where water may make the unit wet – Where there is vibration – Inside a vehicle Take care not to drop or knock the lens. Also ≥ Refer also to the operating instructions of the digital take care not to put a lot of pressure on the lens. -
Page 10: Specifications
Specifications Specifications are subject to change without notice. INTERCHANGEABLE LENS FOR DIGITAL CAMERA “LUMIX G VARIO 14– 140 mm/F3.5– 5.6 II ASPH./POWER O.I.S.” Mount Micro Four Thirds mount Focal length f=14 mm to 140 mm (35 mm film camera equivalent: 28 mm to 280 mm) Lens construction 14 elements in 12 groups (3 aspherical lenses, 2 ED lenses) Aperture type... - Page 11 (ENG) DVQX1827...
-
Page 12: Informationen Für Ihre Sicherheit
Inhalt ≥ Wenn die Kamera durch elektromagnetische Felder anderer Geräte gestört wird und Fehlfunktionen Informationen für Ihre Sicherheit.........12 auftreten, schalten Sie die Kamera aus. Nehmen Vermeidung von Störungen ........14 Sie den Akku heraus und/oder trennen Sie das Beiliegendes Zubehör ..........16 Netzadapter ab. - Page 13 DEUTSCH ≥ Das G MICRO SYSTEM ist ein Digitalkamerasystem aus der LUMIX-Reihe mit Wechselobjektiven auf Grundlage des Micro-Four-Thirds-Standards. ≥ Andere Namen von Systemen oder Produkten welche in dieser Bedienungsanleitung genannt werden, sind normalerweise Warenzeichen oder eingetragene Warenzeichen der Hersteller dieser Produkte oder Systeme.
-
Page 14: Vermeidung Von Störungen
∫ Staub- und Spritzwasserschutz Vermeidung von Störungen ≥ Die staub- und spritzwassergeschützte ∫Objektivpflege Konstruktion der Kamera verhindert nicht ≥ Üben Sie keinen zu starken Druck auf das vollständig das Eindringen von Staub oder Objektiv aus. Wassertropfen. Treffen Sie die folgenden ≥... - Page 15 – Für Informationen zum Wechseln des Objektivfassungsgummis wenden Sie sich an Ihr nächstgelegenes Service-Center. ∫Hinweise zu Kondensation (Beschlagen des Objektivs) ≥ Kondensation tritt auf, wenn sich Umgebungstemperatur oder Luftfeuchtigkeit ändern. Seien Sie vorsichtig, da dies Ablagerungen am Objektiv, Schimmelbildung und Funktionsstörungen verursachen kann.
-
Page 16: Beiliegendes Zubehör
Beiliegendes Zubehör Bezeichnungen und Funktionen der einzelnen Kamerateile Die Produktnummern beziehen sich auf den Stand von März 2019. Änderungen sind vorbehalten. VFC4430 VYC1119 VYF3514 VFC4605 Objektivbeutel Gegenlichtblende Objektivdeckel Hinterer Objektivdeckel (Beim Kauf sind der hintere Objektivdeckel und 1 Linsenfläche der Objektivdeckel auf das Wechselobjektiv 2 Schärfenring aufgesetzt.) In der MF-Einstellung (manueller Fokus) drehen Sie... -
Page 17: Objektiv Ansetzen/Abnehmen
Objektiv ansetzen/abnehmen 4 O.I.S.-Schalter Wenn das Objektiv an der Kamera angebracht und der O.I.S.-Schalter auf [ON] eingestellt ist, wird die ≥ Informationen zum Aufsetzen Bildstabilisatorfunktion aktiviert. und Abnehmen des Objektivs ≥ Es empfiehlt sich, den O.I.S.-Schalter auf [OFF] finden Sie auch in der zu stellen, wenn Sie ein Stativ verwenden. - Page 18 ∫Das Objektiv abnehmen 1 Richten Sie die Markierung C, die sich Drehen Sie beim am kurzen Blatt der Betätigen der Gegenlichtblende Objektivfreigabetaste befindet, an der das Objektiv in Markierung am Rand des Pfeilrichtung bis zum Anschlag und entfernen Objektivs aus. Sie es.
-
Page 19: Vorsichtsmaßnahmen
∫Gegenlichtblende auf dem Objektiv ∫ Hinweise zum Verwenden von Filtern aufbewahren ≥ Es ist möglich, den Objektivdeckel und die Gegenlichtblende bei bereits aufgesetzten Filtern 1 Drehen Sie die zu verwenden. ≥ Wenn Sie zwei oder mehr Filter gleichzeitig Gegenlichtblende in verwenden, kann es zu einer Verdunklung von Pfeilrichtung, um sie Teilen des aufgenommenen Bildes kommen. -
Page 20: Fehlerbehebung
≥ Falls solche Substanzen auf das Objektiv beeinträchtigt oder der Einsatz völlig unmöglich werden. Es wird empfohlen, die Funktionsfähigkeit gelangen, könnten sie zur Beschädigung des des Gerätes vor dem Gebrauch zu prüfen. Objektivs oder zum Abblättern der Farbe führen. ≥ Stellen Sie sicher, dass das Objektiv nicht über Ist ein Objektiv an der Kamera angebracht, einen längeren Zeitraum in Kontakt mit Gummi- tragen Sie die Kamera nicht am Objektiv. -
Page 21: Spezifikationen
Spezifikationen Die Spezifikationen können ohne Ankündigung geändert werden. WECHSELOBJEKTIV FÜR DIGITAL-KAMERA “LUMIX G VARIO 14– 140 mm/F3.5– 5.6 II ASPH./POWER O.I.S.” Objektivbajonett Micro Four Thirds-Fassung Brennweite f=14 mm bis 140 mm (Kleinbild-Äquivalent: 28 mm bis 280 mm) Objektivaufbau 14 Elemente in 12 Gruppen (3 asphärische Linsen, 2 ED-Linsen) Blende 7 Blendenlamellen/runde Öffnungsblende Maximale Blendenöffnung... -
Page 22: Information Pour Votre Sécurité
Table des matières L’objectif peut être utilisé de pair avec un appareil photo numérique compatible avec la monture Information pour votre sécurité ......22 d’objectif standard prise en charge par le système Précautions ............24 “Micro Four Thirds System”. Accessoires fournis ..........26 ≥... - Page 23 FRANÇAIS -Si vous voyez ce symbole- Élimination des équipements usagés Applicable uniquement dans les pays membres de l’Union européenne et les pays disposant de systèmes de recyclage. Apposé sur le produit lui-même, sur son emballage, ou figurant dans la documentation qui l’accompagne, ce pictogramme indique que les appareils électriques et électroniques usagés doivent être séparés des ordures ménagères.
-
Page 24: Précautions
∫ Résistance à la poussière et aux Précautions éclaboussures ∫Entretien de l’objectif ≥ La résistance de l’appareil photo n’empêchera ≥ N’appuyez pas avec force sur l’objectif. pas complètement la pénétration de la ≥ Lorsqu’il a des salissures (eau, huile, traces de poussière ou des gouttes d’eau. - Page 25 – Le joint en caoutchouc de l’objectif laisse des marques sur la monture de l’appareil photo numérique, mais cela n’a aucune incidence sur les performances. – Pour des informations sur le changement du joint en caoutchouc de la monture de l’objectif, contactez votre service après-vente le plus proche.
-
Page 26: Accessoires Fournis
Accessoires fournis Noms et fonctions des composants Les numéros de produits sont corrects à compter de mars 2019. Ceux-ci sont susceptibles d'être modifiés. VFC4430 VYC1119 VYF3514 VFC4605 Étui pour objectif Parasoleil Capuchon d’objectif 1 Surface de l’objectif Capuchon d’objectif arrière (Le capuchon arrière de l’objectif et le capuchon 2 Bague de mise au point d’objectif sont fixés à... -
Page 27: Fixation/Retrait De L'objectif
Fixation/Retrait de l’objectif ≥ Nous vous conseillons de régler le commutateur O.I.S. (S.O.I.) sur [OFF] (NON) lorsque vous utilisez un trépied. ≥ Pour les instructions sur la mise 5 Repère pour la mise en place de l’objectif en place et le retrait de l’objectif, 6 Point de contact consultez également le manuel 7 Garniture en caoutchouc de l’objectif... - Page 28 ∫Retrait de l’objectif ∫ Fixation du parasoleil (Fourni) Tenez le parasoleil avec • Ne tenez pas le Tout en appuyant sur vos doigts placés comme parasoleil de manière à montré sur l’image. le tordre ou le plier. la touche de déverrouillage de l’objectif B, tournez l’objectif dans le sens...
-
Page 29: Précautions D'utilisation
∫Rangement temporaire du parasoleil ∫ Remarques sur l’utilisation d’un filtre ≥ Il est possible d’installer le capuchon d’objectif ou 1 Tournez le parasoleil le parasoleil avec le filtre déjà en place. ≥ Si vous utilisez deux filtres ou plus en même dans le sens de la flèche temps, une partie de l’image enregistrée peut être pour le retirer. -
Page 30: Dépannage
causée par la moisissure etc. Nous vous conseillons de Lorsque vous transportez l’appareil photo vérifier le fonctionnement de l’objectif avant de l’utiliser. numérique, ne le tenez pas par l’objectif. ≥ Évitez que l’objectif ne soit en contact avec des Ne pointez pas l'objectif vers le soleil ou produits en plastique ou en caoutchouc pendant d'autres sources intenses de lumière. -
Page 31: Spécifications
Spécifications Ces caractéristiques peuvent subir des changements sans avis préalable. OBJECTIF INTERCHANGEABLE POUR APPAREIL PHOTO NUMÉRIQUE “LUMIX G VARIO 14– 140 mm/F3.5– 5.6 II ASPH./POWER O.I.S.” Monture Monture Micro Quatre Tiers (Micro Four Thirds) Distance focale f=14 mm à 140 mm (Équivalence 35 mm: 28 mm à 280 mm) Composition de l’objectif 14 éléments en 12 groupes (3 lentilles asphériques, 2 lentilles ED) Type d’ouverture... -
Page 32: Información Para Su Seguridad
Índice El objetivo puede usarse con una cámara digital compatible con el estándar de montaje de objetivos Información para su seguridad ......32 del “Micro Four Thirds System”. Prevención contra las averías ......34 ≥ No se puede montar en una cámara con estándar Accesorios suministrados ........ - Page 33 ESPAÑOL -Si ve este símbolo- Eliminación de Aparatos Viejos Solamente para la Unión Europea y países con sistemas de reciclado. Este símbolo en los productos, su embalaje o en los documentos que los acompañen significa que los productos eléctricos y electrónicos usadas no deben mezclarse con los residuos domésticos.
-
Page 34: Prevención Contra Las Averías
salpicaduras. Si la lente no funciona Prevención contra las averías correctamente, consulte con su distribuidor o con el Centro de Servicio más cercano. ∫Atención del objetivo – Móntela en una cámara digital que sea ≥ No ejerce demasiada presión en el objetivo. resistente al polvo y a las salpicaduras. -
Page 35: Accesorios Suministrados
Accesorios suministrados Nombres y funciones de los componentes Números de productos correctos a partir de marzo de 2019. Pueden estar sujetos a cambio. VFC4430 VYC1119 VYF3514 VFC4605 Estuche de la lente Visera del objetivo Tapa de la lente Tapa trasera de la lente 1 Superficie del objetivo (La tapa trasera de la lente y la tapa de la lente se 2 Anillo del enfoque... -
Page 36: Unir Y Quitar El Objetivo
Unir y quitar el objetivo 4 Interruptor O.I.S. Cuando la lente está instalada en la cámara, la función de estabilizador de imagen se configura ≥ Se refiera también a las como activa si el interruptor O.I.S. está en la instrucciones de funcionamiento posición [ON]. - Page 37 ∫Separación del objetivo 1 Alinee la marca de ajuste C del pétalo más corto Mientras presiona el de la visera de la lente botón de liberación de con la marca del extremo la lente B, gire la lente de la lente. hacia la flecha hasta que se detenga y luego retírela.
- Page 38 ∫Almacenamiento temporal de la visera ∫ Notas sobre el uso de filtros del objetivo ≥ Se puede colocar la tapa de la lente o la visera de la lente con el filtro ya puesto. 1 Gire la visera del ≥ Si utiliza dos o más filtros a la vez, puede objetivo en la dirección oscurecerse parte de una imagen grabada.
-
Page 39: Precauciones Para El Uso
Precauciones para el uso – Bajo la luz directa del sol o bien a lo largo de la costa durante el verano – En lugares donde haya altas temperaturas o Tenga cuidado de no hacer caer el objetivo ni le altos niveles de humedad o bien donde sean choque contra. -
Page 40: Búsqueda De Averías
No utilice gasolina, diluyente, alcohol u otros agentes de limpieza parecidos para limpiar la unidad. ≥ El hecho de usar disolventes puede dañar el objetivo y hacer desconchar su barniz. ≥ Quite cualquier indicio de polvo o huellas dactilares con un paño blando y seco. ≥... -
Page 41: Especificaciones
Especificaciones Las especificaciones están sujetas a cambio sin previo aviso. ÓPTICA INTERCAMBIABLE PARA CÁMARA DIGITAL “LUMIX G VARIO 14– 140 mm/F3.5– 5.6 II ASPH./POWER O.I.S.” Soporte Montaje de Micro Four Thirds Longitud focal f=14 mm a 140 mm (Igual a una cámara de película de 35 mm: de 28 mm a 280 mm) Estructura del objetivo 14 elementos en 12 grupos (3 lentes asféricas, 2 lentes ED) Tipo de abertura... -
Page 42: Informazioni Per La Sua Sicurezza
Indice L’obiettivo può essere utilizzato con una fotocamera digitale dotata di un supporto dell’obiettivo Informazioni per la sua sicurezza ......42 compatibile con lo standard “Micro Four Thirds Prevenzione guasti ..........44 System”. Accessori in dotazione.......... 46 ≥ Non montabile su una fotocamera con specifiche sul Nomi e funzioni dei componenti...... - Page 43 ITALIANO -Se vedete questo simbolo- Smaltimento di vecchie apparecchiature Solo per Unione Europea e Nazioni con sistemi di raccolta e smaltimento Questo simbolo sui prodotti, sull’imballaggio e/o sulle documentazioni o manuali accompagnanti i prodotti indica che i prodotti elettrici, elettronici non devono essere smaltiti come rifiuti urbani ma deve essere effettuata una raccolta separata.
-
Page 44: Prevenzione Guasti
∫ Resistenza alla polvere ed agli schizzi Prevenzione guasti ≥ Il design resistente alla polvere ed agli schizzi ∫Custodia dell’obiettivo della fotocamera non impedirà completamente l’ingresso di polvere o goccioline d’acqua. ≥ Non premere con troppa forza l’obiettivo. Prendere le seguenti precauzioni per garantire ≥... - Page 45 digitale, ma questo non influisce sulle prestazioni. – Per informazioni sulla sostituzione della protezione in gomma, contattare il Centro Assistenza più vicino. ∫Informazioni sulla condensa (Appannamento dell’obiettivo) ≥ La condensa si forma quando cambia la temperatura ambiente o l’umidità. Fare attenzione, in quanto può...
-
Page 46: Accessori In Dotazione
Accessori in dotazione Nomi e funzioni dei componenti I codici dei prodotti sono aggiornati a marzo 2019. È possibile che subiscano delle modifiche. VFC4430 VYC1119 VYF3514 VFC4605 Borsa per l'obiettivo Paraluce Copriobiettivo Copriobiettivo posteriore (Il copriobiettivo posteriore e il copriobiettivo 1 Superficie dell’obiettivo sono installati sull’obiettivo intercambiabile al 2 Ghiera di messa a fuoco... -
Page 47: Installazione/Rimozione Dell'obiettivo
Installazione/Rimozione 4 Interruttore O.I.S. Quando l'obiettivo è installato sulla fotocamera, la dell’obiettivo funzione stabilizzatore di immagine è impostata in modo da attivarsi se l'interruttore O.I.S. è impostato su [ON]. ≥ Consultare anche le istruzioni per l’uso della fotocamera per ≥ Si consiglia di posizionare l’interruttore O.I.S. su informazioni sulla procedura di [OFF] quando si utilizza un treppiede. - Page 48 ∫Disinstallazione dell’obiettivo ∫ Installazione del paraluce (Accessorio in dotazione) Tenendo premuto il Tenere il paraluce come • Tenere il paraluce in pulsante di sblocco indicato nella figura. modo da evitare di dell’obiettivo B, torcerlo o di piegarlo. ruotare l’obiettivo nella direzione indicata dalla freccia finché...
-
Page 49: Precauzioni Per L'uso
∫Rimozione temporanea del paraluce ∫ Note sull'uso del filtro ≥ È possibile installare il copriobiettivo o il paraluce 1 Ruotare il paraluce nella con il filtro già installato. ≥ Se si usano due o più filtri contemporaneamente, direzione indicata dalla parte di un’immagine registrata può... -
Page 50: Ricerca Guasti
Non trasportare per l'obiettivo quando l'obiettivo ≥ Non lasciare l’obiettivo a contatto per lungo tempo con prodotti in gomma o in plastica. è installato sul corpo della fotocamera digitale. ≥ Non toccare i contatti elettrici dell’unità. In caso Non puntare direttamente l'obiettivo verso il sole contrario l’unità... -
Page 51: Specifiche
Specifiche È possibile che le specifiche subiscano delle modifiche senza preavviso. LENTI INTERCAMBIABILI PER FOTOCAMERA DIGITALE “LUMIX G VARIO 14– 140 mm/F3.5– 5.6 II ASPH./POWER O.I.S.” Supporto Innesto Micro Four Thirds Lunghezza focale f=14 mm a 140 mm (equivalente per fotocamera con pellicola da 35 mm: 28 mm a 280 mm) Costruzione dell’obiettivo 14 elementi in 12 gruppi (3 lenti asferiche, 2 lenti ED) Tipo di apertura... -
Page 52: 安全注意事項
目錄 安全注意事項 安全注意事項 ........52 使本產品遠離磁性設備 (如微波爐 、 電視 、 視訊遊戲設 故障預防 ........54 備 、 無線電發射機 、 高壓線等) 。 操作部中文表示對照表 ......54 ≥ 請勿在移動電話附近使用相機,否則會影響圖片和 提供的附件 ........55 元件的名稱及功能 ......55 聲音質量。 取下鏡頭 ........ 56 ≥ 如果相機由於受帶磁設備影響而不能正常工作,請 安裝 使用時的注意事項 ......59 先將其關閉,取出電池和... - Page 53 中 文 ≥ 本說明書中提到的其他公司名稱和產品名稱是各個 公司的註冊商標或商標。 (對於台灣) 進口廠商 : 台松電器販賣股份有限公司 地址 : 新北市中和區員山路 579 號 電話 :(02)2223-5121 (TCH) DVQX1827...
-
Page 54: 故障預防
– 請小心安裝或移除鏡頭 , 以免沙塵及水滴等異物 , 附 故障預防 著或進入鏡頭固定橡膠 、 接觸點 、 數位相機或鏡頭 。 ∫鏡頭保養 – 如果鏡頭接觸到水滴或其他液體 , 請用軟的乾布 ≥ 請勿用力按壓鏡頭。 將其擦去 。 ≥ 當鏡頭表面有污垢 (水、油和手印等)時,相片 ≥ 為改善鏡頭的防塵防濺性能,接口使用了鏡頭接口 橡膠。 可能會受到影響。 拍攝前後,請用一塊軟乾布輕輕 – 鏡頭接口橡膠可能在數位相機接口上留下摩擦的 擦拭鏡頭表面。 痕跡 , 但這不會影響效能 。 ≥ 為了防止灰塵或其他微粒附著或進入鏡頭,不使用 – 有關更換鏡頭接口橡膠的資訊 , 請與離您最近的 鏡頭時請裝上鏡頭蓋和鏡頭後蓋。... -
Page 55: 提供的附件
提供的附件 元件的名稱及功能 產品號碼截至 2019 年 3 月為準 。 此後可能會有變更 。 VFC4430 VYC1119 VYF3514 VFC4605 鏡頭袋 鏡頭遮光罩 鏡頭蓋 鏡頭後蓋 1 鏡頭表面 (購買時 , 鏡頭後蓋和鏡頭蓋安在可互換鏡頭上 。 ) 2 對焦環 設為 MF (手動對焦) 時 , 轉動聚焦環可進行對焦 。 3 變焦環 想要拍攝較大 (遠攝) 或較寬 (廣角) 圖片時 , 請轉動 變焦環... -
Page 56: 安裝 / 取下鏡頭
安裝 / 取下鏡頭 5 鏡頭安裝標記 6 接觸點 7 鏡頭接口橡膠 ≥ 安裝及取下鏡頭的方法也請參閱相 機的使用說明書。 注意 ≥ 檢查相機是否關閉。 ≥ 在對焦完成後變焦,對焦可能會有差異,此時請重 ≥ 從鏡頭上取下鏡頭後蓋。 新對焦。 ≥ 如果您介意錄製影片時的 AF (自動對焦)和影像 ∫ 安裝鏡頭 穩定器的操作聲音,建議用下列方式錄製: – 設為 MF (手動對焦) 錄製 。 將鏡頭上的鏡頭安裝標 – 將 O.I.S. 開關設為 [OFF] 並使用三腳架錄製 。 記... - Page 57 ∫取下鏡頭 ∫ 安裝鏡頭遮光罩 (提供的附件) ≥ 請勿以會使其變形或 持拿鏡頭遮光罩時 , 您的 按鏡頭釋放按鈕 B 的同 手指要如圖所示那樣放 彎曲的方式持拿鏡頭 時 , 朝箭頭指示的方向轉 置 。 遮光罩。 動鏡頭直到停止為止 , 然 後取下 。 • 請蓋上鏡頭後蓋 , 這樣就 不會劃傷鏡頭支座觸點 。 • 務必將機身蓋裝到數位相 機上 , 以避免汙垢和灰塵進入相機機身 。 1 將鏡頭遮光罩的短花瓣上 的安裝標記 C 對準鏡頭頂 端的標記。...
- Page 58 ∫暫時存放鏡頭遮光罩 ∫ 濾鏡使用注意事項 ≥ 即使已安裝濾鏡,亦可再裝上鏡頭蓋或鏡頭遮光 1 朝著箭頭方向轉動鏡頭遮 罩。 光罩以卸下。 ≥ 如果你拍攝時同時使用兩塊濾鏡或以上,部份圖像 可能會變暗。 ≥ 不可安裝除了濾鏡以外的任何物品到鏡頭前端並搭 配鏡頭使用,例如轉換鏡頭或轉換器。如果安裝這 類物品,可能會使鏡頭損壞。 2 倒轉鏡頭遮光罩,然後用 前面所示的相同方法進行安 裝。 注意 ≥ 裝上閃光燈及鏡頭遮光罩拍照時,畫面下半部可能 會變暗,您亦可能無法控制閃光燈,因為拍攝時閃 光可能會被遮光罩阻擋。我們建議移除鏡頭遮光 罩。 ≥ 當在暗處使用 AF 輔助燈時,請取下鏡頭遮光罩。 ≥ 為避免鏡頭摔落,拿鏡頭時絕不可只握住鏡頭遮光 罩。 DVQX1827 (TCH)
-
Page 59: 使用時的注意事項
≥ 也請參閱數位相機的使用說明書。 使用時的注意事項 ≥ 準備長時間不使用本裝置時,建議在存放時放入一 些乾燥劑 (矽膠) 。 否則,可能會由於發霉等原因 請務必小心 , 切勿跌落或撞擊鏡頭 。 還要務必小心 , 切 而導致性能出現故障。 建議在使用前先檢查本裝置 勿在鏡頭上施加過多壓力 。 是否能夠正常運行。 ≥ 請注意不要讓裝有鏡頭的包跌落,因為這樣可能會損 ≥ 請勿讓鏡頭與橡膠或塑料製品長時間接觸。 壞鏡頭。相機可能會停止正常操作,可能無法繼續拍 ≥ 請勿觸摸本裝置的電觸點。 這樣做可能會導致本裝 攝圖片。此外,也可能使鏡頭損壞。 置發生故障。 在相機周圍使用殺蟲劑或其他揮發性的物質時 , 請勿 ≥ 請勿拆卸或改裝本裝置。 使其接觸到鏡頭 。 請勿使用汽油 、 稀釋劑 、 酒精或其他類似的清潔劑清潔 ≥... - Page 60 規格 規格如有變更 , 恕不另行通知 。 數位相機用可替換鏡頭 “LUMIX G VARIO 14– 140 mm/F3.5– 5.6 II ASPH./POWER O.I.S.” Micro Four Thirds 接口 鏡頭接口 f=14 mm 至 140 mm 焦距 (相當於 35 mm 菲林相機 : 28 mm 至 280 mm) 14 件 12 組 (3 片非球面鏡片 、 2 片 ED 鏡片) 鏡頭結構...
-
Page 61: Информация Для Вашей Безопасности
РУССКИЙ ЯЗЫК Содержание ≥ Если камера подвергается негативному влиянию электромагнитного излучения и перестает Информация для вашей безопасности ....61 работать нормально, выключите камеру, Правила эксплуатации ...........62 извлеките батарею и/или подключенный сетевой Принадлежности, входящие в комплект ....64 адаптер переменного тока. Затем снова вставьте Названия... -
Page 62: Правила Эксплуатации
≥ G MICRO SYSTEM является системой Правила эксплуатации объективов сменного типа для цифровых ∫ Уход за объективом камер LUMIX, разработанной на основе стандарта Micro Four Thirds System. ≥ Нельзя сильно нажимать на объектив. ≥ Другие названия систем и продуктов, ≥ В случае попадания на поверхность объектива упомянутые... - Page 63 ∫Пыленепроницаемость и – От резинового уплотнительного кольца брызгозащищенность объектива на креплении цифровой ≥ Пыленепроницаемое и брызгозащищенное фотокамеры остаются потертости, но это не исполнение фотокамеры не обеспечивает влияет на ее работу. полной защиты от проникновения внутрь – За информацией о замене резинового пыли...
-
Page 64: Принадлежности, Входящие В Комплект
Принадлежности, Названия и функции входящие в комплект составных частей Номера изделий верны по состоянию на март 2019 г. Они могут изменяться. VFC4430 VYC1119 VYF3514 VFC4605 Чехол для объектива Бленда объектива Крышка объектива Задняя крышка объектива 1 Поверхность линзы (Во время покупки крышка объектива и 2 Кольцо... -
Page 65: Установка/Снятие Объектива
Установка/Снятие объектива 4 Переключатель O.I.S. Когда к фотокамере прикреплен объектив, функция стабилизатора изображения ≥ Информацию об установке и включается при установке переключателя O.I.S. снятии объектива см. также в на [ON]. инструкциях по эксплуатации ≥ При использовании штатива рекомендуется камеры. устанавливать переключатель O.I.S. в ≥... - Page 66 ∫Снятие объектива ∫ Присоединение бленды объектива (Принадлежность в комплекте) Удерживая нажатой Держите бленду • Не держите бленду таким объектива пальцами, образом, при котором кнопку B расположите их так, как она скручивается или проверните показано на рисунке. изгибается. объектив до упора в направлении...
- Page 67 ∫Временное хранение бленды ∫ Примечания об использовании фильтров 1 Чтобы снять бленду, ≥ Вместе с установленным фильтром можно прикрепить крышку объектива или бленду поверните ее в объектива. направлении стрелки. ≥ В случае одновременного использования двух или более фильтров часть записанного изображения...
-
Page 68: Предосторожности При Использовании Фотокамеры
Предосторожности при условиях, так как это может привести к сбоям в работе или неправильной работе. использовании фотокамеры – Под воздействием прямых солнечных лучей или на пляже летом – В местностях с высокой влажностью воздуха Старайтесь не ронять и не ударять объектив. и... -
Page 69: Устранение Неисправностей
≥ Не прикасайтесь к электрическим контактам устройства. Это может вызвать сбой в его работе. ≥ Запрещается разбирать или вносить изменения в аппарат. Не используйте бензин, растворитель, спирт и другие подобные моющие средства для очистки аппарата. ≥ Использование растворителей может повредить объектив или привести к отслаиванию... -
Page 70: Технические Характеристики
Технические характеристики Технические характеристики могут быть изменены без уведомления. СМЕННЫЙ ОБЪЕКТИВ ДЛЯ ЦИФРОВОЙ ФОТОKAMEРЫ “LUMIX G VARIO 14–140 мм/F3.5–5.6 II ASPH./POWER O.I.S.” Крепление Крепление Micro Four Thirds Фокусное расстояние f=14 мм до 140 мм (Эквивалент 35 мм пленочной камеры: от 28 мм до 280 мм) Конструкция... - Page 71 Установленный производителем в порядке п. 2 ст. 5 Федерального Закона РФ “О защите прав потребителей” срок службы данного изделия равен 7 годам с даты производства при условии, что изделие используется в строгом соответствии с настоящей инструкцией по эксплуатации и применимыми техническими стандартами. Импортёр...
- Page 72 Manufactured by: Panasonic Corporation Kadoma, Osaka, Japan Importer for Europe: Panasonic Marketing Europe GmbH Panasonic Testing Centre Winsbergring 15, 22525 Hamburg, Germany Panasonic Corporation Web Site: http://www.panasonic.com Panasonic Corporation 2019...