Table of Contents
Advertisement
Advertisement
Table of Contents

Related Manuals for Ryobi ORM1800


Summary of Contents for Ryobi ORM1800
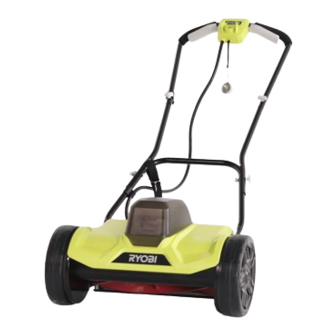
- Page 1 ORIGINAL INSTRUCTIONS Power Cylinder Mower ORM1800 RCM1850...
- Page 2 Important! It is essential that you read the instructions in this manual before assembling, operating, and maintaining the product. Subject to technical modification.
-
Page 3: Intended Use
Safety, performance, and dependability have persons (including children) with reduced been given top priority in the design of your physical, sensory or mental capabilities, or lack of experience and knowledge, powered cylinder mower. unless they have been given supervision or instruction concerning use of the appliance INTENDED USE by a person responsible for their safety. - Page 4 BATTERY TOOLS USE AND CARE Do not use the product near drop-offs, ditches, excessively steep slopes, or Recharge only with the charger specified embankments. Poor footing could cause a by the manufacturer. A charger that is slip-and-fall accident. suitable for one type of battery pack may Use caution when reversing or pulling the create a risk of fire when used with another product towards you.
-
Page 5: Maintenance
Remove the safety key and keep it key in contact with other batteries or conductive away from children when leaving the materials while in transport by protecting product unattended. exposed connectors with insulating, non- conductive caps or tape. Do not transport Remove the safety key when maintaining or transporting the product. -
Page 6: Residual Risks
Battery pack x 1 RISK REDUCTION Charger x 1 It has been reported that vibrations from NOTE: For ORM1800, the battery pack and handheld tools may contribute to a condition charger are sold separately. called Raynaud’s Syndrome. Symptoms may include tingling, numbness and blanching of SYMBOLS ON THE PRODUCT to cold. -
Page 7: Symbols In This Manual
moderate injury. Do not operate on inclines greater than 15°. Mow across CAUTION the face of slopes, never up Without safety alert symbol and down. Indicates a situation that may result in Do not expose to rain or damp property damage. condition. - Page 8 WHAT’S IN THE BOX ORM1800 *Battery and charger are sold separately.
- Page 9 WHAT’S IN THE BOX RCM1850 *Kit includes battery and charger.
-
Page 10: Know Your Product
KNOW YOUR PRODUCT 1. Start button/safety key 8. Spring-loaded fastener 15. Middle tube 2. On-off trigger 9. Reel blades 16. Suspension strap 3. Safety key with lanyard 10. Bottom blade 17. Charger 4. Handle fasteners 11. Roller 18. Battery pack 5. - Page 11 GETTING STARTED GETTING STARTED GETTING STARTED Personal protective equipment (PPE) 1. Insert the top handle onto the middle tubes. Attach the lower handles to the mower housing by Attach the upper handle assembly to the lower handles 1. Insert the grass catcher frame to the grass catcher bag. Clip the suspension strap onto the grass catcher.
- Page 13 OVERVIEW Safety and best practices Replacing the bottom blade Adjusting the bottom blade p.12 p.14 p.16 Installing the grass catcher p.13 Cutting height adjustment p.13 Storing the product Emptying the grass catcher Cleaning the product p.18 p.17 p.19...
-
Page 14: Operation
OPERATION Safety and best practices SAFETY AND BEST PRACTICES WARNING: Avoid holes, ruts, bumps, rocks, property stakes, or other hidden objects. Uneven terrain could cause a slip-and-fall accident. NOTE: Clear the lawn of debris before mowing. Debris can get jammed in between the blades. -
Page 15: Installing The Grass Catcher
OPERATION Installing the grass catcher INSTALLING THE GRASS CATCHER 1. Insert the grass catcher frame to the grass catcher bag. Align the bottom hooks of the grass catcher on either side of the roller bar. Hook the grass catcher onto either side of the roller bar. - Page 16 MAINTENANCE Replacing the bottom blade REPLACING THE BOTTOM BLADE 1. Open the battery cover and remove the battery pack. Close the battery cover. 2. Remove the adjustment bolts. Remove the 2 adjustment springs. NOTE: Keep hands clear of the blades. 3.
- Page 17 MAINTENANCE 5. Install the new bottom blade assembly. 6. Secure the bottom blade assembly with the bolts and nuts. 7. Install the adjustment springs using the adjustment bolts. NOTE: Adjust the bolts to ensure the reel blade can rotate freely.
-
Page 18: Adjusting The Bottom Blade
MAINTENANCE Adjusting the bottom blade ADJUSTING THE BOTTOM BLADE 1. Rotate the adjustment bolts clockwise using an Allen key to decrease the gap between the bottom blade and the reel blades. Rotate adjustment bolts counter- clockwise to increase the gap. NOTE: Ensure the bottom blade does not come in contact with the reel blades. -
Page 19: Cleaning The Product
MAINTENANCE Cleaning the product CLEANING THE PRODUCT 1. Remove the battery pack. 2. After each use, clean the product with a soft, dry cloth, or cleaning brush. NOTE: Clean the motor vents after each use to prevent debris build-up. 3. Clean the debris from the blades with a cleaning brush, and then carefully apply rust-preventative... -
Page 20: Emptying The Grass Catcher
MAINTENANCE Emptying the grass catcher EMPTYING THE GRASS CATCHER 1. Unclip the suspension strap from the grass catcher. 2. Lift and unhook the grass catcher from the roller. 3. Empty grass clippings into a bin. -
Page 21: Storing The Product
STORAGE Storing the product STORING THE PRODUCT 1. Remove the battery pack. 2. Remove the grass catcher. 3. Remove the handle fasteners of the middle tubes and the lower handles. 4. Slightly squeeze the lower handles together to release them from the location knobs, then lift away. - Page 22 STORAGE 5. Store the product in a cool, dry, and well-ventilated place that is inaccessible to children. Keep away from corrosive agents such as garden chemicals and de-icing salts. Do not store outdoors.
-
Page 23: Product Specifications
PRODUCT SPECIFICATIONS REPLACEMENT PART Powered Cylinder Mower Bottom blade 682285001 Model ORM1800/RCM1850 Safety key 527968005 Rated voltage DC 18V VIBRATION LEVEL Cutting width 350 cm The declared vibration value has been measured with a standard test method and Wheel size 216 mm may be used to compare one tool with another. - Page 24 Imported by: Techtronic Industries Australia Pty Ltd 31 Gilby Road, Mount Waverley, VIC 3149 Melbourne, Australia Techtronic Industries N.Z. Limited 2 Landing Drive, Mangere Auckland, 2022, New Zealand 961087049-01...