
Related Manuals for HP 10000 G2 Series


Summary of Contents for HP 10000 G2 Series
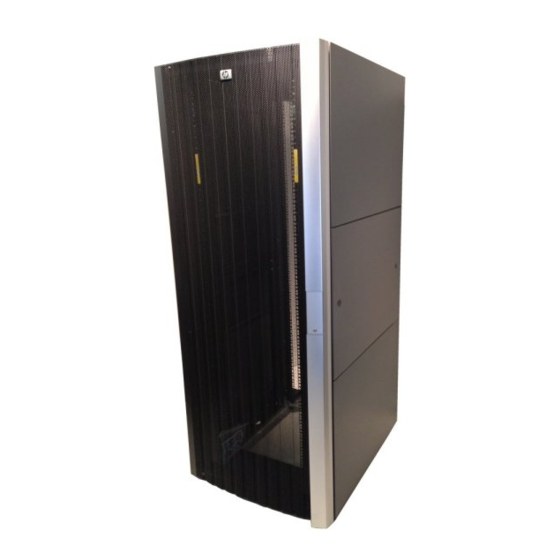
- Page 1 HP 10000 G2 Series Rack User Guide Part Number 391312-006 August 2010 (Sixth Edition)
- Page 2 © Copyright 2005, 2010 Hewlett-Packard Development Company, L.P. The information contained herein is subject to change without notice. The only warranties for HP products and services are set forth in the express warranty statements accompanying such products and services. Nothing herein should be construed as constituting an additional warranty. HP shall not be liable for technical or editorial errors or omissions contained herein.
-
Page 3: Table Of Contents
HP 10642 G2 Rack specifications ......................25 HP 10647 G2 Rack specifications ......................25 HP 10642 1200 mm Full Frame Rack specifications ..................25 HP 10647 1200 mm Full Frame Rack specifications ..................26 HP 10842 G2 Rack specifications ......................26 HP 10642 Extended Depth Rack specifications ................... - Page 4 Grounding methods to prevent electrostatic discharge .................. 27 Technical support ........................28 Before you contact HP ..........................28 HP contact information ..........................28 Acronyms and abbreviations ......................29 Index ............................30...
-
Page 5: Configuration Factors
HP eCo-Enterprise Configurator HP Custom Builder was retired from service on 12 December 2005. If you require factory default racking for the HP hardware portfolio, you can still use the HP eCo-Enterprise Configurator, which is available on the HP website (http://h30099.www3.hp.com/eGlue/eco/begin.do). -
Page 6: Power Requirements
Before populating your new rack, you must plan the placement of each component. Factors of each component, such as weight, accessibility, power, temperature, and airflow requirements affect installation order and component placement in the rack. Apply the following rules to the physical placement of components in the HP 10000 G2 Series Rack: Configuration factors 6... -
Page 7: Additional Rack Considerations
For further information regarding component placement, refer to the Important Safety Instructions that are shipped with the rack. Also, refer to the Safety and Comfort Guide—Precautions for Server and Network Products on the HP website (http://www.hp.com) (search for Safety and Comfort Guide). Additional rack considerations Consider the following specifications and components, with regard to your specific rack configuration: •... -
Page 8: General Component Placement Guidelines
Be sure that the cable you have selected is appropriate for your installation site. If you require a U.S. plenum-rated (CL2P) cable, contact your local HP authorized reseller to obtain any of the following options: •... - Page 9 Do not exceed the manufacturer’s TMRA. • IMPORTANT: HP strongly recommends that you configure the rack using the HP eCo- Enterprise Configurator, which provides factory default racking. The latest version of this software is available on the HP website (http://h30099.www3.hp.com/eGlue/eco/begin.do).
-
Page 10: Preparing The Rack For Component Installation
IMPORTANT: Retain the extra fasteners for future use. Hardware kit contents If any of the following items are missing or damaged, contact your HP authorized reseller. M6 screws (50) Cage nut insertion tool (1) M5.5 x 10 self tapping screws (6) -
Page 11: Required Tools
Hook-and-loop cabling strap 12.7-cm (5 in) clip (1) Hook-and-loop cabling strap 20.32-cm (8 in) clip (1) Hook-and-loop cabling strap 30.48-cm (12 in) clip (1) Extra hardware might be included for your convenience. Required tools The following tools are required for installation: •... - Page 12 Lift the top hinge pin up, and tilt the door away from the rack. Lift the door up to remove it from the bottom hinge. Store the door in an upright position, taking care to protect it from damage. Preparing the rack for component installation 12...
-
Page 13: Removing The Rear Doors
Lift the rear doors off of the hinge brackets, and remove them from the rack (2). Store the doors in an upright position, taking care to protect them from damage. Removing the side panels NOTE: The side panels come preinstalled on all HP 10622 G2 Racks. Preparing the rack for component installation 13... - Page 14 Unlock the middle side panel locks, and remove the side panel from the rack. Preparing the rack for component installation 14...
-
Page 15: Stabilizing Requirements
Rack stability is important when equipment is routinely installed, removed, or accessed within the rack. Stabilization can be achieved through the use of an HP Rack Stabilizer Option Kit, HP Rack Baying Option Kit, or HP Rack Tie-Down Option Kit. -
Page 16: Rack Stabilizer Option Kit
The weight of the rack should rest on the leveling feet. Rack stabilizer option kit The HP Rack Stabilizer Option Kit provides stability and support and prevents possible tipping when equipment is installed, removed, or accessed within the rack. There are four stabilizer kit options: •... -
Page 17: Rack Baying Option Kit
The 10000 and 10000 G2 series rack can be bayed together by installing the HP Rack Baying Option Kit, as long as they are the same series, height, and depth. For example, an HP 10636 Series Rack and an HP 10636 G2 Series Rack can be bayed together. This configuration helps decrease space needs and increase stability. - Page 18 A separate tie-down kit is used exclusively for the 1200 mm Full Frame Rack. The following figure illustrates the 1200 mm Full Frame Rack Tie-down Kit. For more information, see the HP 10000 G2 Series Rack Options Installation Guide. Preparing the rack for component installation 18...
-
Page 19: Installing Components
The following steps outline the sequence for installing rack-mountable components in a rack. HP strongly recommends installing a stabilizer foot before any other component. Install 0U devices first, such as PDUs, console switches, and so on. - Page 20 Use the insertion tool to pull the cage nut through the hole until the top lip snaps into position. Installing components 20...
-
Page 21: Installing The Hook-And-Loop Components
Installing the hook-and-loop components Route and secure your cables with the hook-and-loop cabling strap clips. Installing components 21... -
Page 22: Installing The Cable Management Brackets
Installation is complete. Installing the cable management brackets Position the cable management bracket so that one side is attached to the inside of the rack frame. Slide the cable management bracket into place (1). Secure the cable management bracket to the rack frame and extension kit using one screw (2). Installation is complete. -
Page 23: Rack Options
Rack options Ordering rack options In addition to the standard racks, HP also provides rack options to complement or complete your rack solution. The following list is only a sample of the many rack option kits available. For information about ordering rack option kits, refer to the HP website (http://www.hp.com) or contact the nearest HP... - Page 24 Rack option Description Cable Helps with cable management management D- ring rack option 25-in rail adapter Allows the inner rack rails to accommodate third-party rack option kit options 1U keyboard Holds and conceals a keyboard drawer option kit 100 kilo sliding Allows easy access to various rack components shelf rack option TFT7600RKM...
-
Page 25: Specifications
Specifications HP G2 rack specifications For a current list of all rack specifications, see the Best Practices document on the HP website (http://www.hp.com/support/HP10000G2SeriesRack_Manuals). HP 10622 G2 Rack specifications U height Width Depth Dynamic load (gross) Static load 600 mm 1,000 mm 544.3 kg (1,200 lb) -
Page 26: Hp 10647 1200 Mm Full Frame Rack Specifications
This tie-down kit is exclusively for the 1200 mm Full Frame Rack. For more information, see the HP 10000 G2 Series Rack Options Installation Guide. HP 10647 1200 mm Full Frame Rack specifications U height Width Depth Dynamic load (gross) -
Page 27: Electrostatic Discharge
Electrostatic discharge Preventing electrostatic discharge To prevent damaging the system, be aware of the precautions you need to follow when setting up the system or handling parts. A discharge of static electricity from a finger or other conductor may damage system boards or other static-sensitive devices. -
Page 28: Technical Support
(http://welcome.hp.com/country/us/en/wwcontact.html). For HP technical support: • In the United States, for contact options see the Contact HP United States webpage (http://welcome.hp.com/country/us/en/contact_us.html). To contact HP by phone: Call 1-800-HP-INVENT (1-800-474-6836). This service is available 24 hours a day, 7 days a week. -
Page 29: Acronyms And Abbreviations
Acronyms and abbreviations central processing unit cathode-ray tube keyboard, video, and mouse power distribution unit rackmount keyboard monitor TMRA recommended ambient operating temperature uninterruptible power system Acronyms and abbreviations 29... -
Page 30: Index
HP 10622 G2 Rack, specifications 25 requirements, space 5 HP 10636 G2 Rack, specifications 25 requirements, temperature 6 HP 10642 Extended Depth Rack, specifications 26 HP 10642 G2 Rack, specifications 25 HP 10647 Extended Depth Rack, specifications 26 side panels, removing 13...