Sony DSC-W350 Cyber-shot® Instruction Manual
Cyber-shot cameras: cyber-shot digital still camera
Hide thumbs
Also See for DSC-W350 Cyber-shot®:
- Instruction manual (516 pages) ,
- Service manual (34 pages) ,
- Handbook (137 pages)

Related Manuals for Sony DSC-W350 Cyber-shot®


Summary of Contents for Sony DSC-W350 Cyber-shot®
- Page 1 DSC-W350/W350D/W360 GB Digital Still Camera/Instruction Manual © 2010 Sony Corporation 4-188-073-22(1)
-
Page 2: Important Safety Instructions
English Owner’s Record The model and serial numbers are located on the bottom. Record the serial number in the space provided below. Refer to these numbers whenever you call upon your Sony dealer regarding this product. Model No. DSC-W350/W350D/W360 Serial No. ______________________________... -
Page 3: Battery Charger
• Be sure to charge the battery pack using a genuine Sony battery charger or a device that can charge the battery pack. • Keep the battery pack out of the reach of small children. • Keep the battery pack dry. -
Page 4: Regulatory Information
The number below is for the FCC related matters only. Regulatory Information Declaration of Conformity Trade Name: SONY Model No.: DSC-W350 Responsible Party: Sony Electronics Inc. Address: 16530 Via Esprillo, San Diego, CA 92127 U.S.A. Telephone No.: 858-942-2230 This device complies with Part15 of the FCC Rules. Operation is subject to the... -
Page 5: For Customers In Europe
For Customers in Europe Notice for the customers in the countries applying EU Directives The manufacturer of this product is Sony Corporation, 1-7-1 Konan Minato-ku Tokyo, 108-0075 Japan. The Authorized Representative for EMC and product safety is Sony Deutschland GmbH, Hedelfinger Strasse 61, 70327 Stuttgart, Germany. For any service or guarantee matters please refer to the addresses given in separate service or guarantee documents. - Page 6 If the plug supplied with this equipment has a detachable fuse cover, be sure to attach the fuse cover after you change the fuse. Never use the plug without the fuse cover. If you should lose the fuse cover, please contact your nearest Sony service station.
-
Page 7: Table Of Contents
Table of contents Getting started Refer to “Cyber-shot Handbook” (PDF) on supplied CD-ROM ...8 Checking the accessories supplied ...8 Notes on using the camera...8 Identifying parts ...11 Charging the battery pack...12 Inserting the battery pack/a memory card (sold separately) ...14 Setting the clock ...17 Shooting/viewing images Shooting still images...18... -
Page 8: Cd-Rom
Refer to “Cyber-shot Handbook” (PDF) on supplied CD-ROM For details on advanced operations, please read “Cyber- shot Handbook” (PDF) on the CD-ROM (supplied) using a computer. Refer to “Cyber-shot Handbook” for in-depth instructions on shooting or viewing images and connecting the camera to your computer, printer or TV (page 21). - Page 9 Notes on recording/playback • When you use a memory card with this camera for the first time, it is recommended to format the card using the camera for stable performance of the memory card before shooting. Note that formatting permanently erases all data on the memory card, and is unrecoverable.
- Page 10 JEITA (Japan Electronics and Information Technology Industries Association). • Sony does not guarantee that the camera will play back images recorded or edited with other equipment, or that other equipment will play back images recorded with the camera.
-
Page 11: Identifying Parts
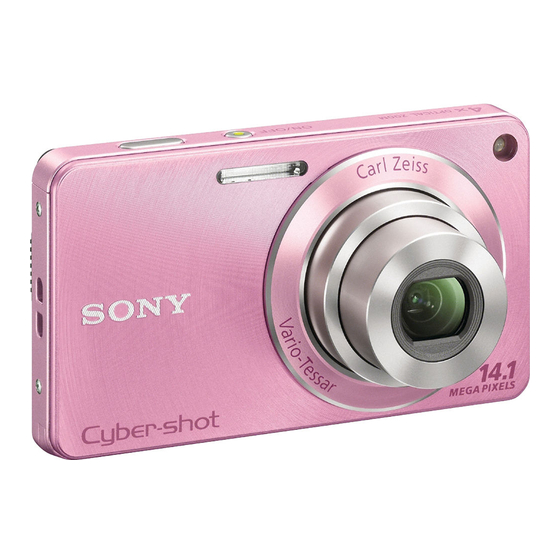
Identifying parts A ON/OFF (Power) button B Shutter button C Flash D Self-timer lamp/Smile Shutter lamp/AF illuminator E Lens F Microphone G LCD screen H For shooting: W/T (Zoom) button For viewing: (Playback zoom) button/ (Index) button I Mode switch J Hook for wrist strap (Playback) button (Delete) button... -
Page 12: Charging The Battery Pack
Charging the battery pack Insert the battery pack into the battery charger. • You can charge the battery even when it is partially charged. Connect the battery charger to the wall outlet (wall socket). If you continue charging the battery pack for about one more hour after the CHARGE lamp turns off, the charge will last slightly... -
Page 13: Using The Camera Abroad
• When charging is finished, disconnect the power cord (mains lead) from the wall outlet (wall socket), and remove the battery pack from the battery charger. • Be sure to use the battery pack or the battery charger of the genuine Sony brand. Battery life and number of still images you can... -
Page 14: Inserting The Battery Pack/A Memory Card (Sold Separately)
Inserting the battery pack/a memory card (sold separately) Open the cover. Insert the memory card (sold separately). With the notched corner facing down as illustrated, insert the memory card until it clicks into place. Insert the battery pack. Check the direction of the battery, insert the battery pack while pressing the battery eject lever in the direction of the arrow. -
Page 15: Memory Cards That You Can Use
Memory cards that you can use • The following memory cards are compatible with this camera: “Memory Stick PRO Duo” media, “Memory Stick PRO-HG Duo” media, “Memory Stick Duo” media, SD memory cards, SDHC memory cards and SDXC memory cards. Operation with all memory cards is not assured. MultiMediaCard is not compatible. -
Page 16: To Remove The Battery Pack
When there is no memory card inserted Images are stored in the camera’s internal memory (approximately 45 MB). To copy images from the internal memory to a memory card, insert the memory card in the camera, then select MENU t (Memory Card Tool) t [Copy]. -
Page 17: Setting The Clock
Setting the clock Press the ON/OFF (Power) button. The camera is turned on. • It may take time for the power to turn on and allow operation. Select a setting item with v/V on the control button, then press z. Date &... -
Page 18: Shooting Still Images
Shooting still images Set the mode switch to (Still Image), then press the ON/OFF (Power) button. Hold the camera steady as illustrated. • Press the T button to zoom in, W button to zoom out. Press the shutter button halfway down to focus. When the image is in focus, a beep sounds and the z indicator lights. -
Page 19: Shooting Movies
Shooting movies Set the mode switch to (Movie), then press the ON/OFF (Power) button. Press the shutter button fully down to start recording. Press the shutter button fully down again to stop recording. Note • The operating sound of the lens is recorded when the zoom function operates while shooting a movie. -
Page 20: Viewing Images
Viewing images Press the button. • When images on a memory card recorded with other cameras are played back on this camera, the registration screen for the data file appears. Selecting next/previous image Select an image with B (next)/b (previous) on the control button. •... -
Page 21: Learning More About The Camera ("Cyber-Shot Handbook")
Learning more about the camera (“Cyber-shot Handbook”) “Cyber-shot Handbook”, which explains how to use the camera in detail, is included on the CD-ROM (supplied). Refer to it for in-depth instructions on the many functions of the camera. For Windows users Turn on your computer, and insert the CD-ROM (supplied) into the CD-ROM drive. -
Page 22: List Of Icons Displayed On The Screen
List of icons displayed on the screen When shooting still images • The icons are limited in Mode). When shooting movies Display Indication Battery remaining Low battery warning Image size Scene Selection • on DSC-W350/W360. REC Mode (Intelligent Auto Adjustment/ Program Auto/Sweep Panorama) Movie shooting scene... - Page 23 Display Indication Recording folder Number of recordable images 100Min Recordable time Recording/Playback Media (Memory card/ Internal memory) AF illuminator Red-eye reduction Flash mode Flash charging Display Indication Self-timer C:32:00 Self-diagnosis display Destination Overheating warning Face Detection Database file full/ Database file error AF range finder frame Spot metering cross hair...
-
Page 24: Number Of Still Images And Recordable Time Of Movies
Number of still images and recordable time of movies The number of still images and recordable time may vary depending on the shooting conditions and the memory card. Still images/Panoramic images Capacity Size 16:9(11M) 16:9(2M) Wide (horizontal) Standard (horizontal) Wide (vertical) Standard (vertical) Notes •... -
Page 25: Precautions
Movies The table below shows the approximate maximum recording times. These are the total times for all movie files. Continuous shooting is possible for approximately 29 minutes. Capacity Internal memory Approx. Size 45 MB 1280×720(Fine) — 1280×720(Standard) — 0:01:40 1:21:20 2:43:40 5:31:50 11:15:50 22:15:50 Note •... - Page 26 Cleaning the lens Wipe the lens with a soft cloth to remove fingerprints, dust, etc. Cleaning the camera surface Clean the camera surface with a soft cloth slightly moistened with water, then wipe the surface with a dry cloth. To prevent damage to the finish or casing: –...
-
Page 27: Specifications
Specifications Camera [System] Image device: 7.76 mm (1/2.3 type) color CCD, Primary color filter Total pixel number of camera: Approx. 14.5 Megapixels Effective pixel number of camera: Approx. 14.1 Megapixels Lens: Carl Zeiss Vario-Tessar 4× zoom lens f = 4.7 mm – 18.8 mm (26 mm – 105 mm (35 mm film equivalent)) F2.7 (W) –... - Page 28 2.3 Wh (630 mAh) minimum: 2.2 Wh (600 mAh) Design and specifications are subject to change without notice. Trademarks • The following marks are trademarks of Sony Corporation. , “Cyber-shot,” “Memory Stick,” , “Memory Stick PRO,” “Memory Stick Duo,”...
- Page 29 • Adobe and Reader are either trademarks or registered trademarks of Adobe Systems Incorporated in the United States and/or other countries. • In addition, system and product names used in this manual are, in general, trademarks or registered trademarks of their respective developers or manufacturers.
- Page 40 v V b B z...
- Page 47 v V b B...
- Page 56 × ×...
- Page 59 ×...
- Page 60 × × × × × × × ×...
- Page 61 ™ ®...
- Page 72 v V b B...
- Page 79 v V b B...
- Page 87 × ×...
- Page 89 ×...
- Page 90 × – × × × × × × – × ×...
- Page 91 ™ ®...
- Page 92 Printed in China...