
Related Manuals for JVC KD-R482


Summary of Contents for JVC KD-R482
-
Page 1: Instruction Manual
ENGLISH ไทย KD-R482 CD RECEIVER INSTRUCTION MANUAL เครื ่ อ งเล น CD คู ่ ม ื อ การใช้ ง าน B5A-1628-00 [M]... -
Page 2: Table Of Contents
CONTENTS BEFORE USE BEFORE USE IMPORTANT • To ensure proper use, please read through this manual before using this product. It is especially important that you read and observe BASICS Warning and Caution in this manual. • Please keep the manual in a safe and accessible place for future reference. GETTING STARTED 1 Cancel the demonstration WARNING... -
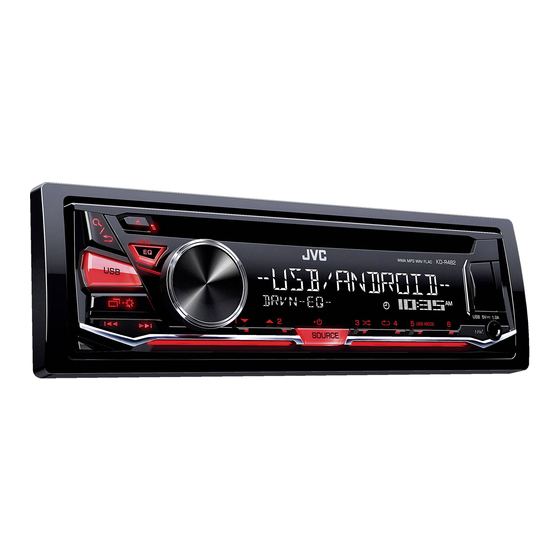
Page 3: Basics
BASICS Faceplate Remote control (RM-RK52) Volume knob Loading slot Remote sensor (Do not expose to bright sunlight.) Pull out the insulation sheet when using for the first time. Detach button Display window Attach Detach How to reset How to replace the battery Your preset adjustments will be erased except stored... -
Page 4: Getting Started
YES: Starts upgrading the firmware. ; NO: Cancels (upgrading is not Turn the volume knob to make the settings, then press the knob. activated). For details on how to update the firmware, see: Hour Minute <http://www.jvc.net/cs/car/>. Turn the volume knob to select [CLOCK FORMAT], then press the CLOCK knob. -
Page 5: Cd/Usb/Android
Do not leave the cable inside the car when not using. When connecting an Android device, “Press [VIEW] to install JVC MUSIC PLAY APP” is shown. Follow the instructions to install the application. You can also install the latest version of JVC MUSIC PLAY application on your Android device before connecting. - Page 6 For ANDROID, applicable only when [AUTO MODE] is selected. Press Control Android device from this unit via JVC MUSIC PLAY AUTO MODE: Turn the volume knob to select a folder/list, then press the knob. application installed in the Android device.
-
Page 7: Radio
RADIO Other settings Press and hold Turn the volume knob to select an item (see the following table), then press the knob. Repeat step until the desired item is selected/ activated or follow the instructions stated on the selected item. “ST”... -
Page 8: Aux
RADIO Use a portable audio player LOCAL SEEK ON: Searches only AM/SW1/SW2 stations with good reception. ; OFF: Cancels. Connect a portable audio player (commercially available). • Settings made are applicable only to the selected source/station. Once you change the source/station, you need to make the settings again. 3.5 mm stereo mini plug with “L”... -
Page 9: Audio Settings
AUDIO SETTINGS Default: XX EQ SETTING PRESET EQ Select a preset equalizer suitable to the music genre. • Select [USER] to use the settings made in [EASY EQ] or [PRO EQ]. FLAT/DRVN 3/DRVN 2/DRVN 1/HARD ROCK/HIP HOP/JAZZ/POP/R&B/TALK/USER/ VOCAL BOOST/BASS BOOST/CLASSICAL/DANCE EASY EQ Adjust your own sound settings. - Page 10 AUDIO SETTINGS LEVEL 01/LEVEL 02: Boosts low or high frequencies to produce a well- ON: Creates realistic sound by compensating the high-frequency LOUDNESS D.T.EXPANDER balanced sound at low volume. ; OFF: Cancels. components and restoring the rise-time of the waveform that are lost in (Digital Track audio data compression. ;...
-
Page 11: Display Settings
DISPLAY SETTINGS BRIGHTNESS Set the brightness for day and night separately. 1 DAY/NIGHT: Select day or night. 2 Select a zone. 3 LEVEL 00 to LEVEL 31: Set the brightness level. (Default: DAY: LEVEL 31 ; NIGHT: LEVEL 15) TEXT SCROLL * SCROLL ONCE: Scrolls the display information once. ; SCROLL AUTO: Repeats scrolling at 5-second intervals. ;... -
Page 12: References
For: – Latest firmware updates and latest compatible item list – Any other latest information About Android device Visit <http://www.jvc.net/cs/car/>. • This unit supports Android OS 4.1 and above. • Some Android devices (with OS 4.1 and above) may not fully support Android Open Accessory General (AOA) 2.0. -
Page 13: Troubleshooting
TROUBLESHOOTING REFERENCES Change the display information Symptom Remedy Each time you press , the display information changes. Sound cannot be heard. • Adjust the volume to the optimum level. • If the information is unavailable or not recorded, “NO TEXT”, “NO NAME”, or other •... -
Page 14: Installation/Connection
• Connect speakers with a maximum power of more than 50 W. If the maximum power of the speakers is lower than 50 W, change the [AMP GAIN] setting to avoid damaging the Cannot playback at • Make sure JVC MUSIC PLAY APP is installed on the speakers. ( 10) [AUTO MODE]. - Page 15 INSTALLATION/CONNECTION Installing the unit (in-dash mounting) Part list for installation (A) Faceplate Do the required wiring. ( 16) Hook on the top side (B) Trim plate Dashboard of Orientate the trim plate as your car illustrated before fitting. Bend the appropriate tabs to (C) Mounting sleeve hold the sleeve firmly in place.
-
Page 16: Wiring Connection
INSTALLATION/CONNECTION Wiring connection Signal cord (not supplied) IMPORTANT JVC Amplifier * We recommend installing the unit with a commercially available custom Rear/subwoofer output wiring harness specific for your car and leave this job to professionals for your safety. Consult your car audio dealer. -
Page 17: Specifications
SPECIFICATIONS Subject to change without notice. FM Frequency Range 87.5 MHz — 108.0 MHz (50 kHz step) USB Standard USB 1.1, USB 2.0 (Full speed) Usable Sensitivity (S/N = 26 dB) 8.2 dBf (0.71 μV/75 Ω) Compatible Devices Mass storage class Quieting Sensitivity 17.2 dBf (2.0 μV/75 Ω) File System FAT12/16/32 (DIN S/N = 46 dB) Maximum Supply Current DC 5 V ... - Page 18 สารบั ญ ก่ อ นใช้ ง าน ก่ อ นใช้ ง าน ข้ อ มู ล สํ า คั ญ เพื ่ อ ให แ น ใ จว า ใช ง านถู ก ต อ ง กรุ ณ าอ า นคู ม ื อ นี ้ ก อ นใช ผ ลิ ต ภั ณ ฑ คุ ณ จํ า เป น ต อ งอ า นและดู ค ํ า เตื อ นและข อ ควรระวั ง ในคู ม ื อ นี ้ ข้...
- Page 19 ข้ อ มู ล เบื ้ อ งต้ น แผงหน้ า ปั ด รี โ มทคอนโทรล (RM-RK52) ปุ ม ปรั บ ระดั บ เสี ย ง ช อ งถาดใส แ ผ น ดิ ส ก รี โ มทเซ็ น เซอร (อย า วางให ถ ู ก แสงแดดจั ด ) ดึ...
- Page 20 หมุ น ปุ่ มเสี ย งเพื ่ อ ทํ า การตั ้ ง ค่ า หลั ง จากนั ้ น กดปุ่ ม ละเอี ย ดเกี ่ ย วกั บ วิ ธ ี ก ารอั พ เดตเฟ ร ม แวร โปรดดู : <http://www.jvc.net/cs/car/>...
- Page 21 เมื ่ อ เชื ่ อ มต อ กั บ อุ ป กรณ แ อนดรอยด จะปรากฏ “Press [VIEW] to install JVC MUSIC PLAY APP” ปฏิ บ ั ต ิ ต ามคํ า แนะนํ า เพื ่ อ ติ ด ตั ้...
- Page 22 [AUTO MODE] กด ควบคุ ม อุ ป กรณ Android จากเครื ่ อ งนี ้ ผ า นแอปพลิ เ คชั ่ น JVC MUSIC PLAY ที ่ ต ิ ด ตั ้ ง ใน AUTO MODE หมุ น ปุ่ มปรั บ ระดั บ เสี ย งเพื ่ อ เลื อ กโฟลเดอร์ / รายการ จากนั ้ น ให้ ก ดปุ่ มนี ้...
- Page 23 วิ ท ยุ การตั ้ ง ค่ า อื ่ น ๆ กด ค้ า งไว้ หมุ น ปุ่ มปรั บ ระดั บ เสี ย งเพื ่ อ เลื อ กรายการ ดู ใ นตารางต่ อ ไป จากนั ้ น กดปุ่ ม ทํ...
- Page 24 วิ ท ยุ : ค น หาเฉพาะสถานี AM/SW1/SW2 ที ่ ร ั บ สั ญ ญาณได ด ี ; : ยกเลิ ก ใช้ เ ครื ่ อ งเล่ น เสี ย งแบบพกพา LOCAL SEEK สามารถตั ้ ง ค า ได ก ั บ แหล ง สั ญ ญาณ/สถานี ท ี ่ เ ลื อ กเท า นั ้ น เมื ่ อ เปลี ่ ย นแหล ง สั ญ ญาณ/ •...
- Page 25 การตั ้ ง ค่ า ระบบเสี ย ง ค า เริ ่ ม ต น : EQ SETTING เลื อ กอี ค วอไลเซอร ท ี ่ ต ั ้ ง ไว ล ว งหน า ให เ หมาะกั บ ประเภทของเพลง PRESET EQ เลื...
- Page 26 การตั ้ ง ค่ า ระบบเสี ย ง : เพิ ่ ม ความถี ่ ต ํ ่ า หรื อ สู ง เพื ่ อ สร า งสมดุ ล ที ่ ด ี ใ นระดั บ เสี ย งตํ ่ า ; : สร...
- Page 27 หน้ า จอแสดงผลการตั ้ ง ค่ า ตั ้ ง ค า ความสว า งสํ า หรั บ กลางวั น และกลางคื น แยกกั น BRIGHTNESS : เลื อ กกลางวั น หรื อ กลางคื น 1 DAY NIGHT เลื อ กโซน ถึ...
- Page 28 “ระบบเสี ย งดิ จ ิ ต อลของแผ น คอมแพคดิ ส ก ” ดั ง นั ้ น จึ ง ไม แ นะนํ า ให ใ ช ด า นที ่ ไ ม ใ ช DVD ของแผ น DualDisc กั บ เครื ่ อ งนี ้ ดู ร ายละเอี ย ดและหมายเลขเกี ่ ย วกั บ ไฟล เ สี ย งได จ าก <http://www.jvc.net/cs/car/> •...
- Page 29 การแก้ ไ ขปั ญ หาเบื ้ อ งต้ น อ้ า งอิ ง เปลี ่ ย นข้ อ มู ล ที ่ แ สดง อาการ วิ ธ ี ก ารแก้ ไ ข แต ล ะครั ้ ง ที ่ ค ุ ณ กด ข...
- Page 30 ( 10) ไม ส ามารถเล น ได ใ น ให แ น ใ จว า มี JVC MUSIC PLAY APP ติ ด ตั ้ ง บนอุ ป กรณ แ อน • ติ ด ตั ้ ง เครื ่ อ งด ว ยมุ ม ที ่ น อ ยกว า 30º...
- Page 31 การติ ด ตั ้ ง /เชื ่ อ มต่ อ การติ ด ตั ้ ง เครื ่ อ ง (การยึ ด เข้ า กั บ ช่ อ งหน้ า ปั ด ) รายชื ่ อ ชิ ้ น ส่ ว นสํ า หรั บ การติ ด ตั ้ ง แผงหน...
- Page 32 ข้ อ มู ล สํ า คั ญ ของ JVC แนะนํ า ให ต ิ ด ตั ้ ง เครื ่ อ งด ว ยชุ ด สายไฟเฉพาะที ่ ก ํ า หนดซึ ่ ง มี จ ํ า หน า ยสํ า หรั บ รถยนต...
- Page 33 ข้ อ มู ล จํ า เพาะ เปลี ่ ย นแปลงได โ ดยไม ต อ งแจ ง ให ท ราบล ว งหน า FM ช ว งความถี ่ 87.5 MHz — 108.0 MHz (ขั ้ น ละ 50 kHz) มาตรฐาน...
- Page 34 • Microsoft and Windows Media are either registered trademarks or trademarks of Microsoft Corporation in the United States and/or other countries. • Android is trademark of Google Inc. libFLAC Copyright (C) 2000,2001,2002,2003,2004,2005,2006,2007,2008,2009 Josh Coalson The marking of products using lasers Redistribution and use in source and binary forms, with or without modification, are permitted provided that the The label is attached to the chassis/case and says that the component uses laser beams that have following conditions are met:...
- Page 35 • Microsoft and Windows Media are either registered trademarks or trademarks of Microsoft Corporation in the United States and/or other countries. • Android is trademark of Google Inc. libFLAC Copyright (C) 2000,2001,2002,2003,2004,2005,2006,2007,2008,2009 Josh Coalson ﻭﺿﻊ ﻋﻼﻣﺎﺕ ﻋﻠﻰ ﺍﻟﻤﻨﺘﺠﺎﺕ ﺑﺎﺳﺘﺨﺪﺍﻡ ﺍﻟﻠﻴﺰﺭ Redistribution and use in source and binary forms, with or without modification, are permitted provided that the ﻫﺬﺍ...
- Page 36 ﺗﻮﺿﻴﺤﺎﺕ .ﻣﻤﻜﻦ ﺍﺳﺖ ﺑﺪﻭﻥ ﺍﻋﻼﻡ ﻗﺒﻠﯽ ﺗﻐﻴﻴﺮ ﻛﻨﺪ ﺣﻮﺯﻩ ﻓﺮﻛﺎﻧﺲ ( )ﺳﺮﻋﺖ ﺑﺎﻻUSB 2.0 ،USB 1.1 USB ﺍﺳﺘﺎﻧﺪﺍﺭﺩ 50 5.78 ﻣﮕﺎ ﻫﺮﺗﺰ — 0.801 ﻣﮕﺎ ﻫﺮﺗﺰ )ﮔﺎﻡ (ﻛﻴﻠﻮﻫﺮﺗﺰی ﻛﻼﺱ ﺫﺧﻴﺮﻩ ﺍﻧﺒﻮﻩ ﺩﺳﺘﮕﺎﻩ ﻫﺎی ﺳﺎﺯﮔﺎﺭ ﺣﺴﺎﺳﻴﺖ ﻗﺎﺑﻞ ﺍﺳﺘﻔﺎﺩﻩ (75 Ω/0.71 μV) 8.2 dBf ﺳﻴﺴﺘﻢ...
- Page 37 ﺍﺗﺼﺎﻝ ﺳﻴﻢ ﻛﺸﯽ (ﺳﻴﻢ ﺳﻴﮕﻨﺎﻝ )ﻋﺮﺿﻪ ﻧﻤﯽ ﺷﻮﺩ ﻣﻬﻢ JVC ﺁﻣﭙﻠﯽ ﻓﺎﻳﺮ ﻣﺎ ﭘﻴﺸﻨﻬﺎﺩ ﻣﯽ ﻛﻨﻴﻢ ﺩﺳﺘﮕﺎﻩ ﺭﺍ ﺑﺎ ﻳﮏ ﺩﺳﺘﻪ ﺳﻴﻢ ﺳﻔﺎﺭﺷﯽ ﻣﺨﺼﻮﺹ ﺧﻮﺩﺭﻭی ﺧﺮﻭﺟﯽ ﻋﻘﺐ/ﺳﺎﺏ ﻭﻭﻓﺮ ﺧﻮﺩ ﻛﻪ ﺩﺭ ﺑﺎﺯﺍﺭ ﻣﻮﺟﻮﺩ ﺍﺳﺖ ﻧﺼﺐ ﻛﻨﻴﺪ ﻭ ﺑﺮﺍی ﺍﻳﻤﻨﯽ ﺧﻮﺩ، ﺍﻳﻦ ﻛﺎﺭ ﺭﺍ ﺑﻪ ﺍﻓﺮﺍﺩ...
- Page 38 ﻧﺼﺐ/ﺍﺗﺼﺎﻝ ﻓﻬﺮﺳﺖ ﻗﻄﻌﺎﺕ ﺑﺮﺍی ﻧﺼﺐ (ﻧﺼﺐ ﺩﺳﺘﮕﺎﻩ )ﻧﺼﺐ ﻛﺮﺩﻥ ﺩﺭ ﺩﺍﺷﺒﻮﺭﺩ ﺳﻴﻢ ﻛﺸﯽ ﻫﺎی ( ﺻﻔﺤﻪ ﺟﻠﻮﻳﯽA) ﻣﻮﺭﺩ ﻧﻴﺎﺯ ﺭﺍ ﺍﻧﺠﺎﻡ (16 ) .ﺑﺪﻫﻴﺪ ﺭﻭی ﺳﻤﺖ ﺭﺍﺳﺖ ﺩﺭ ﺑﺎﻻ ﻗﻼﺏ ﺍﻳﺠﺎﺩ ﻛﻨﻴﺪ ( ﻗﺎﺏ ﺩﻭﺭ ﺿﺒﻂB) ﺑﻪ ﺻﻔﺤﻪ ﺑﺮﺵ ﻫﻤﺎﻧﻄﻮﺭ ﻛﻪ ﺩﺍﺷﺒﻮﺭﺩ...
- Page 39 • ﺑﻠﻨﺪﮔﻮﻫﺎﻳﯽ ﺑﺎ ﺣﺪﺍﻛﺜﺮ ﺗﻮﺍﻥ ﺑﻴﺸﺘﺮ ﺍﺯ 05 ﻭﺍﺕ ﺭﺍ ﻭﺻﻞ ﻛﻨﻴﺪ. ﺍﮔﺮ ﺣﺪﺍﻛﺜﺮ ﺗﻮﺍﻥ ﺑﻠﻨﺪﮔﻮ ﻛﻤﺘﺮ ﺍﺯ 05 ﻭﺍﺕ ﭘﺨﺶ ﺩﺭ ﺣﺎﻟﺖ ﺭﻭی ﺩﺳﺘﮕﺎﻩJVC MUSIC PLAY APP • ﻣﻄﻤﺌﻦ ﺷﻮﻳﺪ ﻛﻪ ﺑﺮﻧﺎﻣﻪ (10 ) .[ ﺭﺍ ﺗﻐﻴﻴﺮ ﺩﻫﻴﺪAMP GAIN] ﺍﺳﺖ، ﺑﺮﺍی ﺟﻠﻮﮔﻴﺮی ﺍﺯ ﺁﺳﻴﺐ ﺩﻳﺪﻥ ﺑﻠﻨﺪﮔﻮﻫﺎ، ﺗﻨﻈﻴﻤﺎﺕ...
- Page 40 ﻋﻴﺐ ﻳﺎﺑﻲ ﻣﻨﺎﺑﻊ ﺍﻃﻼﻋﺎﺕ ﺭﻭی ﺻﻔﺤﻪ ﻧﻤﺎﻳﺶ ﺭﺍ ﺗﻐﻴﻴﺮ ﻣﯽ ﺩﻫﺪ ﻧﺤﻮﻩ ﺗﻌﻤﻴﺮ ﻋﻮﺍﺭﺽ .ﺭﺍ ﻓﺸﺎﺭ ﺩﻫﻴﺪ، ﺍﻃﻼﻋﺎﺕ ﻣﻮﺭﺩ ﻧﻤﺎﻳﺶ ﺗﻐﻴﻴﺮ ﺧﻮﺍﻫﺪ ﻛﺮﺩ ﻫﺮﺑﺎﺭ ﻛﻪ ﺩﻛﻤﻪ .ﺻﺪﺍﻳﯽ ﺑﮕﻮﺵ ﻧﻤﯽ ﺭﺳﺪ .• ﺍﻧﺪﺍﺯﻩ ﺻﺪﺍ ﺭﺍ ﺑﺮ ﺭﻭ ﻣﻴﺰﺍﻥ ﺑﻬﻴﻨﻪ ﺁﻥ ﺗﻨﻈﻴﻢ ﻧﻤﺎﻳﻴﺪ “...
- Page 41 .• ﻣﻤﻜﻦ ﺍﺳﺖ ﺍﺗﺼﺎﻝ ﻳﮏ ﻛﺎﺑﻞ ﺑﺎ ﻃﻮﻝ ﺑﻴﺸﺘﺮ ﺍﺯ 5 ﻣﺘﺮ ﺑﺎﻋﺚ ﭘﺨﺶ ﻏﻴﺮﻋﺎﺩی ﺻﺪﺍ ﺷﻮﺩ – ﺳﺎﻳﺮ ﺍﻃﻼﻋﺎﺕ ﺟﺪﻳﺪ ﻛﻪ ﺩﺭﺟﻪ ﺑﻨﺪی ﺁﻥ ﺑﻪ ﻏﻴﺮ ﺍﺯ 5 ﻭﻟﺖ ﻭ ﺑﺎﻻﺗﺮ ﺍﺯ 1 ﺁﻣﭙﺮ ﺑﺎﺷﺪ ﺭﺍUSB • ﺍﻳﻦ ﺩﺳﺘﮕﺎﻩ ﻧﻤﯽ ﺗﻮﺍﻧﺪ ﺩﺳﺘﮕﺎﻩ .< ﻣﺮﺍﺟﻌﻪ ﻧﻤﺎﻳﻴﺪhttp://www.jvc.net/cs/car/> ﺑﻪ .ﺗﺸﺨﻴﺺ ﺩﻫﺪ ﻋﻤﻮﻣﻰ...
- Page 42 ﺗﻨﻈﻴﻤﺎﺕ ﻧﻤﺎﻳﺶ .ﻣﯽ ﺗﻮﺍﻧﻴﺪ ﺭﻭﺷﻨﺎﻳﯽ ﺭﺍ ﺑﻪ ﻃﻮﺭ ﺟﺪﺍﮔﺎﻧﻪ ﺑﺮﺍی ﺭﻭﺯ ﻭ ﺷﺐ ﺗﻨﻈﻴﻢ ﻛﻨﻴﺪ BRIGHTNESS .: ﺭﻭﺯ ﻳﺎ ﺷﺐ ﺭﺍ ﺍﻧﺘﺨﺎﺏ ﻛﻨﻴﺪNIGHT/DAY 1 .2 ﻧﺎﺣﻴﻪ ﺍی ﺍﻧﺘﺨﺎﺏ ﻛﻨﻴﺪ .: ﺳﻄﺢ ﺭﻭﺷﻨﺎﻳﯽ ﺭﺍ ﺗﻨﻈﻴﻢ ﻛﻨﻴﺪLEVEL 31 ﺗﺎLEVEL 00 3 (LEVEL 15 :NIGHT ...
- Page 43 ﺗﻨﻈﻴﻤﺎﺕ ﺻﺪﺍ : ﺑﺎ ﺟﺒﺮﺍﻥ ﻣﺆﻟﻔﻪ ﻫﺎی ﻓﺮﻛﺎﻧﺲ ﺑﺎﻻ ﻭ ﺑﺎﺯﻳﺎﺑﯽ ﺯﻣﺎﻥ ﺍﻭﺝ ﻓﺮﻡ ﻣﻮﺟﯽ ﺷﻜﻞ ﻛﻪON : ﺑﺎ ﺗﻘﻮﻳﺖ ﻓﺮﻛﺎﻧﺲ ﻫﺎ ﺿﻌﻴﻒ ﻳﺎ ﻗﻮ، ﺻﺪﺍﻳﯽ ﺑﺎ ﻛﻴﻔﻴﺖLEVEL 02/LEVEL 01 D.T.EXPANDER LOUDNESS ﺩﺭ ﻓﺸﺮﺩﻩ ﺳﺎﺯی ﺩﺍﺩﻩ ﻫﺎی ﺻﺪﺍ ﺍﺯ ﺑﻴﻦ ﺭﻓﺘﻪ ﺍﻧﺪ، ﺻﺪﺍﻫﺎﻳﯽ ﻭﺍﻗﻌﯽ ﺭﺍ ﺍﻳﺠﺎﺩ ﻣﯽ .: ﻟﻐﻮ...
- Page 44 ﺗﻨﻈﻴﻤﺎﺕ ﺻﺪﺍ XX :ﭘﻴﺶ ﻓﺮﺽ EQ SETTING .ﻳﮏ ﺍﻛﻮﻻﻳﺰﺭ ﭘﻴﺶ ﺗﻨﻈﻴﻢ ﻣﺘﻨﺎﺳﺐ ﺑﺎ ژﺍﻧﺮ ﻣﻮﺳﻴﻘﯽ ﺭﺍ ﺍﻧﺘﺨﺎﺏ ﻣﯽ ﻛﻨﺪ PRESET EQ .[ ﺭﺍ ﺍﻧﺘﺨﺎﺏ ﻛﻨﻴﺪUSER] ،[ ﺍﻧﺠﺎﻡ ﺩﺍﺩﻩ ﺍﻳﺪPRO EQ] [ ﻳﺎEASY EQ] • ﺑﺮﺍی ﺍﺳﺘﻔﺎﺩﻩ ﺍﺯ ﺗﻨﻈﻴﻤﺎﺗﯽ ﻛﻪ ﺩﺭ /TALK/R&B/POP/JAZZ/HIP HOP/HARD ROCK/DRVN 1/DRVN 2/DRVN 3/FLAT DANCE/CLASSICAL/BASS BOOST/VOCAL BOOST/USER .ﺗﻨﻈﻴﻤﺎﺕ...
- Page 45 ﺭﺍﺩﻳﻮ ﺍﺳﺘﻔﺎﺩﻩ ﺍﺯ ﻳﮏ ﭘﺨﺶ ﻛﻨﻨﺪﻩ ﺻﻮﺗﯽ ﻗﺎﺑﻞ ﺣﻤﻞ ﺑﺎ ﺩﺭﻳﺎﻓﺖ ﺧﻮﺏ ﺭﺍ ﺟﺴﺘﺠﻮ ﻣﯽ ﻛﻨﺪ. ؛SW2/SW1/AM : ﻓﻘﻂ ﺍﻳﺴﺘﮕﺎﻩ ﻫﺎیON LOCAL SEEK .: ﻟﻐﻮ ﻣﻰ ﺷﻮﺩOFF .ﻳﮏ ﭘﺨﺶ ﻛﻨﻨﺪﻩ ﺻﻮﺗﯽ ﻗﺎﺑﻞ ﺣﻤﻞ )ﻛﻪ ﺑﺮﺍی ﺧﺮﻳﺪ ﻣﻮﺟﻮﺩ ﺍﺳﺖ( ﺭﺍ ﻭﺻﻞ ﻛﻨﻴﺪ •...
- Page 46 ﺭﺍﺩﻳﻮ ﺳﺎﻳﺮ ﺗﻨﻈﻴﻤﺎﺕ .ﺭﺍ ﻓﺸﺎﺭ ﺩﺍﺩﻩ ﻭ ﻧﮕﻪ ﺩﺍﺭﻳﺪ ،ﺟﻬﺖ ﺍﻧﺘﺨﺎﺏ ﻳﮏ ﮔﺰﻳﻨﻪ )ﺑﻪ ﺟﺪﻭﻝ ﺫﻳﻞ ﺭﺟﻮﻉ ﻛﻨﻴﺪ(، ﺩﻛﻤﻪ ﻭﻟﻮﻡ ﺭﺍ ﺑﭽﺮﺧﺎﻧﻴﺪ .ﺳﭙﺲ ﺩﻛﻤﻪ ﺭﺍ ﻓﺸﺎﺭ ﺩﻫﻴﺪ ﺭﺍ ﺗﻜﺮﺍﺭ ﻛﻨﻴﺪ ﺗﺎ ﺍﻳﻨﻜﻪ ﺁﻳﺘﻢ ﻣﻮﺭﺩ ﻧﻈﺮ ﺭﺍ ﺍﻧﺘﺨﺎﺏ/ﻓﻌﺎﻝ ﻧﻤﺎﻳﻴﺪ، ﻳﺎ ﻣﺮﺣﻠﻪ .ﺩﺳﺘﻮﺭﺍﻟﻌﻤﻞ...
- Page 47 ،ANDROID ﻫﻨﮕﺎﻡ ﺑﺎﺯ ﺑﻮﺩﻥ ﻣﻨﺒﻊ .ﺭﺍ ﻓﺸﺎﺭ ﺩﻫﻴﺪ .JVC MUSIC PLAY : ﻛﻨﺘﺮﻝ ﺩﺳﺘﮕﺎﻩ ﺍﻧﺪﺭﻭﻳﺪ ﺍﺯ ﺭﻭی ﺍﻳﻦ ﺩﺳﺘﮕﺎﻩ ﺑﺎ ﺩﺍﺷﺘﻦ ﺑﺮﻧﺎﻣﻪAUTO MODE .ﺟﻬﺖ ﺍﻧﺘﺨﺎﺏ ﻳﮏ ﭘﻮﺷﻪ/ﻟﻴﺴﺖ، ﺩﻛﻤﻪ ﻭﻟﻮﻡ ﺭﺍ ﺑﭽﺮﺧﺎﻧﻴﺪ، ﺳﭙﺲ ﺩﻛﻤﻪ ﺭﺍ ﻓﺸﺎﺭ ﺩﻫﻴﺪ : ﻛﻨﺘﺮﻝ ﺩﺳﺘﮕﺎﻩ ﺍﻧﺪﺭﻭﻳﺪ ﺑﺎ ﺍﺳﺘﻔﺎﺩﻩ ﺍﺯ ﺧﻮﺩ ﺩﺳﺘﮕﺎﻩ ﺍﻧﺪﺭﻭﻳﺪ ﺍﺯ ﻃﺮﻳﻖ ﺳﺎﻳﺮ ﺑﺮﻧﺎﻣﻪ ﻫﺎیAUDIO MODE .ﺟﻬﺖ...
- Page 48 .* ﻭﻗﺘﯽ ﺍﺯ ﺩﺳﺘﮕﺎﻩ ﺍﺳﺘﻔﺎﺩﻩ ﻧﻤﯽ ﻛﻨﻴﺪ، ﻛﺎﺑﻞ ﺭﺍ ﺩﺍﺧﻞ ﺧﻮﺩﺭﻭ ﺭﻫﺎ ﻧﻜﻨﻴﺪ ،“ ﻧﻤﺎﻳﺶ ﺩﺍﺩﻩ ﻣﯽ ﺷﻮﺩ. ﺑﺮﺍی ﻧﺼﺐ ﺑﺮﻧﺎﻣﻪPress [VIEW] to install JVC MUSIC PLAY APP” * ﻫﻨﮕﺎﻣﯽ ﻛﻪ ﺩﺳﺘﮕﺎﻩ ﺍﻧﺪﺭﻭﻳﺪی ﺭﺍ ﻣﺘﺼﻞ ﻛﻨﻴﺪ، ﭘﻴﺎﻡ ﺭﺍ ﺭﻭی ﺩﺳﺘﮕﺎﻩ ﺍﻧﺪﺭﻭﻳﺪJVC MUSIC PLAY ﺩﺳﺘﻮﺭﺍﻟﻌﻤﻞ ﻫﺎ ﺭﺍ ﺩﻧﺒﺎﻝ ﻛﻨﻴﺪ. ﻫﻤﭽﻨﻴﻦ ﻣﯽ ﺗﻮﺍﻧﻴﺪ ﻗﺒﻞ ﺍﺯ ﻣﺘﺼﻞ ﻛﺮﺩﻥ ﺩﺳﺘﮕﺎﻩ، ﺁﺧﺮﻳﻦ ﻧﺴﺨﻪ ﺑﺮﻧﺎﻣﻪ...
- Page 49 .[، ﺩﻛﻤﻪ ﻭﻟﻮﻡ ﺭﺍ ﺑﭽﺮﺧﺎﻧﻴﺪ، ﺳﭙﺲ ﺩﻛﻤﻪ ﺭﺍ ﻓﺸﺎﺭ ﺩﻫﻴﺪCLOCK ADJUST] ﺟﻬﺖ ﺍﻧﺘﺨﺎﺏ F/W UP xxxx :ﺑﺮﺍی ﺍﻃﻼﻉ ﺍﺯ ﺟﺰﺋﻴﺎﺕ ﺩﺭﺑﺎﺭﻩ ﺑﻪ ﺭﻭﺯ ﺭﺳﺎﻧﯽ ﻣﻴﺎﻥ ﺍﻓﺰﺍﺭ، ﻣﺮﺍﺟﻌﻪ ﻛﻨﻴﺪ ﺑﻪ .ﭘﻴﭻ ﻣﻴﺰﺍﻥ ﺻﺪﺍ ﺭﺍ ﺑﭽﺮﺧﺎﻧﻴﺪ ﺗﺎ ﺗﻨﻈﻴﻤﺎﺕ ﺍﻧﺠﺎﻡ ﺷﻮﻧﺪ ﻭ ﺳﭙﺲ ﭘﻴﭻ ﺭﺍ ﻓﺸﺎﺭ ﺩﻫﻴﺪ .<http://www.jvc.net/cs/car/> ﺩﻗﻴﻘﻪ ﺳﺎﻋﺖ CLOCK .[،...
- Page 50 ﻧﻜﺎﺕ ﺍﻭﻟﻴﻪ ﺻﻔﺤﻪ ﺟﻠﻮﻳﯽ (RM-RK52) ﻛﻨﺘﺮﻝ ﺍﺯ ﺭﺍﻩ ﺩﻭﺭ ﺩﻛﻤﻪ ﻭﻟﻮﻡ ﺷﻜﺎﻑ ﺑﺎﺭﮔﺰﺍﺭی ﺳﻨﺴﻮﺭ ﺍﺯ ﺭﺍﻩ ﺩﻭﺭ (.)ﺩﺭ ﺑﺮﺍﺑﺮ ﻧﻮﺭ ﺧﻮﺭﺷﻴﺪ ﻗﺮﺍﺭ ﻧﺪﻫﻴﺪ ﺩﺭ ﺻﻮﺭﺕ ﺍﺳﺘﻔﺎﺩﻩ ﺑﺮﺍی ﺍﻭﻟﻴﻦ ﺑﺎﺭ، ﻭﺭﻕ ﻋﺎﻳﻖ ﺭﺍ ﺑﻴﺮﻭﻥ .ﺑﻴﺎﻭﺭﻳﺪ ﺩﻛﻤﻪ ﺟﺪﺍﺳﺎﺯی ﭘﻨﺠﺮﻩ ﻧﻤﺎﻳﺶ ﻧﺤﻮﻩ ﺗﻌﻮﻳﺾ ﺑﺎﺗﺮی ﻧﺤﻮﻩ...
- Page 51 ﻓﻬﺮﺳﺖ ﻣﻄﺎﻟﺐ ﻗﺒﻞ ﺍﺯ ﺍﺳﺘﻔﺎﺩﻩ ﻗﺒﻞ ﺍﺯ ﺍﺳﺘﻔﺎﺩﻩ ﻣﻬﻢ • ﺑﺮﺍی ﺍﻃﻤﻴﻨﺎﻥ ﺍﺯ ﺍﺳﺘﻔﺎﺩﻩ ﺻﺤﻴﺢ، ﻟﻄﻔ ﺎ ﹰ ﺍﻳﻦ ﺩﻓﺘﺮﭼﻪ ﺭﺍﻫﻨﻤﺎ ﺭﺍ ﻗﺒﻞ ﺍﺯ ﺍﺳﺘﻔﺎﺩﻩ ﺍﺯ ﺍﻳﻦ ﻣﺤﺼﻮﻝ ﻣﻄﺎﻟﻌﻪ ﻛﻨﻴﺪ. ﻣﻄﺎﻟﻌﻪ ﻭ ﺭﻋﺎﻳﺖ ”ﺍﺧﻄﺎﺭ“ ﻫﺎ ﻭ ”ﺍﺣﺘﻴﺎﻁ“ ﻫﺎی ﻧﻜﺎﺕ ﺍﻭﻟﻴﻪ .ﻣﻨﺪﺭﺝ...
- Page 52 ﺍﻟﻤﻮﺍﺻﻔﺎﺕ .ﻳﺨﻀﻊ ﻟﻠﺘﻐﻴﻴﺮ ﺩﻭﻥ ﺇﺧﻄﺎﺭ ﻣﺴﺒﻖ ( )ﺳﺮﻋﺔ ﻗﺼﻮﻯUSB 2.0 ،USB 1.1 USB ﻣﻌﻴﺎﺭ 5.78 ﻣﻴﺠﺎﻫﺮﺗﺰ — 0.801 ﻣﻴﺠﺎﻫﺮﺗﺰ ﻧﻄﺎﻕ ﺍﻟﺘﺮﺩﺩ ()05 ﻛﻴﻠﻮ ﻫﺮﺗﺰ ﻟﻠﺨﻄﻮﺓ ﻣﻦ ﻓﺌﺔ ﺍﻟﺘﺨﺰﻳﻦ ﺍﻹﺟﻤﺎﻟﻲ ﺍﻷﺟﻬﺰﺓ ﺍﻟﻤﺘﻮﺍﻓﻘﺔ ( 2.8 )17.0 ﻣﻴﻜﺮﻭ ﻓﻮﻟﺖ/ 57 ﺍﻭﻡdBf ﺩﺭﺟﺔ ﺍﻟﺤﺴﺎﺳﻴﺔ ﺍﻟﻤﺴﺘﺨﺪﻣﺔ ﻧﻈﺎﻡ...
- Page 53 ﺍﻟﺘﺮﻛﻴﺐ/ﺍﻟﺘﻮﺻﻴﻞ ﺗﻮﺻﻴﻞ ﺍﻷﺳﻼﻙ (ﻛﺎﺑﻞ ﺍﻹﺷﺎﺭﺓ )ﻏﻴﺮ ﻣﺮﻓﻘﺔ ﻫﺎﻡ JVC ﻣﻀﺨﻢ ﻧﻨﺼﺢ ﺑﺘﺮﻛﻴﺐ ﺍﻟﺠﻬﺎﺯ ﻣﻊ ﺿﻔﻴﺮﺓ ﺍﺳﻼﻙ ﻛﻬﺮﺑﺎﺋﻴﺔ ﺧﺎﺻﺔ ﻣﺘﻮﻓﺮﺓ ﺗﺠﺎﺭﻳﺎ /ﺃﻃﺮﺍﻑ ﺍﻟﺘﻮﺻﻴﻞ ﺍﻟﺨﻠﻔﻴﺔ ﻣﺨﺼﺼﺔ ﻟﺴﻴﺎﺭﺗﻚ ﻭﺇﻳﻜﺎﻝ ﻫﺬﻩ ﺍﻟﻤﻬﻤﺔ ﻟﻠﻤﺨﺘﺼﻴﻴﻦ ﻭﺫﻟﻚ ﻟﻀﻤﺎﻥ ﺧﺮﺝ ﺍﻟﺼﺒﻮﻭﻓﺮ .ﺳﻼﻣﺘﻚ. ﺍﺳﺘﺸﻴﺮ ﺑﺎﺋﻊ ﺃﺟﻬﺰﺓ ﺍﻟﺼﻮﺗﻴﺎﺕ ﺍﻟﺨﺎﺻﺔ ﺑﺎﻟﺴﻴﺎﺭﺍﺕ ﺍﻟﻘﺮﻳﺐ ﻣﻨﻚ...
- Page 54 ﺍﻟﺘﺮﻛﻴﺐ/ﺍﻟﺘﻮﺻﻴﻞ ﻗﺎﺋﻤﺔ ﻗﻄﻊ ﺍﻟﻐﻴﺎﺭ ﺍﻟﻤﺴﺘﺨﺪﻣﺔ ﻓﻲ (ﺗﺮﻛﻴﺐ ﺍﻟﻮﺣﺪﺓ )ﺩﺍﺧﻞ ﺗﺎﺑﻠﻮ ﺍﻟﺴﻴﺎﺭﺓ ﺍﻟﺘﺮﻛﻴﺐ ﻗﻢ ﺑﺘﻮﺻﻴﻞ ( ﻭﺍﺟﻬﺔ ﺍﻟﺠﻬﺎﺯA) .ﺍﻷﺳﻼﻙ ﺍﻟﻤﻄﻠﻮﺑﺔ (16 ) ﺍﻟﺨﻄﺎﻑ ﻓﻲ ﺍﻟﺠﺎﻧﺐ ﺍﻟﻌﻠﻮﻱ ﻳﺘﻢ ﺗﻮﺟﻴﻪ ﻟﻮﺣﺔ ﺍﻟﺰﻳﻨﺔ ﺗﺎﺑﻠﻮﻩ ﺍﻟﺴﻴﺎﺭﺓ ( ﻭﺣﺔ ﺍﻟﺰﻳﻨﺔB) ﺍﻷﻣﺎﻣﻴﺔ ﻛﻤﺎ ﻫﻮ ﻣﻮﺿﺢ .ﻗﺒﻞ ﺍﻟﺘﺮﻛﻴﺐ ﺍﺛﻦ...
- Page 55 • ﺻﻞ ﺍﻟﺴﻤﺎﻋﺎﺕ ﺑﻄﺎﻗﺔ ﻗﺼﻮﻯ ﺗﺰﻳﺪ ﻋﻦ 05 ﻭﺍﺕ، ﺇﺫﺍ ﻛﺎﻧﺖ ﺃﻗﺼﻰ ﻃﺎﻗﺔ ﺃﻗﻞ ﻣﻦ 05 ﻭﺍﺕ، ﻓﻐﻴ ﹼ ﺮ (12 ) .ﺍﻟﻮﺣﺪﺓ (10 ) .[ ﻟﺘﺠﻨﺐ ﺗﻠﻒ ﺍﻟﺴﻤﺎﻋﺎﺕAMP GAIN] ﺇﻋﺪﺍﺩ ﻓﻲ ﺟﻬﺎﺯJVC MUSIC PLAY APP • ﺗﺄﻛﺪ ﻣﻦ ﺗﺜﺒﻴﺖ ﺍﻟﺘﻄﺒﻴﻖ ﻻ ﻳﻤﻜﻦ ﺍﻟﺘﺸﻐﻴﻞ ﻓﻲ .30º • ﻗﻢ ﺑﺘﺮﻛﻴﺐ ﺍﻟﺠﻬﺎﺯ ﻋﻨﺪ ﺯﺍﻭﻳﺔ ﺃﻗﻞ ﻣﻦ...
- Page 56 ﺍﻟﺒﺤﺚ ﻋﻦ ﺍﻻﻋﻄﺎﻝ ﻭﺍﻻﺻﻼﺡ ﻣﺮﺍﺟﻊ ﺗﻐﻴﻴﺮ ﻣﻌﻠﻮﻣﺎﺕ ﺍﻟﺸﺎﺷﺔ ﻣﻌﺎﻟﺠﺔ ﺍﻷﻋﻄﺎﻝ ﺍﻻﻋﺮﺍﺽ .، ﺗﺘﻐﻴﺮ ﻣﻌﻠﻮﻣﺎﺕ ﺍﻟﺸﺎﺷﺔ ﻛﻠﻤﺎ ﺿﻐﻄﺖ ﻋﻠﻰ .• ﺍﺿﺒﻂ ﻣﺴﺘﻮﻯ ﻗﻮﺓ ﺍﻟﺼﻮﺕ ﻋﻠﻰ ﺍﻓﻀﻞ ﻣﺴﺘﻮﻯ ﻣﻤﻜﻦ .ﻻ ﻳﻤﻜﻦ ﺳﻤﺎﻉ ﺍﻟﺼﻮﺕ “ ﺃﻭNO NAME” “ ﺃﻭNO TEXT” • ﺇﺫﺍ ﻟﻢ ﺗﻜﻦ ﺍﻟﻤﻌﻠﻮﻣﺎﺕ ﻣﺘﻮﻓﺮﺓ ﺃﻭ ﺍﻧﻬﺎ ﻏﻴﺮ ﻣﺴﺠﻠﺔ، ﻳﻈﻬﺮ .•...
- Page 57 .ﻓﻲ ﺍﻟﺘﺸﻐﻴﻞ – ﺃﻱ ﻣﻦ ﺍﺣﺪﺙ ﺍﻟﻤﻌﻠﻮﻣﺎﺕ ﺍﻻﺧﺮﻯ . ﻳﻜﻮﻥ ﻣﻌﺪﻟﻪ 5 ﻓﻮﻟﺖ ﻭﻳﺘﺠﺎﻭﺯ 1 ﺃﻣﺒﻴﺮUSB • ﻻ ﻳﻤﻜﻦ ﻟﻠﻮﺣﺪﺓ ﺍﻟﺘﻌﺮﻑ ﻋﻠﻰ ﺟﻬﺎﺯ .<http://www.jvc.net/cs/car/> ﻗﻢ ﺑﺰﻳﺎﺭﺓ Android ﺑﺨﺼﻮﺹ ﺟﻬﺎﺯ ﻋﺎﻡ . ﻭﺍﻋﻠﻰAndroid OS 4.1 • ﻫﺬﻩ ﺍﻟﻮﺣﺪﺓ ﺗﺪﻋﻢ ﻧﻈﺎﻡ ﺍﻟﺘﺸﻐﻴﻞ...
- Page 58 ﺇﻋﺪﺍﺩﺍﺕ ﺍﻟﺸﺎﺷﺔ .ﺍﺿﺒﻂ ﺍﻟﺴﻄﻮﻉ ﻟﻠﻨﻬﺎﺭ ﻭﺍﻟﻠﻴﻞ ﺑﺼﻮﺭﺓ ﻣﻨﻔﺼﻠﺔ BRIGHTNESS .: ﻳﺤﺪﺩ ﺍﻟﻨﻬﺎﺭ ﺃﻭ ﺍﻟﻠﻴﻞNIGHT/DAY 1 .2 ﺍﺧﺘﺮ ﻣﻨﻄﻘﺔ .: ﻳﻀﺒﻂ ﻣﺴﺘﻮﻯ ﺍﻟﺴﻄﻮﻉLEVEL 31 ﺇﻟﻰLEVEL 00 3 (LEVEL 15 :NIGHT ؛LEVEL 31 :DAY :)ﺍﻓﺘﺮﺍﺿﻲ : ﻳﻤﺮﺭ ﺍﻟﻤﻌﻠﻮﻣﺎﺕ ﺍﻟﻤﻌﺮﻭﺿﺔ ﻣﺮﺓ ﻭﺍﺣﺪﺓ. ؛SCROLL ONCE TEXT SCROLL * : ﻳﻜﺮﺭ...
- Page 59 ﺇﻋﺪﺍﺩﺍﺕ ﺍﻟﺼﻮﺕ : ﻳﺨﻠﻖ ﺻﻮ ﺗ ﹰ ﺎ ﻭﺍﻗﻌﻴ ﹰ ﺎ ﻋﻦ ﻃﺮﻳﻖ ﺗﻌﻮﻳﺾ ﺍﻟﻤﻜﻮﻧﺎﺕ ﻋﺎﻟﻴﺔ ﺍﻟﺘﺮﺩﺩON : ﻳﻌﺰﺯ ﺍﻟﺘﺮﺩﺩﺍﺕ ﺍﻟﻤﻨﺨﻔﻀﺔ ﺃﻭ ﺍﻟﻌﺎﻟﻴﺔ ﻣﻦ ﺃﺟﻞ ﺗﻜﻮﻳﻦLEVEL 02/LEVEL 01 D.T.EXPANDER LOUDNESS ﻭﺍﺳﺘﻌﺎﺩﺓ ﺯﻣﻦ ﺍﻟﺼﻌﻮﺩ ﻟﺸﻜﻞ ﺍﻟﻤﻮﺟﺔ ﺍﻟﺘﻲ ﺿﺎﻋﺖ ﻋﻨﺪ ﺿﻐﻂ ﺍﻟﺒﻴﺎﻧﺎﺕ )ﻣﻮﺳﻊ...
- Page 60 ﺇﻋﺪﺍﺩﺍﺕ ﺍﻟﺼﻮﺕ XX :ﺍﻓﺘﺮﺍﺿﻲ EQ SETTING .ﻳﺤﺪﺩ ﺍﻟﻤ ﹸ ﻌﺎ ﺩ ﹺ ﻝ ﺍﻟﻤﻀﺒﻮﻁ ﻣﺴﺒﻘ ﺎ ﹰ ﻭﺍﻟﻤﻨﺎﺳﺐ ﻟﻨﻮﻉ ﺍﻟﻤﻮﺳﻴﻘﻰ PRESET EQ .[PRO EQ] [ ﺍﻭEASY EQ] [ ﻻﺳﺘﺨﺪﺍﻡ ﺍﻹﻋﺪﺍﺩﺍﺕ ﺍﻟﺘﻲ ﺗﻢ ﺗﻨﻔﻴﺬﻫﺎ ﻓﻲUSER] • ﺍﺧﺘﺮ /TALK/R&B/POP/JAZZ/HIP HOP/HARD ROCK/DRVN 1/DRVN 2/DRVN 3/FLAT DANCE/CLASSICAL/BASS BOOST/VOCAL BOOST/USER .ﻗﻢ...
- Page 61 ﺭﺍﺩﻳﻮ ﺍﺳﺘﺨﺪﻡ ﻣﺸﻐﻞ ﺍﻟﺼﻮﺕ ﺍﻟﻤﺤﻤﻮﻝ ﺫﺍﺕ ﺍﻻﺳﺘﻘﺒﺎﻝ ﺍﻟﺠﻴﺪ ﻓﻘﻂ. ؛SW2/SW1/AM : ﺍﻟﺒﺤﺚ ﻋﻦ ﺍﻟﻤﺤﻄﺎﺕON LOCAL SEEK .: ﺍﻟﻐﺎﺀOFF .(ﺍﻻﺗﺼﺎﻝ ﺑﺠﻬﺎﺯ ﻣﺸﻐﻞ ﺍﻟﺼﻮﺕ ﺍﻟﻤﺤﻤﻮﻝ )ﻣﺘﺎﺡ ﻟﻠﺸﺮﺍﺀ • ﺍﻹﻋﺪﺍﺩﺍﺕ ﺍﻟﺘﻲ ﻳﺘﻢ ﺗﻨﻔﻴﺬﻫﺎ ﻗﺎﺑﻠﺔ ﻟﻠﺘﻄﺒﻴﻖ ﻋﻠﻰ ﺍﻟﻤﺼﺪﺭ/ﺍﻟﻤﺤﻄﺔ ﻗﺎﺑﺲ ﺻﻐﻴﺮ ﻟﻠﺼﻮﺕ ﺍﻟﻤﺠﺴﻢ 5.3 ﻣﻢ ﻣﻊ ﻣﻮﺻﻞ ﻋﻠﻰ ﺍﻟﻤﺨﺘﺎﺭﺓ...
- Page 62 ﺭﺍﺩﻳﻮ ﺇﻋﺪﺍﺩﺍﺕ ﺃﺧﺮﻯ ﺍﺿﻐﻂ ﻣﻊ ﺍﻻﺳﺘﻤﺮﺍﺭ ﻋﻠﻰ ﺃﺩﺭ ﻗﺮﺹ ﻣﺴﺘﻮﻯ ﺍﻟﺼﻮﺕ ﻟﺘﺤﺪﻳﺪ ﺑﻨﺪ )ﺭﺍﺟﻊ ﺍﻟﺠﺪﻭﻝ .ﺍﻟﺘﺎﻟﻲ(، ﺛﻢ ﺍﺿﻐﻂ ﺍﻟﻘﺮﺹ ﺍﻟﻰ ﺍﻥ ﻳﺘﻢ ﺍﺧﺘﻴﺎﺭ ﺍﻟﺒﻨﺪ ﺍﻟﻤﺮﻏﻮﺏ ﺍﻭ ﺍﺗﺒﻊ ﻛﺮﺭ ﺍﻟﺨﻄﻮﺓ .ﺍﻟﺘﻌﻠﻴﻤﺎﺕ ﺍﻟﻤﺘﻌﻠﻘﺔ ﺑﺎﻟﺒﻨﺪ ﺍﻟﻤﺨﺘﺎﺭ .ﻟﻠﺨﺮﻭﺝ ﺍﺿﻐﻂ ﻋﻠﻰ . ﻣﻊ ﻗﻮﺓ ﺇﺷﺎﺭﺓ ﻛﺎﻓﻴﺔFM “ ﻋﻨﺪ ﺍﺳﺘﻘﺒﺎﻝ ﺑﺚ ﺑﺼﻮﺕ ﻣﺠﺴﻢ ﻋﻠﻰ ﻣﻮﺟﺔST” ﺗﻀﻲﺀ ﻟﻠﺮﺟﻮﻉ...
- Page 63 ﻣﻦ ﻫﺬﺍ ﺍﻟﺠﻬﺎﺯ ﻋﺒﺮ ﺗﻄﺒﻴﻖAndroid : ﻗﻢ ﺑﺎﻟﺘﺤﻜﻢ ﺑﺠﻬﺎﺯAUTO MODE .ﺍﺩﺭ ﻣﻘﺒﺾ ﻣﺴﺘﻮﻯ ﺍﻟﺼﻮﺕ ﻻﺧﺘﻴﺎﺭ ﻣﻠﻒ، ﺛﻢ ﺍﺿﻐﻂ ﺍﻟﻤﻘﺒﺾ .Android ﺍﻟﻤﺜﺒﺖ ﻓﻲ ﺟﻬﺎﺯJVC MUSIC PLAY ﻧﻔﺴﻪ ﻋﺒﺮAndroid ﺑﺎﺳﺘﺨﺪﺍﻡ ﺟﻬﺎﺯAndroid : ﻗﻢ ﺑﺎﻟﺘﺤﻜﻢ ﺑﺠﻬﺎﺯAUDIO MODE . ﻟﻜﻦ، ﻻ ﻳﺰﺍﻝAndroid ﺗﻄﺒﻴﻘﺎﺕ ﻣﺸﻐﻞ ﻭﺳﺎﺋﻂ ﺍﺧﺮﻯ ﻣﺜﺒﺘﺔ ﻓﻲ ﺟﻬﺎﺯ...
- Page 64 .* ﻻ ﺗﺘﺮﻙ ﺍﻟﻜﺎﺑﻞ ﺑﺪﺍﺧﻞ ﺍﻟﺴﻴﺎﺭﺓ ﻋﻨﺪ ﻋﺪﻡ ﺍﺳﺘﺨﺪﺍﻣﻪ .“. ﺍﺗﺒﻊ ﺍﻟﺘﻌﻠﻴﻤﺎﺕ ﻟﺘﻨﺼﻴﺐ ﺍﻟﺘﻄﺒﻴﻖPress [VIEW] to install JVC MUSIC PLAY APP” ، ﻳﺘﻢ ﻋﺮﺽAndroid * ﻋﻨﺪ ﺗﻮﺻﻴﻞ ﺟﻬﺎﺯ ﻋﻠﻰ ﺟﻬﺎﺯ ﻗﺒﻞ ﺍﻟﺘﻮﺻﻴﻞ. ﻟﻤﺰﻳﺪ ﻣﻦ ﺍﻟﻤﻌﻠﻮﻣﺎﺕ، ﻗﻢ ﺑﺰﻳﺎﺭﺓJVC MUSIC PLAY ﻛﻤﺎ ﻳﻤﻜﻦ ﺗﺮﻛﻴﺐ ﺍﺣﺪﺙ ﺍﺻﺪﺍﺭ ﻣﻦ ﺍﻟﺘﻄﺒﻴﻖ...
- Page 65 .ﺃﺩﺭ ﻗﺮﺹ ﻣﺴﺘﻮﻯ ﺍﻟﺼﻮﺕ ﻟﺘﺤﺪﻳﺪ ﺍﻹﻋﺪﺍﺩﺍﺕ، ﺛﻢ ﺍﺿﻐﻂ ﻋﻠﻰ ﺍﻟﻘﺮﺹ F/W UP xxxx :ﻟﻠﺤﺼﻮﻝ ﻋﻠﻰ ﺗﻔﺎﺻﻴﻞ ﺣﻮﻝ ﻛﻴﻔﻴﺔ ﺗﺤﺪﻳﺚ ﺍﻟﺒﺮﻧﺎﻣﺞ ﺍﻟﺜﺎﺑﺖ، ﺍﻧﻈﺮ ﺩﻗﻴﻘﺔ ﺳﺎﻋﺔ .<http://www.jvc.net/cs/car/> [، ﺛﻢ ﺍﺿﻐﻂ ﻋﻠﻰCLOCK FORMAT] ﺃﺩﺭ ﻗﺮﺹ ﻣﺴﺘﻮﻯ ﺍﻟﺼﻮﺕ ﻟﺘﺤﺪﻳﺪ .ﺍﻟﻘﺮﺹ CLOCK 42[، ﺛﻢ ﺍﺿﻐﻂ ﻋﻠﻰH] 21[ ﺃﻭH] ﺃﺩﺭ ﻗﺮﺹ ﻣﺴﺘﻮﻯ ﺍﻟﺼﻮﺕ ﻟﺘﺤﺪﻳﺪ...
- Page 66 ﺃ ﹶ ﺳﺎﺳ ﹺ ﻴ ﹼ ﺎﺕ (RM-RK52) ﻭﺣﺪﺓ ﺍﻟﺘﺤﻜﻢ ﻋﻦ ﺑﻌﺪ ﻭﺍﺟﻬﺔ ﺍﻟﺠﻬﺎﺯ ﻗﺮﺹ ﻣﺴﺘﻮﻯ ﺍﻟﺼﻮﺕ ﻓﺘﺤﺔ ﺍﻟﺘﺤﻤﻴﻞ ﺣﺴﺎﺱ ﺍﻟﺘﺤﻜﻢ ﻋﻦ ﺑﻌﺪ )ﺗﺠﻨﺐ ﺍﻟﺘﻌﺮﻳﺾ (.ﻟﻀﻮﺀ ﺍﻟﺸﻤﺲ ﺍﻟﺴﺎﻃﻊ ﻗﻢ ﺑﺴﺤﺐ ﻏﻄﺎﺀ ﻋﺎﺯﻝ ﺍﻟﻜﻬﺮﺑﺎﺀ ﻋﻨﺪ ﺍﻻﺳﺘﺨﺪﺍﻡ .ﻷﻭﻝ ﻣﺮﺓ ﻧﺎﻓﺬﺓ ﺍﻟﻌﺮﺽ ﺯﺭ ﺍﻟﻔﺼﻞ ﻛﻴﻒ...
- Page 67 ﺍﻟﻤﺤﺘﻮﻳﺎﺕ ﻗﺒﻞ ﺍﻻﺳﺘﺨﺪﺍﻡ ﻗﺒﻞ ﺍﻻﺳﺘﺨﺪﺍﻡ ﻫﺎﻡ ﺃ ﹶ ﺳﺎﺳ ﹺ ﻴ ﹼ ﺎﺕ • ﻟﻀﻤﺎﻥ ﺍﻻﺳﺘﺨﺪﻟﻢ ﺍﻟﻤﻨﺎﺳﺐ، ﻳﺮﺟﻰ ﻗﺮﺍﺀﺓ ﻫﺬﺍ ﺍﻟﺪﻟﻴﻞ ﺑﺘﻤﻌﻦ ﻗﺒﻞ ﺍﺳﺘﺨﺪﺍﻡ ﻫﺬﺍ ﺍﻟﻤﻨﺘﺞ. ﻣﻦ ﺍﻟﻤﻬﻢ ﺟﺪﺍ ﺍﻥ ﺗﻘﺮﺃ ﻭﺗﺮﺍﻗﺐ ﺍﻟﺘﺤﺬﻳﺮﺍﺕ .ﻭﺍﻟﺘﻨﺒﻴﻬﺎﺕ ﺍﻻﺣﺘﻴﺎﻃﻴﺔ ﻓﻲ ﻫﺬﺍ ﺍﻟﺪﻟﻴﻞ ﺍﻟﺸﺮﻭﻉ ﻓﻲ ﺍﻟﻌﻤﻞ .•...
- Page 68 ﻋﺮﺑﻲ ﻓﺎﺭﺳﻰ KD-R482 ﺟﻬﺎﺯ ﺭﺍﺩﻳﻮ ﻭﻣﺸﻐﻞ ﺃﺳﻄﻮﺍﻧﺎﺕ ﺩﻟﻴﻞ ﺍﻟﺘﻌﻠﻴﻤﺎﺕ ﮔﻴﺮﻧﺪﻩ ﺳﯽ ﺩی ﺭﺍﻫﻨﻤﺎی ﺍﺳﺘﻔﺎﺩﻩ © 2016 JVC KENWOOD Corporation 0816DTSMDTJEIN...