Table of Contents
Advertisement
OPERATOR'S
MANUAL
Rear Tine Tiller
6HP Rear Tine Tiller
Mfg. No.
1694161
1694908
7800052
7HP Rear Tine Tiller
Mfg. No.
1694162
1694909
7800053
Description
6016RT, 6HP Rear Tine Tiller
6016RT, 6HP Rear Tine Tiller
6016RT, 6HP Rear Tine Tiller
Description
7016RT, 7HP Rear Tine Tiller
7016RT, 7HP Rear Tine Tiller
7016RT, 7HP Rear Tine Tiller
1722732
Revision 02
Rev. Date 12/2005
TP 100-2627-02-RT-SMA
OM7016 RT / OM6016RT
Advertisement
Table of Contents

Related Manuals for Snapper 6HP


Summary of Contents for Snapper 6HP
- Page 1 OPERATOR’S MANUAL Rear Tine Tiller 6HP Rear Tine Tiller Mfg. No. Description 1694161 6016RT, 6HP Rear Tine Tiller 1694908 6016RT, 6HP Rear Tine Tiller 7800052 6016RT, 6HP Rear Tine Tiller 7HP Rear Tine Tiller Mfg. No. Description 1694162 7016RT, 7HP Rear Tine Tiller...
-
Page 3: Table Of Contents
MODEL IDENTIFICATION ... 1 SAFETY RULES ... 2 Owner's Responsibility ... 2 General ... 2 Preparation ... 2 Operation ... 3 Maintenance & Storage ... 3 Safety Decals ... 4 FEATURES ... 5 CONTROLS ... 6 Drive Safety Control Levers ... 6 Reverse Handle ... -
Page 4: Safety Rules
Learn how the drive safety control levers work and how to control the tiller at all times. • Never allow children to operate the tiller. Keep small children away from the area being tilled. Do not allow adults to operate the tiller without proper instruction. -
Page 5: Operation
• If vegetation clogs the tines, raise the handlebars to elevate the tines, and run the tiller in reverse . If this does not clean clogged vegetation from the tines, STOP THE ENGINE AND DISCONNECT THE SPARK PLUG WIRE before removing vegetation by hand. -
Page 6: Safety Decals
Should any of these labels become unreadable because of being worn, faded, or otherwise damaged during the use of your tiller, please use the part number information provided to order a replacement label from your local authorized dealer. -
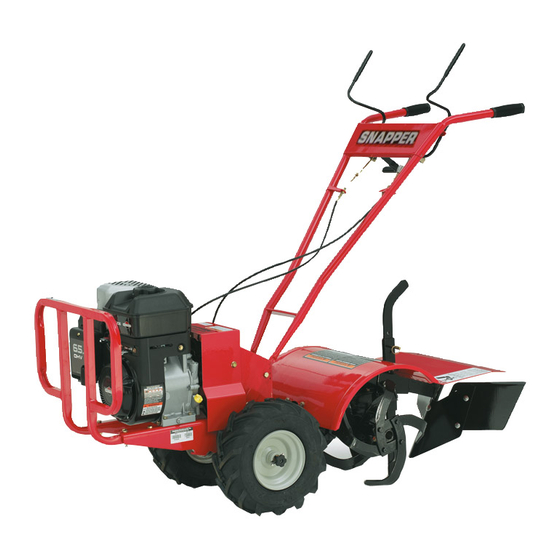
Page 7: Features
MODEL 7016RT* Drive Safety Control Lever Reverse Handle Reverse Belt Tension Adjustment Engine Controls Bumper Guard (Standard on Model 7016RT) Serial No. Plate * Hiller-Furrower Attachment is standard on Model 7016RT Page 5 Features 1722551 - Simplicity Logo Decal 1723522 - 7016 RT Decal 1723523 - 6016 RT Decal Console Forward Belt Tension... -
Page 8: Controls
Pulling down on drive safety control levers engages the wheels and tines. Releasing drive safety control levers disengages the wheels and brings the tiller to a complete stop. It is now in the neutral position. Drive Safety Control... -
Page 9: Engine Controls
These two operating controls, the Choke and the Throttle, are conveniently located on the tiller engine where they can be easily adjusted to start and run the unit under a variety of operating conditions. -
Page 10: Adjustments
Wheel lockout in tilling position. (hub & axle slot) NOTE: Always have both wheel lockouts in or out. Do not operate tiller with only one wheel locked. To place wheels in free-wheel position. 1. Pull knob in center of wheel out, away from machine. -
Page 11: Handlebar Adjustments
HANDLEBAR ADJUSTMENTS Height Adjustment The ideal height of the handlebar varies with operator height and the depth of tilling. To adjust handlebar height: 1. Remove bolt from lower crossbar of handlebar and pivot handlebar height adjuster. 2. Align handlebar to desired hole on the height adjuster. -
Page 12: Depth Regulator Lever
Adjustments DEPTH REGULATOR LEVER Tilling depth is controlled by the height of the depth regualtor lever. To adjust tilling depth. 1. Remove detent pin. 2. Raise the depth regulator lever to position tines at chosen tilling depth. 3. Align hole in depth regulator lever with hole in depth regulator bracket and replace detent pin. -
Page 13: Operation
6. Check position of wheels and wheel lockouts. 7. Check depth regulator lever position. CAUTION Please do not start your tiller until you have read the Manual that came with your engine, and the sections in this manual titled Controls, Adjustments and Safety. -
Page 14: Shutting Down
Raising depth regulator lever too high can result in loss of control of tiller! 2. Move the throttle control to fast . 3. Place the tiller in forward by pushing down on the drive safety control levers--this will engage the wheels and tines. -
Page 15: Tips
Reset for deeper depths with successive passes. If tiller jumps or skids uncontrollably, lower the drag stake by placing the detent pin in a higher hole. This will allow for shallower tilling. Hold firmly to the handlebars to control sudden lurches. -
Page 16: Normal Care
Your rototiller has been designed and produced by the industry's leading manufacturer of outdoor power equipment to provide you with years of reliable operation. Keeping your tiller in top running condition will prolong its life, and help you obtain optimum performance whenever you wish to till your garden. -
Page 17: Servicing The Rototiller
SERVICING THE ROTOTILLER General The following information will help you make the necessary checks and perform the procedures required to follow the normal care recommendations made for your rototiller unit. If you prefer, your local authorized dealer can make these checks and perform the required procedures for you. - Page 18 Normal Care Change Forward/Reverse Belt 1. Turn off engine. Engine must be cool. 2. Remove spark plug wire and secure from spark plug. 3. Remove belt guard. remove the forward belt from the forward engine pulley: - gently pull the engine recoil rope to rotate the pulley.
- Page 19 CAUTION Do not operate tiller before reading the engine manual provided in the parts packet. WARNING Temperature of muffler and near by areas may exceed 150 F. Avoid these areas. Engine can overheat and become damaged if debris blocks the cooling system or rotating screen.
- Page 20 1. Turn off engine. Engine must be cool. 2. Remove spark plug wire and secure from spark plug. 3. Tip the tiller forward. Block the tiller in position so that it rests on the engine mount and the tines are exposed.
-
Page 21: Storage
PREPARE FOR STORAGE Follow the steps below to prepare your tiller for storage. Read your engine manual for detailed instructions on preparing the engine for storage. 1. Protect wheels and axles from rust: - Loosen locking bolt inside wheel. Slide wheel toward machine. -
Page 22: Troubleshooting And Repair
Engine will not stop when throttle control is positioned at stop Tiller moves forward during starting Tiller is difficult to control when tilling (machine jumps or lurches forward) Tines turn, wheels do not turn Tines turn, wheels turn, tiller does not move WARNING Practice safety at all times. - Page 23 PROBLEM Belts squeal in neutral and/or reverse Belts squeal in forward operation Excessive heat build up in transmission/tine area during tilling Troubleshooting and Repair REMEDY/ACTION • Adjust forward belt guide: - turn engine off and allow muffler to cool - disconnect spark plug wire and secure from spark plug - remove belt guard - pull down on drive safety control levers - manually bend forward belt guide so there is 1/16 inch...
-
Page 24: Specifications
Specifications FEATURES ) 7-HP Briggs & Stratton Engine (7016RT) ) 6-HP Briggs & Stratton Engine (6016RT) ) Tractor Type Pneumatic Tires ) All Gear Drive Transmission ) Handlebar Height Adjustment ) Forward/Reverse Control ) Functional Depth Regulator System ) Wheel Lockout Control (7016RT) ) Wheel Lockpins (6016RT) ) Drive Safety Control Levers ) Self Cleaning Bolo Tines (7016RT) - Page 26 M A N U F A C T U R I N G , I N C . 500 N Spring Street / PO Box 997 Port Washington, WI 53074-0997 www.SimplicityMfg.com Snapper Inc. 535 Macon Street McDonough, GA 30253 www.snapper.com ©...