Table of Contents
Advertisement
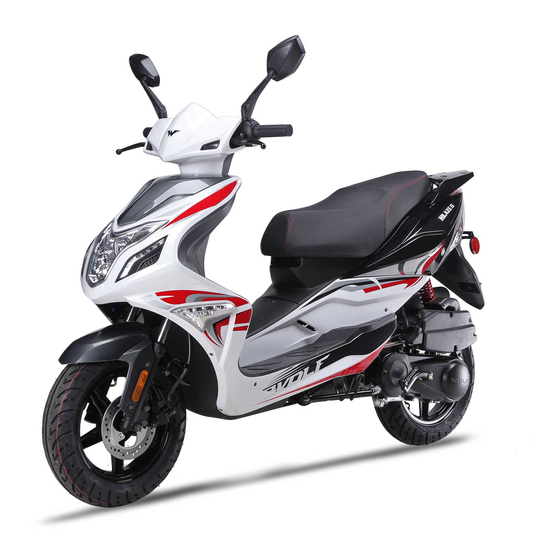
WOLF BRAND SCOOTERS
Blaze and Blaze II Models
Precautions .................................................................................... 1
Vehicle Identification Number and Engine Number ..................... 2
Brief Introduction to your vehicle ................................................. 3
Technical Specifications ............................................................... 6
Instrument cluster ........................................................................ 10
Left control switches ................................................................. 11
Right control switches ................................................................. 12
Ignition switch ............................................................................ 13
Seat storage lock and Fuel tank .................................................. 14
Vehicle Operation ...................................................................... 16
Environmental protection device ................................................ 17
Vehicle Load ............................................................................... 18
Tool kit (included) ....................................................................... 18
Operating Instructions
Basic vehicle checks and maintenance levels ............................. 19
Kick starting the engine .............................................................. 23
Electric starting the engine .......................................................... 24
....................................................................... 25
Service and Maintenance
Regular Service and Maintenance .............................................. 26
Requirements on Service and Maintenance ................................ 26
USER'S MANUAL
Service and Maintenance during break-in Period ....................... 27
Precautions you should take during the break-in period ............. 27
Contents of Level 1 Service and Maintenance ............................ 28
Contents of Level 2 Service and Maintenance ............................ 28
Contents of Level 3 Service and Maintenance ............................ 28
Service and Maintenance of the Carburetor ................................ 29
Checking and changing the engine oil ........................................ 30
Service and Maintenance of the Spark Plug ................................ 31
Service and Maintenance of the Air Filter ................................... 32
Adjusting the throttle ................................................................... 33
Service and Maintenance of the Front Brake .............................. 34
Service and Maintenance of the Rear Brake ............................... 35
Checking the brake light switches ............................................... 36
Adjusting the idle speed .............................................................. 36
Service and Maintenance of the Front and Rear Tires ................ 37
..................................................................................................... 39
Service and Maintenance of the battery ...................................... 40
Service and Maintenance of the fuse ........................................... 41
Service and Maintenance of the horn .......................................... 41
Storage of the vehicle .................................................................. 42
Service and Maintenance Interval Table ..................................... 43
Common Faults and Troubleshooting............................................. 45
Schematic Wiring Diagram ............................................................. 49
Instructions to Users
Advertisement
Table of Contents

Related Manuals for Wolf Blaze

Summary of Contents for Wolf Blaze
-
Page 1: Table Of Contents
Instructions to Users Instructions to Users Service and Maintenance during break-in Period ....... 27 Blaze and Blaze II Models Precautions ..................1 Precautions you should take during the break-in period ..... 27 Vehicle Identification Number and Engine Number ..... 2 Contents of Level 1 Service and Maintenance ...... - Page 3 Please observe all traffic laws and regulations. All users must have a valid driver’s license. Operating a vehicle with a 150cc sized engine (the Blaze II) may require extra licensing endorsements. Please check your local motor vehicle laws to be sure.
-
Page 4: Instructions To Users Precautions
Instructions to Users USER’S MANUAL Vehicle Identification Number (VIN) and Engine Number The Vehicle Identification Number (VIN), Engine Number and Quality Certificate, are used to obtain the registration and license plate for your new vehicle. The product nameplate is riveted on Vehicle Identification Number (VIN) is The Engine Number is printed on the the right lower part of the frame. -
Page 5: Brief Introduction To Your Vehicle
USER’S MANUAL Instructions to Users A Brief Introduction to the vehicle Headlight Left front turn signal Seat cushion and storage Rear luggage carrier Disc brake Side stand Center stand Kick Start Air filter assembly... - Page 6 Instructions to Users USER’S MANUAL Tail light/ Brake light Helmet hook Right front turn signal Muffler Battery Front brake lever...
- Page 7 USER’S MANUAL Instructions to Users Rearview mirrors Left grip Left switch assembly Instrument cluster Ignition Right switch assembly Throttle grip...
-
Page 8: Technical Specifications
Instructions to Users USER’S MANUAL Technical Specifications Blaze (49cc) - Page 9 USER’S MANUAL Instructions to Users Technical Specifications Blaze (49cc)
- Page 10 Instructions to Users USER’S MANUAL Technical Specifications Blaze II (150cc)
- Page 11 USER’S MANUAL Instructions to Users Technical Specifications Blaze II (150cc)
-
Page 12: Instrument Cluster
Instructions to Users USER’S MANUAL Instrument cluster Left turn indicator lamp: When the turning indicator lamp “ ” flashes, it indicates that the “left turn signal” is on. High beam indicator lamp: When the blue high beam indicator lamp “ ”... -
Page 13: Left Control Switches
USER’S MANUAL Instructions to Users Left switch assembly High beam headlamp switch: To use the “High beam lamp”, turn the switch to the upper “ ”. position Low beam headlamp switch: To use the “Low beam lamp”, turn the switch to the lower “ ”. -
Page 14: Right Control Switches
Instructions to Users USER’S MANUAL Right switch assembly Electric start button: This is pressed when you want to start the vehicle. Press the yellow “ ” button while holding in brake levers. Throttle grip: When the engine is on, twist to accelerate. The Cut Off or Run /Stop Switch: Electrical power for the engine is turned on when the switch is set to The position marked “... -
Page 15: Ignition Switch
USER’S MANUAL Instructions to Users Ignition 1) Ignition On: 2) Ignition Off: 3) Steering lock: Insert the key and turn the ignition When stopped, turn the handle bars Turn the ignition lock to “ ” to turn the all the way to the left, push the key lock to “... -
Page 16: Seat Storage Lock And Fuel Tank
Instructions to Users USER’S MANUAL Seat Storage lock Fuel tank Opening the fuel tank: Twist cap counter clockwise 90 degrees and remove. Seat: Insert the ignition lock key into the seat lock and Closing the fuel tank: Insert the fuel cap in the fuel turn it clockwise to open the seat cushion. - Page 17 USER’S MANUAL Instructions to Users Fuel filter: This is positioned in the main fuel line; the Bolt on Fuel valve or “switch”, this valve is opened by the fuel passes through here between the fuel tank and the vacuum pressure produced by the engine, it allows fuel to carburetor to ensure clean fuel is entering the carburetor.
-
Page 18: Vehicle Operation
All Wolf Brand Scooters use the dry, centrifugal clutch and belt driven CVT (Continuously Variable Transmission). If there is an issue with the clutch, belt or variator, take your vehicle to an authorized Wolf Brand Scooter dealership for service. Front brake: This is the right lever when you’re Rear brake: This is the left lever when you’re... -
Page 19: Environmental Protection Device
USER’S MANUAL Instructions to Users Environmental protection device Emission Standards of Motorcycles (Stage III , under the running mode) Unit: g/km The environmental protection device is mainly a two-in-one air compensating valve (air pump) combining a one-way leaf valve Emitted pollutants Two-wheel vehicle and a secondary air control valve. -
Page 20: Vehicle Load
Instructions to Users USER’S MANUAL Vehicle Load Tool kit (Included) The vehicles maximum load of 330 lbs. must be strictly Common service and maintenance tools are delivered together with the vehicle. observed. Otherwise, the safety and stability of the vehicle may be compromised. -
Page 21: Basic Vehicle Checks And Maintenance Levels
There are regular checks that you should do on your vehicle on a regular basis to ensure that the vehicle is always safe to use and to **ALL WORK SHOULD BE DONE AT AN AUTHORIZED WOLF keep it in good condition. Keeping it in good condition will also help DEALERSHIP TO ENSURE THE WARRANTY DOES NOT GET in maintaining the vehicles optimal performance. - Page 22 USER’S MANUAL Ensure you have enough gas for your trip Check your steering by moving from left to and ensure the gas cap is secured properly. right. The handlebar should move easily and smoothly with no play or binding. Place the vehicle on the main stand and check the oil Check that the throttle grip rotates smoothly level.
- Page 23 USER’S MANUAL Check the pressure of the front tire. Set it to between 32 and 40 Check for any fluid leaks under the P.S.I. Check for abnormal wear on the tire tread and side walls. engine. Check air pressure when tires are cold Check the terminals on the battery to Check the pressure of the rear tire.
- Page 24 USER’S MANUAL The throttle grip should have a slight amount of free Check that the head light, turn signals and play in it. About 10-20 mm (0.393-0.787 inch) indictor lamps work properly. Check that the rear brake lever has the correct Check that the tail light and brake lights amount of free play in it.
-
Page 25: Kick Starting The Engine
USER’S MANUAL Operating Instructions Using the kick starter 1)Turn the ignition on. 3) Pull out the foot lever, place your foot on it and push firmly and quickly all the way down. Let the arm return to its horizontal position before you try to kick start it again. Repeat this motion. 2) The vehicle should be put on the main stand and you need to hold the brake levers to allow the engine to start. -
Page 26: Electric Starting The Engine
Operating Instructions USER’S MANUAL Using the Electric Starter The duration of each electric startup attempt should not exceed 5 seconds, and the interval between attempts should never be less than 10 seconds. If 3 startup attempts fail consecutively, the vehicle must be checked. First, insert the key into the ignition switch lock, and turn it to the “... -
Page 27: Parking The Vehicle
USER’S MANUAL Operating Instructions Parking the vehicle When you need to park the vehicle, you have 2 different methods to support it, the side stand, or the main stand. To lock the steering column, turn the You should turn your engine off before using either of these stands. handlebars all the way to the left, push Using the side stand: the key inwards and turn the ignition to... -
Page 28: Regular Service And Maintenance
Common Faults and Troubleshooting USER’S MANUAL Regular Service and Maintenance Throughout the life of the vehicle, usage will inevitably cause All mechanical parts should be lubricated. wear of its mechanical parts. Regular maintenance will prolong The cable connections to the battery terminals should be the life of the vehicle. -
Page 29: Service And Maintenance During Break-In Period
Common Faults and Troubleshooting USER’S MANUAL Precautions you should follow during the break-in period of a Contents of Level 1 Service and Maintenance new vehicle Level 1 Service and Maintenance should be performed every Within the break-in period, replace the oil every 300 miles, and 500~1000 miles. -
Page 30: Contents Of Level 1 Service And Maintenance
Common Faults and Troubleshooting USER’S MANUAL Contents of Level 2 Service and Maintenance Contents of Level 3 Service and Maintenance Level 2 Service and Maintenance should be performed every Level 3 Service and Maintenance should be performed every 2000~4000 miles: 5000~8000 miles. -
Page 31: Service And Maintenance Of The Carburetor
Common Faults and Troubleshooting USER’S MANUAL Service and Maintenance for the Carburetor Start and drive your vehicle often. Gasoline left sitting for a long For maximum performance and reliability, it is important the period of time will start to break down, becoming “stale”. The carburetor is adjusted properly. -
Page 32: Checking And Changing The Engine Oil
Common Faults and Troubleshooting USER’S MANUAL Check and Replacement of Lubricating Oil Caution With the vehicle on the center kick stand, Checking and Replacing Engine Oil unscrew the oil dipstick and wipe clean To ensure an accurate reading when checking the engine oil, place the vehicle on the with a rag. -
Page 33: Service And Maintenance Of The Spark Plug
Common Faults and Troubleshooting USER’S MANUAL Service and Maintenance of the Spark Plug Remove the spark plug from the engine. If the color of the insulator skirt of the spark plug is brown it indicates that the carburetor is adjusted properly. Any signs of buildup on the plug should be noted as this could be a sign of an incorrect carburetor adjustment. -
Page 34: Service And Maintenance Of The Air Filter
Paper based filters are a disposable item and just need to be results in an increased resistance to air flow through the air intake replaced. You can find them at your Wolf Brand dealership system. This leads to an overly rich fuel/air mixture that can reduce Foam or cloth filter elements can be cleaned and reused power and increase fuel consumption. -
Page 35: Adjusting The Throttle
Common Faults and Troubleshooting USER’S MANUAL Adjustment of the throttle grip Service and Maintenance for the Front Brake Check whether the free travel of the throttle is within the specified Most models use a front disc brake, which features high heat range and adjust it if necessary. -
Page 36: Service And Maintenance Of The Front Brake
Common Faults and Troubleshooting USER’S MANUAL Service and Maintenance for the Front Brake Disc brake Check the travel of the brake lever when applied. Excessive Check for the wear on the front disc rotor. Any signs of warping travel could indicate worn pads or air in the brake fluid. Either of or irregularities in the surface of the brake rotor can cause vibration, which need to be addressed prior to riding. -
Page 37: Service And Maintenance Of The Rear Brake
Common Faults and Troubleshooting USER’S MANUAL Service and Maintenance for the Rear Brake Adjustment of the rear drum brake: When applying the rear brake, ensure the wheel stops First, use the main stand to prop up the rear wheel of the vehicle spinning within the recommend free travel. -
Page 38: Checking The Brake Light Switches
Common Faults and Troubleshooting USER’S MANUAL Adjustment of the rear braking light Adjustment of the idle speed It is important to always check the vehicle lights and make sure If the vehicle stalls out during normal operation due to the engine they are properly functioning prior to using the vehicle. -
Page 39: Service And Maintenance Of The Front And Rear Tires
Common Faults and Troubleshooting USER’S MANUAL Service and Maintenance for Front and Rear Tires Removal and Installation of Front Wheel Prior to riding always inspect the tires. Make sure the front and rear With the engine off, place the vehicle on the center kickstand. tire are filled to their recommended pressure. - Page 40 Common Faults and Troubleshooting USER’S MANUAL Removal and Replacement of the Rear Wheel If the tread depth in the middle of the tire reaches the following limits the tire must be replaced immediately. Turn the engine off. 2.0mm (0.079”) Minimum limit of Front wheel Place vehicle on center stand and remove muffler.
-
Page 41: Service And Maintenance Of The Environmental Protection Device
Common Faults and Troubleshooting USER’S MANUAL Service and Maintenance for the Environmental Protection Device Vehicle operators must conduct regular service and maintenance of the environmental protection system to ensure the best performance of the assembly. With proper and regular service and maintenance, we can promptly eliminate faults, prolong the service life of the environmental protection system, reduce the maintenance costs, and realize the goal of being environmental-friendly by reducing your vehicles fuel consumption. -
Page 42: Service And Maintenance Of The Battery
Common Faults and Troubleshooting USER’S MANUAL Service and Maintenance for the battery In this model, the battery is mounted under the floor mat. For the first 500 to 1000 miles of the vehicle, the battery should be serviced and maintained as follows: Keep the battery poles clean of corrosion. -
Page 43: Service And Maintenance Of The Fuse
If you do not get a read from the multi-meter on the horn circuit, you should have the vehicle checked out by your local WOLF Brand Scooter Dealer. -
Page 44: Storage Of The Vehicle
Common Faults and Troubleshooting USER’S MANUAL Storage of the Vehicle Inflate the front and rear tire to the correct P.S.I. For vehicles that will needs to be parked for more than one month, the Cover the vehicle, and park it in a well-ventilated, dark dry, following steps should be taken: clean, place, far away from any hazardous substances such as flammable material or corrosive chemicals. -
Page 45: Service And Maintenance Interval Table
Items marked ※ Air filter ※ can only be Spark plug gap serviced and ※※ Valve lash maintained by Engine oil authorized Wolf Oil filter screen Brand Scooter ※※ Timing chain service center. Carburetor idling When driving in an ※※... -
Page 46: Service And Maintenance Interval Table For Lubricated Parts
Common Faults and Troubleshooting USER’S MANUAL Service and Maintenance Interval Table for Lubricated Parts Odometer reading Name Type 1000 2000 4000 8500 10500 15000 20000 SAE 15W-40 (5W-40 Engine oil if synthetic) Multipurpose Brake Cables lithium-based lubricating grease Brake fluid DOT3 or DOT4 Lubricating oil for Lubricating grease... -
Page 47: Common Faults And Troubleshooting
Common Faults and Troubleshooting USER’S MANUAL Trouble shooting common faults Fault system Fault Causes Troubleshooting Fuel not entering the carburetor. Check the fuel lines. The fuel is not flowing from the tank. Clean the tank and replace fuel shut off valve. Engine won’t start The vacuum lines are pinched or leak. - Page 48 Common Faults and Troubleshooting USER’S MANUAL Fault system Fault Causes Troubleshooting Too much carbon is built up at the secondary Clean the carbon buildup at the secondary air air intake port. intake port. Emitted pollutants The air pump is blocked or damaged. Replace the air pump.
- Page 49 Common Faults and Troubleshooting USER’S MANUAL Fault system Fault Causes Troubleshooting Compression ratio is There is carbon buildup in the combustion Clean the carbon buildup in the combustion too high. chamber and on the top of the piston. chamber and on the top of the piston. The valves are not adjusted properly.
- Page 50 Common Faults and Troubleshooting USER’S MANUAL Fault system Fault Causes Troubleshooting The rear wheel is damaged. Replace the rear wheel. The rear wheel vibrates Rear Wheel The tire pressure is too low. Increase the tire pressure. The rear wheel nut is loose. Tighten the rear wheel nut to specs.
-
Page 51: Schematic Wiring Diagram
Common Faults and Troubleshooting USER’S MANUAL...