Table of Contents
Advertisement
MODEL DESIGNATION
DRIVE SYSTEM TYPE
ENGINE HORSE POWER
CUTTING WIDTH
Y – Yard Cruiser
Z – Zero Turning Radius
Thank you for buying a SNAPPER Product! Before operating your YARD CRUISER, read this manual carefully
and pay particular attention to the "IMPORTANT SAFETY INSTRUCTIONS" on Pages 2 & 3. Remember that all
power equipment can be dangerous if used improperly. Also keep in mind that SAFETY requires careful use in
accordance with the operating instructions and common sense!
COPYRIGHT © 2002
SNAPPER INC.
ALL RIGHTS RESERVED
Safety Instructions & Operator's Manual for
MODEL NUMBER EXPLANATION
Y
Z
16
16 – 16 HP Engine
42 - 42" Cutting Deck
20 – 20 HP Engine
48 - 48" Cutting Deck
YARD CRUISER
42
4
B
4 - Series Designation
HYDRO DRIVE
SERIES 4
MODELS
YZ16424BVE
YZ20484BVE
V
E
ENGINE OPTIONS
ENGINE MODEL
SERIES DESIGNATION
B - Briggs Engine
MANUAL No. 6-3260 (REV. 1, 6/28/02)
ENGINE TYPE
V – Over Head Valve
E - Electric Start
Advertisement
Table of Contents

Related Manuals for Snapper YARD CRUISER YZ16424BVE


Summary of Contents for Snapper YARD CRUISER YZ16424BVE
-
Page 1: Hydro Drive
Z – Zero Turning Radius 20 – 20 HP Engine Thank you for buying a SNAPPER Product! Before operating your YARD CRUISER, read this manual carefully and pay particular attention to the “IMPORTANT SAFETY INSTRUCTIONS” on Pages 2 & 3. Remember that all power equipment can be dangerous if used improperly. -
Page 2: Important Safety Instructions
If you have any questions pertaining to your machine which your dealer cannot answer to your satisfaction, call or write the Customer Service Department at SNAPPER, McDonough, Georgia 30253. Phone: (1-800-935-2967). -
Page 3: Important Safety Instructions
13. DO NOT test for spark by grounding spark plug next to spark plug hole; spark plug could ignite gas exiting engine. 14. Have machine serviced by an authorized SNAPPER dealer at least once a year and have the dealer install any new safety devices. -
Page 4: Table Of Contents
TABLE OF CONTENTS IMPORTANT SAFETY INSTRUCTIONS...2-3 TABLE OF CONTENTS...4 SECTION 1 - FAMILIARIZATION ...5 SECTION 2 - OPERATING INSTRUCTIONS...6-9 Pre-start Checklist ...6-7 Rolling Machine w/o Engine Running ...6 Starting & Stopping Engine, Propelling Mower ...7-8 Starting & Stopping Mower Blades ...8 Starting &... -
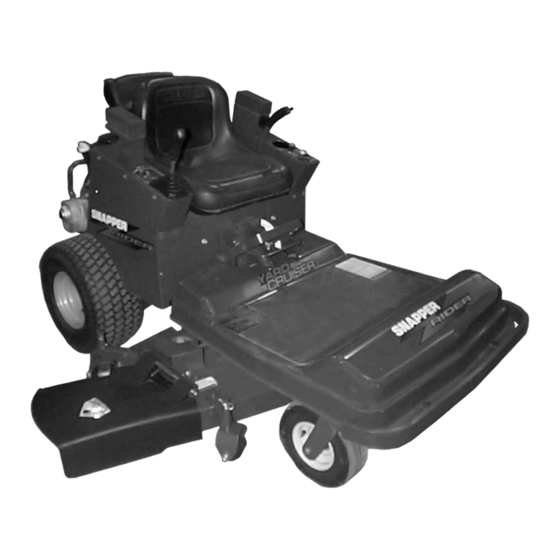
Page 5: Section 1 - Familiarization
Contact your Snapper dealer if you have questions FIGURE 1.1 1.2 NOMENCLATURE The nomenclature drawing above, Figure 1.1, shows the essential parts of the SNAPPER YARD CRUISER. It is recommended that all operators of this equipment become thoroughly familiar components, and operation of this machine before operating. -
Page 6: Section 2 - Operating Instructions
Section 2 - OPERATING INSTRUCTIONS 2.1 PRE-START CHECK LIST Make the following checks and perform the service required before each start-up. 2.1.1. Check tires and add or release air as needed to bring pressure to 12 P.S.I. in front and 12 P.S.I. in rear tires. -
Page 7: Starting & Stopping Engine, Propelling Mower
Section 2 - OPERATING INSTRUCTIONS IMPORTANT: This YARD CRUISER is equipped with hydrostatic drive. forward, steering movement of the machine is controlled by a joystick lever. Joystick operations performed only from the operator’s position in the seat. A small movement of the joystick can cause the machine to move instantly. -
Page 8: Starting & Stopping Mower Blades
Blades must stop rotating in 5 seconds or less after blades have been turned off. DO NOT operate machine until blade brake has been repaired and functioning properly. Contact your SNAPPER dealer for assistance. 2.3.4. PARKING BRAKE 1. Manually position joystick in the neutral position. -
Page 9: Cutting Height Adjustment
Section 2 - OPERATING INSTRUCTIONS 2.3.5. CUTTING HEIGHT ADJUSTMENT This machine has seven different cutting height positions. IMPORTANT: When positioning the cutting deck into a higher cutting position, pull up on the deck lift handle only, it is not necessary to pull up on the release lever at the same time. -
Page 10: Section 3 - Maintenance Instructions
To retain the quality of the YARD CRUISER, use genuine SNAPPER replacement parts only. Contact a local SNAPPER dealer for parts and service assistance. For the correct part or information for a particular mower, always mention the model and serial number. -
Page 11: Check Mower Drive Belt
Section 3 - MAINTENANCE 3.2.4. CHECK MOWER DRIVE BELT 1. Footrest Removal a. Pull deck lift handle to highest cutting position. See Figure 3.3. b. Remove the knobs that secure the corners of the footrest. c. Remove footrest. DECK LIFT HANDLE RELEASE LEVER... -
Page 12: Check Mower Components
Section 3 - MAINTENANCE 3.3 SERVICE EVERY 25 OPERATING HOURS 3.3.1. ENGINE 5. Air Filter c. Reinstall air cleaner cover. Insert tabs located on the engine cover into corresponding slots in air cleaner cover. IMPORTANT: The yellow tabs must be completely inserted into air cleaner cover or the compartment will not be completely sealed to prevent debris from entering into the carburetor. -
Page 13: Mower Deck Linkage - Lubrication
Section 3 - MAINTENANCE WARNING DO NOT attempt any adjustments, maintenance or service with the engine or blade running. STOP blade. STOP engine. Set brake. Remove key. Remove spark plug wire from spark plug and secure wire away from spark plug. Engine and components can be extremely hot. -
Page 14: Service - Annually
If there is any problem: leakage, malfunction or etc. return the Yard Cruiser immediately to the nearest authorized Snapper dealer for service. 3.4.6. Fuel Filter Service fuel filter as instructed below. Turn key to “OFF”... -
Page 15: Section 4 - Adjustments And Repair
However, if there is difficulty in achieving these adjustments and repairs, it is recommended that these repairs be made by an authorized SNAPPER dealer. 4.2.1. MOWER DRIVE BELT ADJUSTMENT The 42” and 48”mower deck drive belts do not require any adjustment. -
Page 16: Blade Brake
5 seconds or less. If the electric clutch fails to stop the blade(s) rotation in 5 seconds, contact an authorized SNAPPER dealer to repair or replace. Blades must stop rotating in 5 seconds or less after blades have been turned off. -
Page 17: Mower Deck Adjustment (Levelness - Side To Side 48" Deck)
The mower deck timing rod is preadjusted at the factory. It is set to maintain the deck in the same attitude through all heights of cut. If the timing rod requires adjustment, contact an authorized SNAPPER dealer for service. PIVOT ROD... -
Page 18: Mower Deck Adjustment (Side To Side, 42" & 48" Decks)
Section 4 - ADJUSTMENTS & REPAIR WARNING DO NOT attempt any adjustments, maintenance or service with the engine or blade running. STOP blade. STOP engine. Set brake. Remove key. Remove spark plug wire from spark plug and secure wire away from spark plug. Engine and components can be extremely hot. -
Page 19: Mower Deck Adjustment (Front To Rear Pitch, 42" Decks)
The mower deck timing rod is preadjusted at the factory. It is set to maintain the deck in the same attitude through all heights of cut. If the timing rod requires adjustment, contact an authorized SNAPPER dealer for service. See Figure 4.9. ADJUSTING 4.2.11. -
Page 20: Mower Blade Wear Limits
Section 4 - ADJUSTMENTS & REPAIR WARNING DO NOT attempt any adjustments, maintenance or service with the engine or blade running. STOP blade. STOP engine. Set brake. Remove key. Remove spark plug wire from spark plug and secure wire away from spark plug. Engine and components can be extremely hot. -
Page 21: Battery Removal
Section 4 - ADJUSTMENTS & REPAIR WARNING DO NOT attempt any adjustments, maintenance or service with the engine or blade running. STOP blade. STOP engine. Set brake. Remove key. Remove spark plug wire from spark plug and secure wire away from spark plug. Engine and components can be extremely hot. -
Page 22: Battery Testing
Section 4 - ADJUSTMENTS & REPAIR WARNING The electrolyte (acid) produces a highly explosive gas. Keep all sparks, flame and fire away from area when charging battery or when handling electrolyte or battery. Electrolyte (acid) is a highly corrosive liquid. Wear eye protection. -
Page 23: Troubleshooting
CORRECTIVE ACTION 1. Service battery. 2. Replace fuse. 3. Clean and check connections for good contact. 4. Contact authorized SNAPPER dealer. 5. Move blade engagement switch to “OFF”. 6. Engage park brake. 7. Contact authorized SNAPPER dealer. 8. Replace engine starter. -
Page 24: Maintenance/Replacement Parts
CORRECTIVE ACTION 1. Place joystick in desired speed position. 2. Move roll release lever to the engaged position. 3. Contact authorized SNAPPER dealer. 4. Move parking brake to disengaged position. 5. Replace traction drive belt. 1. Move blade switch to the “ON” position. -
Page 25: Service Schedule
ITEM SERVICE PERFORMED Engine Oil Check Oil Level Initial Oil Change Periodic Oil Change Initial Oil Change Oil Filter Periodic Oil Change Air Pre-Cleaner Clean Sponge Element Clean or Replace Air Cleaner Replace Spark Plug Replace Fuel Filter Engine Cooling Clean Shroud &... -
Page 26: Warranty
For three (3) years from purchase date for the original purchaser's residential, non-commercial use, SNAPPER, through any authorized SNAPPER dealer will replace, free of charge (except for taxes where applicable), any part or parts found upon examination by the factory at McDonough, Georgia, to be defective in material or workmanship or both. -
Page 27: Primary Maintenance
PRIMARY MAINTENANCE... - Page 28 PRIMARY MAINTENANCE...
- Page 29 PRIMARY MAINTENANCE...
- Page 30 PRIMARY MAINTENANCE...
-
Page 31: Product Registration Form
Date of Purchase ___________________________________________________________ Retailer ___________________________________________________________________ Retailer’s Phone Number____________________________________________________ It is very important that you register your purchase with Snapper to ensure warranty coverage. Please mail your product registration card to: Snapper at P.O. Box 777, McDonough, Georgia 30253. Or you may register on line at www.snapper.com. - Page 32 HYDRO DRIVE SERIES 4 Snapper products are built using engines that meet or exceed all applicable emissions requirements on the date manufactured. The labels on those engines contain very important emissions information and critical safety warnings. Read, Understand, and Follow all warnings and instructions in this manual, the engine manual, and on the machine, engine and attachments.