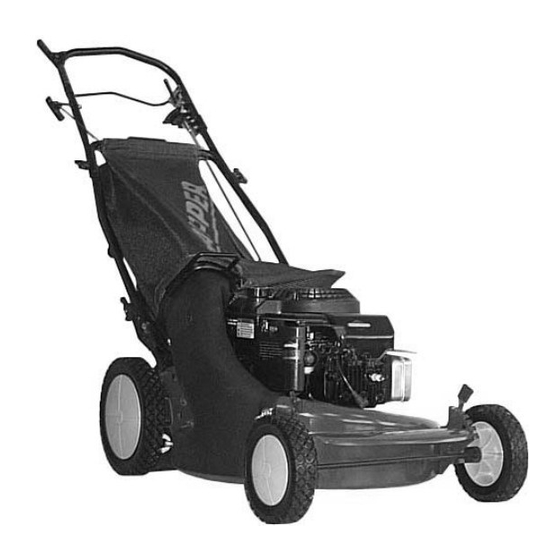
Snapper 216517B, P216517B, P217017BV, P217017BVE, P215517HC Operator's Manual
21” steel deck walk mowers series 17
Hide thumbs
Also See for 216517B, P216517B, P217017BV, P217017BVE, P215517HC:
- Parts manual (56 pages)
Table of Contents
Advertisement
SELF-PROPELLED
CUTTING WIDTH
ENGINE HORSE POWER
W – Model Designation
21 – 21" Cutting Width
55 – 5.5 HP (Engine Horse Power)
70 – 7.0 HP (Engine Horse Power)
Thank you for buying a SNAPPER Product! Before operating your Walk Behind, read this manual carefully and pay
particular attention to the "IMPORTANT SAFETY INSTRUCTIONS" on Pages 2 & 3. Remember that all power
equipment can be dangerous if used improperly. Also keep in mind that SAFETY requires careful use in accordance
with the operating instructions and common sense.
COPYRIGHT © 2003
SNAPPER PRODUCTS INC.
ALL RIGHTS RESERVED
Safety Instructions & Operator's Manual for
MODEL NUMBER EXPLANATION
P
21
P – Self Propelled Model
65 – 6.5 HP (Engine Horse
Power)
21" STEEL DECK
WALK MOWERS
70
17
B
17 - Series Designation
B – Briggs & Stratton
V – Overhead Valve
E – Electric Start
SERIES 17
MODELS
216517B
P216517B
P217017BV
P217017BVE
P215517HC
V
E
ENGINE DESIGNATION
SERIES DESIGNATION
H – Honda Engine
C –Overhead Cam
MANUAL No. 7-5508 (I.R. 4/22/03)
ENGINE OPTION
Advertisement
Table of Contents

Related Manuals for Snapper 216517B, P216517B, P217017BV, P217017BVE, P215517HC


Summary of Contents for Snapper 216517B, P216517B, P217017BV, P217017BVE, P215517HC
- Page 1 70 – 7.0 HP (Engine Horse Power) Thank you for buying a SNAPPER Product! Before operating your Walk Behind, read this manual carefully and pay particular attention to the “IMPORTANT SAFETY INSTRUCTIONS” on Pages 2 & 3. Remember that all power equipment can be dangerous if used improperly.
-
Page 2: Important Safety Instructions
If you have any questions pertaining to your machine which your dealer cannot answer to your satisfaction, call or write the Customer Service Department at SNAPPER, McDonough, Georgia 30253. Phone: (1-800-935-2967). -
Page 3: Important Safety Instructions .....................................................................2
10. DO NOT test for spark by grounding spark plug next to spark plug hole; spark plug could ignite gas exiting engine. 11. Have machine serviced by an authorized SNAPPER dealer at least once a year and have the dealer install any new safety devices. -
Page 4: Table Of Contents
PRIMARY MAINTENANCE ... 25-28 PRODUCT REGISTRATION FORM ... 29 The figures and illustrations in this manual are provided for reference only and may differ from your specific model. Contact your local SNAPPER dealer if you have questions. TABLE OF CONTENTS ! IMPORTANT ! -
Page 5: Section 1 - Familiarization
FIGURE 1.1 1.2 NOMENCLATURE The nomenclature drawing above, Figure 1.1, shows the essential parts of the SNAPPER WALK BEHIND MOWERS. It is recommended that all operators of the mower become thoroughly familiar with the controls, parts and operation of the mower before operating. -
Page 6: Section 2 - Operating Instructions
Section 2 - OPERATING INSTRUCTIONS 2.1 PRE-START CHECK LIST Make the following checks and perform the service required before each start-up. 2.1.1. Check guards, deflectors, grass bag, adapter and covers to make sure all are in place and securely tightened. 2.1.2. -
Page 7: Starting & Stopping Wheel Drive
Section 2 - OPERATING INSTRUCTIONS 2.2 STARTING & OPERATION 2.2.1. ENGINE & BLADE (Choke Models) Move fuel shut off valve to the “ON” position. See Figure 2.5. NOTE: Stop the engine (and blade) by releasing the blade control. FUEL SHUT OFF VALVE SHOWN IN THE “ON”... -
Page 8: Handle Height Adjustment
Section 2 - OPERATING INSTRUCTIONS 2.4 HANDLE HEIGHT ADJUSTMENT The height of the mower handle can be adjusted as follows: 1. Loosen the lower nuts on each lower handle as shown in Figure 2.8. HIGHER LOWER HANDLE LOOSEN LOWER NUTS ON EACH LOWER HANDLE FIGURE 2.8 2. -
Page 9: Recycling Operation
Section 2 - OPERATING INSTRUCTIONS WARNING DO NOT attempt any maintenance, adjustments or service with engine and blade running. STOP engine and blade. Disconnect spark plug wire and secure away from spark plug. Engine and components are HOT. Avoid serious burns, allow sufficient time for all components to cool. - Page 10 Section 2 - OPERATING INSTRUCTIONS WARNING DO NOT attempt any maintenance, adjustments or service with engine and blade running. STOP engine and blade. Disconnect spark plug wire and secure away from spark plug. Engine and components are HOT. Avoid serious burns, allow sufficient time for all components to cool.
-
Page 11: Installation Of Discharge Deflector
Section 2 - OPERATING INSTRUCTIONS 2.12 INSTALLATION of DISCHARGE DEFLECTOR (Optional accessory on some models) Install discharge deflector if discharging is desired. Grass Bag and Bag Adapter or Recycling Cover must be removed. 1. Remove front and rear nuts that secure Bag Adapter or Recycling Cover to deck. -
Page 12: Section 3 - Maintenance Instructions
2. If liquid grease IS NOT visible on the input gear (the small gear below the plug hole), add an amount, to cover gear, of Snapper “00” grease. See Figure 3.2. FILL PLUG FIGURE 3.2 NOTE: Snapper “00”... -
Page 13: Check Mower Blade
Section 3 – MAINTENANCE WARNING DO NOT attempt any maintenance, adjustments or service with engine and blade running. STOP engine and blade. Disconnect spark plug wire and secure away from spark plug. Engine and components are HOT. Avoid serious burns, allow sufficient time for all components to cool. -
Page 14: Section 4 - Adjustments And Repair
Section 4 - REPAIR & ADJUSTMENTS WARNING DO NOT attempt any maintenance, adjustments or service with engine and blade running. STOP engine and blade. Disconnect spark plug wire and secure away from spark plug. Engine and components are HOT. Avoid serious burns, allow sufficient time for all components to cool. -
Page 15: Wheel Drive Control Adjustment
Section 4 - REPAIR & ADJUSTMENTS WARNING DO NOT attempt any maintenance, adjustments or service with engine and blade running. STOP engine and blade. Disconnect spark plug wire and secure away from spark plug. Engine and components are HOT. Avoid serious burns, allow sufficient time for all components to cool. -
Page 16: Driven And Drive Disc Service
Section 4 - REPAIR & ADJUSTMENTS WARNING DO NOT attempt any maintenance, adjustments or service with engine and blade running. STOP engine and blade. Disconnect spark plug wire and secure away from spark plug. Engine and components are HOT. Avoid serious burns, allow sufficient time for all components to cool. -
Page 17: Driven Disc Replacement
Section 4 - REPAIR & ADJUSTMENTS WARNING DO NOT attempt any maintenance, adjustments or service with engine and blade running. STOP engine and blade. Disconnect spark plug wire and secure away from spark plug. Engine and components are HOT. Avoid serious burns, allow sufficient time for all components to cool. -
Page 18: Driven Disc Bearing Replacement
Section 4 - REPAIR & ADJUSTMENTS WARNING DO NOT attempt any maintenance, adjustments or service with engine and blade running. STOP engine and blade. Disconnect spark plug wire and secure away from spark plug. Engine and components are HOT. Avoid serious burns, allow sufficient time for all components to cool. -
Page 19: Hex Shaft Bearing Replacement
Section 4 - REPAIR & ADJUSTMENTS WARNING DO NOT attempt any maintenance, adjustments or service with engine and blade running. STOP engine and blade. Disconnect spark plug wire and secure away from spark plug. Engine and components are HOT. Avoid serious burns, allow sufficient time for all components to cool. -
Page 20: Engine Drive Belt Replacement
Section 4 - REPAIR & ADJUSTMENTS WARNING DO NOT attempt any maintenance, adjustments or service with engine and blade running. STOP engine and blade. Disconnect spark plug wire and secure away from spark plug. Engine and components are HOT. Avoid serious burns, allow sufficient time for all components to cool. -
Page 21: Battery Service
Section 4 - REPAIR & ADJUSTMENTS 4.5. BATTERY SERVICE 4.5.1. NEW BATTERY PREPARATION 1. Remove battery from carton. 2. Place battery in a well ventilated area on a level non-concrete surface. 3. Remove battery cell caps. Fill cells as required with electrolyte (supplied with battery) to proper level. -
Page 22: Troubleshooting
1. Service mower blade. 2. Service and tighten loose parts. 3. Replace air lifts. Tighten to proper torque. 4. Replace belt. 1. Contact authorized SNAPPER dealer. 2. Replace traction drive belt. 3. Clean or replace driven disc. 1. Adjust cutting height. -
Page 23: Service Schedule
ITEM SERVICE PERFORMED Engine Oil Check Oil Level Initial Oil Change Periodic Oil Change Clean Sponge Element Air Pre-Cleaner Clean or Replace Air Cleaner Replace Spark Plug Clean Shroud & Fins Engine Cooling System Drive Belts Check For Wear And Tension Check For Wear, Damage Mower Blade... -
Page 24: Warranty
For two (2) years from purchase date for the original purchaser's residential, non-commercial use, SNAPPER, through any authorized SNAPPER dealer will replace, free of charge (except for taxes where applicable), any part or parts found upon examination by the factory at McDonough, Georgia, to be defective in material or workmanship or both. -
Page 25: Primary Maintenance
PRIMARY MAINTENANCE... - Page 26 PRIMARY MAINTENANCE...
- Page 27 PRIMARY MAINTENANCE...
- Page 28 PRIMARY MAINTENANCE...
-
Page 29: Product Registration Form
Date of Purchase ___________________________________________________________ Retailer ___________________________________________________________________ Retailer’s Phone Number____________________________________________________ It is very important that you register your purchase with Snapper to ensure warranty coverage. Please mail your product registration card to: Snapper at P.O. Box 777, McDonough, Georgia 30253. Or you may register on line at www.snapper.com. - Page 30 NOTES ___________________________________________________________________ ___________________________________________________________________ ___________________________________________________________________ ___________________________________________________________________ ___________________________________________________________________ ___________________________________________________________________ ___________________________________________________________________ ___________________________________________________________________ ___________________________________________________________________ ___________________________________________________________________ ___________________________________________________________________ ___________________________________________________________________ ___________________________________________________________________ ___________________________________________________________________ ___________________________________________________________________ ___________________________________________________________________ ___________________________________________________________________ ___________________________________________________________________ ___________________________________________________________________ ___________________________________________________________________ ___________________________________________________________________ ___________________________________________________________________ ___________________________________________________________________ ___________________________________________________________________ ___________________________________________________________________ ___________________________________________________________________ ___________________________________________________________________ ___________________________________________________________________ ___________________________________________________________________ ___________________________________________________________________ ___________________________________________________________________ ___________________________________________________________________ ___________________________________________________________________ ___________________________________________________________________ ___________________________________________________________________ ___________________________________________________________________ ___________________________________________________________________ ___________________________________________________________________ ___________________________________________________________________ ___________________________________________________________________ ___________________________________________________________________ ___________________________________________________________________...
- Page 31 NOTES ___________________________________________________________________ ___________________________________________________________________ ___________________________________________________________________ ___________________________________________________________________ ___________________________________________________________________ ___________________________________________________________________ ___________________________________________________________________ ___________________________________________________________________ ___________________________________________________________________ ___________________________________________________________________ ___________________________________________________________________ ___________________________________________________________________ ___________________________________________________________________ ___________________________________________________________________ ___________________________________________________________________ ___________________________________________________________________ ___________________________________________________________________ ___________________________________________________________________ ___________________________________________________________________ ___________________________________________________________________ ___________________________________________________________________ ___________________________________________________________________ ___________________________________________________________________ ___________________________________________________________________ ___________________________________________________________________ ___________________________________________________________________ ___________________________________________________________________ ___________________________________________________________________ ___________________________________________________________________ ___________________________________________________________________ ___________________________________________________________________ ___________________________________________________________________ ___________________________________________________________________ ___________________________________________________________________ ___________________________________________________________________ ___________________________________________________________________ ___________________________________________________________________ ___________________________________________________________________ ___________________________________________________________________ ___________________________________________________________________ ___________________________________________________________________ ___________________________________________________________________...
-
Page 32: Important
WALK BEHIND MOWERS SERIES 17 Snapper products are built using engines that meet or exceed all applicable emissions requirements on the date manufactured. The labels on those engines contain very important emissions information and critical safety warnings. Read, Understand, and Follow all warnings and instructions in this manual, the engine manual, and on the machine, engine and attachments.