Table of Contents
Advertisement
INSTRUCTIONS FOR USE
BEFORE USING THE APPLIANCE
SAFEGUARDING THE ENVIRONMENT
PRECAUTIONS AND GENERAL
RECOMMENDATIONS
IF THE APPLIANCE IS NOT GOING TO BE
USED
MAINTENANCE AND CLEANING
STORING, FREEZING AND THAWING
FOOD
DESCRIPTION OF THE APPLIANCE
"MULTIFLOW" AIR DISTRIBUTION
GUIDE TO THE INSIDE PARTS
USING THE APPLIANCE
USING THE ICE AND WATER DISPENSER
USING THE AUTOMATIC ICE-MAKER
CHANGING A WATER FILTER CARTRIDGE
TROUBLESHOOTING GUIDE
21
Advertisement
Table of Contents

Related Manuals for Smeg American Style Fridge Freezer FA550X2


Summary of Contents for Smeg American Style Fridge Freezer FA550X2
-
Page 1: Instructions For Use
INSTRUCTIONS FOR USE BEFORE USING THE APPLIANCE SAFEGUARDING THE ENVIRONMENT PRECAUTIONS AND GENERAL RECOMMENDATIONS IF THE APPLIANCE IS NOT GOING TO BE USED MAINTENANCE AND CLEANING STORING, FREEZING AND THAWING FOOD DESCRIPTION OF THE APPLIANCE “MULTIFLOW” AIR DISTRIBUTION GUIDE TO THE INSIDE PARTS USING THE APPLIANCE USING THE ICE AND WATER DISPENSER USING THE AUTOMATIC ICE-MAKER... -
Page 2: Before Using The Appliance
BEFORE USING THE APPLIANCE Your new appliance is designed exclusively for domestic use. After unpacking the appliance, make sure it is not damaged and that the door closes properly. Any damage must be reported to the dealer within 24 hours of delivery of the appliance. Wait at least two hours before switching the appliance on, to ensure that the refrigerant circuit is fully efficient. -
Page 3: Precautions And General Recommendations
• Use the refrigerator compartment only for storing fresh food and the freezer compartment only for storing frozen food, freezing fresh food and making ice cubes. -
Page 4: If The Appliance Is Not Going To Be Used
This will have to be put back after replacing the light bulb. • The refrigerator accepts light bulbs with a bayonet type mount. These do not need unscrewing/screwing when replacing. • The ice/water dispenser light bulb has a standard screw type mount and therefore needs to be screwed in place. -
Page 5: Storing, Freezing And Thawing Food
Wrap food so that no water, moisture or condensate can enter; this will prevent odours or aromas going from one part to another in the refrigerator, ensuring better preservation of frozen foods. Use plastic containers with hermetic lids, aluminium trays, aluminium foil, plastic film and waterproof plastic wraps. -
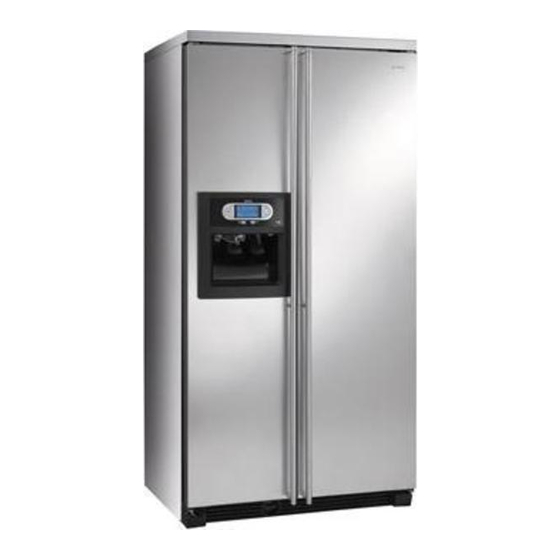
Page 6: Description Of The Appliance
DESCRIPTION OF THE APPLIANCE REFRIGERATOR COMPARTMENT A. Inside light B. Inside light C. Adjustable shelf D. Shelf - drawer lid E. Crisper Crisper adjustment G. Meat / vegetable drawer H. Meat / vegetable drawer adjustment Dairy products compartment Door trays K. -
Page 7: Guide To The Inside Parts
“MULTIFLOW” is a ventilated air distribution system, which ensures a homogeneous temperature inside the refrigerator compartment. Thanks to this system, the different types of food can be stored on any of the shelves of the appliance. Attention should be paid not to obstruct the air distribution vents, thus ensuring free air circulation. -
Page 8: Using The Appliance
USING THE APPLIANCE FIRST USE Connect the appliance to the water system and power supply (refer to the Installation manual). When connecting the appliance to the power supply, the display will show the temperatures preset by the manufacturer. Note: Reaching the preset temperatures requires a variable amount of time. This time depends on several factors (times the door is open, amount of food stored, ambient temperature). - Page 9 Refrigerator temperature The factory-set ideal temperature is +5°C. To change the temperature press the °C refrigerator button until the desired value is reached. The selected temperature will start flashing and then come on permanently, within 5 seconds, on the display.
- Page 10 Door open alarm The door alarm symbol lights up and the acoustic alarm is activated when one or both doors of the refrigerator and/or freezer have remained open. When the doors are left open for more than 2 minutes, the symbol and icon flash and an acoustic signal sounds.
- Page 11 Control panel lock function This function prevents accidental changing of appliance settings or switching off. The function is set by pressing the °C freezer and the °C refrigerator buttons at the same time for 3 seconds: the symbol will come on and an acoustic signal will activate.
-
Page 12: Using The Ice And Water Dispenser
USING THE ICE AND WATER DISPENSER First use When the ice and water dispenser is used for the first time, the first ice cubes and water coming out of the dispenser may have an unpleasant taste and should therefore be discarded. Ice maker The function is activated when the symbol is lit. -
Page 13: Using The Automatic Ice-Maker
USING THE AUTOMATIC ICE-MAKER After switching on the refrigerator, it usually takes overnight for the first ice cubes to form. When selecting crushed ice, the cubes are crushed just before being dispensed, therefore the crushed ice may come out with a slight delay. Noise from the ice crusher is normal, and pieces of ice may vary in size. -
Page 14: Changing A Water Filter Cartridge
CHANGING A WATER FILTER CARTRIDGE 1. Locate the water filter cartridge cap below the freezer compartment door. Rotate the cap counterclockwise to a vertical position and pull the cap and filter cartridge out through the base grille. Note: Since there is water in the cartridge, some spilling may occur. -
Page 15: Troubleshooting Guide
TROUBLESHOOTING GUIDE Before contacting the After-sales Service... Operation problems are often due to minor causes that can be found and fixed without using any tools. Noises from the appliance are normal, since the fans and compressors for controlling its operation switch on and off automatically. - Page 16 • If the room is very humid, it is normal for moisture to accumulate inside the appliance. If there is water in the defrost pan: • This is normal in hot and humid weather. The pan can even be half full. Make sure the refrigerator is level so that water does not spill from the pan.
- Page 17 TROUBLESHOOTING GUIDE If the automatic ice-maker does not work: • Has the freezer had enough time to become cold? With a new appliance this may take overnight. • Is the automatic ice-maker ON/OFF button set to ON? • Is water reaching the automatic ice-maker? Is the water cock open? The filter may be clogged or not correctly installed.
-
Page 18: Electrical Connection For Great Britain And Ireland Only
ELECTRICAL CONNECTION FOR GREAT BRITAIN AND IRELAND ONLY Warning - this appliance must be earthed Fuse replacement If the mains lead of this appliance is fitted with a BS 1363A 13amp fused plug, to change a fuse in this type of plug use an A.S.T.A. -
Page 19: Installation
LEVELLING YOUR REFRIGERATOR INSTALLING CUSTOM DOOR PANELS INSTALLATION DIMENSIONS AND REQUIREMENTS REMOVING THE FREEZER DOOR (A) REMOVING THE REFRIGERATOR DOOR (B) MOUNTING THE FREEZER DOOR (C) MOUNTING THE REFRIGERATOR DOOR (D) HORIZONTAL ALIGNMENT OF FREEZER AND REFRIGERATOR DOORS (E) VERTICAL ALIGNMENT OF FREEZER AND... -
Page 20: Before Installing The Refrigerator
BEFORE INSTALLING THE REFRIGERATOR Your new appliance is a FULL NO FROST model exclusively for domestic use, i.e. both refrigerator and freezer compartments are provided with an automatic defrosting function. This manual contains indications and warnings for correct and safe installation of the appliance - read it carefully before starting installation operations. - Page 21 3. Move the refrigerator into its final position. 4. Open both doors and remove the plinth to locate the levelling bolts at the left and right of the refrigerator base. The top bolt (1) will adjust the rear wheel (if provided), and the bottom bolt (2) will adjust the front wheel.
- Page 22 • Weight requirements for raised panel inserts - The refrigerator door panel should not exceed 10 kg. - Freezer door panels should not exceed 7 kg combined weight.