
Related Manuals for Smeg ST1124


Summary of Contents for Smeg ST1124
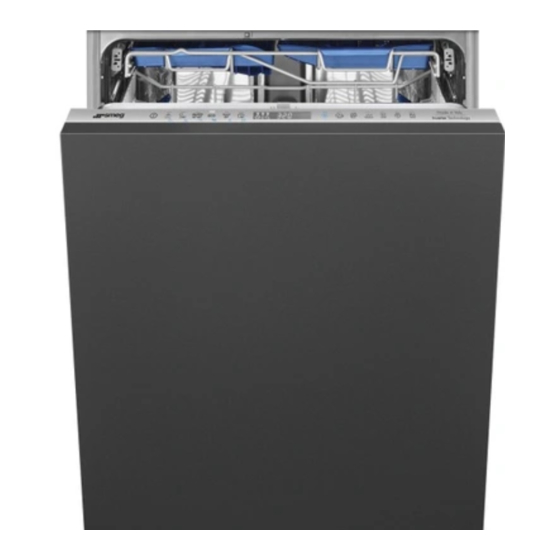
- Page 1 INSTRUCTION MANUAL...
- Page 2 This user-friendly manual will provide answers to all your questions about use of the dishwasher. For any other information about use and maintenance of the dishwasher, read the enclosed manual carefully. USER INSTRUCTIONS: useful information is provided for the use of the...
-
Page 3: User Instructions
User instructions 1. Description of the controls 1.1 Upper panel All the dishwasher controls are grouped on the upper panel. Switch-on, programming, switch-off etc. procedures are only possible when the door is open. ON/OFF BUTTON Pressing this button energises the appliance. - Page 4 User instructions EXTRA PROGRAM LIGHT Illuminates to indicate that one of the five extra programs (see table) is going to be executed. 3/1 OPTION BUTTON Press this button to activate the option for use of 3/1 products. 3/1 OPTION LIGHT Illuminates to indicate that the function is activated.
- Page 5 Cold prewash Wash at 40°C Wash at 55°C (**) Cold rinse Rinse at 68°C Wash at 55°C Cold rinse 100' Rinse at 68°C 60-70" program is selected, the dishwasher AUTO CONSUMPTION WATER POWER LITRES (1) KWh (2) 0,03 1,05 (**)
- Page 6 User instructions PROGRAMME, LOAD CROCKERY NUMBER & SYMBOL AND CUTLERY Pans and dishes SOAK awaiting a further wash Dishes with DELICATE light dirt Wash immediately after BIO (*) use for dishes with EN 50242 normal dirt Dishes with NORMAL normal dirt Very dirty pans and dishes, including dried- SUPER...
- Page 7 User instructions The washing cycle will not take place if the dishwasher door is left open or not properly closed. TABLE FOR CERTIFICATION BODIES Reference standard Reference program Load Type of detergent Amount of detergent Rinse aid setting CANCELLING THE CURRENT PROGRAM •...
- Page 8 User instructions SELECTING HALF LOAD WASH This function is ideal for small loads and saves water and electricity. It is controlled by the HALF LOAD (10) button, with two alternatives: press the button once to select washing in the top basket (the relative light comes on);...
- Page 9 The PROGRAM DELAY button (12) can be pressed to delay the start of the program by up to 9 hours. This means that the dishwasher can be operated at the time of day of your choice. Press the button several times in succession and the display will show the delay with which the appliance will start, beginning from 9 hours.
- Page 10 User instructions ADJUSTING THE WATER SOFTENING SYSTEM Depending on model, the setting may be made electronically or by means of a selector switch. ELECTRONIC SETTING (models with display) N.B.: for the setting below to be possible, a washing program other than the soak program must be set.
- Page 11 According to the machine model, the selector which acts on the adjustment may be located: • inside the plastic locking ring located on the right-hand side, inside the dishwasher; • inside the water softener, just below the cap. Both allow for adjustment to 5 settings:...
- Page 12 END OF CYCLE At the end of the washing cycle the dishwasher gives a short acustic signal and the program indicators nr 4 and 5 start blinking (the word "end" is displayed on the window).
-
Page 13: Troubleshooting
User instructions 2. Troubleshooting The dishwasher is capable of signalling a number of faults through the simultaneous illumination of several indicator lights, with the following meanings: FAULT DESCRIPTION Acquastop failure The anti-flooding system has been activated (for the relevant models only). The system is tripped in case of water leaks. - Page 14 • The alarm E7 is visualized at the end of the cycle that comes, however, brought to the end since the operation of the dishwasher is not harmed. To “reset” an alarm is necessary: •...
- Page 15 Following the cleaning instructions provided here will keep your dishwasher's performance at peak levels in the long term. This user-friendly manual will provide answers to all your questions about use of the dishwasher.
-
Page 16: Safety Instructions
Safety instructions 1. Safety and operating instructions THIS MANUAL FORMS AN INTEGRAL PART OF THE APPLIANCE: IT MUST ALWAYS BE KEPT INTACT TOGETHER WITH THE DISHWASHER. BEFORE USING THE APPLIANCE, CAREFULLY READ ALL THE INSTRUCTIONS CONTAINED IN THIS MANUAL. INSTALLATION MUST BE PERFORMED BY A QUALIFIED TECHNICIAN, IN COMPLIANCE WITH THE REGULATIONS IN FORCE. - Page 17 CHILDREN (LOCKS, DOORS, ETC.). THE APPLIANCE MUST THEN BE TAKEN TO A SORTED WASTE COLLECTION CENTRE. IN THE EVENT OF A FAULT, DISCONNECT THE DISHWASHER FROM THE ELECTRICAL POWER SUPPLY AND SHUT OFF THE WATER TAP. THEN CALL IN A QUALIFIED TECHNICIAN.
- Page 18 NOT IN ANY WAY AFFECT THE OPERATION OF THE APPLIANCE. DO NOT DRINK THE WATER RESIDUES WHICH MAY BE PRESENT INSIDE THE DISHES OR DISHWASHER AT THE END OF THE WASHING PROGRAM AND BEFORE THE DRYING CYCLE. KNIVES OR OTHER SHARP-ENDED COOKING UTENSILS MUST BE PLACED IN THE CUTLERY BASKET BLADE-DOWN, OR LAID HORIZONTAL IN THE TOP BASKET.
-
Page 19: Installation Instructions
2. Installation and hook-up Remove the polystyrene basket retainers. Position the appliance in the desired place of installation. The back or sides of the dishwasher may be placed up against walls or other furniture units. If the dishwasher is installed near a heat source, fit the special insulating panel to prevent overheating and malfunction of the appliance. - Page 20 The dishwasher can also be connected to a hot water supply not exceeding 60°C. Supplying the appliance with hot water cuts down the washing time by approximately 20 minutes, but slightly reduces its effectiveness.
-
Page 21: Operating Instructions
Before replacing the cap, remove any salt residues from around the opening. • When using the dishwasher for the first time, in addition to the salt it is also necessary to add one litre of water to the container. •... - Page 22 User instructions • Do not use table salt as it contains insoluble substances which, over time, may damage the water softening system. • When necessary, refill the regenerating salt container before starting the washing program. In this way, the excess saline solution will be immediately removed by the water;...
- Page 23 ADJUSTING THE RINSE AID DISPENSER SETTING The dishwasher is factory set for medium water hardness. However it possible to change the setting by turning the dispenser’s selector to the desired position: the amount of rinse aid dispensed is proportional to the selector position.
- Page 24 • Do not use detergents formulated for washing dishes by hand, because they produce a great deal of foam and may negatively affect the operation of the dishwasher. • Add the correct amount of detergent. An insufficient amount of detergent will result in a partial removal of dirt from the dishes, whereas an excessive amount is wasteful and does not improve the washing results.
- Page 25 "3/1" Products If you wish to use detergents which already contain salt and rinse aid, check whether your dishwasher is fitted with the "3/1 option button" on the "Controls description" page and then refer to the section which explains how to use this function.
- Page 26 User instructions 3.3 General warnings and recommendations Before using the dishwasher for the first time, it is advisable to read the following recommendations concerning dish types to be washed and their loading. There are generally no constraints on the washing of domestic dishes, but in certain cases it is necessary to take their characteristics into account.
- Page 27 • Glass and crystal: in general, glass and crystal objects can be washed in the dishwasher. However, certain types of glass and crystal may become dull and lose their clearness after many washings. Therefore, for these items we recommend using the least aggressive program available.
- Page 28 User instructions 3.4 Using the baskets The dishwasher has a capacity of 12 place-settings, including serving dishes. EN 50242 STANDARD LOADS FOR CERTIFICATION BODIES LOWER BASKET UPPER BASKET UPPER BASKET for AAA models only (see energy label) The upper basket must be set in the low position.
- Page 29 User instructions LOWER BASKET The lower basket receives the full force of the lower spray arm, and should therefore be used for the “toughest” items with a heavier degree of soiling. All types and combinations of loads are permitted, provided that the dishes, pots and pans are arranged with all the soiled surfaces exposed to the water jets coming from the bottom.
- Page 30 The dishwasher is complete with two cutlery baskets, which means that one of them can be removed, freeing space in the bottom basket, if there is not much cutlery to be washed, or if a ½...
- Page 31 User instructions UPPER BASKET It is recommended to load the upper basket with small- or medium-sized items such as glasses, small plates, tea or coffee cups, shallow bowls and light objects made from heat resistant plastic. If the upper basket is used in the lowermost position, it can also be loaded with serving dishes, provided they are only slightly soiled.
- Page 32 User instructions LOADING THE UPPER BASKET Load plates facing forward; cups, bowls etc. must always be facing downwards. The left-hand side of the basket can be loaded with two layers of cups and glasses. The centre can be filled with plates and side- plates, fitted upright into the supports provided.
- Page 33 User instructions ADJUSTING THE UPPER BASKET The upper basket can be adjusted in two positions, according to the user’s needs and according to the height of the dishes in the lower basket. Proceed as follows. Pull-out version: • pull out the right-hand basket guide •...
-
Page 34: Cleaning And Maintenance
4.1 General warnings and recommendations Avoid the use of acidic or abrasive detergents. Clean the outer surfaces and door-lining of the dishwasher regularly using a soft cloth moistened with water or with a normal detergent suitable for painted surfaces. Clean the door gaskets with a damp sponge. - Page 35 The filters should be cleaned under running water using a stiff brush. • It is essential to thoroughly clean the filters according to the above instructions: the dishwasher cannot function if the filters are clogged. • Carefully replace the filters in their seats, to avoid damaging the wash pump.
- Page 36 In some cases it is possible to remedy minor problems by referring to the following instructions: If the program fails to start, check that: • the dishwasher is connected to the electrical power supply; • there is no power failure; •...
- Page 37 User instructions If the dishes fail to dry or remain dull, check that: • there is rinse aid inside the special container; • the rinse aid dispenser setting is correct; • the detergent used is of good quality and has not lost its effectiveness (for example, through incorrect storage, with the box left open).
- Page 38 User instructions TECHNICAL DATA Width 597 ÷ 599 mm Free standing: 600 mm Depth measured flush with the outer edge of the control panel Semi-integrated: 590 mm - Fully integrated: 570 mm Height (depending on models) Free standing: from 850 mm to 870 mm Semi-integrated and fully integrated: from 820 mm to 870 mm Capacity 12 Standard place settings...
- Page 39 Posizionamento agganci porta per modelli con visualizzazione programmi “a led”. Location of door hooks for models with “LED” program display. Positionnement des crochets sur la porte pour les modèles avec affichage des programmes “à led”. Posizionamentoagganci porta per modelli con con display.. Location of doorhooks for models with display.