Table of Contents
Advertisement
Quick Links
STARTER KIT USER'S GUIDE
Please read this user's guide before
building and using your new car.
6000939_UG_EN 062013.indd 1
PRECISION CONTROL!
Adjust the trim from
your XMODS controller.
Page 10.
The 6000939 XMODS Starter Kit
revs up your XMODS experience.
WHAT'S UNDER
YOUR HOOD?
Awesome upgrades!
Page 12.
6/21/2013 1:17:06 PM
Advertisement
Table of Contents

Related Manuals for Radio Shack XMODS

Summary of Contents for Radio Shack XMODS
- Page 1 STARTER KIT USER’S GUIDE PRECISION CONTROL! Adjust the trim from your XMODS controller. Page 10. The 6000939 XMODS Starter Kit revs up your XMODS experience. WHAT’S UNDER YOUR HOOD? Awesome upgrades! Page 12. Please read this user’s guide before building and using your new car.
-
Page 2: Table Of Contents
Contents XMODS Custom RC Starter Kit ................3 Your Starter Kit Includes ............................. 3 Assembling Your XMODS Custom RC ..............4 Assembling the Car Chassis ..........................4 Installing Batteries in the Chassis ........................6 Mounting the Car Body on the Chassis ......................6 Setting Up Your Controller ................. -
Page 3: Xmods Custom Rc Starter Kit
Digital proportional steering for optimal speed, acceleration, and maneuverability To really get your motor running, customize your XMODS with optional upgrades for both performance and looks, available at your local RadioShack store. Check out the line-up of XMODS upgrades available online at www.RadioShack.com. -
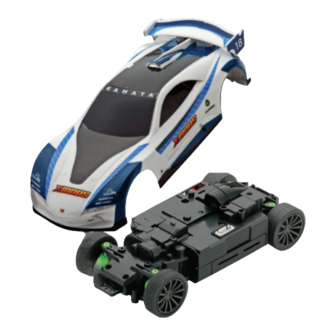
Page 4: Assembling Your Xmods Custom Rc
Assembling Your XMODS Custom RC Assembling the Car Chassis 1. Connect the terminal of the Front Unit to the terminal of the Battery Unit, and secure them with two screws. 2. Connect the terminal of the Rear Unit to the terminal of the Battery Unit, and secure them with two screws. - Page 5 6000939_UG_EN 062013.indd 5 6/21/2013 1:17:16 PM...
-
Page 6: Installing Batteries In The Chassis
Installing Batteries in the Chassis 1. Make sure the power switch on the chassis is OFF. 2. Remove the screw on the battery compartment cover. Then carefully unlatch the battery compartment cover and remove the cover. 3. Insert four AA batteries (not included) in the compartment, matching the polarity symbols (+ and –) marked inside. - Page 7 6000939_UG_EN 062013.indd 7 6/21/2013 1:17:22 PM...
-
Page 8: Setting Up Your Controller
Pairing Your Controller and the Car Your XMODS operates at a frequency of 2.4Ghz. Before driving the first time, you must pair the controller and car. 1. Turn on the controller. 2. Turn on the car (The power switch is under the chassis). The LED indicator on the car flashes slowly. - Page 9 ON/OFF LED Indicator Pairing Button LED Indicator 6000939_UG_EN 062013.indd 9 6/21/2013 1:17:26 PM...
-
Page 10: Driving Your Car And Adjusting Trim
To conserve battery life, turn off the controller and car after you finish driving. Handle your XMODS car and controller carefully and do not drop them. Keep away from dust and dirt. Wipe your car and controller with a damp cloth occasionally to keep them looking new. - Page 11 Reverse/Brake Neutral Drive 6000939_UG_EN 062013.indd 11 6/21/2013 1:17:32 PM...
-
Page 12: Xmods Upgrades
XMODS Upgrades Modify and personalize your XMODS car with these available kits. Check out the entire line of XMODS upgrades and accessories at your local RadioShack store and www.RadioShack.com. Body and Nitro Kit 6000944 This kit lets you boost performance with a super capacitor built to look like a supercharger and put a new body on your XMODS chassis to match the enhanced performance. - Page 13 This Hi-Speed Rear Unit replaces the stock rear unit and is designed to reach higher speeds. Rechargeable Lithium Battery Pack and Charger 6000947 Add recharging capabilities when you replace your XMODS car’s AA battery compartment with a Lithium Polymer (LiPo) battery kit. 6000939_UG_EN 062013.indd 13 6/21/2013 1:17:41 PM...
-
Page 14: Fcc Information
FCC Information This equipment has been tested and found to comply with the limits for a Class B digital device, pursuant to Part 15 of the FCC Rules. These limits are designed to provide reasonable protection against harmful interference in a residential installation. This equipment generates, uses, and can radiate radio frequency energy and, if not installed and used in accordance with the instructions, may cause harmful interference to radio communications. - Page 15 Service Facility; (d) consumables such as fuses or batteries; (e) ordinary wear and tear or cosmetic damage; (f) transportation, shipping or insurance costs; (g) costs of product removal, installation, set-up service, adjustment or reinstallation; and (h) claims by persons other than the original purchaser. Should a problem occur that is covered by this warranty, take the product and the RadioShack sales receipt as proof of purchase date to any RadioShack store.
- Page 16 Directive,” which protects the environment by restricting specific hazardous materials and products. Car models for video games "Ridge Racer" series originally created by NAMCO BANDAI Games Inc. Ridge Racer™ & ©NAMCO BANDAI Games Inc. XMODS is a trademark used by RadioShack Corporation. 06A13 ©2013. RadioShack Corporation. 6000939 All rights reserved.