
Related Manuals for Belkin DockStation F5U216


Summary of Contents for Belkin DockStation F5U216
- Page 1 P74321ea_F5U216_manual_uk 02-06-2003 15:59 Page 1 Hi-Speed USB 2.0 DockStation Connect all your devices to your notebook, easily ™ User Manual F5U216ea...
- Page 2 P74321ea_F5U216_manual_uk 02-06-2003 15:59 Page 2...
-
Page 3: Table Of Contents
P74321ea_F5U216_manual_uk 02-06-2003 15:59 Page 3 Introduction ........1 Overview . - Page 4 P74321ea_F5U216_manual_uk 02-06-2003 15:59 Page 4...
-
Page 5: Introduction
P74321ea_F5U216_manual_uk 02-06-2003 15:59 Page 1 INTRODUCTION Congratulations Thank you for purchasing the Belkin Hi-Speed USB 2.0 DockStation (the DockStation). This low-cost universal docking station solution will give you, by far, the easiest and most convenient way to connect devices to your laptop, or legacy-free PC. -
Page 6: Overview
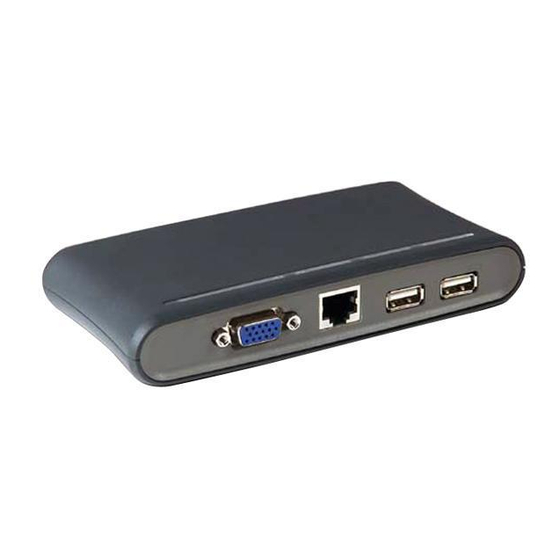
P74321ea_F5U216_manual_uk 02-06-2003 15:59 Page 2 Features • Dual Hi-Speed USB 2.0 hub ports for connecting any USB-compliant peripheral • Ethernet port for connecting your computer to any 10/100Base-T Ethernet port • Full-speed serial port for connecting RS232 devices such as mice, modems, PDAs, scanners, or GPS receivers •... -
Page 7: Technical Specifications
P74321ea_F5U216_manual_uk 02-06-2003 15:59 Page 3 Technical Specifications USB Hub • Supported Data Rates: • Upstream USB Ports: • Downstream USB Ports: • Per-Port Voltage: • Per Port Current: • Power Mode: Parallel Port • USB Printer Class Specification 1.0-compliant • IEEE-1284 1994 (bidirectional parallel interface) specification- compliant •... - Page 8 P74321ea_F5U216_manual_uk 02-06-2003 15:59 Page 4 Ethernet Port • Network Support: • USB Mode: Power Supply • Output Voltage: • Current: Status LEDs • Upstream USB Port: • Downstream USB Ports: Green: Red: • Ethernet Port: Green: Red: Environmental • Operating Temperature: •...
-
Page 9: Hardware Installation
P74321ea_F5U216_manual_uk 02-06-2003 15:59 Page 5 HARDWARE INSTALLATION • Connect the VGA cable from your desktop monitor into the “VGA In” port on the DockStation (See fig. 1). • Connect the “VGA Out” cable on the DockStation to the VGA connector on your computer. -
Page 10: Driver Installation
12. The “Add New Hardware Wizard” will locate the driver for “Generic USB Hub on USB 2.0 Bus”. Click “Next”. 13. Click “Finish“ to complete installation of the DockStation’s Hi-Speed USB 2.0 hub functionality. 14. Windows will locate the driver for “Belkin USB to Fast Ethernet Adapter”. Click “Next”. - Page 11 21. Click “Finish“ to complete installation of the DockStation’s full-speed USB hub functionality. 22. Windows will now detect and install the drivers for “USB Printing Support”, and “Belkin USB Serial Port”. 23. Restart your computer, then proceed to the “Verifying Proper Installation” section of this User Manual.
- Page 12 2. Select “Properties”, then click the “Device Manager” tab. 3. Click the (+) sign next to “Network Adapters”. The Network Adapters list will open and you should find an entry for “Belkin USB 2.0 to Fast Ethernet Adapter”. 4. Click the (+) sign next to “Ports (COM &LPT)”.
-
Page 13: Windows Me
P74321ea_F5U216_manual_uk 02-06-2003 15:59 Page 9 DRIVER INSTALLATION Windows Me 1. Insert the Belkin installation CD into your CD-ROM drive. 2. After a few moments the CD will auto-start. Click the “Install Driver” button to begin the installation process. 3. The installer’s opening screen will be displayed. Click “Next” to continue. - Page 14 12. The “Add New Hardware Wizard” will now locate “Device on USB 2.0 Hub”. Select “Automatic Search for a better driver (Recommended)”. Click “Next”. 13. Windows will locate and install the driver for “Belkin USB to Fast Ethernet Adapter”. 14. The “Add New Hardware Wizard” will locate a second “generic USB Hub on USB 2.0 Bus”.
- Page 15 2. Select “Properties”, then click the “Device Manager” tab. 3. Click the (+) sign next to “Network Adapters”. The Network Adapters list will open and you should find an entry for “Belkin USB 2.0 to Fast Ethernet Adapter”. 4. Click the (+) sign next to “Ports (COM &LPT)”.
-
Page 16: Windows 2000
Hi-Speed USB 2.0 port. 9. Windows will now detect and install “Generic Hub on USB 2.0 Bus”. 10. The “Found New Hardware Wizard” will now detect the “Belkin USB to Fast Ethernet Adapter”. A “Digital Signature Not Found” message will be displayed. Click “Yes” to continue. - Page 17 3. Select “Device Manager”. 4. Click the (+) sign next to “Network Adapters”. The Network Adapters list will open and you should find an entry for “Belkin USB 2.0 to Fast Ethernet Adapter”. 5. Click the (+) sign next to “Ports (COM &LPT)”.
-
Page 18: Windows Xp
Hi-Speed USB 2.0 port. 9. Windows will now detect and install “Generic Hub on USB 2.0 Bus”. 10. The “Found New Hardware Wizard” will now detect the “Belkin USB to Fast Ethernet Adapter”. A “Digital Signature Not Found” message will be displayed. Click “Yes” to continue. - Page 19 3. Select “Device Manager”. 4. Click the (+) sign next to “Network Adapters”. The Network Adapters list will open and you should find an entry for “Belkin USB 2.0 to Fast Ethernet Adapter”. 5. Click the (+) sign next to “Ports (COM &LPT)”.
-
Page 20: Information
Belkin Corporation warrants this product against defects in materials and workmanship for its lifetime. If a defect is discovered, Belkin will, at its option, repair or replace the product at no charge provided it is returned during the warranty period, with transportation charges prepaid, to the authorized Belkin dealer from whom you purchased the product. - Page 21 P74321ea_F5U216_manual_uk 02-06-2003 15:59 Page 17...
- Page 22 P74321ea_F5U216_manual_uk 02-06-2003 15:59 Page 18 © 2003 Belkin Corporation. All rights reserved. All trade names are registered trademarks of respective manufacturers listed. Belkin Corporation 501 West Walnut Street Compton • CA • 90220 • USA Tel: 310.898.1100 Fax: 310.898.1111 Belkin Components, Ltd.