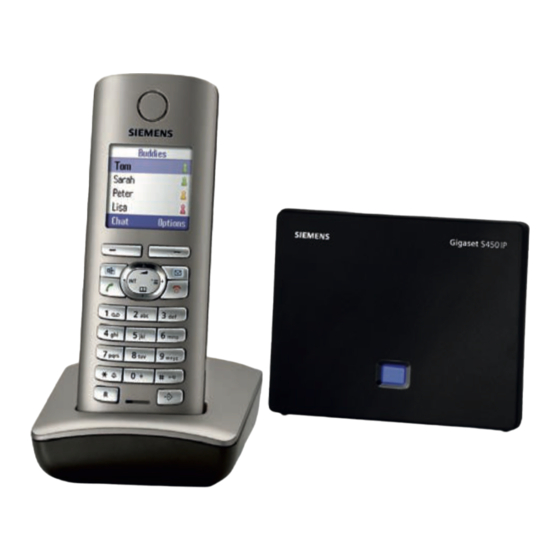
Siemens Gigaset S450 IP User Manual
Siemens mobile phone user guide
Hide thumbs
Also See for Gigaset S450 IP:
- User manual (143 pages) ,
- Manual (47 pages) ,
- Owner's manual (44 pages)
Table of Contents
Advertisement
Quick Links
Advertisement
Chapters
Table of Contents

Related Manuals for Siemens Gigaset S450 IP


Summary of Contents for Siemens Gigaset S450 IP
- Page 1 Siemens Home and Office Communication Devices GmbH & Co. KG Schlavenhorst 66 D-46395 Bocholt Gigaset 2007 © Siemens Home and Office Communication Devices GmbH & Co. KG 2006 All rights reserved. Subject to availability. Rights of modification reserved. S450 IP www.siemens.com/gigaset...
-
Page 2: The Handset At A Glance
The handset at a glance Ð INT 1 10.06.06 09:45 FixedLine Base station at a glance Handset keys 1 Display in idle status (example) 2 Battery charge status e V U e V U 3 Display keys (page 24) 4 Message key Opens calls and message lists Flashes: new message or new call 5 End call key, On/Off key... -
Page 3: Table Of Contents
Base station at a glance ..1 Safety precautions ... . 5 Gigaset S450 IP – more than just a telephone ..6 VoIP –... - Page 4 Opening the buddy list ... . 51 Receiving messages ....52 Writing and sending messages ..53 Calling a buddy .
- Page 5 Writing and editing text ..102 Gigaset S450 IP – free software ..103 Accessories ....110 Glossary .
-
Page 6: Safety Precautions
Safety precautions Warning: Read the safety precautions and the user guide before use. Explain their contents and the potential hazards associated with using the telephone to your children. Only use the mains adapter supplied, as indicated on the underside of the base station. Use only recommended rechargeable batteries (page 99) of the same type! This means that you must not use any other battery type or non-rechargeable batteries as this could result in significant health risks and personal injury. -
Page 7: Gigaset S450 Ip - More Than Just A Telephone
Gigaset S450 IP – more than just a telephone Gigaset S450 IP – more than just a telephone Your phone lets you make calls both via the fixed network and (cost effectively) via the Internet (VoIP) without using a PC. -
Page 8: Voip - Making Calls Via The Internet
Internet access, i.e. you need a router that will connect your phone to the Internet. You will find a list of recom- mended routers on the Gigaset S450 IP product page at: http://www.siemens.com/gigaset Access to the services of a VoIP pro- vider. - Page 9 First steps ¤ Insert the batteries the right way round (see figure). The polarity is indicated in/on the battery compartment. The handset switches on automatically. You will hear a confirmation tone. Closing the battery cover ¤ First, align the notches on the side of the battery cover with the protrusions on the inside of the housing.
-
Page 10: Installing The Base Station
Initial charging and discharging of batteries Battery charging is indicated in the top right of the display by a flashing battery icon e, V or U. During handset oper- ation, the battery icon indicates the charge status of the batteries (page 1). The correct charge status can only be dis- played when the batteries are first fully charged and discharged through use. -
Page 11: Connecting The Base Station
Figure 1 Connecting the phone to the fixed network and the Internet 1 Internet connection: Router and modem (in picture) or router with integrated modem 2 Gigaset S450 IP base station 3 Gigaset S45 handset 4 PC in LAN Follow the steps in the order given below: 1. - Page 12 Connecting the base station with the fixed network and the mains power supply ¤ Please connect the phone jack first and then the mains adapter, as shown below. 1 Phone jack with phone cord 2 Underside of the base station 3 Mains adapter 230 V Please note: Keep the mains adapter plugged in at...
-
Page 13: Making Settings For Voip Telephony
(page 68). Downloading VoIP provider data The phone establishes a connection with the Siemens server on the Internet. Pro- files with general access data for various VoIP providers can be downloaded here. After a brief period you will see the follow-... - Page 14 Select country (press the con- trol key up/down) and press . The VoIP providers availa- §OK§ ble for your VoIP profile will be displayed. Select your VoIP provider and press §OK§ The necessary general access data for your VoIP provider will be downloaded and saved on the phone.
- Page 15 First steps If the attempt to create the entry fails (e.g. because the phone is not connected to the Internet), a message to this effect is displayed briefly (see page 14). You can then create the entry later via the Gigaset.net direc- tory (see page 27).
-
Page 16: Belt Clip And Headset
The server address for the VoIP server has not yet been entered, or has been entered incorrectly. ¤ Start the Web configurator. ¤ ¢ Open Settings Telephony ¢ Web page. Connections ¤ Edit the server address where neces- sary Please note: If port forwarding is activated on your router for the ports that have been registered as the SIP port (Standard 5060) and the RTP port... -
Page 17: Menu Trees
Menu trees Menu trees Phone menu Open the main menu on your phone by right-clicking on the control key when the handset is in idle status: v. There are two ways to select a function: Using number combinations ('shortcut') ¤ Enter the number combination that is in front of the function in the menu tree. - Page 18 1-1-6 1-2 E-mail 1-2-1 1-2-2 1-3 Messenger 1-3-1 1-3-2 1-3-3 ê Sel. Services 2-1 VoIP 2-1-6 2-1-7 ì Alarm Clock í Add. Features 4-3 Room Monitor Ð Settings 5-1 Date/Time 5-2 Audio Settings 5-2-1 5-2-2 5-3 Display 5-3-1 5-3-2 5-3-3 5-3-4 Settings 1-1-6-1 Service Centres...
- Page 19 Menu trees 5-4 Handset 5-4-1 5-4-2 5-4-3 5-4-4 5-4-5 5-5 Base 5-5-1 5-5-2 5-5-3 5-5-4 5-5-5 5-5-6 5-5-8 5-6 Voice Mail 5-6-1 5-7 Telephony 5-7-1 5-7-2 5-7-4 5-7-6 5-7-7 Language Auto Answer Register H/Set Select Base Reset Handset Calls List Type 5-5-1-1 Missed Calls 5-5-1-2 All Calls Music on hold...
-
Page 20: Web Configurator Menu
Web configurator menu Home Settings IP Configuration Telephony Messaging Miscellaneous Status Device Connections Audio Number Assignment Dialing Plans Telephone Directory Advanced Settings Messenger E-Mail Menu trees page 72 page 75 page 77 page 83 page 85 page 87 page 88 page 86 page 90 page 91... -
Page 21: Making Calls With Voip And The Fixed Network
Making calls with VoIP and the fixed network Making calls with VoIP and the fixed network Making an external call External calls are calls made via the public telephone network (fixed network) or via the Internet (VoIP). You determine what type of connection you want to use when you dial. -
Page 22: Ending A Call
Ending a call Press the end call key. Answering a call The handset indicates an incoming call in three ways: by ringing, by a display on the screen and by the flashing handsfree key Please note: Only calls to receiving numbers that are assigned to your handset will be signalled (page 85). -
Page 23: Handsfree Talking
Making calls with VoIP and the fixed network Display when Calling Line Identification is withheld For calls from the fixed network, the caller can withhold calling line identification or not request it. In this case the number is not displayed. The following is displayed in place of the number: External, if no number is transmitted. -
Page 24: Dialling The Emergency Number
Dialling the emergency number The default setting for your phone is that all numbers that are saved as emergency numbers are automatically dialled using the fixed network. The selected connec- tion type (Internet or fixed network) is irrelevant for dialling. You can deactivate this function using the phone's Web configurator (see dialling rules, page 88), e.g. -
Page 25: Display Keys
Operating the handset During an external call Press and release to open the handset directory. Press and hold to open the list of available online directories (e.g. Gigaset.net directory). Initiate an internal consulta- tion call. Adjust loudspeaker volume for earpiece and handsfree mode. Display keys The current display functions are shown in the bottom display line in reversed high-... -
Page 26: Correcting Incorrect Entries
Gigaset.net online directory under a name of your choice (page 13/page 27). Gigaset net is a VoIP service provided by Siemens Home and Office Communica- tion Devices GmbH und Co KG, which is available to all users with a Gigaset VoIP device. - Page 27 VoIP telephony via Gigaset.net Or (when the handset is in idle status): 11NN#O Enter the number (1188#9). c / d Press the talk or handsfree key. The connection to the Gigaset.net direc- tory is always made using VoIP. If no connection can be made to the Gigaset.net directory, an error message will be sent and the handset will go into idle status.
-
Page 28: Entering, Editing And Deleting Own Entry
Using other functions Precondition: the hit list is displayed. ¢ q (select entry) §Options§ The following functions can be selected with q: Add to directory Copy the number to the handset direc- tory. The number and name (where appropriate abbreviated, max. 16 char- acters) are copied to the directory. -
Page 29: Network Services - Voip
Network services – VoIP Network services – VoIP You can use the following network serv- ices to make calls via the VoIP connection. Settings for all calls General call forwarding ¢ ¢ ê Sel. Services VoIP ¢ Call Divert A list of your phone's configured and activated VoIP phone numbers will be dis- played. - Page 30 Accepting a waiting call Precondition: Call waiting is activated. Press the display key. §Accept§ You have the option of toggling or holding a conference call. Please note: – If the first call was an internal call, the inter- nal connection is ended. –...
-
Page 31: Using The Directory And Lists
Using the directory and lists Using the directory and lists The options are: Directory/call-by-call list If applicable, online directories Last number redial list SMS, e-mail and messenger list Calls list You can store a maximum of 150 entries in the directory and call-by-call list (the actual number depends on the size of the individual entries). - Page 32 Selecting entries in the directory and call-by-call list s / C Open directory or call-by-call list. You have the following options: Use q to scroll to the entry until the required name is selected. Enter the first character of the name, or scroll to the entry with q.
- Page 33 Using the directory and lists A successful transfer is confirmed by a message and confirmation tone on the receiving handset. If you have sent a single entry, you can transfer another entry with Please note: Entries with identical numbers are not overwritten in the receiver handset.
-
Page 34: Last Number Redial List
Last number redial list The last number redial list contains the ten numbers last dialled with the handset (max. 32 numbers). If one of the numbers is in the directory, the corresponding name will be displayed. Dialling from the last number redial list Press the key briefly. -
Page 35: Base
Using the directory and lists Please note: If calls are saved in the network mailbox you will receive a message if the appropriate set- tings have been made (see the network mail- box instructions of your network provider). Incoming SMS list All received SMS messages are saved in the incoming message list, see page 39. -
Page 36: Making Cost-Effective Calls
Managing entries in the calls list After pressing the display key can select more functions with q: Copy to Directory Copying a displayed number to the directory. Information If a URI was received and stored for a VoIP call, this will be shown. The URI is dialled if you press the talk key c. -
Page 37: Sms (Text Messages)
SMS (text messages) SMS (text messages) You can only send and receive SMS mes- sages via the fixed network. When an SMS is sent, the base station automatically establishes a connection via the fixed network. Your unit is supplied ready for sending SMS messages immediately. -
Page 38: Writing/Sending An Sms
Writing/sending an SMS Writing an SMS ¢ ¢ î Messaging Mailbox 2 Select mailbox if necessary and press (page 41). §OK§ Enter mailbox PIN if necessary and press §OK§ Select and press New SMS Write an SMS. Press the display key. §Options§... - Page 39 SMS (text messages) Draft message list You can save an SMS in the draft message list and edit and send it later. Saving an SMS in the draft message list ¤ You are writing an SMS (page 37). Press the display key. §Options§...
-
Page 40: Receiving An Sms
Receiving an SMS All received SMS messages are saved in the incoming message list. Linked SMS messages are displayed as one message. If this is too long (it consists of more than 8 linked individual SMS messages) or if it was not fully transmitted, it will be split into several individual SMS messages. - Page 41 SMS (text messages) Replying to or forwarding text messages ¤ Read the SMS (page 39): Press the display key. §Options§ You have the following options: Reply Write and send a reply SMS directly (page 37). Edit Edit the text in the SMS and then send it (page 37).
-
Page 42: Notification By Sms
Notification by SMS You can arrange to be notified about missed calls by SMS. Precondition: For missed calls, the caller's number (CLI) must have been transmit- ted. Notification is sent to your mobile phone or another phone with SMS functionality. You only need to set the phone number to which notification should be sent (notifi- cation number) and the notification type. -
Page 43: Setting Sms Centre
SMS (text messages) Active mailboxes are marked with ½ in the mailbox list. They are shown in the SMS list and can, if necessary, be displayed by pressing the message key f. Deactivating a mailbox ¤ On/Off: to Off. Confirm message with if necessary. -
Page 44: Sms On A Pabx
SMS on a PABX You can only receive an SMS when the Calling Line Identification is for- warded to the extension of the PABX (CLIP). The CLIP of the phone number for the SMS centre is evaluated in your Gigaset. If required, you must prefix the number for the SMS centre with the access code (depending on your PABX). - Page 45 SMS (text messages) You cannot send messages. 1. You have not requested the CLIP service (Calling Line Identification Presentation). ¥ Ask your service provider to enable this service. 2. SMS transfer was interrupted (e.g. by an incoming call). ¥ Re-send the SMS. 3.
-
Page 46: E-Mail Notifications
E-mail notifications Your phone will notify you when new e- mail messages have been received on your incoming e-mail server. It periodically connects to the e-mail server (around every 15 minutes) and checks for any new messages. Any new messages that have been received are displayed on all Gigaset S45 handsets that have been registered: you will hear an advisory tone, the message... -
Page 47: Opening The Incoming E-Mail Server
E-mail notifications Opening the incoming e-mail server ¢ ¢ î Messaging E-mail Or if new e-mail messages have been received (the message key f is flash- ing): ¢ E-mail: The phone will connect to the incoming e- mail server. A list of e-mail messages that are stored there will be displayed. - Page 48 Log-in failed! Error during login to incoming e-mail server. This may have the following cause: – Incorrect entries for name of incom- ing e-mail server, user name and/or password. ¤ Check settings (page 45). Mailbox settings incomplete! Incorrect entries for name of incoming e-mail server, user name and/or pass- word.
-
Page 49: Messenger
Messenger Messenger The messenger in your handset enables instant messaging (immediate message transfer, chatting). The phone supports the XMPP messenger (Jabber). Instant messaging refers to communica- tion between 'friends' on the Internet. Subscribers exchange short messages which are forwarded immediately. This gives rise to a flowing 'conversation' simi- lar to chatting. -
Page 50: Establishing A Connection, Going Online
Establishing a connection, going online When you go online, your buddy list will be displayed on the handset and you will receive messages from your buddies. Only one of the handsets connected to the base station can connect to the messen- ger server. -
Page 51: Changing/Checking Your Personal Status, Going Offline
Messenger Changing/checking your personal status, going offline You want to log off (go offline) or let your buddies know whether you wish to chat or would prefer to remain undisturbed. You have the following options: Offline You log off from the messenger server. The messenger server informs your buddies that you are no longer avail- able. -
Page 52: Opening The Buddy List
Opening the buddy list Precondition: you are Online already created a buddy list (using the PC) on your provider's messenger server. ¢ ¢ î Messaging Messenger ¢ Buddies Only the first 20 (maximum) buddies on the buddy list will be read by the messen- ger server and displayed on the handset. -
Page 53: Receiving Messages
Messenger Requesting information about buddies You have opened the buddy list (page 51). Select buddy.. Press the display key. §Info§ The display depends on the provider. Example: Info Julian Online Julian.Reeves@jabbe r.com Ý Chat 1 Web name (nickname, abbreviated if neces- sary) 2 Status 3 User ID (format: userid@provider-domain;... -
Page 54: Writing And Sending Messages
Message types In instant messaging, a distinction is made between the following types of message: Buddy messages are the 'instant mes- sages' you receive from your buddies. You can answer the messages. Info messages are special information from the provider. They are forwarded to you, but you cannot reply to them. -
Page 55: Calling A Buddy
Messenger Predictive Text Activate/deactivate predictive text, see page 102. Select Language For predictive text: select the language in which you wish to write the text and press §OK§ Calling a buddy You can call a buddy directly. Precondition: the messenger server sup- ports calls using vCard and your buddy's vCard contains a phone number. -
Page 56: Using The Network Mailbox
Using the network mailbox Some fixed network providers and VoIP providers offer answering machines on the network – network mailboxes. You can use the relevant network mailbox if you have requested it from your fixed network or VoIP provider. The network mailbox only answers incom- ing calls made via the relevant line (fixed network or VoIP). -
Page 57: Using Several Handsets
Using several handsets Using several handsets Registering handsets You can register up to six handsets to your base station. You can register your Gigaset S45 handset on up to four base stations. Please note: – If there are several handsets registered to your base station, then you can use one to make a call via the Internet and the other to make a call via the Internet or the fixed net-... -
Page 58: De-Registering Handsets
De-registering handsets You can de-register any registered handset from any registered Gigaset S45 handset. Open list of internal users. The handset you are currently using is indicated by < . Select the handset to be de- registered. Press the display key. §Options§... -
Page 59: Changing The Name Of A Handset
Using several handsets Changing the name of a handset The names "INT "INT 2" etc. are assigned 1", automatically at registration. You can change these names. The changed name is displayed in every handset's list. Open list of handsets. Your own handset is indicated by <. -
Page 60: Using A Handset As A Room Monitor
Ending a consultation call Press the display key. §End§ You are reconnected with the external subscriber. Initiating a conference call Press the display key. §Conf.§ You are in a three-way conference call with the external and the internal sub- scriber. If the internal subscriber who has been called ends the call (press end call key a), you will be connected with the... - Page 61 Using several handsets Caution! – You should always check the operation of the room monitor before use. For example, test its sensitivity. Check the connection if you are diverting the room monitor to an outside number. – When the function is switched on the hand- set's operating time is severely reduced.
-
Page 62: Setting The Handset
Setting the handset Your handset is preconfigured, but you can change these settings to suit your individual requirements. Changing the display language You can view the display texts in different languages. ¢ ¢ Ð Settings Handset ¢ Language The current language is marked with ½. Select a language and press §OK§... -
Page 63: Setting The Display Backlight
Setting the handset Setting the display backlight Depending on whether or not the handset is in the base station you can set different levels of display backlight. If the base sta- tion is switched on, the display is perma- nently dimmed. ¢... -
Page 64: Adjusting The Loudspeaker Volume
Adjusting the loudspeaker volume You can set the loudspeaker volume for handsfree talking to five different levels and the earpiece volume to three different levels. You can only make these adjust- ments during a call. The handsfree volume can only be adjusted when this function is set. -
Page 65: Activating/Deactivating Advisory
Setting the handset Deactivating the ringer tone for the current call Press the display key. §Silence§ Activating/deactivating the alert tone In place of the ringer tone you can activate an alert tone. When you receive a call, you will hear a short tone ("Beep") instead of the ringer tone. -
Page 66: Restoring The Handset Default
Deactivating the wake-up call/ repeating after a pause (snooze mode) Precondition: A wake-up call is sounding. Press the display key. The §OFF§ wake-up call is deactivated. Press the display key or any §Snooze§ key. The wake-up call is deacti- vated and then repeated after 5 minutes. -
Page 67: Restoring The Base Station To Factory Settings
Base station settings Restoring the base station to factory settings Resetting the base station via the menu Each individual setting is reset, in particu- lar: VoIP settings such as VoIP provider and account data and DTMF settings (page 68, page 77, page 86) Settings for the local network (page 69, page 75) Default connection (page 67) -
Page 68: Setting The Default Connection
Automatic firmware update Your phone will check daily whether a newer firmware update is available via the Internet on the Siemens configuration server. If this is the case, the message New firmware available when the handset is in idle status, and the message key f flashes. -
Page 69: Making Voip Settings
You can make the following settings using your handset. Download the general access data for your VoIP provider from the Siemens configuration server and store them on your phone. Enter your personal access data for your first VoIP account (first VoIP phone number). -
Page 70: Setting The Phone's Ip Address
VoIP provider is available via Internet on the Siemens configuration server. If this is the case, when the handset is in idle status the message... -
Page 71: Activating/Deactivating Display Of Voip Status Messages
Making VoIP settings IP Address: = Dynamic: IP Address Type The IP address that is currently assigned to the base station will be displayed. It cannot be amended. IP Address Type = Static: Enter the IP address that is to be assigned to the base station (overwrit- ing the current settings). -
Page 72: Operating The Base Station On The Pabx
Operating the base station on the PABX The following settings are only necessary when your PABX requires them; see the PABX user guide. The settings only con- cern fixed network connections. You cannot send or receive SMS messages on PABXs that do not support Calling Line Identification. -
Page 73: Web Configurator
Web configurator Web configurator The Web configurator is the Web interface for your handset. It allows you to make the settings for your phone's base station via your PC's Web browser. Please note: Depending on your VoIP provider, it is possible that you will be unable to change individual settings in the Web configurator. -
Page 74: Logging Off
Once you have successfully registered, a opens with general information on Home the Web configurator. Please note: – If you have forgotten your system PIN, you must restore your device's factory settings. Please note that this will restore all other settings too (page 66). -
Page 75: Home
Web configurator Menu bar In the menu bar, the Web configurator menus are depicted in the form of tab pages. The following menus are available: Home The start screen is opened once you have registered with the Web configu- rator. It contains information on the Web configurator functions. -
Page 76: Opening Web Pages
Warning: Changes that have not been saved on your phone are lost if you move to another Web page or if the connection to the Web configu- rator is terminated, e.g. due to exceeding the time limit (page 73). Buttons Buttons are displayed in the bottom sec- tion of the working area. - Page 77 Web configurator Select if you would like to set up a Static static IP address for your phone. A static IP address is useful, for example, if port for- warding or a DMZ is set up on the router for the phone. The following fields are displayed when you select = Static:...
-
Page 78: Configuring Telephone Connections
Access to the Web configurator services from other networks is only possible if your router is set accordingly. The router must pass on the service requests from "outside" to Port 80 (standard port) of the phone. Please also read the user guide for your router. - Page 79 Web configurator Active You can use the option in the umn to activate (½) and deactivate (Õ) VoIP connections. If a connection is deactivated, the phone will not register for this connection. The connection can be activated/deactivated by clicking directly on the option. The change does not need to be saved.
- Page 80 Area: Personal Provider Data Enter the configuration data that is neces- sary for accessing your VoIP provider's SIP service. This data can be obtained from your VoIP provider. Authentication Name Specify the registration or authentica- tion ID agreed with your VoIP provider. The registration ID serves as the access ID that your phone must specify when registering with the SIP proxy/registrar...
- Page 81 Network Please note: If you have downloaded the general settings for your VoIP provider from the Siemens con- figuration server (page 82), then some fields in this area will be preset with the data from this download (e.g. the settings for the STUN server and the outbound proxy).
- Page 82 STUN server Enter the (fully-qualified) DNS name or the IP address of the STUN server on the Internet. If you selected the option STUN enabled field, you must enter a STUN server here. STUN port Enter the number of the communica- tion port on the STUN server.
- Page 83 Select VoIP Provider This will display information on the down- load procedure. The phone establishes a connection with the Siemens server on the Internet. The download procedure has several steps: ¤ Click on Next. ¤ From the list, select the country for which the list of VoIP providers is to be loaded.
-
Page 84: Optimising Voice Quality For Voip Connections
Please note: If you do not use your Gigaset.net connection for six weeks, it is automatically deactivated. You cannot be reached for calls from the Gigaset.net. The connection is reactivated: – as soon as you start a search in the Gigaset.net directory (page 25) or –... - Page 85 Web configurator Voice Quality Default settings for the codecs used are stored in your phone: one setting opti- mised for narrow bandwidths and one setting optimised for wide bandwidths. ¤ Activate one of the options for low bandwidth Optimized for high bandwidth if you wish to accept a default setting for all VoIP connec-...
-
Page 86: Assigning Sending And Receiving Numbers To Handsets
Therefore, allow your VoIP calling partner to finish speaking. Avoid interrupting your calling partner. Voice quality and infrastructure With your Gigaset S450 IP you have the opportunity to make calls with good voice list) if there is a quality via VoIP. -
Page 87: Setting Dtmf Signalling For Voip
Web configurator Please note: A handset is assigned the following numbers after it is registered with the base station: – Receiving numbers: all phone numbers assigned to the phone (fixed network and VoIP). – Sending numbers: the fixed network number and the VoIP phone number that you entered at the start of the phone con- figuration. -
Page 88: Defining Local Communication Ports For Voip
Defining local communication ports for VoIP ¤ Open the following Web page: ¢ ¢ Settings Telephony tings. In the Listen Ports for VoIP Connections specify which local ports the telephone is to use for VoIP telephony. The ports must not be used by any other subscriber in the LAN. -
Page 89: Loading/Deleting Directories Into/From The Pc
Web configurator Changing settings for dialling emergency numbers You can store up to five emergency num- bers in your telephone. The default setting for the phone is that these emergency numbers are always dialled via the fixed network – irrespective of which connec- tion type you select. -
Page 90: Telephone Directory
Load the directory file from the PC to the handset ¤ In the field: enter the tsv File for upload file (complete path name) that is to be loaded onto the handset. Click on the Browse button to navigate to the file. ¤... -
Page 91: Saving Messenger Access Data
Web configurator Saving messenger access data The messenger client in your base station enables instant messaging (immediate message transfer, chatting). The phone supports the XMPP messenger (Jabber). In order for you to use your phone's mes- senger to "go online" and "chat" on the Internet, the access data of a messenger server must be saved on your phone. -
Page 92: Making E-Mail Settings
Setting up a Gigaset.net Jabber-Account Your phone is already registered with the Gigaset.net Jabber server. An account has already been assigned to the phone. In order to chat with other Gigaset.net subscribers via this account, you must transfer the required Gigaset.net subscrib- ers to a contact list (buddy list) on your PC. -
Page 93: Defining The Server For Firmware Updates, Starting The Update
¢ Settings Miscellaneous. Download the firmware update directly from the Internet The server on which Siemens makes new firmware versions available for your base station is set by default. The URL of the Internet server is displayed in the field. -
Page 94: Activating/Deactivating The Automatic Version Check
When the version check is activated, the phone checks on a daily basis whether the Siemens configuration server is carrying a new version of the phone firmware or of the file with the general settings for your VoIP provider. -
Page 95: Appendix
Questions and answers If you have any questions about using your phone, visit us at any time at www.siemens.com/gigasetcustomercare. The table below contains a list of common problems and possible solutions. Please note:... - Page 96 flashes in the display. Base Search The handset is set to and no base sta- Best Base tion is switched on or within range. ¥ Move the handset closer to the base sta- tion. ¥ Check the base station mains adapter. flashes in the display.
- Page 97 ¥ Please use only firmware and down- loads that are made available on the preconfigured Siemens server (page 92) or at www.siemens.com/ gigasetcustomercare. 3. If Server not accessible! download server may not be accessible. ¥...
- Page 98 VoIP status codes If you have problems with your VoIP con- nections, activate the Show Stat. on HS function (page 69, page 93). You will then receive a VoIP status code that will support you in problem analysis. Also enter the code during problem analysis by the Serv- ice department.
- Page 99 Appendix Status Meaning code 0x486 The called party is busy. 0x487 General faults: The call was interrupted before a call was established. The status code con- firms receipt of the interruption sig- nal. 0x488 The server cannot process the query because the data entered in the media description is not compatible.
-
Page 100: Searching For Service Information
Variant, version of handset software Service (Customer Care) We offer you support that is fast and tai- lored to your specific needs! Our Online Support on the Internet: http://www.siemens.com/gigasetcustom- ercare For more information on aftersales serv- ice, please refer to your local warranty card. -
Page 101: Symbols
Appendix Handset operating times/charging times The following information relates to bat- teries with a capacity of 650 mAh. Standby time around 170 hours (7 days) Talktime around 13 hours Charging time around 6 hours The operating and charging times apply only when using the recommended bat- teries. -
Page 102: Example: Multiple Line Input
¢ ¢ Ð Settings Display ¤ With the handset in idle status, press on the right of the control key to open the main menu. ¤ Use the control key to select the Ð Settings line – by pressing the con- trol key repeatedly up or down until the menu function is selected. -
Page 103: Writing And Editing Text
Appendix Writing and editing text The following rules apply when writing a text: Control the cursor with u v t Characters are inserted on the left of the cursor. Press the star key * to show the table of special characters. The first letter of the name of directory entries is automatically capitalised, fol- lowed by lower case letters. -
Page 104: Gigaset S450 Ip - Free Software
Names that you have prefixed with a star will move to the end of the directory. Gigaset S450 IP – free software Your Gigaset S450 IP's firmware includes free software that is licensed under the GNU Lesser General Public License. - Page 105 02871 / 91 30 29 Use of the free software contained in this product extending beyond the program sequence intended by Siemens is at the user's own risk – i.e. there shall be no claims for liability for defects against Sie- mens Home and Office Communication Devices GmbH &...
- Page 106 We protect your rights with a two-step method: (1) we copyright the library, and (2) we offer you this license, which gives you legal permis- sion to copy, distribute and/or modify the library. To protect each distributor, we want to make it very clear that there is no warranty for the free library.
- Page 107 Appendix Activities other than copying, distribution and modification are not covered by this License; they are outside its scope. The act of running a program using the Library is not restricted, and output from such a program is covered only if its contents constitute a work based on the Library (independent of the use of the Library in a tool for writing it).
- Page 108 5. A program that contains no derivative of any portion of the Library, but is designed to work with the Library by being compiled or linked with it, is called a "work that uses the Library". Such a work, in isolation, is not a derivative work of the Library, and therefore falls outside the scope of this License.
- Page 109 Appendix distribution of the work based on the Library and of the other library facilities is otherwise permitted, and provided that you do these two things: a) Accompany the combined library with a copy of the same work based on the Library, uncom- bined with any other library facilities.
- Page 110 write to the author to ask for permission. For software which is copyrighted by the Free Soft- ware Foundation, write to the Free Software Foundation; we sometimes make exceptions for this. Our decision will be guided by the two goals of preserving the free status of all deriva- tives of our free software and of promoting the sharing and reuse of software generally.
-
Page 111: Accessories
Illuminated keypad Handsfree talking Polyphonic ringer tones Directory for around 150 entries SMS (Precondition: CLIP must be enabled) Headset socket Room monitor www.siemens.com/gigaset Gigaset Handset C45 Illuminated colour display (4096 colours) Various different screensavers Illuminated keypad Handsfree talking Polyphonic ringer tones... -
Page 112: Glossary
Glossary ADSL Asymmetric Digital Subscriber Line Special form of DSL. Application Layer Gateway NAT control mechanism of a router. Many routers with integrated NAT use ALG. ALG lets the data packets in a VoIP connection pass and adds the public IP address of the secure private network. - Page 113 You can specify the IP address of the primary/secondary DNS server. See also: DynDNS. Domain name Name of one (of several) Web server on the Internet (e.g. Siemens Home) The domain name is assigned to the rele- vant IP address by DNS. DSCP Differentiated Service Code Point See Quality of Service (QoS).
- Page 114 DTMF Dual Tone Multi-Frequency Another description for dual tone multi-frequency dialling (DTMF). Dynamic IP address A dynamic IP address is assigned to a network component automatically via DHCP. The dynamic IP address for a network component can change every time it registers or at certain time inter- vals.
- Page 115 Glossary G.711 a law, G.711 µ law Standard for a Codec. G.711 delivers a very good voice qual- ity that corresponds to that in the ISDN fixed network. As there is little com- pression, the necessary bandwidth is around 64 Kbit/s per voice connection, but the delay caused by coding/decod- ing is only 0.125 ms.
- Page 116 Internet Global WAN. A series of protocols have been defined for exchanging data, known by the name TCP/IP. Every Network subscribers is identifi- able via its IP address. DNS assigns a Domain name to the IP address. Important services on the Internet include the World Wide Web (WWW), e-mail, file transfer and discussion forums.
- Page 117 Glossary Music on hold Music that is played while you are Consultation call or Toggling. The waiting participant hears music while on hold. Network Address Translation Method for converting (private) IP addresses to one or more (public) IP addresses. NAT enables the IP addresses of Network subscribers (e.g.
- Page 118 Pre-dialling See Block dialling. Private IP Address See Public IP address. Protocol Describes the agreements for commu- nicating within a Network. It contains rules for opening, administering and closing a connection, about data for- mats, time frames and possible error handling.
- Page 119 Glossary Routing Routing is the transmission of data packets to another subscriber in your network. On its way to the recipient, the data packet is sent from one router to the next until it reaches its destina- tion. If data packets were not forwarded in this way, a network like the Internet would not be possible.
- Page 120 Uniform Resource Identifier Character string used to identify resources (e.g. e-mail recipient, http://siemens.com, files). On the Internet URIs are used as a uni- form identification for resources. URIs are also described as an SIP address.
-
Page 121: Index
Index Index Access protection ....Access to Web configurator from other networks ..Accessories ....Account name (e-mail) . - Page 122 Call display ....fixed network ....VoIP .
- Page 123 Index Deleting characters ....Demilitarised Zone ....De-registering with Web configurator ..Deregistering handset from base station Destination number (room monitor)
- Page 124 Enquiry call ending ..... . external (VoIP) ....internal .
- Page 125 Index transferring a call ....using room monitor ... . using several ....Handset directory editing via PC .
- Page 126 paging key (base station) recall key ..... speed dial ....star key .
- Page 127 Index Multiple line input ....Muting the handset ....Muting the microphone ... Name changing name of the handset displayed (VoIP)
- Page 128 Priority (messenger) ....Private IP Address ....Problems and solutions ... Protocol .
- Page 129 Index draft message list ....forwarding ....input language .
- Page 130 Versions check, automatic VIP (directory entry) ....Voice over Internet Protocol Voice quality ....Voice quality and infrastructure VoIP .