Advertisement
Quick Links
Installation Manual
Part names
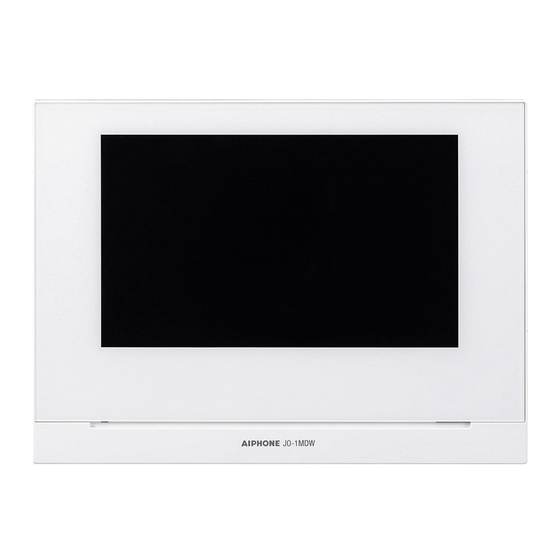
JO-1MDW
RESET button
Press this button to
reboot the station.
Microphone
M
Status LED
Camera-angle
JO-DA
adjustment switch
itch
Surface mount
The camera-angle adjustment switch is
le adjustment switch is
behind the panel.
.
+17° (Upward)
Upward)
+7° (Upward)
0° (Center)
Center)
-7° (Downward)
wnward)
Camera-angle
adjustment switch
Drainage holes
Locator LED (red)
Holes for discharging rain water from inside the unit.
Do not obstruct these holes.
JO-DV
Surface mount
Illumination
sensor
Call button
Vandal resistant front panel
JO-DVF
Surface mount
Illumination
sensor
Vandal resistant front panel
JO-1MDW (Master monitor station)
JOS-1AW (A set including JO-1MDW, JO-DA and power supply)
JOS-1VW (A set including JO-1MDW, JO-DV and power supply)
JOS-1FW (A set including JO-1MDW, JO-DVF and power supply)
Package contents
JO-1MDW
JO-DA
microSD card
slot
JO-DV
Speaker
JO-DVF
Camera
Microphone
Flush mount
back box
Illumination sensor
Speaker
Call button with white light LED
or
PS-1820, PS-1820S,
PS-1820UL, PS-1820BF
Camera
Microphone
White light LED
Speaker
Name plate
(with backlight)
The backlight is always lit while
the power is on.
NOTES:
•
Drainage holes
Mounting and wood mounting screws not included.
Do not obstruct.
•
microSDHC card is not included. Please purchase separately.
•
For details on the power supply, see the installation manual of the power supply separately.
Precautions
Camera
Warning
Microphone
1. Do not dismantle or alter the unit. Fire or electric shock could result.
White light LED
2. Do not use power supply with a voltage other than specifi ed. Fire or electric shock could result.
Speaker
3. Do not open the case. High voltage is present internally. Electric shock could result.
Name plate
4. Do not install two power supplies in parallel to single input. Fire or damage to the unit
(with backlight)
could result.
5. Do not connect any terminal on the unit to AC power line. Fire or electric shock could result.
Call button
6. For power supply, use Aiphone power supply model specifi ed for use with system.
If non-specifi ed product is used, fi re or malfunction could result.
JO-1MDW
JOS-1AW
JOS-1VW
Special
screw × 4
Power
supply
PS-1820DM
Installation
manual
Information sheet
Special
screwdriver
Special screwdriver
(Hexagonal wrench)
Transparent
name plate × 2
Negligence could result in death or serious injury.
Caution
Negligence could result in injury to people or damage to property.
1. Do not install or make any wire terminations while power supply is plugged in. It can cause
JOS-1FW
electrical shock or damage to the unit.
2. Before turning on power, make sure wires are not crossed or shorted.
Fire or electric shock could result.
3. Install the device in a position where it will not easily be brushed against by somebody's
shoulder, etc.
Failure to do so could result in injury.
4. Do not place your ear close to the speaker during use.
It could cause hearing damage.
Precautions for mounting
1. Installing the device in the following locations could cause malfunction:
* Locations exposed to direct sunlight
* Locations that get hot
Close to a heater, boiler, etc.
* Locations where there is risk of exposure to liquid, dust, oil, or chemicals
* Locations with high humidity
Bathroom, basement, greenhouse, etc.
* Locations with low temperature
Inside a cold storage warehouse, the front of a cooler, etc.
* Locations directly exposed to steam or oil smoke
Next to heating devices or a cooking space, etc.
* Sulphurous environments such as a hot spring area
* Locations close to the sea or directly exposed to sea breeze
2. In 50Hz regions, if a strong fl uorescent light shines directly into the camera, it may cause the
image to fl icker. Either shield the camera from the light or use an inverter fl uorescent light.
3. For running cables, separate them for audio/video and door release and keep them more than
10cm (3-15/16") away from each other.
4. When using an existing wiring, depending on the type of wiring, it may not operate the system.
In case of that, change wiring is required.
5. Do not use the impact driver for mounting. Damage to the unit could result.
6. Avoid installing the master monitor station in concave space of a wall to prevent disconnection
of communication.
General Precautions
1. Install low-voltage lines at least 30cm (11") away from high-voltage lines (AC100V-240V),
especially inverter air conditioner wiring. Failure to do so may result in interference or
malfunction.
2. When installing or using the device, give consideration to the privacy rights of subjects, as it
is the responsibility of the system owner to post signs or warnings in accordance with local
ordinances.
Notices
1. Please note that images and illustrations depicted in this manual may differ from the actual
ones.
2. Using a mobile phone or professional-use radio equipment such as walkie-talkie close to the
system may cause a malfunction.
3. In areas where broadcasting station antennas are close by, the intercom system may be
affected by radio frequency interference.
4. Do not install the unit close to an electrical appliance or water heater using a dimmer or
inverter, a remote controller of fl oor heating, etc. Failure to do so may generate a noise
causing a malfunction of the unit.
5. When warm indoor air fl ows into the unit, dew condensation may be caused by a temperature
difference between indoors and outdoors. It is recommended to cover openings on the unit
such as cable incoming holes to avoid condensation.
6. In areas where microwave is close by, the intercom system may be affected by radio
frequency interference.
Issue date: Dec. 2018 FK2603 A P1218 HZ 61036
Advertisement

Related Manuals for Aiphone JO-1MDW


Summary of Contents for Aiphone JO-1MDW
-
Page 1: Part Names
5. Do not connect any terminal on the unit to AC power line. Fire or electric shock could result. Call button 6. For power supply, use Aiphone power supply model specifi ed for use with system. If non-specifi ed product is used, fi re or malfunction could result. -
Page 2: Mounting Locations
JO-DV JO-DA 1,800 (5′ 11″) Approx. • Never use individual conductors, twisted pair cable or coaxial cable. JO-1MDW Approx. (20″) IER-2 Unit (1′ 9″) center To connect low voltage wires, either crimp them with a crimp sleeve or solder 1,250 Approx. - Page 3 JO-1MDW (Master monitor station) Installation Manual JOS-1AW (A set including JO-1MDW, JO-DA and power supply) JOS-1VW (A set including JO-1MDW, JO-DV and power supply) JOS-1FW (A set including JO-1MDW, JO-DVF and power supply) Issue date: Dec. 2018 FK2603 A P1218 HZ 61036...
-
Page 4: Technical Precautions
Please note that any damage JO-DVF or other issues caused by failure of function or interconnection with Aiphone products is also not covered by this warranty. Aiphone will not be responsible for any costs incurred Mobile device Mobile device involving on site service calls.