Table of Contents
Advertisement
Advertisement
Table of Contents

Related Manuals for Aztech WMB250AC


Summary of Contents for Aztech WMB250AC
- Page 2 © Copyright All rights reserved. No part of this document may be reproduced, republished, or retransmitted in any form or by any means whatsoever, whether electronically or mechanically, including, but not limited to, by way of photocopying, recording, information recording, or through retrieval systems without the express written permission. We reserve the right to revise this document at any time without the obligation to notify any person and/or entity.
-
Page 3: Table Of Contents
Status ........................15 Config ........................18 System ........................20 Changing the SSID and Password using the AztechMesh App .......... 22 Adding a New WMB250AC Mesh Node to an existing network ........24 Safety Warning ..........................26 General Specification ........................27... -
Page 4: About The Wmb250Ac
To give you a better connection and coverage, Aztech developed the WMB250AC, an all-in-one solution that gives a 2100Mbps dual-band concurrent wireless access point to give you a satisfying experience for your internet needs. - Page 5 AztechMesh App • Using the AztechMesh app on your phone, you can easily change the SSID and password of the mesh network. You can also view the information of all the nodes, and clients within the mesh network.
-
Page 6: Package Contents
Package Contents Package contents are listed below. For any missing items, please contact your dealer immediately. Product contents vary for different models. WMB250AC • Ethernet cable (RJ45) • DC Power Adapter • Easy Start Guide • Warranty Policy • NOTE: You may also download the Easy Start Guide and the User Manual by visiting... -
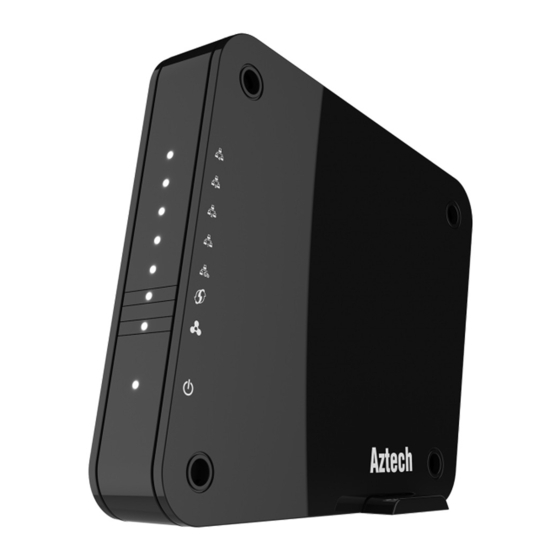
Page 7: Device Interface
Device Interface Front 1. Fast Ethernet LED 2. Gigabit Ethernet LED 3. WPS LED 4. Mesh LED Power LED Status Description No Power Power Blinking White Device is booting Solid White Device has booted and is running Solid White WPS Pairing has been established Blinking White Ongoing/active WPS process... - Page 8 Back 1. Fast Ethernet Ports 1-4 2. Gigabit Ethernet Port 3. Factory Reset Button 4. 12 DC Power Input Physical Interface Description Ethernet Port 1 - 4 For LAN connection using an Ethernet cable and connecting computers and other Ethernet devices Gigabit Ethernet Port For WAN connection using an Ethernet cable...
-
Page 9: Getting Started
Detailed instructions are provided in the subsequent pages. Plan your You may see the suggested network setup. network Setup Setup your WMB250AC either as an AP or a WMB250AC Mesh Node. Move the Place your WMB250AC to the desired WMB250AC location where dead spot is experienced.*... -
Page 10: Plan Your Extended Network
• NOTE: If you have a data point in the place where you wish to place your WMB250AC, one of the Ethernet port can be used for WAN connection to set up your WMB250AC as AP. To create a network diagram: For wireless devices, identify the wireless devices you want to include in the •... -
Page 11: Setting Wmb250Ac As An Access Point (Ap)
Setting WMB250AC as an Access Point (AP) To setup the WMB250AC as AP, find an area near the data point or the main router and near an electrical outlet. Alternatively, you may wish to use an Ethernet cable to connect the WMB250AC to your router for further distance (only if you do not have/wish to use the data point). - Page 12 Setting up your WMB250AC as Mesh Node WMB250AC is a Mesh-Ready device as a Mesh Node. Before you set up your mesh system, you will need two units of WMB250AC. One unit will be connected to the main router and will be known as the main AP/Controller unit. The second WMB250AC will be the Mesh Node unit.
- Page 13 Adding More WMB250AC Mesh Nodes (Manually) You may add additional WMB250AC to your mesh system as mesh nodes. This will help increase the coverage of your wireless range capacity as well as you will be able to roam without disconnection.
-
Page 14: The Web User Interface
Access the main router’s Web user interface and check the IP of the WMB250AC. After finding out the IP, access the Web User Interface of WMB250AC using that IP. It will be listed as WMB250AC in your router connected device list. E.g.; if IP of the main router is 192.168.1.254, the possible IP of WMB250AC can be 192.168.1.x... -
Page 15: Navigation Panel
Navigation Panel Allows you to access the Status, Configuration, and System panels of WMB250AC. This includes the basic and advanced wireless network properties, view the connected clients and the administration settings. Status • Config • System • A. Status The Status is the default page of the Web User Interface. The Status Tab consists of four sub-tabs;... - Page 16 Wireless The Wireless Page shows the wireless status WMB250AC. This page displays the selection of Wi-Fi Interface, device mode, wireless band, bandwidth, AP Mac Address (BSSID), channel, connected devices, packets received successfully, bytes received, packets transmitted successfully and bytes transmitted.
- Page 17 The SONiQ Mesh Node sub-tab shows the current status/role of the WMB250AC unit when in Mesh mode. In this page, it also shows the connected WMB250AC devices. When SONiQ is configured or when in mesh mode, the current role of the WMB250AC will be displayed in this page.
-
Page 18: Config
B. Config The Config Tab allows you to configure the Basic and Advanced Wireless settings, Wireless MAC Filtering and Networking Settings. There are three sub tabs for Config; Wireless • MAC Filtering • Wireless In this Wireless Page, there is Basic and Advanced Page. Basic Page is where users can configure basic configurations such the SSID and Network Password. - Page 19 MAC Filtering The MAC Filtering feature will provide additional protection to your wireless network. It allows or denies Wireless Devices from accessing the WMB250AC with the use of the MAC address which is unique for every network device. To add a MAC Filter in your network, 1.
-
Page 20: System
The Networking Page allows you to configure the Networking setting of your WMB250AC. In this page, it allows you to configure the IP Address and Subnet Mask for LAN interface. This page also displays the MAC Address of the Ethernet and... - Page 21 AP mode. Update Allows you to update the firmware of your WMB250AC. It is highly recommended to ONLY UPDATE your unit using OFFICIALLY RELEASED Aztech firmware downloadable from our Aztech Support Site (www.aztech.com).
-
Page 22: Changing The Ssid And Password Using The Aztechmesh App
1. Install the AztechMesh app on 2. Connect your phone to your phone. WMB250AC Wi-Fi Network and launch AztechMesh app. Slide to start. 3. Select your WMB250AC master 4. Enter username and password to node from the list. login. Both are “admin” by default. - Page 23 5. Click the Wi-Fi Settings button to 6. Edit SSID and Password. Click enter Wi-Fi Settings screen. Apply to save your changes.
-
Page 24: Adding A New Wmb250Ac Mesh Node To An Existing Network
Adding a New WMB250AC Mesh Node to an existing network 1. Power on the new WMB250AC 2. Click “Add Mesh Node” button. node. Click on the Home icon at the middle of the screen. 3. Select your preferred method to 4. - Page 25 5. To add via QR code, select the 6. After successfully adding a mesh “Scan QR” option. The camera node, wait for the mesh node to shall open. Scan QR code of the restart. The process might take up new mesh node from its product to 2 minutes.
-
Page 26: Safety Warning
Safety Warning For your safety, be sure to read and follow all warning notices and instructions. Do not open the device. Opening or removing the device cover can expose you to dangerous high voltage points or other risks. Only qualified service personnel can service the device. -
Page 27: General Specification
General Specification To properly take care of your device, please be advised of the operation temperature and the only power supply to be used. Operation temperature: 0º to +40ºC...