Table of Contents
Advertisement
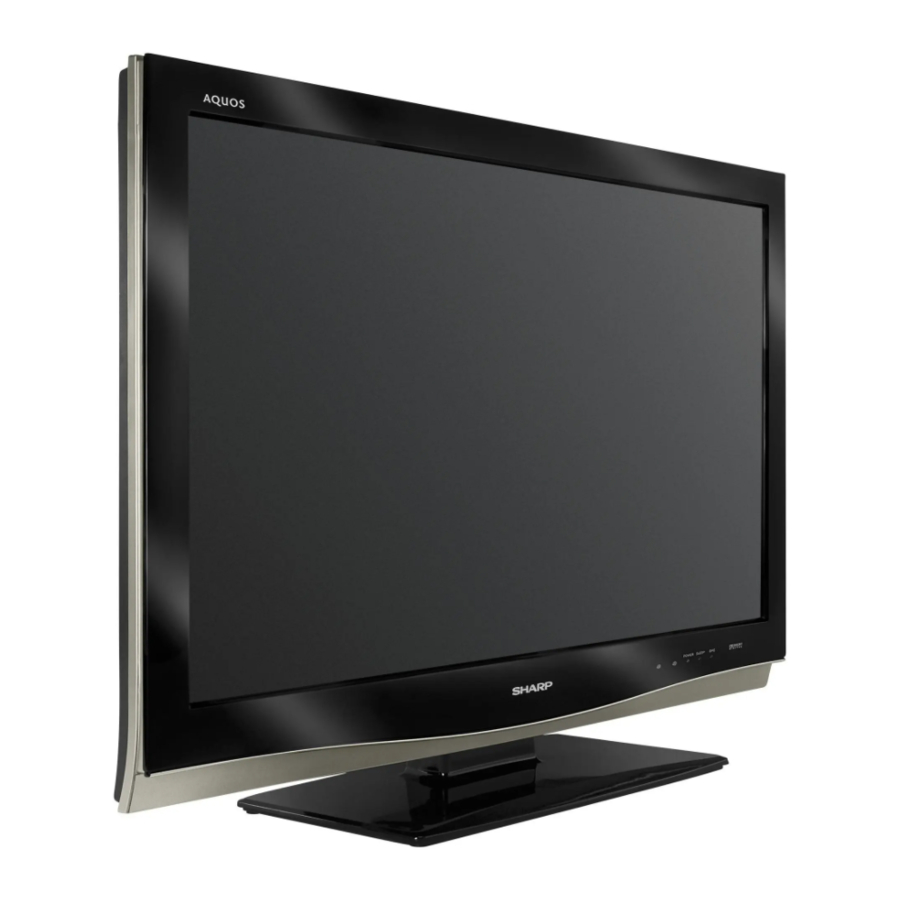
LC-32D64U
LC-37D64U
IMPORTANT
: Please read this operation manual before starting operating the equipment.
IMPORTANTE : Lea este manual de operación antes de comenzar a operar el equipo.
LIQUID CRYSTAL TELEVISION
TÉLÉVISEUR ACL
TELEVISOR CON PANTALLA
DE CRISTAL LÍQUIDO
OPERATION MANUAL
MODE D'EMPLOI
MANUAL DE OPERACIÓN
Advertisement
Table of Contents

Related Manuals for Sharp Aquos LC 37D64U


Summary of Contents for Sharp Aquos LC 37D64U
- Page 1 LC-32D64U LC-37D64U IMPORTANT IMPORTANTE : Lea este manual de operación antes de comenzar a operar el equipo. LIQUID CRYSTAL TELEVISION TÉLÉVISEUR ACL TELEVISOR CON PANTALLA DE CRISTAL LÍQUIDO OPERATION MANUAL MODE D'EMPLOI MANUAL DE OPERACIÓN : Please read this operation manual before starting operating the equipment.
-
Page 3: Important Information
• To avoid scratching the frame or screen, please use a soft, lint free cloth for cleaning. Approved cleaning cloths are available directly from Sharp in single (00Z-LCD-CLOTH) or triple (00Z-LCD-CLOTH-3) packs. Call 1-800 BE SHARP for ordering, or VISIT www.sharpusa.com/SharpDirect. -
Page 4: Trademarks
DECLARATION OF CONFORMITY: SHARP LIQUID CRYSTAL TELEVISION, MODEL LC-32D64U/LC-37D64U This device complies with Part 15 of the FCC Rules. Operation is subject to the following two conditions: (1) This device may not cause harmful interference, and (2) this device must accept any interference received, including interference that may cause undesired operation. -
Page 5: Dear Sharp Customer
DEAR SHARP CUSTOMER Thank you for your purchase of the Sharp Liquid Crystal Television. To ensure safety and many years of trouble-free operation of your product, please read the Important Safety Instructions carefully before using this product. IMPORTANT SAFETY INSTRUCTIONS Electricity is used to perform many useful functions, but it can also cause personal injuries and property damage if improperly handled. - Page 6 IMPORTANT SAFETY INSTRUCTIONS • Outdoor Antenna Grounding — If an outside antenna is connected to the television equipment, be sure the antenna system is grounded so as to provide some protection against voltage surges and built-up static charges. Article 810 of the National Electrical Code, ANSI/NFPA 70, provides information with regard to proper grounding of the mast and supporting structure, grounding of the lead-in wire to an antenna discharge unit, size of grounding conductors,...
-
Page 7: Quick Reference
Setting the TV on the Wall CAUTION • This TV should be mounted on the wall with both the AN-37AG2 (SHARP) wall mount bracket and the AN-37P30 (SHARP) attachment of the wall mount bracket. The TV cannot be mounted when with only the AN-37AG2 wall mount bracket. -
Page 8: Quick Installation Tips
IF THE UNIT DOES NOT POWER ON - UNPLUG THE AQUOS TELEVISION FROM THE OUTLET AND REPEAT THE INSTALLATION STEPS. IF YOU STILL ENCOUNTER NO POWER, PLEASE CONTACT US AT 1-800-BE-SHARP. Place the Ferrite core in the space indicated in the below fi... -
Page 9: Preparation
Preparation Antennas To enjoy a clearer picture, use an outdoor antenna. The following is a brief explanation of the types of connections that are used for a coaxial cable. If your outdoor antenna uses a 75-ohm coaxial cable with an F-type connector, plug it into the antenna terminal at the rear of the TV set. -
Page 10: Table Of Contents
Contents IMPORTANT INFORMATION ...1 Trademarks ...2 DEAR SHARP CUSTOMER ...3 IMPORTANT SAFETY INSTRUCTIONS ...3 QUICK REFERENCE ...5 Attaching/Detaching the Stand ...5 Setting the TV on the Wall ...5 QUICK INSTALLATION TIPS ...6 Using the Remote Control Unit ...6 Preparation ...7 Antennas ...7... -
Page 11: Part Names
Part Names TV (Front) TV (Top/Side/Rear) Channel buttons INPUT button Volume buttons (VOL l / k ) INPUT 3 terminals SERVICE terminal MENU button POWER button Remote control sensor OPC sensor (See page 19.) OPC indicator (See page 19.) SLEEP indicator (See page 13.) POWER indicator (See page 12.) AC INPUT terminal INPUT 4 terminal (HDMI) -
Page 12: Remote Control Unit
Part Names Remote Control Unit • When using the remote control unit, point it at the TV. TV POWER: Switch the TV power on or enters standby. (See page 12.) DISPLAY: Display the channel information. SOURCE POWER: Turns the power of the external equipment on and off. -
Page 13: Connecting To External Equipment
Connecting to External Equipment You can connect many types of external equipment to your TV like a Blu-ray disc player, HD-DVD player, DVD player, VCR, Digital TV tuner, HDMI equipment, game console or camcorder. To view external source images, select the input source from INPUT on the remote control unit or on the TV. (See page 13.) CAUTION •... -
Page 14: Watching Tv
Watching TV Turning On/Off the Power POWER TV POWER (On/Standby) Initial Setup When you turn on the TV for the fi rst time, it will automatically memorize the broadcasting channels available in the region where you live. Perform the following steps before you press TV POWER on the remote control unit. -
Page 15: Direct Button Operation
Direct Button Operation Changing Channels You can change channels by pressing CH • (DOT). Examples: To select a 1 or 2-digit channel number (e. g., Channel 5): Press 5 ENT. To select a 3-digit channel number (e. g., Channel 115): Press 1 ENT. - Page 16 Direct Button Operation AV MODE AV MODE gives you 8 viewing options to choose from to best match the surrounding environment of the TV, which can vary due to factors like room brightness, type of program watched or the type of image input from external equipment.
- Page 17 Direct Button Operation Closed Captions and Digital Closed Captions Your TV is equipped with an internal Closed Caption decoder. It allows you to view conversations, narration and sound effects as subtitles on your TV. Closed Captions are available on some TV programs and on some VHS home video tapes at the discretion of the program provider.
- Page 18 Direct Button Operation VIEW MODE You can select the screen size. Press VIEW MODE. • The View Mode menu displays. • The menu lists the View Mode options selectable for the type of video signal currently being received. Press VIEW MODE or a / b while the View Mode menu is displayed to select a desired item on the menu. •...
-
Page 19: On-Screen Display Menu
On-Screen Display Menu Menu Items For TV/INPUT 1/2/3 Mode Picture Menu OPC ... Page 19 Backlight ... Page 19 Contrast ... Page 19 Brightness ... Page 19 Color ... Page 19 Tint ... Page 19 Sharpness ... Page 19 Advanced C.M.S.-Hue ... -
Page 20: On-Screen Display Menu Operation
On-Screen Display Menu On-Screen Display Menu Operation Example Picture [b12] a16 Backlight Contrast [b30] Brightness Color Tint [ b2] Sharpness Advanced Reset : Select ENTER : Enter RETURN : Back The bar above is an operational guide for the remote control. The bar will change in accordance with each menu setting screen. -
Page 21: Picture Menu
On-Screen Display Menu Picture Menu Adjusts the picture to your preference with the following picture settings. Example Picture [b12] a16 Backlight Contrast [b30] Brightness Color Tint [ b2] Sharpness Advanced Reset Press MENU to display the MENU screen, and then press c/d to select "Picture". -
Page 22: Audio Menu
On-Screen Display Menu I/P Setting Converts input signals depending on the type of images. Fast: Suitable for fast-moving images Slow: Suitable for smooth images with low amounts of fl ickers • "I/P Setting" is not selectable when channel display shows an input resolution of 480P, 720P, or 1080P. -
Page 23: Power Control Menu
On-Screen Display Menu Power Control Menu Power control setting allows you to save energy. Example Power Control No Signal Off No Operation Off Press MENU to display the MENU screen, and then press c/d to select "Power Control". Press a/b to select a "No Signal Off" or "No Operation Off", and then press ENTER. -
Page 24: Ch Setup
On-Screen Display Menu CH Setup If initial setup does not memorize all the channels in your region, follow the instructions below to manually memorize the channels. Air/Cable: Make sure what kind of connection is made with your TV when selecting "Air" or "Cable". CH Search: Channel auto search makes the TV look for all channels viewable in the set area. -
Page 25: Position
On-Screen Display Menu Position For adjusting a picture's horizontal and vertical position. H-Pos.: Centers the image by moving it to the left or right. V-Pos.: Centers the image by moving it up or down. • For resetting adjustments to the factory preset values, press a / b to select "Reset", and then press ENTER. - Page 26 On-Screen Display Menu ■ MPAA (Voluntary movie rating system) ■ MPAA (Voluntary movie rating system) Example Example MPAA MPAA TV Guidelines TV Guidelines Can. English Ratings Can. English Ratings Can. French Ratings Can. French Ratings Press a / b to adjust the item to your desired position. Press a / b to adjust the item to your desired position.
- Page 27 On-Screen Display Menu Canadian Rating Systems (Canadian English ratings and Canadian French ratings) • The TV rating systems in Canada are based on the Canadian Radio-Television and Telecommunications Commission (CRTC) policy on violence in television programming. • While violence is the most important content element to be rated, the structure developed takes into consideration other program content like language, nudity, sexuality and mature themes.
-
Page 28: Option Menu
On-Screen Display Menu Option Menu Example Option AQUOS LINK Setup Audio Only Digital Noise Reduction Output Select Caption Setup Digital Caption Info. Program Title Display Favorite CH Game Play Time Operation Lock Out Press MENU to display the MENU screen, and then press c / d to select "Option". -
Page 29: Caption Setup
On-Screen Display Menu Caption Setup This function allows you to adjust the closed caption screen appearance to suit your preference. You can adjust 7 items: "Caption Size", "Font Style", "Foreground Color", "Foreground Opacity", "Background Color", "Background Opacity" and "Character Edge". Example: Selectable items available for "Font Style". -
Page 30: Digital Setup Menu
USB memory device with the update fi le into the SERVICE terminal on the TV. To check for the availability of a software update, visit www.sharpusa.com. If you have any questions, please call 1-800-BE-SHARP (800-237-4277). [PCM] CAUTION • Do not remove the USB memory device or unplug the AC cord while the software is being updated. - Page 31 On-Screen Display Menu Press ENTER to start checking the data in the USB memory device. Insert the USB memory device containing the software update file. During the data checking, “ Checking Now checking the data in the USB memory device. Checking •...
-
Page 32: Other Viewing Options
Other Viewing Options Presetting Remote Control Function You can operate the connected AV products (AV receiver, cable box, SAT tuner, DTV, VCR, DVD, LD) using the presetting manufacturer function of your remote control unit. Presetting manufacturer codes Press FUNCTION until the LED for your device lights up. - Page 33 Other Viewing Options Manufacturer codes REMOTE CONTROL CODE VCR BRAND DVD/BD/LD BRAND NUMBER CATV/SAT BRAND • Numbers marked with * are SAT codes, all others are CATV codes. AUDIO BRAND REMOTE CONTROL CODE NUMBER REMOTE CONTROL CODE NUMBER REMOTE CONTROL CODE NUMBER...
-
Page 34: Using Aquos Link
Using AQUOS LINK Controlling HDMI Equipment Using AQUOS LINK What’s AQUOS LINK? • Using the HDMI CEC (Consumer Electronics Control) protocol, with AQUOS LINK you can interactively operate compatible system equipment (Blue-ray Disc equipment, AV amplifi er, DVD). • By connecting AQUOS LINK-compatible devices with HDMI-certifi ed cables to the TV, you can control a recorder or AV amplifi... -
Page 35: Selecting Recorder
Using AQUOS LINK AQUOS LINK Setup Press MENU to display the MENU screen, and then press c/d to select "Option". Press a/b to select “AQUOS LINK Setup”, and then Press ENTER. Press a/b to select a specifi c item, and then press ENTER. -
Page 36: Aquos Link Menu
Using AQUOS LINK AQUOS LINK Menu AQUOS LINK Recorder EPG Top menu/title list Media change By AQUOS AUDIO SP By AQUOS SP Sound mode change Model select Timer Recording You can call up the CEC-compatible recorder’s EPG and preset timer recordings using the TV’s remote control. -
Page 37: Appendix
Appendix Troubleshooting Problem • No power • Unit cannot be operated. • Remote control unit does not operate. • Picture is cut off/with sidebar screen. • Strange color, light color, or color misalignment • Power is suddenly turned off. • No picture •... -
Page 38: Rs-232C Port Specifi Cations
Appendix RS-232C Port Specifi cations ■ PC control of the TV • Attach an RS-232C cable cross-type (commercially available) to the supplied Din/D-Sub RS-232C for the connections. • This operation system should be used by a person who is accustomed to using computers. ■... -
Page 39: Specifi Cations
The dimensional drawings are shown on the inside back cover. • As part of policy of continuous improvement, SHARP reserves the right to make design and specifi cation changes for product improvement without prior notice. The performance specifi cation fi gures indicated are nominal values of production units. -
Page 40: Pc Compatibility Chart
The copyrights for the software components and various relevant documents included with this product that were developed or written by SHARP are owned by SHARP and are protected by the Copyright Act, international treaties, and other relevant laws. This product also makes use of freely distributed software and software components whose copyrights are held by third parties. -
Page 41: Calling For Service
WHICH VARY FROM STATE TO STATE. The warranties given herein shall be the sole and exclusive warranties granted by Sharp and shall be the sole and exclusive remedy available to the purchaser and only for the time periods set forth herein. No other representations or promises made by anyone are permitted. -
Page 43: Dimensional Drawings
Dimensional Drawings LC-32D64U LC-37D64U (776) (701.5) (300) (898) (824.4) (300) Unit: inch (mm) (480) (100) (95) (65) ( 276) (480) (100) (95) (65) (276) -
Page 44: Sharp Corporation
SHARP ELECTRONICS CORPORATION Sharp Plaza, Mahwah, New Jersey 07430-2135 SHARP CORPORATION Printed in Mexico Imprimé au Mexique Impreso en México TINS-D490WJZZ 08P01-MX-NM...