Advertisement
Available languages
Available languages
Quick Links
Installation Instructions
2001
®
R
Specifications
• Pressure Range: 40 – 100 PSI (2.8 – 7.0 kg/cm
• Nozzle Performance
@ Optimum Pressure: 60 PSI (4.2 kg/cm
Main
Color
Inner
Radius
GPM
Nozzle
Nozzle
in Feet
#6
Yellow
Gray
51
7.1
#9
Orange
Gray
52
10.2
#12
Brown
Red
53
13.0
#15
Gray
Red
57
16.1
#18
Blue
Red
59
18.9
#24
Green
Red
60
23.3
*Precipitation rates are for triangular spacing at 50% of diameter.
• Nozzle Trajectory: 25°
• Arc Range: 30° – 360°
• Inlet Thread Size: 1" female NPT or 25mm female BSP
• Nozzle Pop-Up Height: 4" (102mm)
• Overall Height (Nozzle Retracted): 8.75" (222mm)
Nozzle Installation
to select appropriate nozzle and install as follows:
Insert tool blade
Lift riser assembly.
through top of
Grasp riser firmly
nozzle turret as
below nozzle turret
shown. Twist 1/4
to prevent
turn to engage.
retraction.
© 2000 The Toro Company, Irrigation Division
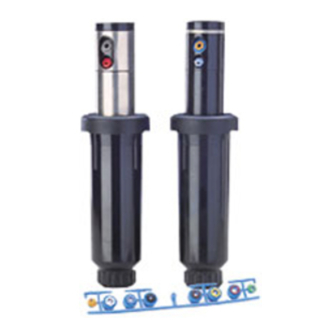
Series Sprinkler
2
) (276 – 689 kPa)
2
) (414 kPa)
Prec. Rate*
Radius
LPM
Prec. Rate*
In./Hr.
in Meters
mm/Hr.
0.23
15.6
26.9
0.31
15.9
38.6
0.39
16.2
49.1
0.41
17.4
60.9
10.5
0.45
18.0
71.3
11.4
0.54
18.3
88.2
13.7
If sprinkler nozzle change is required,
refer to the nozzle specifications above
Thread nozzles
into turret using
socket end of tool.
Align lower nozzle
as shown.
Sprinkler Installation
with finish grade. Tilt sprinkler as required to maintain perpendicular alignment with finish
grade. If installing a part-circle sprinkler, tighten sprinkler on swing joint aligning long rib on
body with left watering border. The sprinkler arc is factory preset to 180°. If arc adjustment is
required, see arc adjustment instructions below.
Swing Joint Components
1
– 1" x 3" (25mm x 76mm) Nipple
2 – 1" (25mm) Ell
3 – 1" (25mm) Street Ell
5.8
4 – 1" x 12" (25mm x 305mm) Nipple
8.0
5 – Lateral Tee
9.8
Caution: Do not use pipe
dope on plastic threads –
severe damage will result.
Arc Adjustment
is non-adjustable (fixed) and is established when the long sprinkler body rib is aligned with the
left watering border. As nozzle begins clockwise travel from left border, adjust arc as follows:
Insert tool blade through center of nozzle turret to
engage slot. Turn blade clockwise to decrease arc or
counterclockwise to increase arc. Each"click" is
equal to 3° of arc change. Observe new arc path as
nozzle sweeps back and forth. Repeat procedure as
necessary to fine-tune.
Note: To expedite arc adjustment process, turn nozzle
turret by hand in current direction of travel, releasing
turret before reversing point.
Install sprinkler to lateral line using a triple swing joint
connection as shown. Position top of sprinkler cap flush
Finish Grade
Align long rib with left
watering border.
4
3
5
Clockwise travel reversing point is adjustable to provide
30° thru 360° of arc. Counterclockwise travel reversing point
Increase
Decrease
90°
1
2
3
Form Number 368-0006 Rev. H
Advertisement

Related Manuals for Toro 2001 Series


Summary of Contents for Toro 2001 Series
-
Page 1: Specifications
Repeat procedure as necessary to fine-tune. Note: To expedite arc adjustment process, turn nozzle turret by hand in current direction of travel, releasing turret before reversing point. © 2000 The Toro Company, Irrigation Division Form Number 368-0006 Rev. H... - Page 2 Nota: Para agilizar el proceso de ajuste del arco, gire la tor- reta de la boquilla a mano siguiendo la dirección actual de movimiento, soltándola antes del punto de retroceso. © 2000 The Toro Company, Irrigation Division Form Number 368-0006 Rev. H...
- Page 3 Remarque : pour accélérer le réglage de l’arc, tournez le porte-buse à la main dans le sens du déplacement, en le relâchant avant le point de renversement de course. © 2000 The Toro Company, Irrigation Division Form Number 368-0006 Rev. H...