Advertisement
Quick Links
Introduction
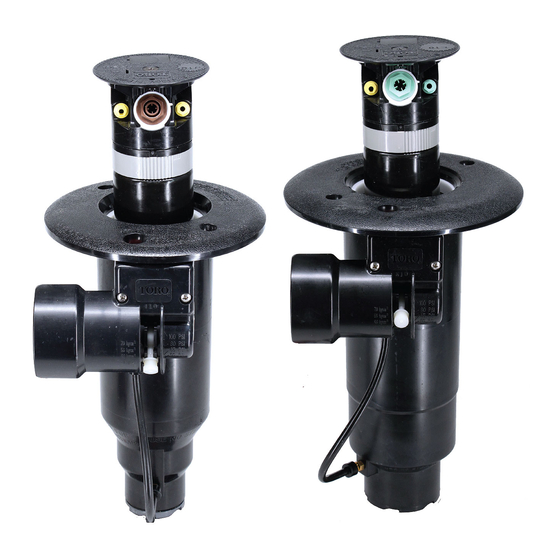
The FLX35 and FLX55 series full and part circle rotary sprinklers
are designed specifically for golf course applications.
Manufactured from durable, high-strength engineering plastic and
stainless-steel components, these sprinklers incorporate many
innovative and time-proven features for lasting, maintenance-free
operation.
Prior to installing the sprinkler, read through the recommended
installation and start-up procedures. Please observe all Warnings
and Cautions when installing and operating this equipment.
Features
• Adjustable Part circle (40°-330°) and true uni-directional full circle (360°) arc coverage
• Arc adjustment in 5° increments
• Dual trajectory main nozzle adjustment – 25° standard or 15° low angle
• Ratcheting riser in 2° increments
• Nozzle base clutching
• Two back nozzle positions
• Industry's largest precision nozzle selection
• All nozzles are color coded, debris tolerant and threaded in from the front
• Five electric and two hydraulic activation types
o Electric – Satellite systems – Standard 24 VAC solenoid; SPIKEGUARD 24VAC solenoid; Nickel plated
SPIKEGUARD 24VAC solenoid
o Electric – 2-wire systems – DC Latching solenoid; Integrated GDC module w/DC latching solenoid
o Hydraulic – Normally Open valve in head; Check-O-Matic (requires remote valve)
• Constant velocity drive and variable stator provide consistent rotation speeds
• Manual control at the sprinkler ON-OFF-AUTO (electric models only)
• Selectable/lockable pressure regulation settings; 50 psi (3,4 bar), 65 psi (4,5 bar), 80 psi (5,5 bar) or 100 psi (6,9 bar)
• Indestructable stainless steel valve seat and valve communication tube
• Body inlet rock screen serviceable from the top
• All internal components are serviceable from the top of the sprinkler
Specifications and Performance/Application Data
FLX35 Series
Radius: 43'–83' (13,1–25,3 m)
•
Flow Rate: 8.2–47.3 GPM (31–179 LPM)
•
Trajectory: Selectable 15° or 25°
•
Arc: Full Circle (360°) or adjustable part circle (40°–330°)
•
Recommended Operating Pressure:
•
65–100 PSI (4,5–6,9 Bar)
Minimum Pressure: 40 PSI (2,8 Bar)
•
Maximum Pressure: 150 PSI (10,3 Bar)
•
Precipitation Rate:
•
Minimum: 0.43"/hr (10,9 mm/hr)
Maximum: 0.76"/hr (19,3 mm/hr)
Body Height: 10" (254 mm)
•
Pop-Up Height to Nozzle: 4 3/16" (106 mm)
•
•
Inlet Size: 1" (25 mm) NPT, BSP or ACME
•
Five electric activation types:
Standard Solenoid - 24 VAC, 50/60 Hz,
0.30 Amps Inrush, 0.20 Amps Holding
SPIKEGUARD Solenoid - 24 VAC, 50/60 Hz,
0.12 Amp Inrush, 0.10 Amp Holding
Nickel Plated SPIKEGUARD Solenoid - 24 VAC, 50/60 Hz,
0.12 Amp Inrush, 0.10 Amp Holding
DC Latching Solenoid - Momentary Low Voltage Pulse
Integrated GDC Module w/ DC Latching Solenoid -
Momentary Low Voltage Pulse
•
Manual Control (Electric only): On-Off-Auto
•
Check-O-Matic Model checks up to 37' (11,2 m) of elevation
•
Eight Nozzle Variations
FLX35 & FLX55 Series Rotary Sprinklers
Installation and Service Instructions
FLX55 Series
•
•
•
•
•
•
•
•
•
•
•
•
•
•
•
Radius: 55'–92' (16,8–28 m)
Flow Rate: 14.1–61.3 GPM (53,4–232 LPM)
Trajectory: Selectable 15° or 25°
Arc: Full Circle (360°) or adjustable part circle (40°–330°)
Recommended Operating Pressure:
65–100 PSI (4,5–6,9 Bar)
Minimum Pressure: 40 PSI (2,8 Bar)
Maximum Pressure: 150 PSI (10,3 Bar)
Precipitation Rate:
Minimum: 0.45"/hr (11,4 mm/hr)
Maximum: 0.94"/hr (23,9 mm/hr)
Body Height: 11" (289 mm)
Pop-Up Height to Nozzle: 4 3/16" (106 mm)
Inlet Size: 1.5" (40 mm) NPT, BSP or ACME
Five electric activation types:
Standard Solenoid - 24 VAC, 50/60 Hz,
0.30 Amps Inrush, 0.20 Amps Holding
SPIKEGUARD Solenoid - 24 VAC, 50/60 Hz,
0.12 Amp Inrush, 0.10 Amp Holding
Nickel Plated SPIKEGUARD Solenoid - 24 VAC, 50/60 Hz,
0.12 Amp Inrush, 0.10 Amp Holding
DC Latching Solenoid - Momentary Low Voltage Pulse
Integrated GDC Module w/ DC Latching Solenoid -
Momentary Low Voltage Pulse
Manual Control (Electric only): On-Off-Auto
Check-O-Matic Model checks up to 37' (11,2 m) of elevation
Nine Nozzle Variations
Advertisement

Related Manuals for Toro FLX35 Series


Summary of Contents for Toro FLX35 Series
- Page 1 • Indestructable stainless steel valve seat and valve communication tube • Body inlet rock screen serviceable from the top • All internal components are serviceable from the top of the sprinkler Specifications and Performance/Application Data FLX35 Series FLX55 Series Radius: 43'–83' (13,1–25,3 m) Radius: 55'–92' (16,8–28 m) •...
- Page 2 Toro recommends the use of a 1 ⁄ " swing joint at flows over 25-GPM (95-LPM). Sprinkler radius data collected in Toro’s zero wind test facility per ASAE standard S398.1. Actual site conditions must be considered when selecting the appropriate nozzle.
-
Page 3: Wire Splices
Use Toro swing joints to connect the sprinklers to the lateral/main line pipe. Figure 1 Toro swing joints provide swivel joints that allow the sprinkler body to be easily positioned to finished grade and prevents pipe breakage by providing the flexibility to allow downward movement if the sprinkler is run over by heavy equipment. -
Page 4: System Start-Up
25' above controller elevation or 70' below controller elevation * - All hydraulic connections on Toro valves are 1/4" insert type. - Control line pressure must be equal to or greater than mainline pressure. - Control line pressure range is 40 to 150 PSI. - Page 5 Winterizing the irrigation system is required in freezing climates to prevent damage from water expansion when it freezes. Following are three key points for successfully winterizing the system, however, Toro provides a complete “Winterization and Pressurization Guide” (P/N 373-0849) that is available from your local Toro Distributor.
- Page 6 Adjustment Band Indicators Figure 7 90° 180° 270° 360° For reference, the adjustment band of the FLX35 and FLX55 has markers at predetermined arcs. By aligning the adjustment band indicators to the turret arrow, you can set the sprinkler arc to 90°, 180°, 270° or 360°. The arc is adjustable from 40°–330°...
-
Page 7: Troubleshooting
Pilot Valve Operation (Electric Models Only) The pilot valve controls the operation of the main valve located in the base of the sprinkler body. The main valve is operated by the release of water metered through the pilot valve when it is activated 100 PSI either manually at the sprinkler or by the irrigation system controller. -
Page 8: Servicing Procedures
Refer to the Troubleshooting Procedure in this manual in the event of a malfunction. Some special tools are required for disassembly and/or maintenance of the sprinkler and are available from your Toro dealer. - Page 9 Step 8 – Remove the cap screw (1) and cap (2). Note: During reassembly, ensure the cap is correctly installed with the Toro Logo positioned over the main nozzle (12) and the snap ring is correctly installed and fully seated in the sprinkler body.
- Page 10 Servicing Main Valve WARNING! If the valve snap ring is difficult to remove, residual water pressure may be remaining in the system. To prevent possible serious injury due to valve being ejected upward under pressure, confirm the following conditions exist prior to removing the snap ring and valve. A.
- Page 11 Step 10 – Thoroughly clean and inspect all parts. Replace damaged parts as necessary and reassemble in reverse order. Note: For service part numbers, refer to www.toro.com and click Parts. Select the “Irrigation” category and search for “Pilot Valves”. Flushing Sprinklers WARNING! Never stand or lean over the sprinkler while the irrigation system is being filled, during manual or automatic operation or when performing sprinkler service procedures.
- Page 12 NOTES: © 2015 • The Toro Company, Irrigation Division • www.toro.com Form Number 373-0859 Rev. A...