Table of Contents
Advertisement
SERIAL
OR CODE
NUMBER:
Model a ndcodenumber m aybe found
on1he right s ideofSpindie Housing
Youshould record bothmodel andserial
number a nd retainin a satepiacefor
future use
CALIFORNIA OWNERS: a unique serial
code numberis stampedinside the
Pulley Cover
CAUTION:
Read All Instructions
Carefully
Before Start-
ing Assembly and Use.
Save This Manual
For
Future Reference.
34om
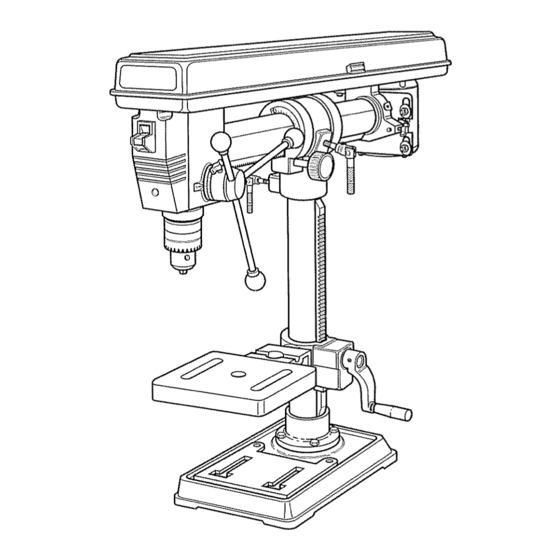
/ CRAFT M AN®
OH RADmAL DRULL
o Assembly
° Operation
o Repair Parts
o Warranty
SEARS, ROEBUCK
AND CO., Hoffman
Estates,
la 60179, U.S.A.
PART NO 4920-252_00
11193
Advertisement
Table of Contents

Related Manuals for Sears Craftsman 149.213340


Summary of Contents for Sears Craftsman 149.213340
- Page 1 Pulley Cover CAUTION: Read All Instructions Carefully Before Start- ing Assembly and Use. Save This Manual Future Reference. SEARS, ROEBUCK PART NO 4920-252_00 / CRAFT M AN® 34om OH RADmAL DRULL o Assembly ° Operation o Repair Parts o Warranty AND CO., Hoffman...
-
Page 2: General Safety Rules For Power Tools
FULL ONE-YEAR If within one year from date of purchase, this Craftsman RADIAL DRILL PRESS fails due to a defect in materi- al or workmanship, Sears will repair it, free of charge WARRANTY SERVICE IS AVAILABLE CENTER IN THE UNITED STATES, . - Page 3 The operation of any power tool can result in foreign objects being thrown into the eyes, which can result in severe eye damage_ Always wear safety goggles complying Z87,1 before Goggles are available at Sears retail or catalog stores and changing STARTING ACCESSORIES manual...
- Page 4 3 ALWAYS WEAR EYE PROTECTION 4 DO NOT WEAR Gloves, necktie or loose fitting ciothing 5 BE SURE DRILL BIT or cutting tool is securely locked in chuck 6 USE RECOMMENDED SPEED for drill accessory...
- Page 5 Check loose parts against Table of Loose Parts on page 5 and parts list on page 15 If any parts are missing or damaged, do not attempt to assemble Radial Drill Press, plug in power cord or turn on power switch until replacement parts are obtained and properly installed...
-
Page 6: Assembly
Column as shown Be very careful to hold Lock Shoe in place during assembly to prevent it from falling down inside column Be sure to engage Vertical Rack with angle on bottom of Column Head Drill head should rotate freely around column Handle... - Page 7 Choose an area that allows sufficient full advantage of the Radial Drill Press's lateral, tional, and tilt motions Bolt Radial Drill Press to a firm and stable surface using Carriage Bolts and Wing Nuts provided, pass entirely through mounting surface and are at least...
-
Page 8: Controls And Adjustments
Depth Stop Adjustment The switch has a When it is desirable to drill holes to an exact depth, the built- in depth stop can be set allows switch to With Radial Drill Press turned OFF, adjust table height... -
Page 9: Spindle Speeds
Spindle Housing moves freely up and down Spindle Speeds Your Radial Drill Press has a 1725 RPM motor with five spin- dle speeds available through a pulley/belt drive The various PulleyCover SPnNDLE SPEED CHART... -
Page 10: Tilting Drill Head
5 Tighten belt tension Butterfly Set Screw and close Pulley Cover Tilting Drill Head The Drill head can be tilted to drill up to 45 degrees clockwise and 90 degrees counter-clockwise of vertical head, loosen Lock Handle on right side of Column head and... - Page 11 Be sure the Vertical Lock plunger (REF 87) is engaged in Horizontal Tube slot (REF 81). Mount a 3" long precision round steel rod or a large, straight drill bit into Chuck and place a combination square on Table Check alignment Table as shown...
-
Page 12: Operation
All of the ball bearings are packed with grease at the factory and require no further lubrication The Quill and Spindle Rack OPERATaON bottomed hole hand drill bit At even the slowest drill press speeds, this style will lift the workpiece "Controls injury. tool from power Feed bit slowly through wood... - Page 13 Although not designed specifically for mortising, the variety of possible drill angles and feed lengths with the Radial Drill Press make possible some formerly impossible Use Sears Model 9 BT 25255 Mortising Chisel Housing and Model 9 BT 29506 Drill Press Mortising Kit with the accompa- nying made-to-fit...
- Page 14 CRAFTSMAN 344NCH RADIAL DRILL PRESS MODEL No. 149.213340 REPAnR PARTS ---i 14/__...
- Page 15 49t0-017-70 STD501002 STD582037 1697-010-00 4920-250-00 4920-252*00 ST0533150 ST0541631 2288-000-00 4910-19!-00 1175-001-00 No. 149.213340 DESCRIPTION PULLEYC0VER KNOB 810-24 X 3/8" PAN HEADSCREWS 810 STARWASHER 810 FLATWASHERS 810 RUBBERWASHERS 8t0-24 X 3/4" PAN HEADSCREWS SWITCHCOVER DPSTSWITCH (INCLUDES60) SWITCH KEY (ORDERFOR KEY ONLY)
-
Page 16: Repair Parts
Now that you have purchased your Radial Drill Press should a need ever exist for repair parts or service, simply contact any Sears Service'Center or most Sears, Roebuck and Co stores, Be sure to provide all pertinent facts when you call or visit...