Table of Contents
Advertisement
Advertisement
Table of Contents

Related Manuals for Katadyn PowerSurvivor 40E


Summary of Contents for Katadyn PowerSurvivor 40E
- Page 1 PowerSurvivor 12-Volt & 24-Volt Watermakers OWNER`S MANUAL...
- Page 2 Customer Service / Technical Support: 800-755-6701 or 763-746-3500 (International Collect Calls Accepted) Email: marine@katadyn.com We suggest you keep a record of your Katadyn dealer’s name, contact information, and the serial number of your watermaker in the space below: Dealer Name: _________________________________________________________________...
-
Page 3: Table Of Contents
Table of Contents System Description ....................... 4 Product Specifications ....................5 Energy Recovery ......................6 Installation ........................7 Installation DOs ........................7 Installation DON’Ts ........................ 7 Plan Ahead for Manual Operation ..................8 Installation Procedures ......................8 Using your Watermaker ..................... -
Page 4: System Description
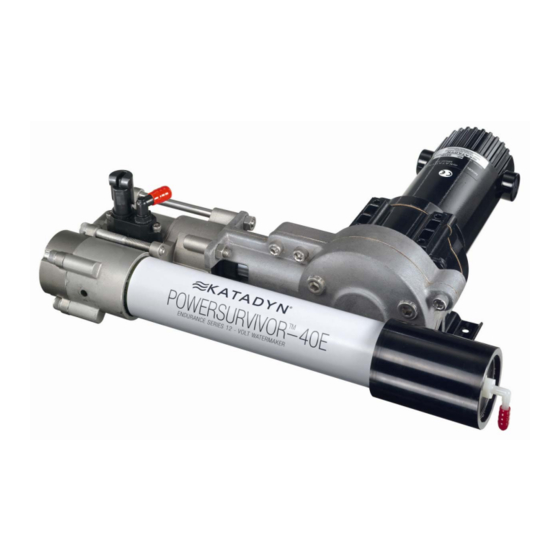
System Description The Katadyn PowerSurvivor 40E watermaker system has several components. Refer to the System (Figure A-1) Diagram in the Appendix for an overview of the components of the system and their interconnections. Motor/Drive/Pump/Membrane Assembly: At the heart of the watermaker system is a high-pressure, positive-displacement pump. -
Page 5: Product Specifications
Product Specifications Power Requirements: 4 amps @ 12 VDC; 3 amps @ 24 VDC* Construction: 316 Stainless Steel Pump Housing Rate of Water Production: 1.5 U.S. gal./hr. (5.6 liters/hr.) ±15% @ 13.8 VDC Feed Water Flow Rate: 15 U.S. gal./hr. (56 liters/hr.) Pump Weight: 25 lbs. -
Page 6: Energy Recovery
Katadyn Watermakers Katadyn watermakers are simple, affordable, energy efficient and easy to use and maintain. The PowerSurvivor 40E represents the latest advancements in watermaker technology, featuring an improved grease lubricated drive assembly, an all-316 stainless steel pump body, and simplified construction for easier and less frequent maintenance. -
Page 7: Installation
The most important part of a good installation is proper planning. Although the design and operating requirements of the PowerSurvivor 40E allow much latitude for equipment location, there are several cautions and suggestions you should consider before proceeding with an installation. -
Page 8: Plan Ahead For Manual Operation
Plan Ahead for Manual Operation The PowerSurvivor 40E watermaker was never intended to be part of a vessel’s “Abandon Ship” equipment. Its capability for manual operation is useful when normal ship’s power is unavailable. If you perform a typical installation, it is unlikely that you would have time to remove the watermaker when abandoning ship. - Page 9 The easiest and most commonly used approach is to tee into an existing seawater intake system. Be- cause the flow rate and volume of seawater intake for the PowerSurvivor 40E are both extremely low, the pump can be adequately supplied by most pre-existing intakes — even inlets that operate at...
- Page 10 When teeing into an existing seawater supply, we recommend installing a separate seacock or valve (in addition to the one at the thru-hull) to independently control the supply to the watermaker. 5. Install Reject Brine Plumbing: The reject brine water can be teed into an existing scupper or sink drain hose for draining overboard.
-
Page 11: Using Your Watermaker
Using your Watermaker Watermakers like to be run often Just like its predecessor, the PowerSurvivor 35, the PowerSurvivor 40E watermaker can be operated in either manual or powered mode. This dual-purpose feature of the watermaker has its roots in our original products, which were designed as military-quality survival equipment. - Page 12 Startup: Turn on the electric power to the watermaker. If there is air in the seawater intake plumbing, the pump may require several minutes to draw up enough water to fill the hoses, prefilter housing, pump and membrane housing. Since the pump is self-priming, there is no need to prime the system prior to running.
-
Page 13: Manual Operation
Manual Operation Manual operation of the PowerSurvivor 40E is useful if the ship’s electric power supply fails. Use following instructions convert your watermaker to manual operation: Jog run the watermaker and stop it when the piston has traveled the maximum distance away from the pump, toward the drive assembly. -
Page 14: Special Conditions
Operate the pump handle back and forth through its full range of travel in both directions. Pump at a rate of approximately one complete cycle every two seconds (one second in each direction). This is about the same rate at which the pump is driven by the motor during powered operation. -
Page 15: Maintenance And Service
Clean the exposed piston shaft with a clean rag and lubricate the shaft with non-petroleum silicone lubricant. Warning: The PowerSurvivor 40E motor should be turned off and disconnected from its source of power before attempting to lubricate the piston shaft. Never put your fingers into the area of the piston shaft while the motor is running. -
Page 16: Prefilter Maintenance
Prefilter Maintenance Background: Maintaining a healthy watermaker largely involves taking proper care of the prefilter assembly and seawater intake plumbing. Failure to do so is the most common cause of the two most frequent types of watermaker “failure” we hear about: (1) producing diminished or no freshwater output, or (2) producing “bad-smelling”... -
Page 17: Membrane Storage, Preserving & Cleaning
If the watermaker will not be used within the next three days, treat it with membrane preservative (see Membrane Storage below). Tie a line through the center of the dirty filter element and, if underway, tow it behind the vessel for a few minutes. If the vessel is anchored, hang the dirty filter over the side of the boat so that it is underwater, and jerk it up and down a few times to dislodge the contaminants. - Page 18 3. Prepare the membrane preservative solution according to the instruction on the Membrane Preservative container. 4. Use your product 3-way valve (or move the product water output hose) to be sure that any water flowing from the product freshwater output is properly discarded. 5.
- Page 19 types of cleaners! Always flush well with clean water between processes if performing both alkaline and acid cleaning. The following directions apply for both types of membrane cleaners: Lift the lever on the cleaning valve on the pump to place it in its “clean” or “up” position (see Figure 12).
-
Page 20: Seal Replacement
The standard Repair Seal Kit (included in the Extended Cruising Kit (see Kits and Accessories) is available from Katadyn and most marine retail stores. It includes a complete set of replacement seals and other components for all user-serviceable parts of the watermaker. - Page 21 pump and set the drive assembly aside. Remove the two 3" socket head caps crews using a 1/4" allen wrench. Separate the pump back plate and piston assembly from the pump body (see Figure R-2). piston assembly remained with the pump back plate when it was removed, pull the piston out of the back plate and set it aside.
- Page 22 This completes the disassembly of all user- serviceable parts Katadyn PowerSurvivor 40E watermaker Reassembly: Before you begin reassembly of the watermaker, clean all parts using clean, lint-free rags. At this time, all parts should be carefully inspected for wear or damage. Use a 10x magnifier or loupe to examine the seals, o-rings and other small parts.
- Page 23 Refer to Figure R-6 during the following procedure. Place the piston assembly on a flat, stable surface with the shaft pointing up. Slide the installation tool (provided in the RSK) over the piston shaft with the wide end down. Lubricate the new PIP ring, seal installation tool with silicone...
- Page 24 A. Lower a new poppet valve spring into the bottom of the bore in the check valve plate. Use your little finger or the eraser end of a pencil to press it into its seat. It is designed to be a light press fit and, when installed correctly, it should stay vertical in place during the next step.
- Page 25 holes in the drive assembly bracket over the studs projecting from the pump back plate. Insert the coupling pin through the aligned holes in the slider shaft and piston shaft. Push the rubber boot over the coupling pin to hold it in place. 12.
-
Page 26: Drive Maintenance
Drive Maintenance After approximately every 1000 hours of use or when there is a suspect that salt water has entered the housing, the eccentric drive should be opened for inspection, cleaning and lubrication. Tools Needed: ¼” allen wrench (Torque wrench if available) Hammer Cape chisel Flat chisel or medium flat blade screwdriver... - Page 27 Remove the connecting rod with slider assembly from the eccentric. Use a flat chisel to lift the connecting rod Slide the slider out of the sleeve Clean the parts with dry cloth. The slider can be cleaned with a soft scotch brite that does not scratch the surface.
-
Page 28: Troubleshooting Flowchart
Use the flow chart below to diagnose and solve the most common problems associated with use of the PowerSurvivor 40E watermaker. The information in this chart is a distillation of the experience of many users, our field representatives, and customer support staff. Use it first if you encounter a problem. -
Page 29: Appendix
Pressure Relief Valve a valve that relieves pressure in a system to prevent damage to system components. In the PowerSurvivor 40E, the relief valve is set to open at 1000 psi, to prevent damage to the pump and membrane. Product Freshwater potable water produced by the reverse osmosis process. -
Page 30: Diagrams
Diagrams... - Page 31 Kit, Spool Valve (8018615) (8016525)
-
Page 34: Kits & Accessories
Membrane Preservative (8 oz.) Part # 8013609 Note: You may order parts and kits through our retailers or from Katadyn North America directly at 800-755-6701. If ordering directly, you’ll need to provide detailed shipping instructions as well as credit card information. -
Page 35: Service Log
Service Log Date Preserved Membrane Cleaned Membrane Other Service... -
Page 36: Warranty
Limited Warranty not to apply. This Limited Warranty does not cover products from which the KATADYN label or logo or the rating label or serial number has been removed. This Warranty does not extend to normal wear or to replacement items, including but not... - Page 37 Katadyn North America 4830 Azelia Avenue North Minneapolis MN 55429, USA Phone: 800-755-6701 Fax: 800-548-0406 www.katadyn.com marine@katadyn.com Katadyn Products Inc. Pfäffikerstrasse 37 8310 Kemptthal Switzerland Phone: +41-44-839-2111 Fax: +41-44-839-2199 www.katadyn.ch info@katadyn.ch Print No: 8012602/6...