Table of Contents
Advertisement
Quick Links
Download this manual
See also:
Owner's Manual
0GU3025
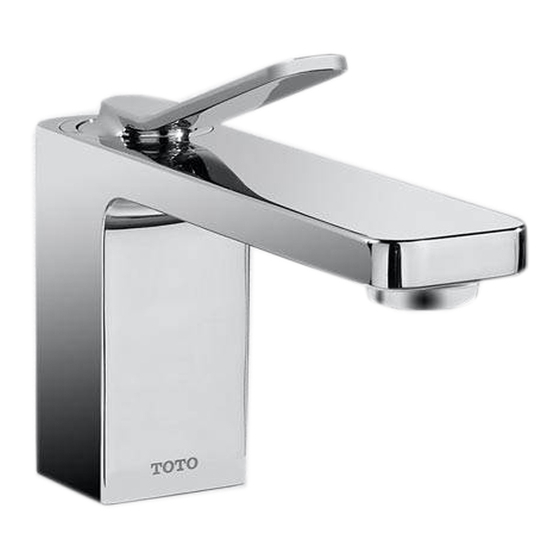
Single Handle Lavatory Faucet
TL170SD
RENESSE
•
Thank you for your recent purchase
of the TOTO® product. Please read the
enclosed information to ensure the
safe use of your product.
.
®
™
Installation and Owner's Manual
English
Contents
Important Safeguards------------1~2
Specifications -------------------------3
Before Installation--------------------3
Set-Up Drawing -----------------------4
Components ---------------------------5
Installation Procedure ---------6~9
How to Use ---------------------------10
Maintenance --------------------11~12
Troubleshooting --------------------13
Replacement Parts------------------14
Warranty -------------------------------15
Español
Français
2007.5
Advertisement
Table of Contents

Summary of Contents for Toto RENESSE TL170SD
-
Page 1: Table Of Contents
Components ---------------------------5 Installation Procedure ---------6~9 How to Use ---------------------------10 Maintenance --------------------11~12 Troubleshooting --------------------13 Replacement Parts------------------14 Warranty -------------------------------15 • Thank you for your recent purchase of the TOTO® product. Please read the enclosed information to ensure the safe use of your product. -
Page 2: Important Safeguards
Important Safeguards (For your safety, please follow the instructions below) Read the “Important Safeguards” section thoroughly before installing the product. ●The following symbols indicate safe and proper use of the product. Failure to observe them may reult in injury or property damage. The following table demonstrates the use of safety symbols in this manual. - Page 3 Warning To use hot water, you must turn the handle on the cold side first, then turn the handle on the hot side slowly and adjust the temperature. When the valve at the hot side is opened, hot water may cause scalding. Before using hot water, check with your hand that the temperature is appropriate.
-
Page 4: Specifications
Specifications Minimum pressure 20psi ( 0.14MPa) (flowing pressure) Cold and hot water pressure 125psi (0.86MPa) (static) Maximum pressure Maximum use temperature Less than 185°F (85˚C) Water that meets National/Primary Suitable Water Quality drinking water regulation Suitable ambient temperture 34~104˚F (2˚C~40˚C) Supply Connection 3/8”... - Page 5 Components *Observe all local plumbing codes. *Make sure that water supply is shut off. *Read these instrutions carefully to ensure proper installation. *For new lavatory installation, install the faucet before installing the lavatory. Check that you have the following parts from the package. Faucet main body parts Lever Spout mounting flange...
-
Page 6: Set-Up Drawing
Set-Up Drawing *Some parts may differ from the illustration depending on the model. COLD 5-5/16 “(135mm) 5-5/16 “(135mm) 1-11/16” (43 mm) 3-11/16” (94 mm) Deck Thickness Max. 1-3/16” (30 mm) 18-3/16” counter hole 8-9/16” φ (462 mm) 1-5/16” to 1-7/16 Pop-up Drain (218 mm) φ35±2 mm) -
Page 7: Installation Procedure
Installation Procedure Install the spout Connect the cold/hot flex hoses Pop-up drain with cable. (Only for faucet with Pop-up drain). Close Pop-up Drain with Cable Clean the cold/hot installation water supply pipes Clean the cold/hot water supply pipes Important dirt and debris in the cold/ hot water supply pipes Before installation must be washed out Install the spout. - Page 8 Connect the cold/hot water supply hoses *Put the gasket into the connectors and tighten the connectors in the stop valves; use the tool to fasten them. *Put the gasket into the cap nuts of the cold/hot flex hoses, screw in the connector, use the tool to fasten them.
- Page 9 Cautions for installing flex hoses ●You have to bend the hoses, but be careful not to break them. The minimum bending radius of the hose is 2 3/8”(60mm), if you bend it over the limit, it will break, which may cause early damage. ●During installation, do not bend the hose from the end surface of the main faucet body too far.
- Page 10 Pop-up Drain with Cable Installation (Only for Faucet with Pop-up Drain) - Apply pipe tape to the flange threads. flange drain body - Insert flange into the drain hole. lock nut drain gasket - Assemble the gasket. flange nut and lock nut. flange nut - Apply pipe tape to the end threads of flange threads and install the tail piece to drain body...
-
Page 11: How To Use
How to Use How to adjust the temperature Turn the lever For cold water, turn it to the right side, for Lever hot water, turn it to the left side. If it is fully turned to the left side, the water temperature is at its highest. -
Page 12: Maintenance
Maintenance For best performance and sanitary environment, please maintain it everyday. Maintain the outlet 1. Unscrew the aerator. Use attached special tool to remove it. Aerator 2. Use a brush to clear the dirt Spout key and debris from the aerator. Unscrew 3. - Page 13 Do not use the following materials, which are harmful to the faucet surface finish. ●Acidic cleaning agents, alkaline cleaning agents, bleaches except for the TOTO scale cleaner. ●Solvents like thinner and benzene ●Cleaning agents like cleanser or grinding powder that contain coarse particles ●Nylon scrubbers and brushes...
-
Page 14: Troubleshooting
Troubleshooting Before contacting a repairman, check the following common problems and solutions. If the problems perists, contact your dealer or tech support Check Refer to Problem Solution Is the stop valve on the cold side fully Too hot Adjust flow with stop valve ―... -
Page 15: Replacement Parts
Replacement Parts Description Drain Assembly Spout Kit Set screw Lever Valve cover Cartridge aerator Spout mounting kit Flex hose (Cold) Flex hose (Hot) Connector assembly... -
Page 16: Warranty
® ® defect together with proof of purchase (original sales receipt) shall constitute delivery. In such case, TOTO ® may choose to repair the Product at the purchaser’s location or pay to transport the Product to a service facility.


