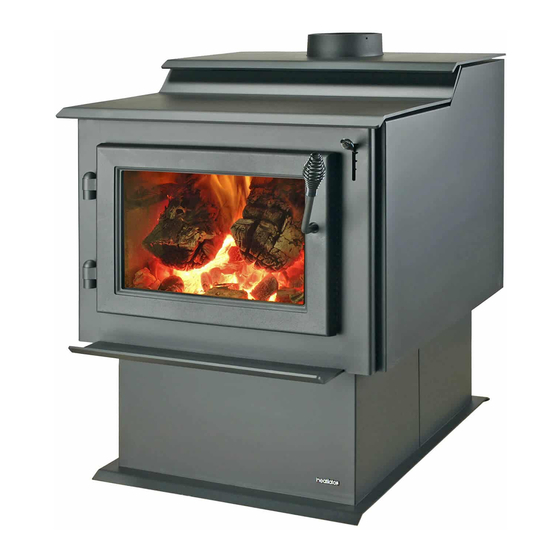
Heatilator ECO CHOICE ECO-ADV-WS22 Owner's Manual
Wood burning appliance
Hide thumbs
Also See for ECO CHOICE ECO-ADV-WS22:
- Owner's manual installation and operation (48 pages) ,
- Owner's manual (48 pages)
Table of Contents
Advertisement
MODEL:
ECO-ADV-WS22
WOOD BURNING
APPLIANCE
•
Important operating
and maintenance
instructions
included.
WARNING
If the information in these instructions is
not followed exactly, a fire could result
causing property damage, personal injury,
or death.
•
Do not store or use gasoline or other flammable
vapors and liquids in the vicinity of this or any other
appliance.
•
Do not over-fire - If appliance or chimney connector
glows, you are over-firing. Over-firing will void your
warranty.
•
Comply with all minimum clearances to combustibles
as specified. Failure to comply may cause house fire.
Installation and service of this appliance should be performed by
qualified personnel. Hearth & Home Technologies recommends
HHT Factory Trained or NFI certified professionals.
Consumer Care 1-877-427-3316 - Prior to calling, please have the model and serial number of the unit you are calling
about. This information can be found at the front of the unit.
www.heatilatorecochoice.com
WS22
NOTICE
DO NOT DISCARD THIS MANUAL
•
Read, understand
and follow these
instructions for safe
installation and
operation.
Hot glass and appliance will cause burns.
•
Do not touch glass until it is cooled
•
Use leather gloves when reloading fuel
•
NEVER allow children to touch glass
•
Keep children away
•
CAREFULLY SUPERVISE children in same room as
appliance.
•
Alert children and adults to hazards of high
temperatures
•
High temperatures may ignite clothing or other
flammable materials.
•
Keep clothing, furniture, draperies and other
flammable materials away.
7057-128K • October 24, 2018
Owner's Manual
Installation and Operation
•
Leave this
manual with party
responsible for use
and operation.
WARNING
HOT SURFACES!
Glass and other surfaces are hot during
operation AND cool down.
WARNING
Fire Risk.
For use with solid wood fuel only.
Other fuels may over-fire and generate
poisonous gases (i.e. carbon monoxide).
ECO-ADV-WS22
1
Advertisement
Table of Contents

Related Manuals for Heatilator ECO CHOICE ECO-ADV-WS22


Summary of Contents for Heatilator ECO CHOICE ECO-ADV-WS22
- Page 1 ECO-ADV-WS22 Owner’s Manual Installation and Operation MODEL: ECO-ADV-WS22 WOOD BURNING APPLIANCE WS22 NOTICE DO NOT DISCARD THIS MANUAL • Important operating • Read, understand • Leave this and follow these manual with party and maintenance instructions for safe responsible for use instructions installation and and operation.
-
Page 2: Sample Of Serial Number / Safety Label
It is against federal regulations to operate this wood et pièces importées. www.heatilator.com heater in a manner inconsistent with the operating instructions in the owner’s manual. DO NOT REMOVE THIS LABEL / NE PAS ENLEVER L'ÉTIQUETTE... -
Page 3: Table Of Contents
E. Baffle Removal ......25 F. Tube Channel Assembly Replacement ..26 Heatilator is a registered trademark of Hearth & Home Technologies. www.heatilatorecochoice.com... -
Page 4: Warranty Policy
HEATILATOR ECO-CHOICE WARRANTY Hearth & Home Technologies Inc., on behalf of its hearth brands (“HHT”), extends the following warranty for ECO-CHOICE by Heatilator wood and pellet hearth appliances that are purchased from an HHT authorized dealer. WARRANTY COVERAGE: HHT warranties to the original owner of the HHT appliance at the site of installation, and to any transferee taking ownership of the appliance at the site of installation within two years following the date of original purchase, that the HHT appliance will be free from defects in materials and workmanship at the time of manufacture. - Page 5 ECO-ADV-WS22 WARRANTY COVERAGE: • This warranty only covers HHT appliances that are purchased through an HHT authorized dealer or distributor. A list of HHT authorized dealers is available on the HHT branded websites. • This warranty is only valid while the HHT appliance remains at the site of original installation. •...
-
Page 6: Quick Start Guide
ECO-ADV-WS22 C. Quick Start Guide 10 Pieces of Newspaper, 10-20 Pieces of Dry Kindling ITEMS NEEDED FOR FIRST FIRE: and a Few Pieces of Dry Split Wood. OPEN AIR ADD NEWSPAPER LOAD WOOD CONTROL HIGH ADD KINDLING WARNING! Risk of Fire Close and securely latch the door after prevent: •... -
Page 7: Listing And Code Approvals
UL1482, (UM) 84-HUD and NPFA211 in the U.S.A. and the ULC S627-00 and CAN/CSA-B365 Installation Codes in Canada. The Heatilator ECO-CHOICE Wood Appliance meets the U.S. Environmental Protection Agency’s crib wood emission limits for wood appliances sold after May 15, 2015. -
Page 8: Mobile Home Approved
ECO-ADV-WS22 C. Mobile Home Approved WARNING • This appliance is approved for mobile home installations; when not installed in a sleeping room and Fire Risk when an outside combustion air inlet is provided. Hearth & Home Technologies disclaims any • The structural integrity of the mobile home floor, ceiling, responsibility for, and the warranty will be voided and walls must be maintained. -
Page 9: Operating Instructions
ECO-ADV-WS22 User Guide Operating Instructions WARNING HOT SURFACES! Glass and other surfaces are hot during operation AND cool down. Hot glass will cause burns. • Do not touch glass until it is cooled • NEVER allow children to touch glass •... -
Page 10: Fire Safety
ECO-ADV-WS22 B. Fire Safety D. Combustible/Non-combustible Materials To provide reasonable fire safety, the following should be • Combustible Material given serious consideration: Material made of or surfaced with wood, compressed 1. Install at least one smoke detector on each floor of paper, plant fibers, plastics, or any material capable your home to ensure your safety. -
Page 11: Chimney Fire
ECO-ADV-WS22 F. Chimney Fire 2. Second Stage The next stage of burning, the secondary stage, is the WARNING period when the wood gives off flammable gases which burn above the fuel with bright flames. During this stage of Fire Risk. burning it is very important that the flames be maintained Do not over-fire. -
Page 12: Burn Rate Air Controls
ECO-ADV-WS22 H. Burn Rate Air Controls I. Burn Rates and Operating Efficiency • The air supply enters at the upper front of the firebox, WARNING near the top of the glass door. • This preheated air supplies the necessary fresh oxygen Risk of Fire. -
Page 13: Building A Fire
ECO-ADV-WS22 J. Building A Fire 9. When ready to reload, It is best to set the Burn Rate Air Control in the High position before reloading. WARNING • This livens up the coal bed and reduces excessive emissions (opacity/smoke). Fire Risk. •... -
Page 14: Correct Baffle/Blanket Placement
ECO-ADV-WS22 K. Correct Baffle/Blanket Placement INCORRECT POSITIONS WARNING Fire Risk. Firebox damage due to improper baffle placement is not covered by warranty. Operate the wood burning appliance with the baffle in the correct position only. Not doing so could result in: •... -
Page 15: Wood Fuel
ECO-ADV-WS22 L. Wood Fuel Seasoned Wood • Cut logs to size • Split to 6 inches (152 mm) or less in diameter WARNING • Air dry to a moisture content of not more than 20% Soft wood - about nine months to dry Fire Risk. -
Page 16: Blower Operating Instructions
ECO-ADV-WS22 M. Blower Operating Instructions NOTE: If your wood appliance is equipped with an optional blower, you should follow these guidelines: Blower Burn Rate Air Control Handle Up = Open Snap Disc Handle Down = Closed Figure 16.2 - Snap Disc Location 7. -
Page 17: Clear Space
ECO-ADV-WS22 O. Clear Space P. Negative Pressure • Do NOT place combustible objects within 4 ft (1.2 m) of WARNING the front of appliance (Figure 17.1). • Mantel - avoid placing candles and other heat-sensitive Asphyxiation Risk. objects on mantel or hearth. Heat may damage these •... -
Page 18: Frequently Asked Questions
ECO-ADV-WS22 Q. Frequently Asked Questions ISSUES SOLUTIONS When first operated, this appliance may release an odor for the first several hours. This is Odor from appliance caused by the curing of the paint and the burning off of any oils remaining from manufacturing. Noise is caused by metal expanding and contracting as it heats up and cools down, similar to Metallic noise the sound produced by a furnace or heating duct. -
Page 19: Maintenance And Service
ECO-ADV-WS22 Maintenance and Service A. Quick Reference Maintenance Guide CAUTION! When properly maintained, your fireplace will give you many years of trouble-free service. Contact your Injury Risk. dealer to answer questions regarding proper operation, • Allow the appliance to completely cool down before troubleshooting and service for your appliance. -
Page 20: General Maintenance
ECO-ADV-WS22 B. General Maintenance 2. Disposal of Ashes • Frequency: When ash is within 1-3/4 in. (44mm) of 1. Creosote (Chimney) Cleaning firebox lip • Frequency: Every 2 months during heating season or • By: Homeowner as recommended by a certified chimney sweep; more frequently if chimney exceeds or is under 14-16 ft. - Page 21 ECO-ADV-WS22 4. Glass Cleaning 6. Inspect Firebrick • Frequency: As desired • Frequency: After each ash removal • By: Homeowner • By: Homeowner Replace the firebrick if they become crumbly and/or if there CAUTION is a 1/4 inch (6.35mm) gap between the bricks. Handle glass assembly with care.
-
Page 22: Troubleshooting Guide
ECO-ADV-WS22 Troubleshooting Guide With proper installation, operation, and maintenance your wood appliance will provide years of trouble-free service. If you do experience a problem, this troubleshooting guide will assist you or a qualified service person in the diagnosis of a problem and the corrective action to be taken. -
Page 23: Service Parts Replacement
ECO-ADV-WS22 Service Parts Replacement A. Glass Replacement B. Firebrick Replacement The firebox is lined with high quality firebrick, which has (Replace with 5mm ceramic glass only) exceptional insulating properties. There is no need to 1. Ensure that the fire is out and the appliance is cool to use a grate;... -
Page 24: Snap Disc Replacement
ECO-ADV-WS22 C. Snap Disc Replacement D. Door Handle Assembly 1. Disconnect power supply. Locate the snap disc bracket 1. Install washer on door handle shaft. assembly at the bottom left rear corner of the appliance 2. Slide door handle through door. (Figure 24.1). -
Page 25: Baffle Removal
ECO-ADV-WS22 E. Baffle Removal 1. Remove all ash from the firebox, and extinguish all hot Baffle Boards & Blanket even with embers before disposal into a metal container. front tube and resting on tubes 2. Remove the baffle protection channel by rotating it down from the front tube (Figure 25.1). -
Page 26: Tube Channel Assembly Replacement
ECO-ADV-WS22 F. Tube Channel Assembly Replacement Removing Tube Channel Assembly 1. Remove the baffle protection channel, ceramic blanket and the 2 baffle boards. See instructions on page 25. 2. Remove the right side shield by removing 3 screws in the back using a Phillips head screw driver. 3. -
Page 27: Getting Started
ECO-ADV-WS22 Install Guide Getting Started A. Design and Installation Considerations B. Fire Safety Consideration must be given to: To provide reasonable fire safety, the following should be given serious consideration: • Safety • Convenience 1. Install at least one smoke detector on each floor of •... -
Page 28: Negative Pressure
ECO-ADV-WS22 C. Negative Pressure D. Tools And Supplies Needed Before beginning the installation be sure the following tools and building supplies are available: WARNING Reciprocating saw Flat blade screwdriver Framing material Electric drill and bits Asphyxiation Risk. Pliers Plumb line •... -
Page 29: Install Checklist
ECO-ADV-WS22 F. Install Checklist ATTENTION INSTALLER: Follow this Standard Work Checklist This standard work checklist is to be used by the installer in conjuction with, not istead of, the instructions contained in this installation manual. _________________________________________________________________________________ Customer: ______________________________________________________________________________ Date Installe: ______________________________________________________________________________ Lot / Address: ________________________________________________________________________... -
Page 30: Dimensions And Clearances
ECO-ADV-WS22 Dimensions and Clearances A. Appliance Dimensions NOTE: Flue Collar size is 6 inch (152mm) diameter (ID) 19-1/16 in. (484mm) 26 in. (660mm) 13 in. 9-13/16 in. (330mm) (249mm) 14-13/16 in. 13-13/16 in. (376mm) (351mm) 9-9/16 in. (243mm) 34 in. (864mm) 19-5/8 in. -
Page 31: Hearth Protection Requirements
ECO-ADV-WS22 B. Hearth Protection Requirements In Canada (Figure 34.2), similar floor protection must be provided 18 inches (457mm) in front and 8 inches (203mm) FLOOR PROTECTION: It is necessary to install a Type II from the sides and rear of the appliance unless reduced by floor protector. -
Page 32: Clearances To Combustibles (Ul And Ulc)
ECO-ADV-WS22 C. Clearances to Combustibles (UL and ULC) MINIMUM CLEARANCES TO COMBUSTIBLE MATERIALS: INCHES & (MILLIMETERS) NOTE: ALL “A”, “C” AND “F” DIMENSIONS ARE TO INSIDE DIAMETER OF FLUE COLLAR. INSTALLATION: Full Vertical OR Horizontal with 2 foot (609mm) minimum vertical Off Appliance Top Single Wall Pipe 10 (254) 8.25 (210) -
Page 33: Chimney Systems
ECO-ADV-WS22 Chimney Systems A. Locating Your Appliance & Chimney • Consider the appliance location in order to avoid floor and ceiling attic joists and rafters. Location of the appliance and chimney will affect • Locate termination cap away from trees, adjacent performance. -
Page 34: Chimney Termination Requirements
ECO-ADV-WS22 B. Chimney Termination Requirements Notice: Locating the appliance in a basement or in a location of considerable air movement can cause Follow manufacturer’s instructions for clearance, securing intermittent smoke spillage from appliance. Do flashing and terminating the chimney (Figure 34.1 & 34.2). not locate appliance near •... -
Page 35: Chimney Height / Rise And Run
ECO-ADV-WS22 D. Chimney Height / Rise and Run Chimney: The chimney can be new or existing, masonry or This product was designed for and tested on a 6 inch prefabricated and must meet the following minimum (152mm) chimney, 14 to 16 feet (420-480cm) high, requirements and as specified in Section 4F. -
Page 36: Appliance Set-Up
ECO-ADV-WS22 Appliance Set-up A. Outside Air Kit Installation 5. Floor Installation Alternative: In some instances you may not be able to install the flex pipe as show in A source of air (oxygen) is necessary in order for combustion to take place. Whatever combustion air is Figure 36.1. -
Page 37: Blower Installation (Optional)
ECO-ADV-WS22 B. Blower Installation (Optional) C. Adjusting the Blower Speed Control 1. Align holes in mounting flange of blower with bolt holes The blower speed control for this appliance is adjusted in appliance. Blower should be positioned at bottom of at the factory, and normally does not require further rear outer skin as shown in Figure 39.1. -
Page 38: Mobile Home Installation
ECO-ADV-WS22 Mobile Home Installation You must use a Quadra-Fire Outside Air Kit Part #: Spark Arestor Cap OAK-ACC 1. An outside air inlet must be provided for combustion Storm Collar and must remain clear of leaves, debris, ice and/or snow. It must be unrestricted while unit is in use to Roof Flashing prevent room air starvation which can cause smoke spillage and an inability to maintain a fire. -
Page 39: Reference Materials
ECO-ADV-WS22 Reference Materials A. Service & Maintenance Log Date of Service Performed By Description of Service www.heatilatorecochoice.com 7057-128K • October 24, 2018... - Page 40 ECO-ADV-WS22 Date of Service Performed By Description of Service 7057-128K • October 24, 2018 www.heatilatorecochoice.com...
-
Page 41: Exploded View
ECO-ADV-WS22 B. Exploded View ECO-ADV-WS22 Service Parts Beginning Manufacturing Date: Mar 2010 Free Standing Wood Stove Ending Manufacturing Date: Active Part number list on following page. 08/18 www.heatilatorecochoice.com 7057-128K • October 24, 2018... -
Page 42: Service Parts
ECO-ADV-WS22 C. Service Parts ECO-ADV-WS22 Service Parts Beginning Manufacturing Date: Mar 2010 Ending Manufacturing Date: Active IMPORTANT: THIS IS DATED INFORMATION. When requesting service or replacement Stocked parts for your appliance please provide model number and serial number. All parts listed in this manual may be ordered from an authorized dealer. -
Page 43: Accessories
ECO-ADV-WS22 D. Accessories ECO-ADV-WS22 Service Parts Beginning Manufacturing Date: Mar 2010 Ending Manufacturing Date: Active IMPORTANT: THIS IS DATED INFORMATION. When requesting service or replacement parts for Stocked your appliance please provide model number and serial number. All parts listed in this manual may be ordered from an authorized dealer. - Page 44 Hearth & Home Technologies 352 Mountain House Road Halifax, PA 17032 Division of HNI INDUSTRIES Please contact your Heatilator dealer with any questions or concerns. For the number of your nearest Heatilator dealer log onto www.heatilator.com CAUTION DO NOT DISCARD THIS MANUAL...