Table of Contents
Advertisement
Quick Links
OWNER'S
MANUAL
IJSANSUI
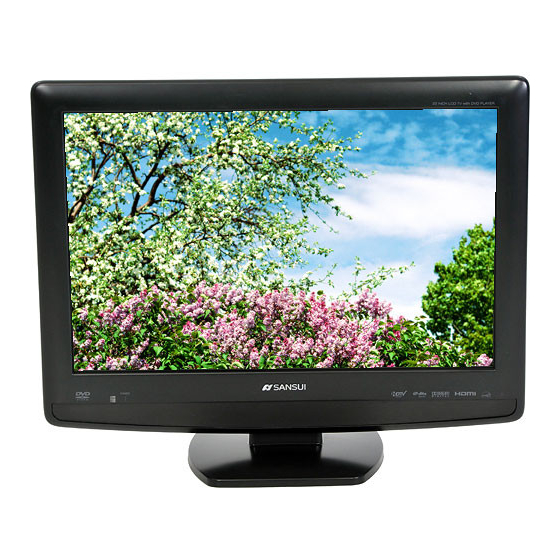
22" TFT LCD DIGITAL
TV WITH
DVD PLAYER
HDLCDVD220
v. ,) Eo
mS.TAL
r.u=.o
DIGITALI
Digital Out
.,_H._._,_,_,o_
Mo_.,_o,_
,.T_
I
ATTENTION
If you purchase a universal remote control from your local retailer, please contact the remote manufacturer
for the
required programming code.
I
AIR/CABLE
MODE
SELECTION
When shipped from the factory, the Signal Type option is set to the "Cable" (Cable Television) mode.
If not using Cable TV, set this menu option to the "Air" position.
IF CONTACT
WITH CUSTOMER
SERVICE
IS REQUIRED
PLEASE
HAVE THE MODEL
NUMBER
READY
PRIOR TO THE CALL
CUSTOMER SERVICE-
1-800-289-0980
ORLON WEBSITE
FOR INFORMATION
ON OUR OTHER
PRODUCTS,
PLEASE VISIT OUR WEBSITE
AT
www.orionsalesinc.com
Before operating the unit, please read this manual thoroughly.
Advertisement
Table of Contents

Related Manuals for Sansui HDLCDVD220


Summary of Contents for Sansui HDLCDVD220
- Page 1 OWNER'S MANUAL 22" TFT LCD DIGITAL HDLCDVD220 v. ,) Eo mS.TAL r.u=.o If you purchase a universal remote control from your local retailer, please contact the remote manufacturer required programming code. When shipped from the factory, the Signal Type option is set to the "Cable" (Cable Television) mode.
- Page 2 CAUTION CAUTION: TO REDUCE THE RISK OF ELECTRIC SHOCK, DO NOT REMOVE (OR BACK). NO USER-SERVICEABLE PARTS INSIDE. QUALIFIED SERVICE WARNING: TO PREVENT OR MOISTURE. CAUTION: TO PREVENT TENSION CORD, RECEPTACLE FULLY INSERTED WARNING: This equipment has been tested to Part 15 of the FCC Rules. These interference in a residential energy...
-
Page 3: Important Safety Instructions
IMPORTANT SAFETY INSTRUCTIONS Read these instructions. Keep these instructions. Heed all warnings. Follow all instructions. Do not use this apparatus near water. Clean only with a clean dry cloth. Do not block any ventilation openings. Do not install near any heat sources amplifiers) that produce heat. - Page 4 IMPORTANTSAFETY INSTRUCTIONS(continued) When replacement parts are required, the manufacturer or those that have the same characteristics Unauthorized substitutions may result in fire, electric shock Upon completion of any service determine that the unit is in proper operating Keep your fingers clear of the disc slot as it is closing. It may cause injury. When you connect the product to other equipment, the wall outlet.
-
Page 5: Safety Precautions
The unit emits heat when in operation. overheating. Do not block ventilation placing on a shelf leave 10 cm (4 inches) "-..,,,-I Notes when mounting the LCD TV/DVD If the unit is to be mounted on the wall, contact and have the equipment professionally and/or damage to the LCD TV/DVD. -
Page 6: Features
Featu res LCD color TV With DVD/CD player Unique space saving design combines A DVD disc has much more capacity, DVD exceeds other software. The picture quality is higher than Super VHS video cassettes. is higher than an audio CD. The DVD also has special options; selection, or multi-angle, etc. - Page 7 IMPORTANT SAFETY INSTRUCTIONS SAFETY PRECAUTIONS IMPORTANT NOTICE ... Features ... Contents ... Disc ... Location of controls ... Remote control ... Power source ... Antenna connections Cable TV connections Setting the on-screen language ... Memorizing channels ... TV operation ... Labeling channels ...
-
Page 8: Disc
Disc Playable discs Disc type and logo mark DVD Video v =o E o CD-DA DIGITAL AUDIO The following discs are also available. • DVD-R/RW discs of DVD video format. • CD-R/RW discs of MP3/WMA/JPEG. Region Number Region number (Regional restriction Region number "1"... -
Page 9: Location Of Controls
Front Remote sensor Left side DISC slot -- To display the menu screen. Press MENU button to display the menu screen. CHANNEL buttons, VOLUME setting during the menu screen operations. Location of controls EJECT button VOLUME .(O9-+-,' -- CHANNELA/I_ CHANNELI , O-f-: CHANNELV/II MENU button... - Page 10 Location of controls (continued) Rear side COMPONENT/AUDIO IN jacks VIDEO IN jacks (VIDEO/S-VIDEO/AUDIO(L/R)) 111111111 HEAD PHONE jack AC INPUT jack PC MONITOR IN jack RF (ANT) IN jack PC/DVI AUDIO IN jack COAXIAL DIGITAL AUDIO OUT jack HDMI/DVI IN jack...
-
Page 11: Remote Control
®OO DISPLAY TV/DVD ©@@0* ®®®o L MUTE ®®®O SLEEP SETUP/®ODvD _MENU MENU EXIT_ CANC P MENU c.v % PLAY SKIP SUBTITLE STOP SKIP SLOW PAUSE/STILL PLAYMODE SLOW AUDIO RETURN REPEATA-B ANGLE 0000 QUICKVIEW/ SCREENSIZE MARKER JUMP ZOOM 0000 INPUT SELECT ATTENTION If you purchase a universal... -
Page 12: Power Source
Remote control Inserting Batteries Open the battery compartment cover in the direction of the arrow, ---___/_ ... Operation • Aim the remote control at the remote sensor and press control buttons to operate. • Operate the remote control within a 30 ° angle on either side of the remote sensor, up to a distance NOTE:... -
Page 13: Antenna Connections
If you are using an indoor or outdoor antenna system. If you are using a Cable TV service, Combination VHF/UHF Antenna (Single 75 ohm cable or 300 ohm twin-lead wire) Antenna Jack 300-75 ohm Matching Antenkna_ Transformer Combination VHF/UHF Antenna (Separate 300-75 ohm Matching Antenkna... -
Page 14: Cable Tv Connections
Cable TV connections This TV has an extended tuning Converter box, Some cable companies Descrambling these signals for normal viewing generally provided by the Cable TV company. For subscribers to basic Cable TV service Antenna 75 ohm Coaxial Jack Cable For subscribers to scrambled Cable TV service If you subscribe... -
Page 15: Setting The On-Screen Language
Setting the on-screen language You can choose from three different (English, French and Spanish) displays. Select the language you prefer first, proceed with the other menu options. To turn on the TV, press POWER. (POWER indicator on the front of the unit changes green. -
Page 16: Tv Operation
NOTE: • Memorizing channels is best accomplished evening "PRIMETIME" hours, as more stations broadcasting digital signals. Memorizing can only be accomplished while a station broadcasting a digital signal to set that channel memory. • If you are unsure of the digital channels in your area, you may visit www.antennaweb.orq receive a list based on your address or zip code. -
Page 17: Labeling Channels
VHF/UHF/CABLE CHANNELS Cable 2-13 2-13 STD/HRC/IRC 14-69 14-36 37-59 60-85 86-94 95-99 100-125 NOTE: • If a channel with no broadcast is selected, sound will automatically be muted. • It may take a few seconds for a digital channel picture to appear on screen after being selected. To select video input... -
Page 18: Setting The V-Chip
Press • or • to select "Ch Label", then press • or ENTER. The "Ch Label" menu will appear. Press 41or • to select a channel you want to label, then press •. Press 41or • repeatedly until the character want appears in the first space. - Page 19 ¢--I" Press • or • to select"V-Chip", 4 or • to select "On". Press • or • to select"V-Chip • or ENTER. The V-Chip Set Menu appears. Press • or • to select which rating will be used, then press • or ENTER. Each rating below will appear.
-
Page 20: Closed Caption
receiving a digital signal for the current Closed Caption WHAT IS CLOSED CAPTIONING? This television has the capability to decode display Closed Captioned television Captioning will display text on the screen for hearing impaired viewers or it will translate another language. -
Page 21: Adjusting The Picture Preference
"--2 Press EXIT/CANCEL to return to the normal screen. NOTE: • You cannot set both "Text Color" and "Background Color" as a same color. • You cannot set both "Text Opacity" Opacity" to "Transparent". Adjusting the picture preference You can select four picture modes--Sports, Standard,... -
Page 22: Setting The Picture Size
Setting the picture size You can view 480i and 480p format variety of picture sizes-- Natural, Cinema Wide2 and Full. Selecting the picture size Press SETUP/TV MENU in the TV mode.The menu screen will appear. Press • or • to select "Picture", ENTER. -
Page 23: Picture Control Adjustment In The Pc Mode
Picture control adjustment in the PC mode You can adjust to optimize the performance the TV in the PC mode. Press INPUT SELECT, then press •/v Number button (4) to select the PC mode. Press SETUP/TV MENU.TheTV will appear. Press • or • to select"Picture", ENTER. -
Page 24: Selecting Language
Z-'l" Press EXIT/CANCEL to return to the normal screen. NOTE: • Generally you can leave yourTV mode because the TV automatically the type of sound being broadcast mono). • If the stereo sound is noisy, select "Mono" to reduce the noise. To listen to a second audio... -
Page 25: Resetting Your Settings
Resetting your settings The Reset function returns your settings factory settings. Press SETUP/TV MENU in the TV mode.The menu screen will appear. Press • or • to select"Setup", ENTER. Press • or • to select"Reset". ¢--I" Press • or ENTER to return your settings factory settings. -
Page 26: Playback Procedure
Playback proced ure Press TV/DVD to select DVD mode. Place the disc in the disc slot with the label side facing forward. the disc has a label.) Hold the disc without touching either of its surfaces, align it with the guides, and place it in position. -
Page 27: Audio Cd Playback
MP3/WMA/JPEG Audio CD playback This player can play back MP3/WMA/JPEG-data which has been recorded on CD-R or CD-RW. To produce MP3/WMA/JPEG-data, Windows-PC with CD-ROM drive and MP3/WMA/ JPEG-encoding software (not supplied). The Apple-HFS-System cannot MP3/WMA/JPEG CD information Limitations on MP3/WMA/JPEG •... -
Page 28: Program Playback (Cd)
JPEG playback: In the file browser, press•/v JPEG file. To display a thumbnail list, press DVD MENU. Press •/v/_l/, to select the desired (To return to the file browser, press TOP MENU.) Press ENTER or PLAY. The selected picture appears Rotating an image You can rotate an image by 90 degrees. -
Page 29: Random Playback (Cd)
Press A/v to select "Program View", then press ENTER. Program View shows only the programmed files that you have added Browser View In the Program View, press PLAY. The files start to playback in programmed order that were added by you. To remove file from program list in stop mode... -
Page 30: Repeat Playback
Press ENTER. • Playback starts. • When you change the title, playback Chapter 1 of the selected title. • Some discs may not work in the above operation. Repeat playback Title, Chapter Playback: Press PLAY MODE during playback mode. Press ENTER repeatedly to select"Chapter"... -
Page 31: Changing Angles
Press AUDIO during playback. The current soundtrack language Press AUDIO repeatedly until the desired language is selected. The on-screen display will disappear seconds. NOTE: • If the desired language is not heard after pressing AUDIO several times, the language on the disc. •... -
Page 32: Setting The Language
Setting the language You can select the language of "Menu", and "Audio" if more than one languages recorded onto the disc. Press SETUP/TV MENU in the stop mode. Press • or • to select [] option, then press _1/• or ENTER. Press •... -
Page 33: Digital Out
Press SETUP/TV MENU in the stop mode or No Disc. Press • or • to select [] option, then press ,/D, or ENTER. Press • or • to select"Picture _,- or ENTER. Press • or • to select your desired then press ENTER. -
Page 34: Temporary Disabling Of Rating Level By Dvd Disc
¢-'1" The parental level list will appear. Press • or • to select the level 1 to level 8. The limitation more severe as the level number press ENTER. • Level : The parental control setting not function. • Level : Virtually all DVD software played back. -
Page 35: Language Code List
Enter the appropriate code number for the initial settings Language Name Code Language Abkhazian 1112 Fiji Afar 1111 Finnish Afrikaans 1116 French Albanian 2927 Frisian Amharic 1123 Galician Arabic 1128 Georgian Armenian 1835 German Assamese 1129 Greek Aymara 1135 Greenlandic Azerbaijani 1136 Guarani... - Page 36 Connections to other equipment The exact arrangement you use to interconnect on the model and features of each component. the location of video and audio inputs and outputs. To connect the LCD TV/DVD to a VCR Rear of the unit To VIDEO/AUDIO @_._ Audio/Video...
-
Page 37: Connections To Other Equipment
Connections to other equipment To connect a HDMI or a DVI device The HDMI input receives digital audio and uncompressed video from a DVI device. When you connect to a DVI device analog audio cords required. Rear of the unit i:_,_ i:_:] TO HDMI/DVl TO PC/DVl AUDIO IN... - Page 38 Connections to other equipment To connect the TV/DVD to a camcorder, To playback from a camcorder, connect the camcorder This unit can also be used as a display signals generated by these devices and subsequent included in the suggested connection additional information.
-
Page 39: Reception Disturbances
Most types of television interference UHF antenna. Outdoor antennas interference are shown below. If one of these symptoms system, the disturbance may be caused IGNITION Black spots or horizontal streaks may appear, the picture may flutter or drift. Usually caused by interference neon lamps or AC powered tools and appliances... -
Page 40: Problems And Troubleshooting
Problems and troubleshooting Use the following check list for troubleshooting dealer or service outlet if problems Be sure all connections are properly SYMPTOMS POWER • Make sure the power cord is plugged TV/DVD does not operate. • Power is off, check fuse or circuit breaker. •... - Page 41 Problems and troubleshooting • SYMPTOMS I • No disc is inserted. Playback doesn't start. • The disc may be dirty. Clean up the disc. • The unit cannot play CD-ROMs, No picture. • TV/DVD selector • Check the input selector of the amplifier No sound.
-
Page 42: Specifications
Specifications GENERAL AC 120V 60Hz Power supply: Power consumption: Operation: Stand by: lW Weight: 5.8 kg (12.8 Ibs) Dimensions: Width: Height: Depth: Operating temperature: 5oc. Less than 80% Operating humidity: TELEVISION Type: 21.6 inches (548.6 mm diagonal) Display method: Transmission Number of Pixels: 1680 (H) x 1050 (V) Viewing... -
Page 43: Warranty
ORION warrants this product to be free from manufacturing normal use and conditions for a period of 1 year from date of original purchase Should service be necessary tion during the first 12 months from date of original authorized Independent Service in material and workmanship... - Page 44 IIIIIIIIIIIIIIIIMHIIIIIIIII J51H0201A S H 08/04 [] Printed in Thailand...