Advertisement
Table of Contents
Original Issue Date: 10/16
Model: Generator Sets
Market: Industrial 15-500 kW
Subject: 6 Amp, 12/24 Volt Battery Charger Kits
1 Introduction
The battery charger is designed to both recharge your batteries and extend your battery's life in applications where it is
stored for long periods of time. The charger is a multi-stage, completely automatic, lightweight, silent battery charger.
The charger produces an output of 12 Volts DC at a full 6 Amps, while using much less AC current than other charger
types. When the charger is attached to your battery and plugged into a 115 Volt / 60 Hz AC outlet, the red and green
LEDs let you know the unit is recharging and maintaining your batteries. Use this battery charger to charge lead acid
flooded, gel, or AGM type 12-volt batteries only. 24-volt battery charger kits include two 12-volt battery chargers.
Save these Instructions
This manual contains important safety and operating instructions for the chargers. Read the entire manual before using.
Also read all instructions and cautions for and on the charger, batteries, and equipment in the vicinity of the batteries.
Battery charger kits covered in this document are listed below. Kits include mounting brackets and hardware for specific
generator set models as shown in the parts lists.
Kit Number
GM96386-KA1
GM96386-KA4
GM96386-KA5
GM96386-KP2
GM96386-KP4
GM96387-KP1
GM96388-KA1
GM96388-KP1
GM96389-KA1
GM96389-KP1
GM96389-KA2
GM96389-KP2
GM96390-KA1
Figure 1
Battery Charger Kits
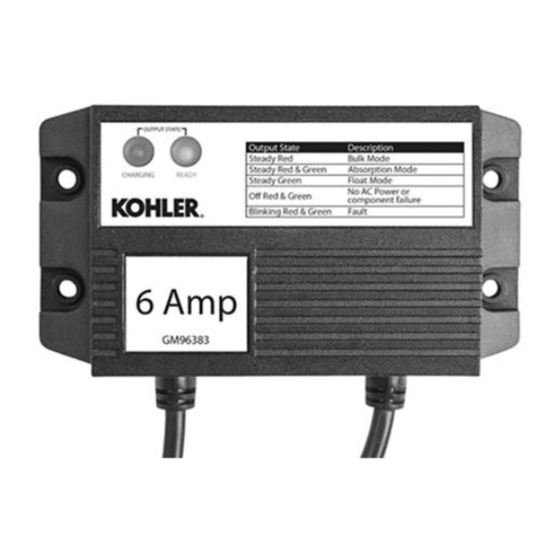
Figure 2
Battery Charger, 6 Amp, GM96383
INSTALLATION INSTRUCTIONS
Description
Battery Charger 12V, 6A
Battery Charger 24V, 6A
Battery Charger 12V, 6A
Battery Charger 24V, 6A
Battery Charger 12V, 6A
Battery Charger 12V, 6A
Battery Charger 12V, 6A
Battery Charger 12V, 6A
Battery Charger 12V, 6A
Battery Charger 12V, 6A
Battery Charger 24V, 6A
Battery Charger 24V, 6A
Battery Charger 24V, 6A
Kit Number
GM96390-KP1
GM96391-KA1
GM96391-KA2
GM96391-KA3
GM96391-KP1
GM96391-KP2
GM96391-KP3
GM96392-KP1
GM96392-KP2
GM96395-KA1
GM96395-KA3
GM96404-KP1
TT-1702 10/16
Description
Battery Charger 24V, 6A
Battery Charger 12V, 6A
Battery Charger 24V, 6A
Battery Charger 24V, 6A
Battery Charger 12V, 6A
Battery Charger 24V, 6A
Battery Charger 24V, 6A
Battery Charger 24V, 6A
Battery Charger 24V, 6A
Battery Charger 12V, 6A
Battery Charger 24V, 6A
Battery Charger 12V, 6A
Advertisement
Table of Contents

Related Manuals for Kohler GM96386-KA1


Summary of Contents for Kohler GM96386-KA1
- Page 1 Battery charger kits covered in this document are listed below. Kits include mounting brackets and hardware for specific generator set models as shown in the parts lists. Kit Number Description Kit Number Description GM96386-KA1 Battery Charger 12V, 6A GM96390-KP1 Battery Charger 24V, 6A GM96386-KA4 Battery Charger 24V, 6A GM96391-KA1...
-
Page 2: Safety Precautions
2 Safety Precautions WARNING Accidental starting. Can cause severe injury or death. Disconnect the battery cables before working on the generator set. Remove the negative (–) lead first when disconnecting the battery. Reconnect the negative (–) lead last when reconnecting the battery. Disabling the generator set. -
Page 3: Important Safety Instructions
2.1 Important Safety Instructions Use of an attachment or spare part not recommended or provided by Kohler Co. may result in a risk of fire, electric shock, or personal injury. To reduce the risk of damage to electric plug and cord, pull by plug rather than cord when disconnecting the chargers. -
Page 4: Preparing To Charge
2.3 Preparing to Charge Before charging a battery with the battery charger, read the following precautions: Do NOT operate the battery charger if the input or output cables or an LED is damaged or defective. Make sure all accessories connected to the batteries you are charging are OFF. If the battery or batteries must be removed from the equipment, always remove the ground terminal from the battery first. -
Page 5: Installation Drawings
3.4 Installation Drawings GM96386-KP2,12 Volt Kit 3, 4 3, 4 3, 4 GM96386-KP4, 24 Volt Kit Bracket, GM28557 Battery charger, GM96383 Screw, M6 Nut, M6 Connect ring terminals to battery Plug AC cord into outlet (after connecting to battery) Figure 3 Battery Charger Installation, GM96386-KP2 and GM96386-KP4 TT-1702 10/16... - Page 6 2, 3, 4 6, 7 View A-A Battery charger GM96383 Screw, M933-06020-60, qty. 4 Washer, M125A-06-80, qty. 4 Nut, M6923-06-80, qty. 4 Bracket, GM32862 Screw, M933-08020-60, qty. 2 Washer, M125A-08-80, qty. 2 Connect ring terminals to battery Plug AC cord into outlet (after connecting to battery) Figure 4 Battery Charger Installation, GM96387-KP1 TT-1702...
- Page 7 2, 3, 4 6, 7 Battery charger, GM96383 Washer, M125A-06-80, qty.4 Screw, M933-06020-60, qty. 4 Nut, M933-06-60, qty. 4 Bracket, GM93706 Screw, M933-10025-60, qty. 2 Washer, M125A-10-80 Connect ring terminals to battery Plug AC cord into outlet (after connecting to the Figure 5 Battery Charger Installation, GM96388-KP1 TT-1702...
- Page 8 1, 2 Washer, M125A-060-80, qty. 4, Screw, M933-06016-60, qty. 4 Battery charger, GM96383, qty. 1 Connect ring terminals to battery Plug AC cord into outlet (after connecting to the battery) Figure 6 Battery Charger Installation, GM96389-KP1, 12 Volt Kit TT-1702 10/16...
- Page 9 4, 5 Battery charger, GM96383, qty. 2 Plug AC cord into outlet (after connecting to the battery) Connect ring terminals to battery Washer, M125A-06-80, qty. 8 Screw, M933-06020-60, qty. 8 Figure 7 Battery Charger Installation, GM96389-KP2, 24 Volt Kit TT-1702 10/16...
- Page 10 1, 2, 3 Washer, M125A-06-80, qty. 8 Nut, M6923-06-80, qty. 8 Screw, M933-06025-60, qty. 8 Bracket, GM78810, qty. 1 Battery charger, GM96383, qty. 2 Screw, M933-06025-60, qty. 4 Connect ring terminals to battery 2 Connect ring terminals to battery 1 Plug AC cord into outlet (after connecting to each battery) Figure 8 Battery Charger Installation, GM96390-KP1, 24 Volt Kit...
- Page 11 2, 3 7, 8 GM96391-KP1, 12 Volt Kit GM96391-KP2 and -KP3, 24 Volt Kits Battery charger, GM96383, qty. 1 Battery charger, GM96383, qty. 2 Screw, M933-06020-60, qty.2 Screw, M933-06020-60, qty.4 Nut, M6923-06-80, qty.2 Nut, M6923-06-80, qty.4 Connect ring terminals to battery Connect to battery 1 Plug AC cord into outlet (after 10.
-
Page 12: Connection Diagram
3.5 Connection Diagram Two-Battery Connection, 24 Volt System (requires two battery chargers) Figure 10 Connection Diagrams, 12 Volt (one battery) and 24 Volt (two batteries) Systems TT-1702 10/16... -
Page 13: Operation
4 Operation 4.1 Charge Cycle Soft Start : The charger verifies connections are good and the battery is capable of accepting a charge. Batteries with very low voltage will be charged slowly to not harm the battery. When the battery voltage reaches 10V for 30 seconds the charger switches to the next stage. -
Page 14: Specifications
7 Specifications Model: GM96383 Input Voltage: 115 VAC, 50/60 Hz Input Voltage Range: 100-240 VAC, 50/60Hz Input Amps (Max): 2.0 amps Banks: Output Volts: 12 VDC Absorption Charge Voltage: 14.3 +/- 0.20 V per bank Float Charge Voltage: 13.3 +/- 0.20 V per bank Charging current: 6 amps Rechargeable battery type:... -
Page 15: Parts List
9 Parts List Parts lists for field-installed loose battery charger kits are shown below. Factory-installed kits are not listed here. Assembly drawing numbers are shown for reference only. See the installation drawings in Section 3.4. Qty. Description Part Number Kit: GM96386-KP2 Battery Charger 12V, 6A GM96383 TT Float/Equalize Bttry Chrgr,12VDC/6Amp... - Page 16 Screw, hex cap M933-06020-60 TT Float/Equalize Bttry Chrgr,12VDC/6Amp TT-1702 Availability is subject to change without notice. Kohler Co. reserves the right to change the design or specifications without notice and without any ® obligation or liability whatsoever. Contact your local Kohler generator set distributor for availability.