Advertisement
Quick Links
5 PIN WIRE HARNESS
1. Red / White Wire: Parking Light Relay input
2. White Wire: Parking Light Relay Output
3. Black Wire: Ground to Vehicle FRAME
4. Brown Wire: Positive output To
Siren
5. Red Wire: +12V To Constant Battery Source
This manual was written September 1, 2015
©2015 Varad International, Inc. All rights reserved.
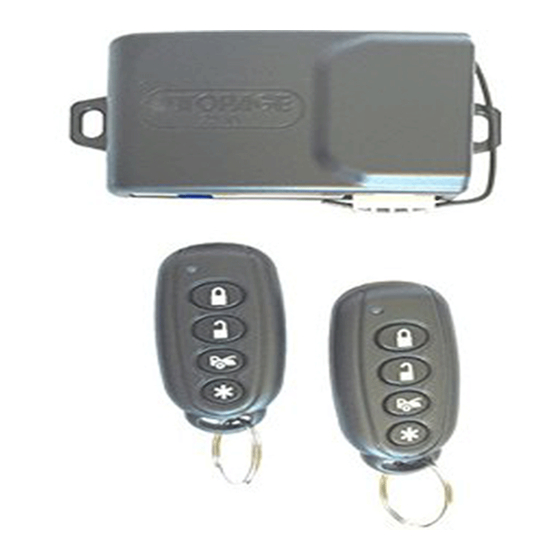
GI-S346
INSTALLATION MANUAL
8 PIN CONNECTOR WIRE HARNESS:
* Starter Kill relay optional
ALARM FEATURE "I" PROGRAMMING:
1
Turn the Ignition 'switch 'ON/OFF' 3 TIMES and stay in OFF position.
2
Push the Valet switch 3 times and hold in on the 3rd push. When a long chirp is heard, release the
valet switch. You are now in the Alarm feature 'I' programming mode.
3
Press the transmitter button corresponding to the feature you want to program.
a. The factory default settings is always [1] LED flash, [1] chirp.
4
Depress the transmitter button again to change the feature. Simply keep pressing the transmitter
button again until the module advances to your desired setting.
One Chirp /
Press
LED one pulse
Transmitter
Factory Default
Button
Setting
1
Active arming
2
Automatic Rearm off
3
Instant Door Ajar
error chirp
4
Siren Confirmation
chirp on only
5
+
White wire=
15A Fuse
Dome Light Output
Lock/Arm &
6
+
Unlock/Disarm
Confirmation Chirps
ALARM with
7.
+
Keyless Entry
8.
+
Car Jacking
feature Off
355A
Three Chirps
Four Chirps /
Two Chirps /
/
LED four
LED two pulses
LED three
pulses
pulses
Passive
Passive arming
arming with
without passive
passive door
door locking
locking.
Automatic Rearm
on
45 seconds delay
Door Ajar error
chirp.
Horn
All
All Confirmation
Confirmation
Confirmation
chirps On
chirp on only
chirps off
White =
White wire=
4
th
Channel
4
th
channel
Momentary
Latched
Lock/Arm
Confirmation
Chirp Only
Keyless Entry
ONLY
Car Jacking
feature On
355A
Transmitter Programming
Note: This mode will only retain the last 4 remote transmitters programmed. If the transmitter
memory is exceeded, the security system will start deleting transmitters from memory in
chronological order.
1. Turn the Ignition 'switch 'OFF/ON' 3 TIMES and stay in ON position.
"Within 15 seconds".
2. Push the Valet switch 2 times and hold it on the 2
nd
release the valet switch. You are now in the Transmitter programming mode.
3. Press and hold any button of the transmitter until the siren responds with a confirming chirp,
indicating the signal has been stored into memory.
4. If you have additional transmitters (up to 4) that need to be programmed, repeat step 3 for
each transmitter.
Exit: Turn Ignition to 'OFF' position, or leave it for 15 seconds. 3 long chirps & 3 parking light
flashes will confirm exit.
ALARM FEATURE "B" PROGRAMMING:
1
Turn the Ignition 'switch 'ON/OFF' 3 TIMES and stay in OFF position.
2
Push the Valet switch 5 times and hold in on the 5
th
push. When a long chirp is heard, release the
valet switch. You are now in the Alarm feature 'B' programming mode.
3
Press the transmitter button corresponding to the feature you want to program.
One Chirp / LED
Press
one pulse
Transmitter
Two Chirps / LED
Three Chirps / LED
two pulses
three pulses
Factory Default
Button
Setting
Pathway
Parking light turns
Parking light turns
1
illumination feature
"on" for 30- second
"on" for 30- second
"off"
upon an unlock
upon an unlock signal
signal
& 10-second upon a
lock signal.
Ignition controlled
2
Ignition controlled
door locks &
door locks only
unlocks
3
0.8-second Door
3.5-second Door
Double pulse unlock
lock pulses.
lock pulse.
3
rd
Channel Pulsed
3
rd
Channel
4
Momentary
5
+
Button =
Button = 4
th
Channel Aux.
Silent Arm/Disarm
Gray Wire = Trunk
Gray Wire = Two
6
+
(Channel 3) Output
Step Door Unlock
Output
Horn chirp Duration
Horn chirp Duration
Horn chirp Duration
7.
+
Standard
50 mS
30 mS
Exit: Turn Ignition to 'ON' position, or leave it for 15 seconds. 3 long chirps will confirm exit.
SHOCK SENSOR ADJUSTMENT
1. Turn the Ignition switch 'ON/OFF' 3 TIMES and stay in OFF position.
2. Push the Valet switch 7 times holding in on the 7th push. Three chirps with a long chirp will be heard. Release the valet
switch. You are now in the Alarm feature 'Shock Sensor' programming mode.
3. Press and hold
button for 2 seconds. One long siren chirp will indicate the unit is ready to accept adjustments of the
shock sensor.
4. Press
button on the transmitter once. This will decrease sensitivity level by one. Each time the button is pushed and a
decrease is made the siren/horn chirp will respond with [1] chirp. Two chirps indicate the minimum sensitivity. Warn away &
full trigger will be deleted when minimum sensitivity is selected
5. Press
button on the transmitter once. This will increase sensitivity level by one. Each time an increase is made the
siren/horn chirp will respond with [1] chirp. Two chirps indicate the maximum sensitivity.
6. Hit the bumper or strong metal part of the vehicle to test the threshold level of the sensor.
a). Activate the warn-away (first stage the shock sensor), the siren will emit a short chirp.
b). Activate the full alarm (second stage the shock sensor), the siren will emit a long chirp.
7. When you are satisfied with the setting, press the
button to lock in the adjustment. One long siren chirp will indicate the
unit has locked in the adjustment.
Note: If 30 seconds of inactivity expires or you turn ON the ignition during of above steps, the unit will exit the program mode
and return to the disarmed mode. Three long chirps will confirm exit.
Varad International, Inc.
5349 Zambrano Street,
Commerce,CA 90040
www.varad.com
push until a long chirp is heard then
Four Chirps /
LED four
pulses
Without ignition
Ignition controlled
controlled door
door unlocks only
locks & unlocks
Comfort feature
Horn chirp
duration
10 mS
Advertisement

Related Manuals for Autopage 355A


Summary of Contents for Autopage 355A
-
Page 1: Installation Manual
355A 355A Transmitter Programming INSTALLATION MANUAL Note: This mode will only retain the last 4 remote transmitters programmed. If the transmitter memory is exceeded, the security system will start deleting transmitters from memory in chronological order. 1. Turn the Ignition 'switch ‘OFF/ON’ 3 TIMES and stay in ON position. -
Page 2: Transmitter Operation
Return to normal operation, turn ignition 'ON'. warranty period, and if the product is defective, VARAD International i.e. Autopage will at its own option, repair or replace as such. Push and hold valet switch for 2 seconds; the LED will turn off indicating the system is exiting 1. - Page 3 FCC statement This device complies with Part 15 of the FCC Rules. Operation is subject to the following two conditions: (1) This device may not cause harmful interference, and (2) This device must accept any interference received, including interference that may cause undesired operation.