Samsung SP-D400 Owner's Instructions Manual
Hide thumbs
Also See for SP-D400:
- User manual (78 pages) ,
- Owner's instructions manual (40 pages) ,
- Owner's instructions manual (35 pages)
Advertisement
Quick Links
Advertisement

Related Manuals for Samsung SP-D400


Summary of Contents for Samsung SP-D400
- Page 2 To avoid injuries or damage to property, please read the following precautions carefully and use the product accordingly. Failure to follow the instructions marked with this symbol may cause personal injury or even fatality. Failure to follow the instructions marked with this symbol may cause personal injury or damage to the product or property.
- Page 3 To disconnect the apparatus from the mains, the plug must be pulled out from the mains socket, therefore the mains plug shall be readily operable. There is a danger of electric shock or fire. Always unplug the unit by holding the power plug. Pulling the power cable may damage the inside of it.
- Page 4 Do not install on an unstable location, or on a stand smaller than the product. Make sure to keep the product out of the reach of children. The product may fall and cause personal injury. In case of thunder/lightning, disconnect the power cord from the wall outlet. There is a danger of electric shock or fire.
- Page 5 This may cause electric shock or fire. If water or an alien substance enters the product, turn the product off, disconnect the power cord from a wall outlet and contact a Do not disassemble, or attempt to fix or modify the product. When the product requires repairs, contact a Do not use or keep the product near flammable sprays or other such substances.
-
Page 6: Correct Disposal Of This Product (Waste Electrical & Electronic Equipment) - Europe Only
When cleaning the product, disconnect the power cord and wipe the product using a soft dry cloth. When not using the product for an extended period of time, disconnect the power plug. Do not install the product in places with heavy dust, chemical substances, high or low temperatures, high humidity, or where it will be operated for a long period continuously etc. - Page 7 environment or damage to health from uncontrolled waste disposal, please separate this from other types of waste and recycle it responsibly to promote the sustainable reuse of material resources. Household users should contact either the retailer where they purchased this product, or their local government office, for details of where and how they can take this item for environmentally safe recycling.
- Page 8 Optical engine with advanced DLP technology - 1024 x 768 panel has been adapted. - 4 segment color wheel to implement optimal colors. - 280 W Lamp designed to improve luminance Vivid colors - Quality picture tuning focused on improving color - this unit aims at realizing color coordinates that meet broadcasting standards on video production.
-
Page 9: Source Button
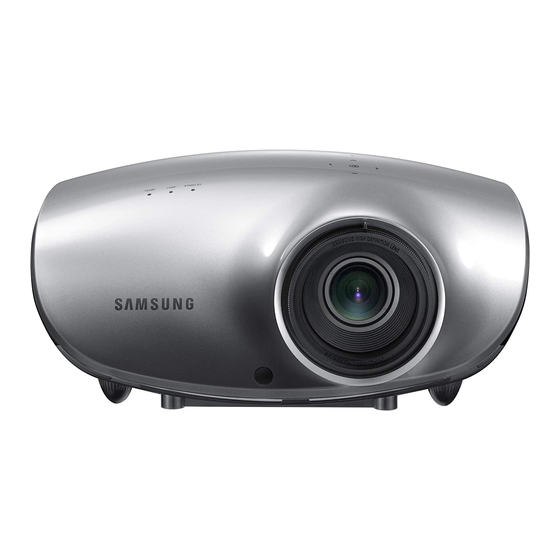
1. Indicators - STAND BY (Blue LED) - LAMP (Blue LED) - TEMP (Red LED) ※ Refer to the Indications. 2. Focus Ring Used for Focus Adjustment. 3. Remote Control Signal Receiver 4. Lens 5. Adjustable Feet You can adjust the screen position by moving the adjustable feet up and down. - Page 10 Power Cable D-Sub Cable LED Indications ●:Light is On ◐:Light is Blinking ○:Light is Off STAND LAMP TEMP If you press the POWER button on the remote control or projector, the screen ● ○ ○ appears within 30 seconds. ● ●...
- Page 11 When the lamp cover protecting the lamp unit is not properly closed or the Action 2 sensor system is not in normal operating condition. When temperature inside Action 3 of the projector becomes too high. When the color wheel fails to Action 4 operate.
- Page 12 4. S-VIDEO IN Input port 5. Remote Control Signal Receiver Product Features 1. ON ( Used to turn on the projector. 2. AUTO Adjusts the Picture automatically. (Available in PC Mode Only) 3. MENU ( Used to display Menu Screen. 4.
- Page 13 8. P.SIZE Used to adjust the size of picture screen. 9. COMP Used to switch to COMPONENT Mode. 10. OFF ( Used to turn off the projector. 11. RETURN ( Returns to the previous menu. 12. BLANK This is used to turn off the screen temporarily. It is released when any button other than the ON/OFF button is pressed.
- Page 14 The DMD Panel used in DLP Projectors consists of several hundred thousand micro mirrors. As with other visual display elements, the DMD Panel may include a few bad pixels. Samsung and the DMD Panel manufacturer have a rigid, bad pixel identification and limitation procedure in place and products will not exceed the maximum number of bad pixels set by our standards.
- Page 15 28.125 1280x720p Component 37.5 720x480p 31.5 720x576p 31.25 31.47 640X350 37.86 640X400 37.86 31.47 640X480 37.5 720X400 31.47 37.88 800X600 46.87 48.36 1024X768 60.02 1280X768 47.78 HDMI 1280X960 63.98 1280X1024 79.98 33.72 1920x1080i 28.125 1280x720p 37.5 720x480p 31.5 720x576p 31.25 720x480i 15.73 720x576i...
- Page 16 Picture Position Modes The position function is not supported in HDMI, Video and S-video input. Overscan : Off Source Input Type Mode 1080i 720p 576p Component 480p 576i 480i 1080i 720p 576p 480p 576i 480i 16:9 Mode Mode Overscan : On Source Input Type...
- Page 17 Installing the Projector Install the projector so that the beam from the projector is perpendicular to the screen. Place the projector so that the lens is at the center of the screen. If the screen is not vertically installed, the picture on the screen may not be a rectangle. Do not install the screen in bright surroundings.
- Page 18 You can adjust the size of image within zoom range by manipulating the Zoom Knob. Focus the picture on the screen using the Focus Ring. If your product is installed at a location out of the specified projection distance (refer to Screen Size and Projection be adjusted correctly.
- Page 19 This projector is designed to show images optimally on a 80 ~ 120 inch sized screen. A. Screen Z: Throw Distance Y': Distance from Lens Center to Image Bottom Setting up the PC Environment - Check the following items before connecting your PC to your projector. 1.
- Page 20 5. Click the [OK] button to close the window, and click the [OK] button of the <Display Properties> window to close the window. The computer may restart automatically. 6. Shut down the PC and connect to the projector. Process might vary depending on your type of computer or Windows versions. (For example, [Properties] appears instead of [Properties (R)] as shown in 1.) This unit appliance supports up to 24 bits per pixel in Color quality when it is used as a PC monitor.
- Page 21 Connecting a DVD player/Cable/Satellite Box to HDMI/DVI - Connecting using an HDMI/DVI cable Connect the [HDMI/DVI IN] terminal on the back of the projector and the DVI output terminal of the DVD player/Cable/Satellite box using a HDMI/DVI cable. - Connecting using an HDMI cable Connect the [HDMI/DVI IN] terminal on the back of the projector and the HDMI output terminal of the DVD player/Cable/Satellite box using a HDMI cable.
- Page 22 Component Ports are marked as (Y/P Connecting to VCR/Camcorder Connect [VIDEO IN(yellow)] input port of the projector to the VIDEO (yellow) OUT port of video equipment using the video cable. - If the video equipment has S-VIDEO OUT port, connect it to [S-VIDEO IN] input port of the projector. Using the S-VIDEO connection, provides a higher visual quality.
- Page 23 Connect [PC IN] port on the rear side of the projector to the monitor output port of the PC using a PC video cable. When connections are all completed, connect both power cords of the projector and the PC. This product supports plug and play, therefore you do not need to install a driver on your PC. Using the Projector Turn on the projector and press the [PC] button to select <PC>.
- Page 24 Screen Adjustment Source List You can select a device connected to the projector to display. 1) Component 2) S-Video 3) Video Edit Name You can edit the names of devices connected to the projector. 1) VCR 2) DVD 3) Cable STB 4) HD STB 5) Satellite STB 6) AV Receiver...
- Page 25 Screen Adjustment Mode Select a screen state which is customized to your projector or change the screen mode as required. 1) Mode - Dynamic Select this mode for a brighter and sharper picture than Standard Mode. - Standard This is the picture mode optimized to the standard broadcast signal. - Monitor1 This is the brightest picture mode appropriate for a presentation.
- Page 26 emphasized. - 9300K : The color temperature appropriate to very bright places such as a shop. 1) Color Temperature 2) R-Gain 3) G-Gain 4) B-Gain 8) Gamma : An image compensation function that controls the settings according to the video properties. ▶...
- Page 27 shaking. If the noise is not removed using Fine Adjustment, adjust the frequency to the maximum and then perform Fine Adjustment again. Only activated in the PC environment. 1) Auto Adjustment : Used to adjust frequency and phase of PC screen automatically.
- Page 28 can comfortably watch pictures on the screen even when watching under dark conditions. It also lowers power consumption and extends the life of the lamp. 2) Bright : Used to enhance the brightness in relatively bright ambient light. Since this mode increases the light level of the lamp, you may experience more noise which is produced when the projector is cooled down.
- Page 29 Screen Adjustment Language You can select the Language used for the menu screen. Menu Option You can adjust the settings related to the menu screen. 1) Position : You can move the location of the menu to a new position (up/down/right/left).
- Page 30 Installation and Connection Symptoms No Power. I want to install my projector on the ceiling. External Source can not be selected. Menu and Remote Control Symptoms Remote control does not work. I cannot select a menu. Screen and External Source Symptoms Cannot see picture images.
- Page 31 odd color./ screen is too dark or bright. Contrast and Color in the menu. If you want to restore various settings to their factory defaults, run <Factory Default>from the menu.
- Page 32 Do not leave the old lamp near inflammables or in reach of children. There is a danger of burn or injury. Remove dirts or foreign materials around or inside the lamp unit using a proper vacuum device. Care and Maintenance Contact SAMSUNG WORLDWIDE Other Authority...
- Page 33 Remove the screws as shown in the figure. Assembling a new lamp is in the reverse order of the disassembly. If you have any questions or comments relating to Samsung products, please contact a SAMSUNG customer care center. U.S.A 1-800-SAMSUNG(726-7864)
- Page 34 DENMARK 70 70 19 70 EIRE 0818 717100 ESTONIA 800-7267 FINLAND 030 - 6227 515 FRANCE 01 48 63 00 00 GERMANY 01805 - SAMSUNG (726-7864, € 0,14/Min) HUNGARY 06-80-SAMSUNG(726-7864) ITALIA 800-SAMSUNG(726-7864) LATVIA 8000-7267 LITHUANIA 8-800-77777 LUXEMBURG 261 03 710 NETHERLANDS 0900 - SAMSUNG (0900-7267864) (€...
- Page 35 022 - 607 - 93 - 33 PORTUGAL 80820 - SAMSUNG (726-7864) SLOVAKIA 0800-SAMSUNG(726-7864) SPAIN 902 - 1 - SAMSUNG (902 172 678) SWEDEN 0771 726 7864 (SAMSUNG) SWITZERLAND 0848-SAMSUNG(7267864, CHF 0.08/min) 0845 SAMSUNG (7267864) ARMENIA 0-800-05-555 AZERBAIJAN 088-55-55-555 BELARUS...
- Page 36 A COMPOSITE IN Port is a general video input port (yellow). Both chrominance and luminance are transmitted on the same 75-ohm cable. Component Port (Green, Blue, Red) The Component Port separately transmits the luminance signal. Digital Broadcast http://www.samsung.com http://www.samsung.com http://www.samsung.com http://www.samsung.com http://www.samsung.com MIDDLE EAST & AFRICA http://www.samsung.com http://www.samsung.com http://www.samsung.com Care and Maintenance Contact SAMSUNG WORLDWIDE Other Authority...
- Page 37 Reproduction in any manner whatsoever without the written permission of Samsung Electronics Co., Ltd. is strictly forbidden. Samsung Electronics Co., Ltd. shall not be liable for errors contained herein or for incidental or consequential damages in connection with the furnishing, performance, or use of this material.