Table of Contents
Advertisement
Advertisement
Table of Contents
Troubleshooting

Related Manuals for Samsung ML-1520


Summary of Contents for Samsung ML-1520
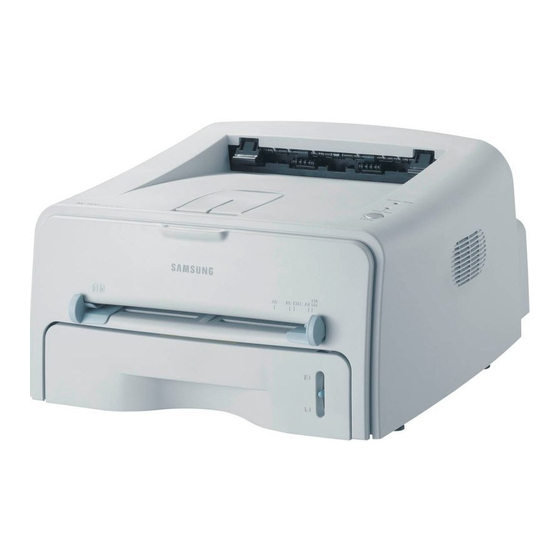
- Page 1 SAMSUNG Laser Printer User's Guide ML-1520...
- Page 2 This manual is provided for information purposes only. All information included herein is subject to change without notice. Samsung Electronics is not responsible for any damages, direct or indirect, arising from or related to use of this manual. © 2004 Samsung Electronics Co., Ltd. All rights reserved.
-
Page 3: Table Of Contents
ONTENTS Chapter 1: Special Features ... 1.2 Printer Components ... 1.4 Understanding the Control Panel ... 1.6 Chapter 2: Unpacking ... 2.2 Installing the Toner Cartridge ... 2.4 Loading Paper ... 2.6 Connecting a Printer Cable ... 2.9 Turning the Printer on ... 2.10 Printing a Demo Page ... - Page 4 SING Chapter 3: Choosing Paper and Other Materials ... 3.2 Sizes and Capacities ... 3.3 Guidelines for Paper and Special Materials ... 3.4 Selecting the Output Location ... 3.5 Printing to the Top Output Tray (Face down) ... 3.5 Printing to the Rear Output Tray (Face up) ... 3.6 Loading Paper ...
- Page 5 Chapter 5: Maintaining the Toner Cartridge ... 5.2 Cleaning the Printer ... 5.5 Consumables and Replacement Parts ... 5.8 OLVING Chapter 6: Troubleshooting Checklist ... 6.2 Solving General Printing Problems ... 6.3 Clearing Paper Jams ... 6.7 Solving Print Quality Problems ... 6.12 Troubleshooting Error Messages ...
- Page 6 PPENDIX Chapter 7: Using Your Printer in Linux ... 7.2 Installing the Printer Driver ... 7.2 Changing the Printer Connection Method ... 7.6 Using the Configuration Tool ... 7.8 Changing LLPR Properties ... 7.10 Printer Specifications ... 7.12 Paper Specifications ... 7.13 Overview ...
- Page 7 Important Precautions and Safety Information When using this machine, these basic safety precautions should always be followed to reduce risk of fire, electric shock, and injury to people: Read and understand all instructions. Use common sense whenever operating electrical appliances. Follow all warnings and instructions marked on the machine and in the literature accompanying the machine.
- Page 8 Unplug the machine from the PC and AC wall outlet, and refer servicing to qualified service personnel under the following conditions: •When any part of the power cord, plug, or connecting cable is damaged or frayed. •If liquid has been spilled into the machine. •If the machine has been exposed to rain or water.
- Page 9 Environmental and Safety Consideration Laser Safety Statement The printer is certified in the U.S. to conform to the requirements of DHHS 21 CFR, chapter 1 Subchapter J for Class I(1) laser products, and elsewhere, is certified as a Class I laser product conforming to the requirements of IEC 825. Class I laser products are not considered to be hazardous.
-
Page 10: Ozone Safety
However, it is advisable that the machine be operated in a well ventilated area. If you need additional information about ozone, please contact your nearest Samsung dealer. Power Saver Recycling Please recycle or dispose of the packaging material for this product in an environmentally responsible manner. -
Page 11: Radio Frequency Emissions
Radio Frequency Emissions FCC regulations This device has been tested and found to comply with the limits for a Class B digital device, pursuant to Part 15 of the FCC rules. These limits are designed to provide reasonable protection against harmful interference in a residential installation. This equipment generates, uses and can radiate radio frequency energy and, if not installed and used in accordance with the instructions, may cause harmful interference to radio communications. - Page 12 Directive 1999/5/EC. The product has been designed to work with the national PSTNs and compatible PBXs of the European countries: In the event of problems, you should contact the Euro QA Lab of Samsung Electronics Co., Ltd. in the first instance.
- Page 14 NTRODUCTION Congratulations on the purchase of your Printer! This chapter includes: • Special Features • Printer Components • Understanding the Control Panel...
-
Page 15: Introduction
Special Features Your new printer is equipped with special features that improve the print quality, giving you a competitive edge. You can: Print with excellent quality and high speed • You can print at 600 dots per inch (dpi). See page 4.16. •... - Page 16 Save your time and money • Allows you to use the Toner Save mode to save toner. See page 4.8. • Allows you to print multiple pages on one single sheet of paper to save paper (N-Up printing). See page 4.10. •...
-
Page 17: Printer Components
Printer Components Front View Cover Manual Feeder guide NTRODUCTION Output Support Front Tray Manual Feeder Top output tray (Face down) Control Panel Power switch Paper level indicator... -
Page 18: Inside View
Inside View Toner cartridge Front Cover Rear View Rear output tray (Face up) Power receptacle USB port NTRODUCTION... -
Page 19: Understanding The Control Panel
Understanding the Control Panel On Line/Error and Toner Save LEDs If the On Line/Error lights green, the printer is ready to print. If the On Line/Error lights red, the printer is experiencing an error, such as jammed paper, the open cover or the empty toner cartridge. -
Page 20: Cancel Button
If the On Line/Error and Toner Save LEDs blink, your system has some problems. To solve the problem, see “Troubleshooting Error Messages” on page 6.18 Cancel button Function Printing demo page In Ready mode, press and hold this button for about 2 seconds until all LEDs blink slowly, and release. - Page 21 NTRODUCTION...
-
Page 22: Setting Up Your Printer
Setting Up Your Printer This chapter provides step by step information on setting up your printer. This chapter includes: • Unpacking • Installing the Toner Cartridge • Loading Paper • Connecting a Printer Cable • Turning the Printer on • Printing a Demo Page •... -
Page 23: Unpacking
Unpacking Remove the Printer and all accessories from the packing carton. Make sure that the printer has been packed with the following items: Notes: • The 1,000 pages and 3,000 pages toner cartridges have different shapes. • If any items are missing or damaged, notify your dealer immediately. -
Page 24: Selecting A Location
Selecting a Location Select a level, stable place with adequate space for air circulation. Allow extra space for opening covers and tray. The area should be well-ventilated and away from direct sunlight or sources of heat, cold, and humidity. See the image below for clearance space. -
Page 25: Installing The Toner Cartridge
Installing the Toner Cartridge Grasp the front cover and pull it toward you to open. Note: Because the printer is very light, it may be moved when you use it; for example, when opening/closing the tray or installing/ removing the toner cartridge. Be careful not to move the printer. Remove the toner cartridge from its bag and remove the paper covering the cartridge. - Page 26 Locate the cartridge slots inside the printer, one on each side. Grasp the handle and insert the cartridge in the printer until it snaps into place. Close the front cover. Make sure that the cover is securely closed. If the cover is not firmly closed, printing errors may occur when you print.
-
Page 27: Loading Paper
Loading Paper You can load approximately 250 sheets of paper in the tray. Pull the tray out of the printer. Note: Because the printer is very light, it may be moved when you use it; for example, when opening/closing the tray or installing/ removing the toner cartridge. - Page 28 Load paper with the print side facing down. Make sure that all four corners are flat in the tray. Pay attention to the paper limit mark on the left inside wall of the tray. Paper overloading may cause paper jams. Note: If you want to change the paper size in the tray, see “Changing the Paper Size in the Tray”...
-
Page 29: Changing The Paper Size In The Tray
Changing the Paper Size in the Tray Pinch the rear guide as shown below to adjust for the paper length. Pinch the side guide as shown and slide it to the left flush against the paper. Notes: • Do not push the width guide far enough to cause the material to warp. -
Page 30: Connecting A Printer Cable
Connecting a Printer Cable To print from your computer, you need to connect your printer to your computer with a Universal Serial Bus (USB) cable. Using a USB Cable Note: Connecting the printer to the USB port of the computer requires a certified USB cable. -
Page 31: Turning The Printer On
Turning the Printer on Plug the power cord into the power receptacle on the back of the printer. Plug the other end into a properly grounded AC outlet and turn on the printer using the power switch. CAUTION: • The fusing area at the rear portion of the inside of your printer is hot when powered. -
Page 32: Printing A Demo Page
Printing a Demo Page Print a demo page to make sure that the printer is operating correctly. Hold down the Cancel button for about 2 seconds to print a demo page. The Demo page shows the printer’s current configuration. 2.11 ETTING RINTER... -
Page 33: Installing Printer Software
Installing Printer Software The supplied CD-ROM contains Windows printing software, Linux printing software, on-line User’s Guide and Acrobat Reader to view the User’s Guide. If you are printing from Windows You can install the following printer software using the CD-ROM. •... -
Page 34: Installing Printer Software In Windows
Installing Printer software in Windows System Requirements Verify the following: • At least 32 MB (Windows 98/Me), 64 MB (Windows 2000), 128 MB (Windows XP) or more of RAM is installed on your PC. • There is at least 300 MB of free disk space on your PC. •... - Page 35 After selecting the language and the component(s), click Next. •View User’s Guide: Opens Samsung ML-1520 Series User’s Guide. If your computer doesn’t have Adobe Acrobat, click on this option and it will automatically install Adobe Acrobat Reader for you.
-
Page 36: Changing The Display Language
To register yourself as a user of Samsung Printers, select the checkbox and click Finish. You are now accessed to the Samsung web site. : If your printer doesn’t work properly, reinstall the printer driver. Changing the Display Language After installation of the software, you can change the display language. -
Page 37: Reinstalling Printer Software
Reinstalling Printer Software Repair is required if your installation fails. From the Start menu, select Programs. Select Samsung ML-1520 Series, and then Maintenance. Select Repair. following window will appear. • After connecting the machine, click Next. • If you want to skip the connection status, click Next, and No to the following screen. -
Page 38: Removing Printer Software
If not, click No to reprint it. When the reinstallation is done, click Finish. Removing Printer Software From the Start menu, select Programs. Select Samsung ML-1520 Series, and then Maintenance. Select Remove. Then you will see a component list so that you can remove any of them individually. -
Page 39: Viewing The User's Guide
After installing the printer software, you can view User’s Guide in PDF format at any time from your Windows desktop. From the Start menu, select Programs. Select Samsung ML-1520 Series and View User’s Guide. Adobe Acrobat automatically runs and then the User’s Guide opens. -
Page 40: Using Print Materials
Using Print Materials This chapter will help you understand types of paper you can use with this printer and how to properly load paper in the tray for the best print quality. This chapter includes: • Choosing Paper and Other Materials •... -
Page 41: Choosing Paper And Other Materials
Choosing Paper and Other Materials You can print on a variety of print materials, such as plain paper, envelopes, labels, transparencies and so on. See “Paper Specifications” on page 7.13. To get the best possible print quality, use only high-quality copier-grade paper. When you choose print materials, consider the followings: •... -
Page 42: Sizes And Capacities
Sizes and Capacities Size Plain Paper Letter (8.5 x 11 in.) Legal (8.5 x 14 in.) Executive (7.25 x 10.5 in.) Folio (8.5 x 13 in.) A4 (210 x 297 mm) B5 (182 x 257 mm) A5 (148 x 210 mm) A6 (105 x 148 mm) Envelopes No. -
Page 43: Guidelines For Paper And Special Materials
Guidelines for Paper and Special Materials When selecting or loading paper, envelopes, or other special materials, keep these guidelines in mind: • Attempting to print on damp, curled, wrinkled, or torn paper can cause paper jams and poor print quality. •... -
Page 44: Selecting The Output Location
Selecting the Output Location The printer has two output locations: the rear output tray and the top output tray. ƒ Top output tray To use the top output tray, be sure the rear output tray is closed. To use the rear output tray, open it. Notes: •... -
Page 45: Printing To The Rear Output Tray (Face Up)
Printing to the Rear Output Tray The printer always prints to the rear output tray if it is open. Paper comes out of the printer face-up, and each time a sheet of paper comes out, it falls down from the printer. Printing from the Manual Feeder to the rear output tray provides the straight paper path. -
Page 46: Loading Paper
If you do not want to print to the rear output tray then close the tray. The pages will stack on the top output tray. Loading Paper Proper paper loading helps prevent paper jams and ensure trouble-free printing. Do not remove the tray while a job is printing. -
Page 47: Using The Manual Feeder
Using the Manual Feeder If you select Manual Feed in the Source option, you can manually load paper in the manual feeder. Manually loading paper can be helpful when you want to check the print quality after each page is printed. If you experience a paper jam from the tray, load one sheet of paper at a time into the manual feeder. - Page 48 In Manual Feed mode, you can’t cancel a print job by pressing the Cancel button. To cancel a print job in Manual Feed mode: Turn the printer off. Double-click the icon at right bottom of the window. Double-click this icon to view the queue of the print jobs.
-
Page 49: Printing On Envelopes
Printing on Envelopes Guidelines • Only use envelopes recommended for laser printers. Before loading envelopes in the manual feeder, make sure that they are undamaged and are not stuck together. • Do not feed stamped envelopes. • Never use envelopes with clasps, snaps, windows, coated lining, or self-stick adhesives. - Page 50 When you print on envelopes, you must select Manual Feed for Source from the software application, and then select the correct paper size and type. For details, see page 4.6. Press the Cancel button to start feeding. Note: Please be careful when you open the rear cover. The inside of the printer maybe hot.
-
Page 51: Printing On Labels
Printing on Labels Guidelines • Only use labels recommended for laser printers. • Verify that the labels’ adhesive material can tolerate fusing temperature of 200°C (392°F) for 0.1 second. • Make sure that there is no exposed adhesive material between the labels. Exposed areas can cause labels to peel off during printing, which can cause paper jams. -
Page 52: Printing On Transparencies
When you print on labels, you must select Manual Feed for Source from the software application, and then select the correct paper size and type. For details, see page 4.6. Note: Please be careful when you open the rear cover. The inside of the printer maybe hot. - Page 53 Adjust the guide to fit the width of the transparencies. When you print on transparencies, you must select Manual Feed for Source from the software application, and then select the correct paper size and type. For details, see page 4.6. Note: Please be careful when you open the rear cover.
-
Page 54: Printing On Card Stock Or Custom-Sized Materials
Printing on Card Stock or Custom-sized Materials Postcards, 3.5 by 5.83 in.(index) cards and other custom-sized materials can be printed with this printer. The minimum size is 76 by 127mm(3.0 by 5.0 in.) and the maximum size is 216 by 356mm(8.5 by 14 in.). -
Page 55: Printing On Preprinted Paper
When you print on card stocks or the custom-sized paper, you must select Manual Feed for Source from the software application, and then select the correct paper size and type. For details, see page 4.6. Note: If the size of your print material is not listed in the Size box in the Paper tab of the printer driver properties, click Add Custom button and set the size manually. - Page 56 Load letterheads into the tray you want to use, as shown in the figures below. Adjust the guides to fit the width of the paper stack. Load with the design face down, bottom edge towards the printer. Load with the design face up, top edge towards the printer.
- Page 57 3.18 SING RINT ATERIALS...
-
Page 58: Printing Tasks
Printing Tasks This chapter explains the printing options and common printing tasks. This chapter includes: • Printing a Document • Setting Paper Properties • Using the Toner Save Mode • Printing Multiple Pages on One Sheet of Paper (N- Up Printing) •... -
Page 59: Printing A Document
Printing a Document The following procedure describes the general steps required for printing from various Windows applications. The exact steps for printing a document may vary depending on the application program you are using. Refer to the User’s Guide of your software application for the exact printing procedure. - Page 60 œ Landscape From the Paper tab, select the paper source, size and type. For further details, see page 4.6. Click other tabs on the top of the Samsung ML-1520 Series Properties window to access other features, if needed. œ Portrait...
-
Page 61: Canceling A Print Job
Click the Windows Start button. For Windows 98/Me/2000, select Settings, and then Printers. For Windows XP, select Printers and Faxes. Select the Samsung ML-1520 Series printer. Click the right mouse button on the printer icon and: • In Windows 98/Me, select Properties. -
Page 62: Using A Favorite Setting
To stop a print job from the Printers folder From the windows Start menu, select Settings. Select Printers to open the Printers window, and double- click the Samsung ML-1520 Series icon. From the Document menu, select Cancel Printing (Windows 98/Me) or Cancel (Windows 2000/XP). -
Page 63: Setting Paper Properties
Setting Paper Properties Use the following options to set the basic paper handling needs when you access the printer properties. See page 4.2 for more information on accessing printer properties. Click the Paper tab to access various paper properties. ➀ ➀... - Page 64 Property ➂ Make sure that corresponding paper tray. Manual Feed source is used when you use the Manual Feeder to print using special materials. You have to load one sheet at a time into the the printer. see page 3.8. If the paper source is set to Auto Select, the printer automatically selects paper from the Manual Feeder first and then from...
-
Page 65: Using The Toner Save Mode
Using the Toner Save Mode Toner Save mode allows the printer to use less toner on each page. Selecting this option will extend the life of your toner cartridge and reduce your cost per page, but will reduce print quality. There are two ways to enable the Toner Save mode: From the Control Panel Press the Cancel button on the control panel. - Page 66 From the software application To change the print settings from your software application, access the printer properties. See page 4.2. Click the Graphics tab, and select the Toner Save option. You can select from: •Printer Setting: If you select this option, this feature is determined by the setting you’ve made on the control panel of the printer.
-
Page 67: Printing Multiple Pages On One Sheet Of Paper (N-Up Printing)
Printing Multiple Pages on One Sheet of Paper (N-Up Printing) You can select the number of pages to print on a single sheet of paper. To print more than one page per sheet, the pages will appear decreased in size and arranged on the sheet. You can print up to 16 pages on one sheet. - Page 68 Select the page order, if necessary. Right then Down then Down Right Click the Paper tab, select the paper source, size and type. Click OK and print the document. Left then Down then Down Left 4.11 RINTING ASKS...
-
Page 69: Scaling Your Document
Scaling Your Document You can scale your print job on a page. To change the print settings from your software application, access the printer properties. See page 4.2. From the Layout tab, select Reduce/Enlarge in the Type drop-down list. Enter the desired scaling rate in the Persentage input box. You can also click the œ¤or ƒ... -
Page 70: Fitting Your Document To A Selected Paper Size
Fitting Your Document to a Selected Paper Size This printer feature allows you to scale your print job to any selected paper size regardless of the digital document size. This can be useful when you want to check fine details on a small document. -
Page 71: Printing Posters
Printing Posters This feature allows you to print a single-page document onto 4, 9, or 16 sheets of paper, for the purpose of pasting the sheets together to form one poster-size document. To change the print settings from your software application, access the printer properties. - Page 72 Specify an overlap in millimeter or inch to make it easier to reconstruct the resulting poster. Click the Paper tab, select the paper source, size and type. Click OK and print the document. You can complete the poster by reconstructing the results. 4.15 RINTING ASKS...
-
Page 73: Setting Graphic Properties
Setting Graphic Properties Use the following Graphic options to adjust the print quality for your specific printing needs. See page 4.2 for more information on accessing printer properties. Click the Graphics tab to display the properties shown below. ➀ ➁ Property ➀... - Page 74 Property You can set advanced settings by clicking the ➂ Advanced Options button. Advanced Options Darkness Use this option to lighten or darken the image appearance in your print. • Normal: This setting is for normal documents. • Light: This setting is for bolder line widths or darker gray-scale images.
- Page 75 Property ➃ Advanced Options (continued) 4.18 RINTING ASKS Description True-Type Options This option determines what the driver tells the printer about how to image the text in your document. Select the appropriate setting according to the status of your document. •...
-
Page 76: Printing Watermarks
Printing Watermarks The Watermark option allows you to print text over an existing document. For example, you may want to have large gray letters reading “DRAFT” or “CONFIDENTIAL” printed diagonally across the first page or all pages of a document. There are several predefined watermarks that come with the printer, and they can be modified or you can add new ones to the list. -
Page 77: Creating A Watermark
Creating a Watermark To change the print settings from your software application, access the printer properties. See page 4.2. Click the Extras tab, and click the Edit button in the Watermark section. The Watermarks window appears. You can enter the desired text message in the Watermark Message box. -
Page 78: Editing A Watermark
Editing a Watermark To change the print settings from your software application, access the printer properties. See page 4.2. Click the Extras tab, and click the Edit button in the Watermark section. The Watermarks window appears. Select the watermark you want to edit in the Current Watermarks list, and change the watermark message and the options. -
Page 79: Printing Overlays
Printing Overlays What is an Overlay? An overlay is text and/or images stored in the computer hard disk drive(HDD) as a special file format that can be printed on any document. Overlays are often used to take the place of Dear ABC preprinted forms and letterhead paper. - Page 80 In the Overlays window, click Create Overlay. In the Create Overlay window, type a name of up to eight characters in the File name box. Select the destination path, if necessary. (The default is C:\Formover). Click Save. You will see the name in the Overlay List. Click OK or Yes until you complete creating.
-
Page 81: Using A Page Overlay
Using a Page Overlay After an overlay has been created, it is ready to be printed with your document. To print an overlay with a document: Create or open the document you want to print. To change the print settings from your software application, access the printer properties. -
Page 82: Deleting A Page Overlay
If necessary, click Confirm page Overlay When Printing. If this box is checked, a message window will appear each time you submit a document for printing, asking you to confirm your wish to print an overlay on your document. Answering Yes to the window means that the selected overlay will be printed with your document. -
Page 83: Using The Status Monitor
Opening the Status Monitor Double click the Status monitor icon on the Windows task bar. Or, select Programs from Start, Samsung ML-1520 Series , and Samsung Printer Status Monitor. The Samsung ML-1520 Series Status monitor window appears. - Page 84 Changing the Status Monitor Program Setting From the Status Monitor window if you click the configuration icon , you can see the following window. • Always On Top always shows the Status monitor window on the top of the window regardless of other open programs. •...
-
Page 85: Setting Up Locally Shared Printer
Setting Up Locally Shared Printer You can connect the printer directly to a selected computer, which is called “host computer”, on the network. The printer can be shared by other users on the network through a Windows 98, Me, 2000 or XP network printer connection. Windows 98/Me Setting Up Host Computer Start Windows. -
Page 86: Windows 2000/Xp
Windows 2000/XP Setting Up Host Computer Start Windows. From the Start menu, select Settings and Printers. (Windows 2000) From the Start menu, select Printers and Faxes. (Windows XP) Double-click your printer icon. From the Printer menu, select Sharing. Check the Shared As box. (Windows 2000) Check the Share this printer box. - Page 87 Fill in the Enter a port name field, and enter the shared name. Click OK, and click Close. Click Apply, and click OK. 4.30 RINTING ASKS...
-
Page 88: Maintaining Your Printer
Maintaining Your Printer This chapter provides suggestions for maintaining the toner cartridge and the printer. This chapter includes: • Maintaining the Toner Cartridge • Cleaning the Printer • Consumables and Replacement Parts... -
Page 89: Maintaining The Toner Cartridge
Maintaining the Toner Cartridge Toner cartridge storage To get the maximum results from the toner cartridge, keep the following guidelines in mind. • Do not remove the toner cartridge from its package until ready for use. • Do not refill the toner cartridge. The printer warranty does not cover damage caused by using a refilled cartridge. -
Page 90: Redistributing Toner
Redistributing Toner When toner is low, faded or light areas may appear on a printed page. You may be able to temporarily improve the print quality by redistributing the toner. The following procedures may allow you to finish the current print job before replacing the toner cartridge. -
Page 91: Replacing The Toner Cartridge
Gently shake the toner cartridge from side to side five or six times to redistribute the toner. Note: If the toner gets on your clothing, wipe it off with a dry cloth and wash clothing in cold water. Hot water sets toner into fabric. -
Page 92: Cleaning The Printer
Cleaning the Printer To maintain the print quality, follow the cleaning procedures below each time the toner cartridge is replaced or if print quality problems occur. Note: While cleaning the inside of the printer, be careful not to touch the transfer roller (located underneath the toner cartridge). Oil from your fingers can cause print quality problems. - Page 93 With a dry, lint-free cloth, wipe away any dust and spilled toner from the toner cartridge area and the toner cartridge cavity. Note: To prevent damage to the toner cartridge, do not expose it to light for more than a few minute. Cover it with a piece of paper, if necessary.
- Page 94 Printing a cleaning sheet If you are experiencing blurred, faded or smeared printouts. Printing a cleaning sheet cleans the drum inside the toner cartridge. This process will produce a page with toner debris, which should be discarded. Ensure that the printer is turned on and in the Ready mode with paper loaded in the tray.
-
Page 95: Consumables And Replacement Parts
Paper Feeding Roller Transfer Roller Pick-up roller Fuser Unit To purchase the consumables and replacement parts, contact Samsung dealer or the place where you bought your product. We strongly recommend that items be installed by a trained service personnel. AINTAINING RINTER... -
Page 96: Solving Problems
Solving Problems This chapter provides helpful information for what to do if you encounter an error while using your printer. This chapter includes: • Troubleshooting Checklist • Solving General Printing Problems • Clearing Paper Jams • Solving Print Quality Problems •... -
Page 97: Troubleshooting Checklist
Troubleshooting Checklist If the printer is not working properly, consult the following checklist. If the printer does not pass a step, follow the corresponding troubleshooting suggestions. Check Check the power cord and the power switch. Make sure that the On Line/Error LED is on. -
Page 98: Solving General Printing Problems
Solution Check the power cord connections. Check the power switch and the power source. Select Samsung ML-1520 Series in the Printer folder in Windows as your default printer. • The printer cover is not closed. • Paper is jammed. - Page 99 The maximum print speed of the printer is 14(A4) or 15(Letter) pages per minute. From the Start menu, choose Settings and Printers. Right-click the Samsung ML-1520 Series printer icon, choose Properties, click the Details tab, and then choose the Spool Settings button.
- Page 100 Problem Possible Cause The paper There is too much keeps paper in the paper jamming. tray. An incorrect type of paper is being used. An incorrect output method is being used. There may be debris inside the machine. The printer The printer cable is prints, but the loose or defective.
- Page 101 Problem Possible Cause The setting in the illustrations software application is print wrong. incorrectly in Adobe Illustrator. ATTENTION: If you have any printing problem after your printer prints about 60,000 pages, you must contact the customer service to replace the transfer roller. OLVING ROBLEMS Solution...
-
Page 102: Clearing Paper Jams
Clearing Paper Jams Occasionally, paper can be jammed during a print job. Some of causes include: • The tray is loaded improperly or overfilled. • The tray has been pulled out during a print job. • The front cover has been opened during a print job. •... - Page 103 Open the rear output tray. Loosen the paper if it is caught in the feed rollers. Then pull the paper gently out. Note: Please be careful when you open the rear cover. The inside of the printer is still hot. Close the rear output tray.
-
Page 104: In The Paper Feed Area
In the Paper Feed Area Slide out the tray to expose the jammed paper. Remove any missfeed paper by pulling it out by the visible edge from the tray. Make sure that all of the paper is properly aligned in the tray. Slide the tray back into the printer. -
Page 105: Around The Toner Cartridge
Around the Toner Cartridge Open the front cover. Push the toner cartridge down and remove it from the printer. Gently pull the paper toward you. Check that there is no other paper in the printer. Reinstall the toner cartridge, and then close the cover. Printing can be resumed. -
Page 106: Tips For Avoiding Paper Jams When Printing On The A5-Sized Paper
Open the input tray and load paper into the tray as shown below. Open the Samsung ML-1520 Series Properties window, set the paper size to A5(5.8x8.3 in.) from the Paper tab. From the Orientation option of the Layout tab, set the Rotate option to 90º. -
Page 107: Tips For Avoiding Paper Jams
Tips for Avoiding Paper Jams By selecting the correct paper types, most paper jams can be avoided. If a paper jam occurs, follow the steps outlined in “Clearing Paper Jams” on page 6.7. • Follow the procedures in “Loading Paper” on page 2.6. Ensure that the adjustable guides are positioned correctly. -
Page 108: Solving Print Quality Problems
Solving Print Quality Problems Problem Light or faded If a vertical white streak or faded area appears on the page: print • The toner supply is low. You may be able to temporarily extend the toner cartridge life. See “Redistributing Toner” on page 5.3. - Page 109 Problem Vertical lines Gray background Toner smear Vertical repetitive defects 6.14 OLVING ROBLEMS Solution If black vertical streaks appear on the page: • The drum inside the toner cartridge has probably been scratched. Install a new toner cartridge. If the amount of background shading becomes unacceptable, the procedures below may fix the problem.
- Page 110 Problem Background Background scatter results from bits of toner distributed on scatter the printed page. • The paper may be too damp. Try printing with a different batch of paper. Do not open packages of paper until necessary so that the paper does not absorb too much moisture.
- Page 111 Problem Wrinkles or creases Back of printouts are dirty Black pages Loose toner Character Voids 6.16 OLVING ROBLEMS Solution Ensure that the paper is loaded properly. • Check the paper type and quality. See “Paper Specifications” on page 7.13. • Open the rear cover and try printing to the rear output tray (face-up).
- Page 112 Problem Horizontal stripes If horizontally aligned black streaks or smears appear: • The toner cartridge may be installed improperly. Remove the cartridge and reinsert. • The toner cartridge may be defective. Install a new toner cartridge. See “Installing the Toner Cartridge” on page 2.4.
-
Page 113: Troubleshooting Error Messages
Troubleshooting Error Messages When the printer experiences an error, the control panel will indicate an error message with the indicator lights. Find the light pattern below that matches the printer light pattern and follow the solutions to clear the error. LED status legend LED pattern On Line/Error... -
Page 114: Common Windows Problems
Common Windows Problems Problem “File in Use” message appears during installation. “Error Writing to LPTx” message appears. “General Protection Fault”, “Exception OE”, “Spool32”, or “Illegal Operation” messages appear. Note: Refer to Microsoft Windows 98, Me, 2000 or XP User’s Guide that came with your PC for further information on Windows error messages. -
Page 115: Common Linux Problems
LPRng is defined as the first queue in /etc/printcap, therefore it is not possible for the Samsung Printer Package to change the default when some queues have otherwise been defined using printtool. - Page 116 Problem The N-up setting does not The N-up feature is achieved through post-processing of work correctly for some the PostScript data that is being sent to the printing of my documents. system. However, such post-processing can only be adequately achieved if the PostScript data conforms to the Adobe Document Structing Conventions.
- Page 117 Problem How do I specify the IP address of my SMB server? Some documents come out as white pages when printing. I have CUPS and some options (such as N-up) seem to be always enabled even though I don’t pick them in LLPR. I configured a printer to print to a file, but I get “Permission denied”...
-
Page 118: Appendix
PPENDIX This chapter includes: • Using Your Printer in Linux • Printer Specifications • Paper Specifications... -
Page 119: Using Your Printer In Linux
Using Your Printer in Linux Installing the Printer Driver System Requirements Supported OS Redhat 6.2/7.0/7.1 and above • Linux Mandrake 7.1/8.0 and above • SuSE 6.4/7.0/7.1 and above • Debian 2.2 and above • Caldera OpenLinux 2.3/2.4 and above • Turbo Linux 6.0 and above •... - Page 120 Installing Printer Driver Make sure that you connect the printer to your computer. Turn both the computer and the printer on. When the Administrator Login window appears, type in “root” in the Login field and enter the system password. Note: You must log in as a super user (root) to install the printer software.
- Page 121 If you selected Recommended, go to Step 6. For Expert, select the desired option and then click Begin Install. The printer driver installation begins. When the installation is completed, click Start. The Linux Printer Configuration window opens. Click the Add Printer icon on the toolbar at the top of the window. Note: Depending on the printing system in use, the Administrator Login window may appear.
- Page 122 You see the printers currently added in your system. Select the printer you will use. The function tabs available for the selected printer appear at the top of the Add a Printer window. Click the Connection tab and ensure that the printer port is set properly.
-
Page 123: Changing The Printer Connection Method
When the window prompts that the new printer is successfully configured, click OK. The Linux Printer Configuration window re-appears. From the Info tab, you can view the information about your printer. If necessary, you can change the printer configuration. For details about changing the printer configuration, see “Using the Configuration Tool”... - Page 124 When the Linux Printer Configuration window appears, click the Add Printer icon on the toolbar at the top of the window. Click the Connection tab at the top of the Add a Printer window. Ensure that the printer port is set properly. If not proper, change the device setting.
-
Page 125: Using The Configuration Tool
The Administrator Login window appears. Type in “root” in the Login field and enter the system password. Click Proceed. Note: You must log in as a super user (root) to uninstall the printer software. If you are not, ask your system administrator. The message window which is asking your confirmation to proceed with the uninstallation appears. - Page 126 The Info tab shows general information about the printer. If you are an Internet user, you can click Go to the Web page for this printer to access the Samsung web page. Click the Job tab to inspect and manage the job queue for the selected printer.
-
Page 127: Changing Llpr Properties
Note: Regular users are able to override the system-wide default settings defined by the administrator. When a regular user clicks Apply, these custom settings will be saved in the user’s profile and may be later used with LLPR. If the administrator is running the configuration tool, then the settings will be saved as the new global defaults. - Page 128 The LLPR Properties window opens. You will see the following six tabs at the top of the window: • General - allows you to change the paper size, the paper type, the paper source, the orientation of the documents, enable duplex feature, add start and end banners, and change the number of pages per sheet.
-
Page 129: Printer Specifications
352 x 372 x 196 mm / 13.8 x 14.6 x 7.7 in. Temperature:10 ~ 32 °C / 50 ~ 90 °F; Humidity: 20 ~ 80 % RH SPL (Samsung Printer Language) Windows font USB 1.1 (Compatible with USB 2.0) Windows 98/Me/2000/XP, Various Linux OS... -
Page 130: Paper Specifications
This may be the result of improper handling, unacceptable temperature and humidity levels, or other variables over which Samsung has no control. • Before purchasing large quantities of paper, ensure the paper meets the requirements specified in this User’s Guide. -
Page 131: Supported Sizes Of Paper
Supported Sizes of Paper Paper Letter Executive Legal B5 (JIS) Folio Minimum size (custom) Maximum size (custom) Transparency Labels Envelopes a.The printer supports a wide range of media sizes. See “Printing on Card Stock or Custom-sized Materials” on page 3.15. b.Capacity may vary depending on media weight and thickness, and environ- mental conditions. -
Page 132: Guidelines For Using Paper
Guidelines for Using Paper For the best result, use conventional 75 g/m Ensure that the paper is of good quality, and free of cuts, nicks, tears, spots, loose particles, dust, wrinkles, voids, and curled or bent edges. If you are unsure of what type of paper you are loading (such as, bond or recycled), check the label on the package. -
Page 133: Paper Specifications
Paper Specifications Acid Content Caliper Curl in Ream Cut Edge Conditions Fusing Compatibility Grain Moisture Content Smoothness Paper Output Capacity Face-down output tray Face-up output slot 7.16 PPENDIX Category 5.5 ~ 8.0 pH 0.094 ~ 0.18 mm (3.0 ~ 7.0 mils) Flat within 5 mm (0.02 in.) Cut with sharp blades with no visible fray. -
Page 134: Printer And Paper Storage Environment
Printer and Paper Storage Environment Paper storage environmental conditions directly affect the feed operation. Ideally, the printer and paper storage environment should be at or near room temperature, and not too dry or humid. Remember that paper is hygroscopic; it absorbs and loses moisture rapidly. Heat works with humidity to damage paper. - Page 135 7.18 PPENDIX...
- Page 136 NDEX cancel, print 4.4 clean, printer 5.5 cleaning sheet, print 5.7 connect power cord 2.10 USB cable 2.9 control panel,use 1.6 demo page, print 2.11 document, print 4.2 error, solve 6.18 install software 2.13 toner 2.4 language, change 2.15 load paper 3.7 output tray, select 3.5 overlay create 4.22...
- Page 137 install 2.13 Linux 7.2 overview 2.12 reinstall 2.16 system requirements 2.13 uninstall 2.17 specification paper 7.13 printer 7.12 status monitor, use 4.26 toner install 2.4 life 5.2 recycle 5.2 redistribute 5.3 replace 5.4 toner save 4.8 watermark create 4.20 delete 4.21 edit 4.21 print 4.19...
- Page 138 www.samsungprinter.com Home Rev.1.02...