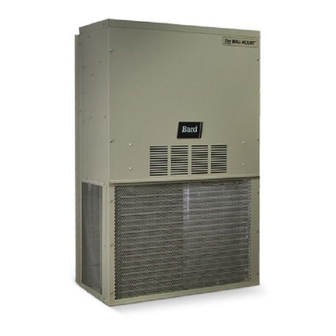
Bard WA381 Installation Instructions Manual
Wall mounted package air conditioners
Hide thumbs
Also See for WA381:
- Installation instructions manual (21 pages) ,
- Installation instructions manual (21 pages)
Table of Contents
Advertisement
Advertisement
Table of Contents

Related Manuals for Bard WA381


Summary of Contents for Bard WA381
- Page 1 INSTALLATION WALL MOUNTED PACKAGE AIR CONDITIONERS MODELS WA381 WA423 WA484 WA491 WA602 Bard Manufacturing Company Bryan, Ohio 43506 Since 1914...Moving ahead just as planned. INSTRUCTIONS Manual : Supersedes: File: Date: 2100-398A 2100-398 Volume III Tab 16 05-28-02 © Copyright 2002...
-
Page 2: Table Of Contents
Contents Getting Other Information and Publications Wall Mount General Information Heat Pump Wall Mount Model Nomenclature ... 2 Shipping Damage ... 5 General ... 5 Duct Work ... 6 Filters ... 6 Fresh Air Intake ... 6 Condensate Drain ... 6 Installation Instructions Wall Mounting Information ... -
Page 3: Getting Other Information And Publications
GETTING OTHER INFORMATION AND PUBLICATIONS These publications can help you install the air conditioner or heat pump. You can usually find these at your local library or purchase them directly from the publisher. Be sure to consult current edition of each standard. -
Page 4: Wall Mount General Information
WALL MOUNT GENERAL INFORMATION HEAT PUMP WALL MOUNT MODEL NOMENCLATURE MODEL NUMBER CAPACITY 38 - 3 Ton 42 - 3 1/2 Ton REVISIONS 48 - 4 Ton 60 - 5 Ton VOLTS & PHASE VENTILATION OPTIONS A - 230/208/60/1 X - Barometric Fresh Air Damper (Standard) B - 230/208/60/3 B - Blank-off Plate C - 460/60/3... -
Page 5: Figure 1 Unit Dimensions
FRONT VIEW FIGURE 1 UNIT DIMENSIONS SIDE VIEW BACK VIEW MIS-1262... -
Page 6: Electrical Specifications
& Maximum size of the time delay fuse or HACR type circuit breaker for protection of field wiring conductors. Based on 75° C copper wire. All wiring must conform to NEC and all local codes. These “Minimum Circuit Ampacity” values are to be used for sizing the field power conductors. Refer to the National Electric Code (latest revision), article 310 for power conductor sizing. -
Page 7: Shipping Damage
& Maximum size of the time delay fuse or HACR type circuit breaker for protection of field wiring conductors. Based on 75° C copper wire. All wiring must conform to NEC and all local codes. These “Minimum Circuit Ampacity” values are to be used for sizing the field power conductors. Refer to the National Electric Code (latest revision), article 310 for power conductor sizing. -
Page 8: Duct Work
5/8 inch. Any grille that meets with 5/8 inch louver criteria may be used. It is recommended that Bard Return Air Grille Kit RG2 through RG5 or RFG2 through RFG5 be installed when no return duct is used. -
Page 9: Installation Instructions
WALL MOUNTING INFORMATION 1. Two holes for the supply and return air openings must be cut through the wall as shown in Figure 3. 2. On wood frame walls, the wall construction must be strong and rigid enough to carry the weight of the unit without transmitting any unit vibration. -
Page 10: Figure 3 Mounting Instructions
FIGURE 3 MOUNTING INSTRUCTIONS MIS-416... -
Page 11: Figure 4 Electric Heat Clearance
ELECTRIC HEAT CLEARANCE MIS-277 WARNING A minimum of 1/4 inch clearance must be maintained between the supply air duct and combustible materials. This is required for the first 3 feet of ducting. It is important to insure that the 1/4 inch minimum spacing is maintained at all points. -
Page 12: Figure 5 Wall Mounting Instructions
SEE FIGURE 3 – MOUNTING INSTRUCTIONS SUPPLY AIR OPENING RETURN AIR OPENING FRAMING MATERIAL 2 X 4’S, 2 X 6’S AND/OR MIS-549 STRUCTURAL STEEL Manual 2100-398 Page 10 FIGURE 5 WALL MOUNTING INSTRUCTIONS SUPPLY AIR OPENING RETURN AIR OPENING FIGURE 6 WALL MOUNTING INSTRUCTIONS ATTACH TO TOP PLATE OF WALL... -
Page 13: Figure 7 Common Wall Mounting Installations
COMMON WALL MOUNTING INSTALLATIONS FREE AIR FLOW NO DUCT FALSE WALL INSTALLATION FIGURE 7 DUCTED SUPPLY RETURN AT UNIT CLOSET INSTALLATION MIS-550 Manual 2100-398 Page... -
Page 14: Wiring - Main Power
WIRING – MAIN POWER Refer to the unit rating plate for wire sizing information and maximum fuse or “HACR” type circuit breaker size. Each outdoor unit is marked with a “Minimum Circuit Ampacity”. This means that the field wiring used must be sized to carry that amount of current. Depending on the installed KW of electric heat, there may be two field power circuits required. -
Page 15: Figure 8 Unit 24V Terminal Board
FIGURE 8 UNIT 24V TERMINAL BOARD MIS-1373D Manual 2100-398 Page... -
Page 16: Start Up
For improved start up performance wash the indoor coil with a dish washing detergent. HIGH PRESSURE SWITCH The WA381, WA484, WA491 and WA602 models are supplied with a remote reset high pressure switch. If tripped, this pressure switch may be reset by turning the thermostat off then back on again. -
Page 17: Sequence Of Operation
SEQUENCE OF OPERATION COOLING – Circuit R-Y makes at thermostat pulling in compressor contactor, starting the compressor and outdoor motor. The G (indoor motor) circuit is automatically completed on any call for cooling operation or can be energized by manual fan switch on subbase of constant air circulation. -
Page 18: Figure 9 Fan Blade Setting
2. Remove the screws holding both grilles, one on each side of unit, and remove grilles. 3. Remove screws holding fan shroud to condenser and bottom. Nine (9) screws. Table 7A on Page 18 for models WA381 and WA491 Manual 2100-398 Page 16 4. Unwire condenser fan motor. -
Page 19: Table 7A Indoor Blower Performance
TABLE 9 MAXIMUM ESP OF OPERATION ELECTRIC HEAT ONLY Values shown are for units equipped with standard 1 inch throwaway filter or 1 inch washable filter. Derate ESP by .15 for 2 inch pleated filters. TABLE 7A INDOOR BLOWER PERFORMANCE 230V / 460V TABLE 8 RECOMMENDED AIRFLOW... -
Page 20: Pressure Table
COOLING Low side pressure ± 2 PSIG High side pressure ± 5 PSIG Tables are based upon rated CFM (airflow) across the evaporator coil. If there is any doubt as to correct operating charge being in the system, the charge should be removed, system evacuated and recharged to serial plate instructions. -
Page 21: Optional Accessories
l a i i t n t a l t i u l l u t i u t i u t i u t i u t i u t i u TABLE 11 OPTIONAL ACCESSORIES i t n t a l i t n t a l...