Advertisement
Quick Links
MODEL HB880R
Operating and User Instructions
WARNING
Risk of Fire or Electrical Shock
• Connect only to an outdoor receptacle protected by a Ground Fault
Circuit Interrupter (GFCI).
• Connect only to an outdoor receptacle with a "while in use" weatherproof
cover.
• Mount at least 24 inches (0.6 meters) above ground level with receptacles
facing downward.
• Unplug timer power cord before opening the battery compartment.
• Replace battery cover and retaining screw before plugging in timer cord.
• Do not use timer if battery cover and/or retaining screw is missing or
damaged.
• Do not exceed rated capacity of connected extension cord or timer.
Specifications
•
Input Voltage: 120 VAC, 60 HZ
•
15 Amps General Purpose
•
1000 Watts Tungsten
•
1/2 Horsepower
•
8.3 Amps Ballast (Standard) (Inductive)
•
500 VA Electronic Ballast
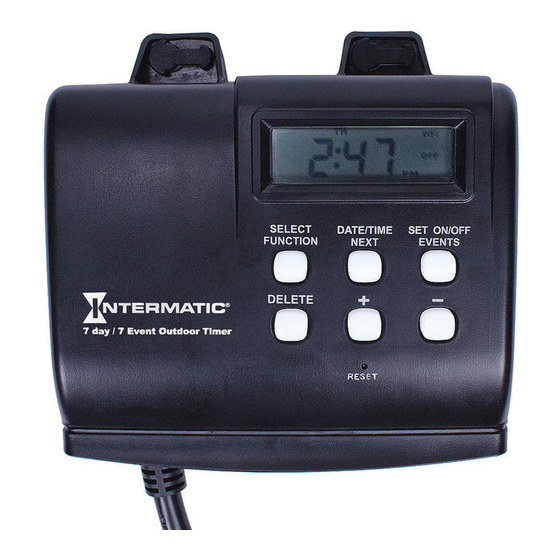
Description
The HB880R Time Switch is a programmable digital timer for outdoor
applications. Astronomic settings adjust for seasonal changes. Auto-
matic Daylight Saving Time adjustment. Follow these instructions to
complete the programming for the HB880R time switch.
SELECT
FUNCTION
DELETE
7 Day/7 Event Outdoor Timer
Enable the Battery
1. On the back of timer, pull out the pull tab (if present) from
the battery holder. See Figure 2.
2. Verify that the controller display activates.
3. Take one of these actions.
IF THE DISPLAY
Activates
Does not activate
Remove plastic tape prior to using product.
Check battery contacts if no LCD display.
Pull Tab
Figure 2
Removing pull tab from battery holder
Setting the Calendar, Clock and Astro Time
NOTE: The timer does not have to be plugged in to set the timer.
1. Press DATE/TIME/NEXT. The year flashes.
MO
TU WE TH FRSA SU
MO
TU WE TH FRSA SU
DST
ON
OFF
AM RDM
PM AUTO
DATE/TIME
SET ON/OFF
NEXT
EVENTS
-
+
Figure 1
The HB880R Time Switch
RESET
THEN...
Go to Setting the Calendar,
Clock and Astro Time
Replace Battery. See
Replacing Battery on page 2.
DST
ON
OFF
AM RDM
PM AUTO
Outdoor 7 Day
Digital Timer
2.
Press + or - to scroll to the current year, then press DATE/
TIME/NEXT. The month digit flashes.
NOTE: The months start with 01 (Jan) through 12 (Dec).
3. Press + or - to select the current month, then press DATE/TIME/
NEXT. The day of the month digit and the corresponding day of
the week flashes.
4. Press + or - to select the current day of the month and then press
DATE/TIME/NEXT.
5. From the DST (Daylight Saving Time) screen, press + or - to set
the DST function to Auto (ON) or OFF, then press DATE/TIME/
NEXT. The hour digit in the current time flashes on the screen.
6. Press + or - to set the current hour (AM/PM), then press DATE/
TIME/NEXT. The minute digit flashes.
7. Press + or - to set the current minute, then press DATE/TIME/
NEXT. A flashing "nor" and the Astro icon appears.
8. Using the map in Figure 3 as reference, press + or - to select your
Astro zone then press DATE/TIME/NEXT to save the zone. The
AM sunrise screen appears.
NOTE: nor denotes NORTH, CEN denotes CENTER, and SOU
denotes SOUTH.
nor
(NORTH)
CEN
(CENTER)
SOU
(SOUTH)
Figure 3
Astro zone map
9. From the AM sunrise screen, press + or - to set the sunrise time,
then press DATE/TIME/NEXT. The PM Sunset screen appears.
NOTE: The setting range is a maximum of +/- 2 hours.
NOTE: Press DELETE to restore calculated sunrise time.
10. Press + or - to set the sunset time, then press DATE/TIME/
NEXT. The time of day screen (flashing colon) appears.
NOTE: The setting range is a maximum of +/- 2 hours from
the automatically calculated sunrise time.
NOTE: Press DELETE to restore calculated sunset time.
Setting Events
This section provides instructions for setting pairs of ON/OFF events.
To set an event pair, you must first set the ON event and then repeat
the procedure to set the OFF event. You can set up to seven pairs
of ON/OFF events (14 total) in the timer. Follow this procedure to set
timer events.
1.
Press SET ON/OFF EVENTS. Dashed lines appear to indicate no
event is set for the event number.
MO
TU WE TH FRSA SU
2. Press DATE/TIME/NEXT to set an ON event. The screen
displays 1200 AM 1 ON (for ON event 1).
3. Press + or - to scroll to the days of the week that the event will run.
NOTE: To set the event to run every:
- Week: Select MO, TU, WE, TH, FR, SA, SU
- Weekday: Select MO, TU, WE, TH, FR
- Weekend: Select SA, SU
Press DATE/TIME/NEXT. The hour flashes.
4. Press + or - to scroll to the desired hour or AM Sunrise or PM
Sunset for the event.
NOTE: The hour can be set with the 12-hour AM/PM format or at
Sunrise or Sunset.
DST
ON
AM RDM
PM AUTO
Advertisement

Related Manuals for Intermatic HB880R


Summary of Contents for Intermatic HB880R
- Page 1 NOTE: nor denotes NORTH, CEN denotes CENTER, and SOU • 500 VA Electronic Ballast denotes SOUTH. Description The HB880R Time Switch is a programmable digital timer for outdoor (NORTH) applications. Astronomic settings adjust for seasonal changes. Auto- matic Daylight Saving Time adjustment. Follow these instructions to (CENTER) complete the programming for the HB880R time switch.
- Page 2 OFF until the next scheduled ON event. Intermatic Incorporated will repair or replace it, at its sole option, free of charge. This warranty is extended to the original purchaser only and is not transferable. This warranty does not apply to: (a) damage to...