Table of Contents
Advertisement
Quick Links
You must read the Usage and Safety Precautions before use.
Download the Operation Manual from the ZOOM website (https://www.zoom.jp/docs/h3-vr).
This page has both PDF and ePub format files.
The PDF file format is suitable for printing and viewing on a computer.
The ePub file format is suitable for smartphones and tablets and can be read on electronic book readers.
© 2018 ZOOM CORPORATION
Copying or reprinting this manual in part or in whole without permission is prohibited.
Product names, registered trademarks and company names in this document are the property of their respective companies.
You might need this manual in the future. Always keep it in a place where you can access it easily.
The contents of this manual and the specifications of the product could be changed without notice.
Quick Guide
Advertisement
Table of Contents

Summary of Contents for Zoom H3-VR
- Page 1 Quick Guide You must read the Usage and Safety Precautions before use. Download the Operation Manual from the ZOOM website (https://www.zoom.jp/docs/h3-vr). This page has both PDF and ePub format files. The PDF file format is suitable for printing and viewing on a computer.
- Page 2 HINT • An AC adapter (ZOOM AD-17) designed for use with this recorder can also connected to the USB port to operate it using AC power. • When connected to a computer, power can be supplied by USB.
- Page 3 ■ Setting the display language to select the display language, and press ■ Setting the date and time Selecting an item: Use to select the item to change, and press Setting a value: to change a value, and press Confirming the to select OK, and press date and time: When setting the date and time is complete, the Home Screen...
-
Page 4: Make Recording Settings
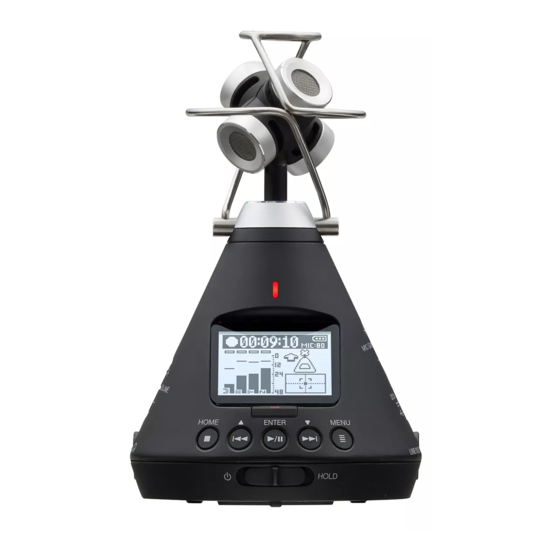
360° camera you can create videos that allow the audio to follow the visual perspec- tive. • Using software provided by ZOOM, you can convert files recorded with the to a variety of formats, including stereo, 5.1ch surround, and binaural stereo. - Page 5 ■ Setting items • Setting the mic position: Mic Position can record sound in every direction, including forward, backward, left, right, up and down. Use Mic Position to set the orientation of the mics and recorder in relation to the forward direction.
- Page 6 • Setting the recording mode: Rec Settings ➡ Rec Mode This sets the file format used to record files. Setting Explanation FuMa Record as Ambisonics B FuMa format (4-channel). AmbiX Record as Ambisonics B AmbiX format (4-channel). Ambisonics A Record as Ambisonics A format (4-channel). Stereo Record as an ordinary stereo (2-channel) file.
- Page 7 Adjusting input levels (MIC GAIN) Turn Adjust so that peak levels on the level meters stay around −12 dBFS. Recording Press when the Home Screen is open. This shows the name of the recording file and starts recording. Press This stops recording and opens the Home Screen. ■...
-
Page 8: Playing Recordings
Playing recordings Press when the Home Screen is open. This shows the name of the file and starts playback. HINT to adjust the headphone output volume. Press This stops playback and opens the Home Screen. Changing the playback mode Press during playback. - Page 9 Tracking playback mode Stereo audio signals can be extracted according to specific orientations from files recorded in Ambisonics A and Ambisonics B (FuMa and AmbiX) formats. The orientation of the extracted audio can be adjusted by changing the orientation of Horizontal Orientation of angle...
-
Page 10: Operations During Playback
Operations during playback • Pause/resume playback: Press • Search forward: Press and hold • Search backward: Press and hold • Move to file beginning: Press • Play next file: Press • Play previous file: Press twice NOTE When using manual playback mode, only pause and resume playback func- tions can be used. - Page 11 List of functions and settings When the home screen is open, press to open the MENU screen where you can use the following functions and settings. Item Explanation Finder This shows the folders and files on the microSD card. Input/Output Lo Cut This function can reduce noise, including air-condi- tioning, wind and vocal pops.
- Page 12 Item Explanation System Date/Time This sets the date/time and date display format. (YYMMDD/MMDDYY/DDMMYY) Time Display Set how the counter appears on the display during recording and playback. (During recording: Elapsed Time/Remaining Time) (During playback: Elapsed Time/Remaining Time) The time until the display backlight turns off and the display contrast can be set.
-
Page 13: Connecting By Usb
Connecting by USB Using as an SD card reader Press when the Home Screen is open. to select “USB”, and press to select "Card Reader", and press Use a USB cable to connect the and the computer. When finished, end the USB connection from the computer. Press when the Home Screen is open. -
Page 14: Using As An Audio Interface
Using as an audio interface Press when the Home Screen is open. to select “USB”, and press to select "Audio I/F", and press to select the mode or type of connected device, and press Setting Explanation Stereo This sends a stereo mix of input signals 1–4 to the computer. This sends tracks 1–4, which are converted from input signals 1–4, as sep- 4ch Ambisonics arate signals to the computer. -
Page 15: Specifications
4 in/2 out ( Ambisonics A/FuMa/AmbiX input), USB 2.0 High Speed 44.1 kHz/24-bit, 48 kHz/24-bit Power 2 AA batteries (alkaline, rechargeable NiMH or lithium) AC adapter (ZOOM AD-17): DC 5V/1A (supports USB bus power) Estimated 48 kHz/24-bit, FuMa Rec Mode Alkaline batteries: about 11.5 hours continuous NiMH batteries (1900 mAh): about 11.5 hours... - Page 16 ZOOM CORPORATION 4-4-3 Kanda-surugadai, Chiyoda-ku, Tokyo 101-0062 Japan www.zoom.co.jp Z2I-3423-01...


