
Related Manuals for Omega DRST-UN


Summary of Contents for Omega DRST-UN
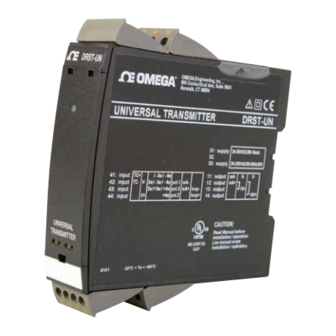
- Page 1 User’s Guide Shop online at omega.com e-mail: info@omega.com For latest product manuals: www.omegamanual.info DRST-UN Universal Transmitter...
- Page 2 Fax: (203) 359-7700 e-mail: info@omega.com For Other Locations Visit omega.com/worldwide The information contained in this document is believed to be correct, but OMEGA accepts no liability for any errors it contains, and reserves the right to alter specifications without notice.
-
Page 3: Table Of Contents
2.7 Normal Operation ..............7 2.8 Cleaning ..................7 2.9 Liability ..................7 Section 3 Demounting ..................8 3.1 How to demount DRST-UN ............ 8 Section 4 Characteristics ................9 4.1 Universal Transmitter DRST-UN ........... 9 4.2 Advanced Features ..............9 4.3 Application ................ - Page 4 Table of DRST-UN MV Transmitter Contents Table of Contents Section ................ Page Section 9 Diagrams ..................19 9.1 Connections ................19 9.2 Block Diagram ................. 20 9.3 Routing Diagram ..............21 9.4 Routing Diagram Advanced Settings ........22 Section 10 Configuration / Operation ............23 10.1 General ...................
-
Page 5: Section 1 Warning
Repair of the device and replacement of circuit breakers must be done by PR electronics A/S only. WARNING DRST-UN must be mounted on a DIN rail according to DIN 46277. INSTALLATION WARNING Do not open the front plate of the module as this will cause damage to the connector for the display / programming front DRSL-DISPLAY. -
Page 6: Section 2 Instructions
Instructions Section 2 - Instructions 2.1 - Definitions Hazardous voltages have been defined as the ranges: 75 to 1500 Volt DC, and 50 to 1000 Volt AC. Technicians are qualified persons educated or trained to mount, operate, and also troubleshoot technically correct and in accordance with safety regulations. Operators, being familiar with the contents of this manual, adjust and operate the knobs or potentiometers during normal operation. -
Page 7: Ul Installation Requirements
Instructions Section 2.5 - UL Installation Requirements Use 60/75°C copper conducters only For use only in pollution degree 2 or better Max. ambient temperature - 60°C Max. wire size - AWG 26-14 UL file number - E231911 Section 2.6 - Calibration and Adjustment During calibration and adjustment, the measuring and connection of external voltages must be carried out according to the specifications of this manual. -
Page 8: Demounting
Picture 1: Detach the device from the DIN rail by lifting the bottom lock. When front LED lights red / display shows AO.ER PR DRST-UN is designed as a SIL 2 device with a high safety level. Therefore, a continuous measurement of the outgoing current is carried out on a 4...20 mA and 20...4 mA output signal. -
Page 9: Characteristics
• Process control with standard analogue output. • Galvanic separation of analogue signals and measurement of floating signals. • The DRST-UN is designed according to strict safety requirements and is thus suitable for application in SIL 2 installations. 4.4 - Technical characteristics •... -
Page 10: Display And Programming Front
5.2 - Application • Communications interface for modification of operational parameters in DRST-UN. • Can be moved from one DRST-UN device to another and download the configuration of the first transmitter to subsequent transmitters. • Fixed display for readout of process data and status. -
Page 11: Mounting And Demounting
Mounting and Demounting Section 6.1 - Mounting and Installation • Click DRSL-DISPLAY onto the front of DRST-UN. Section 6.2 - Mounting/Demounting the DRSL-DISPLAY 1: Insert the taps of DRSL-DISPLAY into the holes at the top of the device. 2: Swing DRSL-DISPLAY into place. -
Page 12: Applications
Applications Section - 7.1 - Inputs Signals Volt Potentio- meter Current RTD and lin. R Connect., wires Order separately: 5910 CJC connector. See the connection drawing on page 15. Section - 7.2 - Output Signals Analogue, 0/4...20 mA and voltage 10 V 10 V Section - 7.3 - Supply... -
Page 13: Specifications
Specifications Section - 8.1 - Order Codes DRST-UN = Universal transmitter DRSL-DISPLAY = Display/programming front 5910 = CJC connector Section - 8.2 - Electrical Specifications Environmental conditions Specifications range .... -20°C to +60°C Calibration temperature ..20...28°C Relative humidity ....< 95% RH (non-cond.) Protection degree .... - Page 14 Specifications Basic values Input Basic Temperature type accuracy coefficient ≤ ±4 µA ≤ ±0.4 µA / °C Volt ≤ ±20 µV ≤ ±2 µV / °C Pt100 ≤ ±0.2°C ≤ ±0.01°C / °C Linear resistance ≤ ±0.1 Ω ≤ ±0.01 Ω / °C Potentiometer ≤...
-
Page 15: Tc Input
Specifications Input Min. Max. type value value Standard Pt10...Pt1000 -200°C +850°C IEC 60751 Ni50...Ni1000 -60°C +250°C DIN 43760 Cu10...Cu100 -200°C +260°C α = 0,00427 Lin. R 0 Ω 10000 Ω Potentiometer 10 Ω 100 kΩ Cable resistance per wire (max.), RTD.... 50 Ω Sensor current, RTD........... - Page 16 Specifications Cold junction compensation (CJC) via external sensor in connector 5910 20...28°C ≤ ±1°C -20...20°C / 28...70°C ≤±2°C via internal CJC sensor ..±(2.0°C + 0.4°C * Δt) Δt = internal temperature - ambient temperature Sensor error detection, all TC types Sensor error current: when detecting ....
- Page 17 Display readout on the DRSL-DISPLAY of sensor error detection and input signal outside range Sensor error check: Device: Configuration Sensor error detection: OUT.ERR=NONE. DRST-UN Else: Outside range readout (IN.LO, IN.HI): If the valid range of the A/D converter or the polynomial is exceeded Input Range Readout Limit IN.LO...
- Page 18 Check measurement of analogue output current AO.ER output (only S4...20/S20...4 DRSL-DISPLAY/ NO.CO Connection error Communications test DRST-UN Check that input signal matches input configuration IN.ER 1) Error levels on input DRSL-DISPLAY/ Configuration is not DRST- Check that saved configuration in TY.ER...
-
Page 19: Section 9 Diagrams
Diagrams Section 9.1 - Connections Supply: Inputs TC, internal RTD, 2-wire RTD, 3- / 4-wire Resistance, 2-wire CJC sensor Resistance, Potentiometer 2-wire transmitter Current 3- / 4-wire *TC, external Voltage CJC connector * Order separately: CJC connector 5910 Outputs Current Voltage, 1 V Voltage, 10 V... -
Page 20: Block Diagram
21.6...253 VAC or 0.2 mA 19.2...300 VDC V loop Supply A / D D / A 10 V SAFETY Green 20 Ω 50 Ω EEPROM 500 Ω Gnd. 50.0 I + V l / min Out. Out. Out. VALVE 5 DRST-UN... -
Page 21: Routing Diagram
Diagram Section 9.3 - Routing Diagram If no key is activated for 1 minute, the display will return to the default state 1.0 without saving configuration changes. 1 Increase value / choose next parameter 2 Decrease value / choose previous parameter 3 Accept the chosen value and proceed to the next menu Hold 3 Back to previous menu / return to menu 1.0 without saving Power up... -
Page 22: Routing Diagram Advanced Settings
Diagram Section 9.4 - Routing Diagram Advanced Settings 2.0 In the submenu simulation (SIM) you must press 3 to return to the default state 1.0. DISP PASS SAVE LANG LOAD SAVE SETUP MEMORY Txt 43 Txt 44 A.OUT DISP A.OUT SETUP CONTRA LIGHT... -
Page 23: Section 10 Configuration / Operation
Configuration / Operation Section 10.1 - General settings which fit the application. For each menu there is a scrolling help text which is automatically shown in line 3 on the display. Configuration is carried out by using the 3 function keys: will increase the numerical value or choose the next parameter will decrease the numerical value or choose the previous parameter will accept the chosen value and proceed to the next menu... -
Page 24: Signal And Sensor Error Info (No Display)
Configuration / operation Section 10.4 - Signal and sensor error info (no display) Status of the unit can also be read from the red/green LED in the front of the device. Green flashing LED 13 Hz indicates normal operation. Green flashing LED 1 Hz indicates sensor error. Steady green LED indicates internal error. -
Page 25: Process Simulation Function
Configuration / operation Section 10.8 - Process simulation function If you say ”yes” to the point “EN.SIM” it is possible to simulate an input signal by means of the arrow keys and thus control the output signal up or down. When you finalise the point with , the unit returns to normal mode. -
Page 26: Auto Diagnosis
Configuration / operation Section 10.11 - Auto diagnosis The unit performs an advanced auto diagnosis of the internal circuits. The following possible errors can by display in the front unit DRSL-DISPLAY. CJ.ER - CJC sensor defect or CJC temperature outside range FL.ER - Flash error AO.ER - No load on the current output (only for S4...20 mA/S20...4 mA) NO.CO - Connection error... -
Page 27: Cjc
Configuration / operation Section 10.14 - CJC In the CJC menu you can choose between external CJC connector and internal cold junction compensation. The external CJC connector (5910) must be ordered separately. Section 10.15 - Memory In the memory menu you can save the configuration of the device in the DRSL-DISPLAY, and then move the DRSL-DISPLAY onto another device of the same type and download the configuration in the new device. - Page 28 Department will issue an Authorized Return (AR) number immediately upon phone or written request. Upon examination by OMEGA, if the unit is found to be defective, it will be repaired or replaced at no charge. OMEGA’s WARRANTY does not apply to defects resulting from any action of the purchaser, including but not limited to mishandling, improper interfacing, operation outside of design limits, improper repair, or unauthorized modification.
- Page 29 Where Do I Find Everything I Need for Process Measurement and Control? OMEGA…Of Course! Shop online at omega.com TEMPERATURE M U Thermocouple, RTD & Thermistor Probes, Connectors, Panels & Assemblies M U Wire: Thermocouple, RTD & Thermistor M U Calibrators & Ice Point References M U Recorders, Controllers &...