Advertisement
Table of Contents
- 1 Table of Contents
- 2 Safety Warnings
- 3 Product Features
- 4 Getting Started
- 5 Control Panel Functions
- 6 Battery Selection
- 7 Charging Process
- 8 Powering the Device
- 9 Using the 240V AC Converter
- 10 Alarm Messages on the LCD Screen
- 11 Mounting & Installation
- 12 Technical Information
- 13 Inverter Specifications
- 14 Trouble Shooting & Faqs
- Download this manual
Advertisement
Table of Contents

Related Manuals for Thunder TDR02007

Summary of Contents for Thunder TDR02007
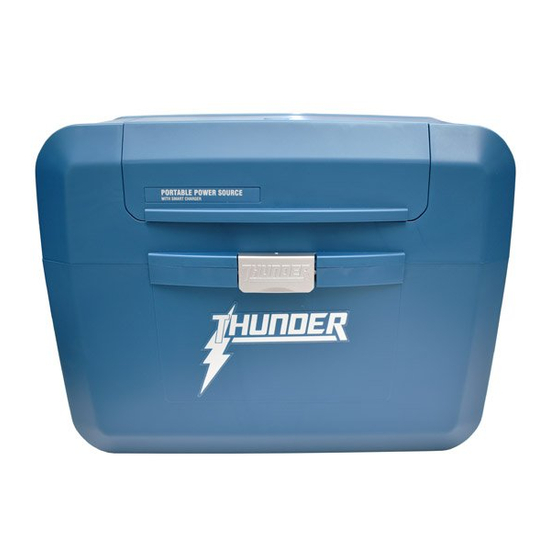
- Page 1 CONGRATULATIONS ON THE PURCHASE OF YOUR THUNDER BATTERY BOX For your personal safety please read, understand and follow the information provided in this instruction manual.
-
Page 2: Table Of Contents
CONTENTS Safety Warnings Product Features Getting Started Control Panel Functions Battery Selection Charging Process Powering the Device Using the 240V AC Converter Alarm Messages on the LCD Screen Mounting & Installation Technical Information Inverter Specifications Trouble Shooting & FAQs Contents... -
Page 3: Safety Warnings
• The AC/DC adaptor can emit a noticeable amount of heat whilst charging and should be placed in a location where it can get plenty of airflow. • When charging the battery or powering a device from one of the outlets the lid of the Thunder Battery Box should be closed and latched shut. -
Page 4: Product Features
PRODUCT FEATURES 12V 10A accessory socket 12V DC 50A Anderson socket Fuses for main charger, 240V socket and 12V accessory sockets 300W inverter with 240V AC socket and USB port Carry handle Main (battery) isolator switch with removable key Control panel and LCD display External positive and negative terminals Input socket for... -
Page 5: Getting Started
Step 1. Release the front latch and open the lid. Step 2. Place a 12 volt Lead Acid battery (not supplied) into the base of the Thunder Battery Box and secure it with the velcro belt. Step 3. Connect the red cable to the positive battery terminal. -
Page 6: Control Panel Functions
CONTROL PANEL FUNCTIONS The Thunder Battery Box has four buttons on the main control panel: Power Button Press to turn charger ON Press and hold for 4 secs to turn charger OFF OK OK OK Menu Buttons Scroll UP button... -
Page 7: Battery Selection
Have you connected a new battery? Step 2. Battery Type Selection The Thunder Battery Box has five types of charge programs that can charge conventional 12V Lead Acid, Calcium, Gel or AGM batteries or 12V Lithium-Ion Phosphate (LiFePO4) batteries. Using the MENU buttons, scroll up or down to your battery type and press OK to select. - Page 8 If you disconnect the saved battery or connect a new battery the welcome screen will appear first (refer to step 1) and you’ll need to select ‘YES’ or ‘NO’ again. CAUTION: The Thunder Battery Box only saves the last battery setup, the setup process will have to be completed every time a different battery is charged.
- Page 9 BATTERY SELECTION (CONTINUED) Main Data Screen Overview The Battery Box has an informative LCD screen displaying all the required information regarding your charge process: • Cycle (charge, boost, float, discharge) • Battery Voltage or net watts • Battery Level Icon •...
-
Page 10: Charging Process
CHARGING PROCESS OVERVIEW The Battery Box seven stage smart charger is based on an advanced software program that monitors your battery. Smart charge will select from the following cycles to optimise your battery’s performance. Stage 1: Testing Checks the battery capacity when the Battery Box is first turned on and predicts the hours left until fully charged. -
Page 11: Powering The Device
POWERING THE DEVICE It is possible to power many types of 240V and 12V devices from the various outlet sockets on the Battery Box. When powering a device the main data screen will show the discharge cycle. It is okay to use the Battery Box to power a device whilst it is connected to mains power or DC power. -
Page 12: Using The 240V Ac Converter
USING THE 240V AC CONVERTER The AC socket is powered by an internal inverter that converts 12V DC to 240V AC with a continuous power output of 300W. This is a modified inverter which also has a USB 5.0V DC output socket for charging cameras, MP3 players or SatNav units. -
Page 13: Alarm Messages On The Lcd Screen
ALARM MESSAGES ON LCD SCREEN 1. Over Temperature Smart charger has exceeded safe temperature limit. 2. Reverse Polarity Battery is connected in reverse polarity (only shows when mains power is connected). 3. Open Circuit Battery is not connected or is faulty (only shows when mains power is connected). 4. -
Page 14: Mounting & Installation
MOUNTING & INSTALLATION Mounting the Battery Box Attach the mounting brackets to the surface you wish to mount the Battery Box on. Attach the mounting tongues in position onto the brackets using the M5 x 8 screws. Attach the two mounting plates to the underside of the Battery Box using the M6 screws. -
Page 15: Technical Information
TECHNICAL INFORMATION GENERAL INPUT (NOMINAL) 240V AC, 50Hz or 110V AC 60 Hz INPUT POWER 120W OUTPUT VOLTAGE 12V DC MINIMUM START VOLTAGE 10.5V BACK DRAIN 0.1A REVERSE POLARITY PROTECTION By fuse BATTERY BOX DIMENSIONS INTERNAL 180mm(W) x 330mm(L) x 238mm(H) EXTERNAL 240mm(W) x 440mm(L) x 327mm(H) WEIGHT... -
Page 16: Inverter Specifications
INVERTER SPECIFICATIONS MAX CONTINUOUS POWER 300W MAX SPIKE OUTPUT POWER 900W INPUT VOLTAGE RANGE DC 10V-15V OUTPUT VOLTAGE RANGE AC 110-120V / AC 220-240V 60 +/- 3Hz OUTPUT FREQUENCY 50 +/- 3Hz OUTPUT WAVEFORM Modified sine wave OPTIMUM EFFICIENCY More than 90% NO LOAD CURRENT DRAW Less than 0.4A COOLING... -
Page 17: Trouble Shooting & Faqs
TROUBLESHOOTING & FAQ Q. How do I know if the battery is fully charged? A. The % charge of battery value on the lower right hand side of the main data screen will read 100%. Refer to page 7. Q. I have installed the battery correctly but the LCD screen reads ‘Alarm - open circuit’, what is wrong? A. - Page 18 TROUBLESHOOTING & FAQ S (CONTINUED) Q. When I connect my laptop AC adaptor to the AC outlet an alarm sounds with two beeps, why is that? A. For some laptop adaptors the in-rush current can trigger the alarm and the internal inverter will protect itself.
- Page 19 WARRANTY TERMS & CONDITIONS When you acquire or fit a Thunder product you have the peace of mind in knowing that it is backed by a comprehensive 12 month warranty against defects in materials and workmanship. The Thunder warranty is provided in addition to any rights you may have under the Australian Consumer Law.
- Page 20 GPC Asia Pacific Pty Ltd ABN 97 097 993 283 51-57 Qantas Drive Brisbane Airport QLD 4007 AUSTRALIA thunderauto.com.au // thunderauto.co.nz...