
Related Manuals for Samsung 7202010


Summary of Contents for Samsung 7202010
- Page 1 T479B P O R T A B L E Q U A D - B A N D M O B I L E P H O N E User Manual Please read this manual before operating your phone, and keep it for future reference. BMC_T479B_UG_EN_07202010_D4...
-
Page 2: Intellectual Property
All Intellectual Property, as defined below, owned by or which is otherwise the property of Samsung or its respective suppliers relating to the SAMSUNG Phone, including but not limited to, accessories, parts, or software relating thereto (the “Phone System”), is proprietary to Samsung and protected under federal laws, provincial laws, and international treaty provisions. - Page 3 In addition, Samsung shall not be liable for any damages of any kind resulting from the purchase or use of the product or arising from the breach of the express warranty, including incidental, special or consequential damages, or loss of anticipated profits or benefits.
-
Page 4: Table Of Contents
Section 1: Getting Started ... 1 Activating Your Phone ... 1 Switching the Phone On or Off ... 6 Setting Up Your Voicemail ... 7 Section 2: Understanding Your Phone ... 8 Features of Your Phone ... 8 Front View of Your Phone ... 9 Keys ... - Page 5 Section 6: Contacts ... 34 Using the Contacts List ... 34 Finding a Contact Entry ... 34 Dialing a Number from Contacts ... 36 Speed Dialing ... 37 My Profile ... 38 Contacts Management ... 38 My Number ... 40 Using the Service Dialing Numbers ...
- Page 6 Memo ... 71 Calculator ... 71 Tip calculator ... 72 World Clock ... 72 Converter ... 73 Timer ... 73 Stopwatch ... 74 Section 10: Web ... 75 Browser ... 75 Section 11: Camera ... 80 Using the Camera ... 80 Take and Send ...
- Page 7 Caring for the Battery ... 109 Acknowledging Special Precautions and Industry Canada No ice ... 110 Information to User ... 110 Specific Absorption Rates (SAR) for Wireless Phones ... 110 Owner’s Record ... 111 Section 15: Warranty Information ... 112 Standard Limited Warranty ...
-
Page 8: Section 1: Getting Started
This section explains how to start using your phone by first configuring your hardware, activating your service, and then setting up your voice mail. Activating Your Phone When you subscribe to a cellular network, you are provided with a plug-in SIM card loaded with your subscription details, such as your PIN, available optional services, and many other features. - Page 9 Removing the Battery Lift up (1) and remove (2) the battery. Installing the SIM Card Important!: The plug-in SIM card and its contacts information can be easily damaged by scratching or bending, so be careful when handling, inserting, or removing the card. Keep all SIM cards out of reach of small children. Carefully slide the SIM card into the SIM card socket until the card locks into place.
-
Page 10: Replacing The Battery
Replacing the Battery Slide the battery into the compartment so that the tabs on the end align with the slots at the bottom of the phone. Lightly press down on the battery until it snaps into place. Check that the battery is properly installed before turning on the phone. - Page 11 Installing or Removing the Memory Card Your phone supports an optional memory card (microSD™) for data storage of things such as music, pictures, video, or other files. This type of memory card is designed for use with this mobile phone and other devices. Note: This phone supports up to a 16 Gigabyte memory card.
-
Page 12: Charging A Battery
Charging a Battery Your phone is powered by a rechargeable Lithium-ion battery. A wall charger, which is used for charging the battery, is included with your phone. Use only approved batteries and chargers. Ask your local Samsung dealer for further details. -
Page 13: Switching The Phone On Or Off
Note: The previous illustration displays the incorrect method for connecting the charger. If attempted, damage to the accessory port will occur therefore voiding the phone’s warranty. Plug the adapter’s power plug into a standard AC wall outlet. When charging is finished, first unplug the adapter’s power plug from the AC wall outlet and then disconnect the wall charger’s connector from the phone. -
Page 14: Setting Up Your Voicemail
Note: For more information, refer to “Lock SIM” on page 95.. If the phone asks for a PIN, use the keypad to enter the PIN and press either the Confirm soft key or more information, refer to “Check PIN code” on page 95. The phone searches for your network and after finding it, the service provider name displays on the upper center of your display. -
Page 15: Section 2: Understanding Your Phone
This section outlines some key features of your phone. It also displays the screen and the icons that display when the phone is in use. Features of Your Phone Your phone is lightweight, easy-to-use and offers many significant features. The following list outlines a few of the features included in your phone. -
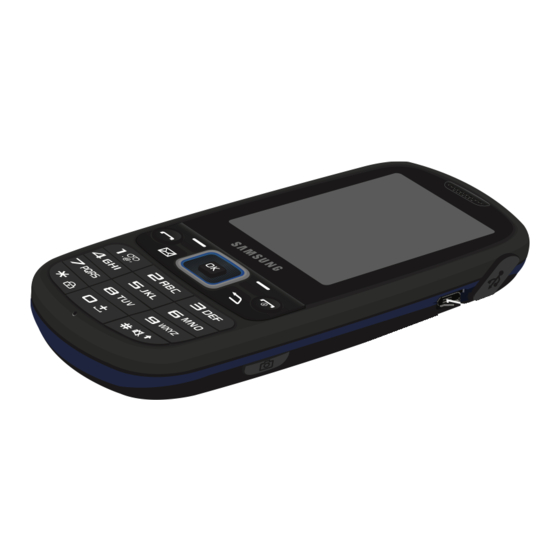
Page 16: Front View Of Your Phone
Front View of Your Phone The following illustrations show the main elements of your phone: Keys The following list correlates to the illustrations. Earpiece allows you to hear the other caller. Left Soft key allows you to select soft key actions or menu items. The option for the soft key displays on the bottom, left portion of the screen. - Page 17 Send key allows you to make or answer a call. In Idle mode, a short press displays Call history. Messaging key allows you to program this key as a shortcut to your favorite messaging application. You can reprogram the key at any time. Voicemail key allows you to quickly access your voicemail.
-
Page 18: Camera View Of Your Phone
This phone also offers the convenience of a slide out QWERTY keyboard. To open the phone to access the keyboard, rotate the phone 90 degrees to the left. Slide the top section of the phone up to open, as shown. To view the display in landscape mode and access the keyboard, slide the phone open as shown. -
Page 19: Side Views Of Your Phone
Side Views of Your Phone The following illustrations show the external elements of your phone. Phone anchor allows you to connect a strap with which to carry the phone. Remove the back battery cover to fully install a strap to this phone anchor. Volume keys allow you to adjust the Ring volume in standby mode (with the phone open) or adjust the Speaker volume during a call. -
Page 20: Display Layout
Display Layout Your display screen provides a wealth of information about the phone’s status and options. The display has three areas: Display Your phone has a display on the front of the phone. From this front display, you can monitor the activity and status of your phone such as signal strength and battery levels. -
Page 21: Missed Messages Tab
Missed Messages Tab When you receive new messages, icons display in three locations: on the phone’s screen, Missed messages tab, and on the icon bar at the top of the screen. View tabs for Missed Calls, Text Messages, and Voicemail Icons This list identifies the symbols you’ll see on your phone’s display screen: Shows the received signal strength. - Page 22 Displays when Bluetooth wireless technology is active. Displays when a new text message is received. Displays when a new voicemail is received. Displays when a new Picture message is received. Displays when you set an alarm to ring at a specified time. For more details, see “Alarm” on page 64. Displays when the Call Forwarding feature is active.
- Page 23 Select the amount of time you want the backlight to stay on and press The Dim option is how much longer the display remains lit after the keypad backlight goes off. You can select Off, 5 seconds, 15 seconds, or 30 seconds. Highlight the Dim field and press Select the amount of time you want the phone to delay before the phone dims and press Understanding Your Phone...
-
Page 24: Section 3: Call Functions
This section describes how to make or answer a call. It also explains the features and functionality associated with making or answering a call. Making a Call When the idle screen displays, enter the number you want to dial and press Note: When you activate the Auto redial option in the Call settings menu, the phone automatically redials up to 10 times when the person does not answer the call or is already on the phone, provided your call is not sent to voicemail. -
Page 25: Adjusting The Call Volume
Press the Up Navigation key to display a list of the most recent numbers used in the order you dialed or received them. Use the Up and Down Navigation keys to scroll through the numbers and highlight the number you want. To view call time for this number, press key to display the following options: •... -
Page 26: Calls
If the Any key option in the Answering mode menu is activated, you can press any key to answer a call except for the key and the Reject soft key. Note: To reject an incoming call, press the Reject soft key or press End the call by pressing Note: You can answer a call while using the Contacts List or menu features. -
Page 27: Dialed Calls
To view a missed call immediately: If the display is off, press the volume key to turn the display on. The Missed Call tab displays the last missed call. Press the key to call the displayed number. – or – Press the Up Navigation key to view the Calls menu, then press the Right Navigation key to view Missed calls. -
Page 28: Vibration Profile
Answered calls This menu lets you view the 30 most recent calls you received. The name and number, if already stored in your Contacts List, displays. Delete All There are two ways to delete all of the records at one time. Press the Up Navigation key to display the Calls menu. -
Page 29: Selecting Functions And Options
Selecting Functions and Options Your phone offers a set of customizable functions. These functions are arranged in menus and sub-menus, and accessed using the two soft keys. Each menu and sub-menu allows you to view and alter the settings of a particular function. -
Page 30: Options During A Call
When you access a list of options, your phone highlights the currently active option. If, however, there are only two options, such as On/Off or Enable/Disable, your phone highlights the option that is not currently active so that you can select it. Options During a Call Your phone provides a number of control functions that are available for use during a call. -
Page 31: Using The Speakerphone
To switch between the two calls: Press the Options soft key, select Swap, and press on hold is then reactivated so that you can continue conversing with that person. Press when you are finished or want to end the call. Using the Speakerphone While on a call, you can use your Speakerphone by following these steps: Press the Spkr on soft key. - Page 32 To switch between the two calls, press the Options soft key, highlight Swap and press the Select soft key To end a call on hold, press Options To end the current/remaining call, press Making a Multi-Party Call A multi-party call is a network service that allows up to six people to participate in a multi-party or conference call. For further details about subscribing to this service, contact your service provider.
-
Page 33: Section 4: Menu Navigation
This section explains the menu navigation for your phone. It also includes an outline of all available menus associated with your phone. Menu Navigation You can tailor the phone’s range of functions to your needs using menus and sub-menus. Menus and sub-menus can be accessed by scrolling using the Navigation keys or by using the shortcuts. -
Page 34: Using Shortcuts
To exit the menu without changing the settings, press Using Shortcuts The menu items, such as menus, sub-menus, and options, are numbered and can be accessed quickly by using their shortcut numbers. For the main menus, press the corresponding number keys (1 to 0) to access any one of the shortcuts. -
Page 35: Section 5: Entering Text
This section outlines how to select the desired text input mode when entering characters into your phone. This section also describes how to use the T9 predictive text entry system to reduce the number of key strokes associated with entering text. Using the QWERTY Keyboard This phone also offers the convenience of a slideout QWERTY keyboard. -
Page 36: Changing The Text Input Mode
Sym/Shift displays the Symbols page when this key is pressed with the Alt key. Choose from an extensive list of symbols and other character sets. Shift converts the alphabetic character into uppercase, and changes the text input mode to Upper/Lower case mode. Left Soft Key allows you to select soft key actions or menu items corresponding to the bottom left line on the display screen. -
Page 37: Entering Text
T9: This mode allows you to enter words with only one keystroke per letter. Each key on the keypad has more than one letter; for • example, touching can enter J, K, or L. However, the T9 make with an internal linguistic dictionary to determine the most likely word, thus requiring far fewer keystrokes than the traditional ABC mode. -
Page 38: Using Abc Mode
The following options are available in Portrait and Landscape mode: • ABC • T9 (English) • Numeric • Symbol Enter text in the text message box using the selected text input mode when the Text input mode indicator that you desire displays. Using ABC Mode With the phone slider closed, to use ABC mode, use the letter keys to enter your text. -
Page 39: Using T9 Mode
Characters scroll in the following order (lowercase characters shown in parentheses): .@,:?-!’/1 ABC2 (abc2) DEF3 (def3) GHI4 (ghi4) JKL5 (jkl5) MNO6 (mno6) Using T9 Mode T9 is a predictive text input mode that allows you to key in any character using single keystrokes. This text input mode is based on a built-in dictionary. -
Page 40: Using Numeric Mode
To enter periods, hyphens, apostrophes, and other special characters press associated symbol. To shift case in T9 mode: Press . There are 3 cases: Capital lock, Initial capital, and Lower case. Tip: You can move the cursor by using the Navigation keys. To delete characters: Press Press and hold the... -
Page 41: Section 6: Contacts
This section explains how to use and manage your Contacts. Using the Contacts List Use the following procedures to store a new contact to your phone. Storing a Number in the Phone’s Memory The default storage location for saving phone numbers to your Contacts is your phone’s built-in memory. In Idle mode, press Menu Enter a first name in the First name field. - Page 42 Enter the first few letters of the name in the text box. The Contacts entries are listed, starting with the first entry matching your input. If needed, press the Up or Down Navigation key until the entry you want highlights. Once you locate the entry, press Contacts entry options: •...
-
Page 43: Dialing A Number From Contacts
Dialing a Number from Contacts Once you have stored phone numbers in Contacts, you can dial them easily and quickly by using the location numbers that were assigned to them. Note: If you cannot remember a location number, you must search Contacts to find an entry by name. For more information, refer to “Finding a Contact Entry”... -
Page 44: Speed Dialing
To change the image associated with the Caller group: Press Options and select Group settings. Highlight Picture and press Select an image from one of the folders, press Select, then press Options save. To change the ringtone associated with the Caller group: Press Options and select Group settings. -
Page 45: My Profile
My Profile My Profile allows you to create a virtual business card. Once completed, you can send the card to recipients as a V- card attachment. Note: As with any profile, your profile can be associated with a group. In Idle mode, press the Down Navigation key to display the Contact list. My profile is listed at the top of the contact list and displays the name of the associated group (if applicable). -
Page 46: Delete All
Copy all to You can copy all Contact entries to the SIM card. Note: When storing an Address Book entry on the SIM card, only the Name, Address, and slot location are saved. In Idle mode, press Menu Highlight Phone or SIM card and press the Select soft key or By default, all the entries in the Contact list on the Phone or SIM card are selected. -
Page 47: My Number
Memory status You can check how many names and numbers are stored in Contacts, within the Phone, SIM card, and the FDN. You can also see the current storage capacity of the memory. In Idle mode, press Menu Press the Back soft key or My Number This function is a memory aid, which you can use to edit or remove your own phone number. -
Page 48: Section 7: Messages
This section describes how to send or receive different types of messages. It also explains the features and functionality associated with messaging. Types of Messages Your phone provides the following message types: Text Message • Picture Message • Email message •... -
Page 49: Text Messages
These View tabs display: Text message • Missed Calls • Voicemail • Picture message • You can search through missed calls or unviewed messages by using the Right and Left navigation keys to select the associated message tab, then pressing the Connect, Call, or View soft key. Text Messages Short Message Service (SMS) allows you to send and receive short text messages to and from other mobile phones. -
Page 50: Picture Message
Note: For further details about entering characters, see “Changing the Text Input Mode” on page 29. The message can be up to 15 pages long. Press the Options soft key when you finish entering your message. The following options are available: •... - Page 51 Enter a phone number in the recipients field. – or – Highlight the Recipients field and press • Recent recipients : allows you to select a number or an address from the last 10 destinations you entered. • Contacts : allows you to enter the phone number you want from Contacts. •...
-
Page 52: Message Inbox
• More: Note: Some options display after you enter text or attach an image file. – Add page: allows you to add a page, for example, another image or sound clip to the message. – Add subject: allows you to add a subject to this message. –... -
Page 53: Viewing A Text Message From The Inbox
Viewing a Text Message from the Inbox In Idle mode, press Menu Select a text message from the list and press the Options soft key. The following options display: • Reply : allows you to send a reply to the sender by sending a message. •... - Page 54 • Save to Templates : allows you to save the selected message as a Text Message template. • More : – Move to phone/SIM card: allows you to move the message from the SIM card into the phone’s memory or from the phone onto the SIM card.
-
Page 55: Voicemail
• Delete : deletes the selected message. • Save media : allows you to save the attached media to the Phone or Memory card. • Lock/Unlock : allows you to lock the picture message to prevent deletion, or unlock it to allow deletion. •... -
Page 56: Outbox
Note: Contact your service provider for further details. Outbox This message box stores sent messages. When you enter this menu, the list of messages in the Sentbox displays with the recipients’ phone numbers or names, if available in Contacts. In Idle mode, press Menu Note: Press the Left or Right Navigation keys to scroll between Inbox, Outbox, and Drafts. -
Page 57: Drafts
– Move to my folders: allows you to move the selected message to a personal folder. – Print via Bluetooth: allows you to print the message using a Bluetooth enabled printer. – Properties: displays the properties for the selected message including: Date, From, To, Size, Priority, Delivery report, and Read report. - Page 58 Press the Options soft key while viewing a message to display the following: Note: Some options apply to Text messages, and other options apply to Picture messages only. • Preview : allows you to preview the selected message. Note : This option displays only when viewing a picture message.
-
Page 59: My Folders
My Folders Use My Folders to manage and organize your messages and store them on your phone. 1. In Idle mode, press Menu To create a new folder Press Create. Enter the title of the folder and press the OK soft key. The newly created folder displays on the My folders screen. -
Page 60: Settings
In Idle mode, press Menu key or Press Create. Press the Up Navigation key and enter a subject in the Subject field. Press the Down Navigation key and enter a text message. Press the Down Navigation key and select one of the following options: •... -
Page 61: Sending Options
Reply path: allows the recipient of your message to send you a reply message using your message center, if your network • supports this service. Request delivery report: allows you to activate or deactivate the report function. When this function is activated, the network •... -
Page 62: Broadcast Message
100 KB • 300 KB • 600 KB • Creation mode Free • Warning • Restricted • Default Style Font color • Font style • Background color • Page duration • Voicemail This menu displays the default phone number used for access of phone’s remote voicemail. Broadcast message Activation: you can specify whether to turn activation On or Off. -
Page 63: Memory Status
Important!: Once messages are deleted, they cannot be recovered. In Idle mode, press Menu Press the Up or Down Navigation key to select a message box to clear. To delete all of your messages, select the All option. Press to place or remove a check mark. Press the Delete soft key to delete the marked objects. -
Page 64: Section 8: My Downloads
This section outlines the various applications that are available on your phone. The My downloads menu allows you to manage your images, videos, sounds, games and apps, other files, and memory status in one convenient location. In Idle mode, press Menu ➔... -
Page 65: Images
• Set as: allows you to set the music file as a Ringtone, Individual ringtone, or Alarm tone. • Delete: allows you to delete the Selected, Multiple, or All music files. • Move: allows you to move the selected music file or multiple files to another location or folder. •... -
Page 66: Sounds
• Sort by: allows you to sort the images by Date, Type, Name, or Size. • Properties: displays Basic details about the selected wallpaper such as Name, Format, Size, Forwarding, Date created, and Location. Sounds Get New Ringers Using the Get new Ringers option allows you to access your service provider’s website to download new ringtones using the web browser. -
Page 67: Videos
Videos In this menu, you can view the list of videos downloaded from the web server or received in picture messages. You can also view a video saved to your Videos folder or memory card. This menu allows you to access your saved videos. In Idle mode, press Menu Highlight a video file and press –... -
Page 68: O Her Files
In Idle mode, press Menu soft key or . The web browser launches. When downloading games, charges may apply. Get New Applications You can download more applications from your service provider’s website. In Idle mode, press Menu Select soft key or . -
Page 69: Section 9: Tools
The Tools menu allows you to set alarms, schedule appointments, view the calendar, create Tasks, perform simple math calculations, check world time, perform unit conversions, set a timer, and use a stopwatch. Calendar With the Calendar feature, you can: Consult the calendar by month, week, or day. •... -
Page 70: Day View
Go to : displays Today’s date or the date you entered. – – Event list: displays a list of selectable events such as: Appointments, Anniversaries, Holidays, Important, or Private. – Delete: allows you to delete Selected, Period, This month, Before date or All. –... -
Page 71: Alarm
Alarm This feature allows you to: Set up to 3 alarms to ring at specified times. • Set the phone to switch on automatically and ring the alarm even if the phone is switched off. • The following options are available: Alarm 1 : set the Name, Alarm activation, Alarm time, Alarm type, Alarm tone, Alarm volume, Day, Snooze, and Repeat for –... -
Page 72: Voice Recognition
Press the Down Navigation key to highlight the Alarm tone field. Press to choose, then press Select or Press the Down Navigation key to highlight the Alarm volume field. Press the Left or Right Navigation key to decrease or increase the volume. Press the Down Navigation key to highlight the weekday checkboxes. -
Page 73: Say A Command Options
Say a Command Options Call <Name or #>: dials a name or number listed in your contact list. If multiple numbers exist (such as home, work, or other) say • the name and the number type (location). Send Text <Name or #>: displays the Create Text Message screen. •... -
Page 74: Name Dialing
On startup Nuance reads your Contacts list and voice-activates all the names. When you have add or change contacts, Nuance automatically reloads and voice-activates the list when you add or modify a contact. Name Dialing To use Name Dial, you need contacts stored in Contacts. For more information, refer to “Using the Contacts List” on page 34. - Page 75 To access Voice recognition: In Idle mode, press Menu After a brief pause, a list of available commands displays on the screen along with the “Say a command” message. Say “Lookup” at a distance of 3-8 inches from the microphone. “Say the name” plays through the earpiece. Say the name exactly as it displays in Contacts, first name followed by last name.
-
Page 76: Voice Recognition Settings
Voice Recognition Settings Confirmation Nuance uses a confirmation list when a name or number is not clearly recognized. The software displays three choices and prompts you to select a choice. You can modify the way Nuance uses the confirmation list in the settings. Each time Nuance activates you can choose to view the confirmation list even if there is only one choice. -
Page 77: Tasks
The screen displays an adaptation message. The entire adaptation process takes just a couple of minutes to complete. Tip: Perform the adaptation process in a quiet room. Press Start to being adaptation or press Back to cancel. Audio Modes Your voice recognition software includes an interface that allows you to customize your voice recognition, mode setting to match your experience and comfort level with voice commands. -
Page 78: Memo
In Idle mode, press Menu Press Options Create to create a new task. ➔ Enter a short description of the task in the Title field then press the Down Navigation key. Enter a short description in the Details field and press the Down Navigation key. Continue to enter other information including Start date, Due date, Alarm, Alarm date, Alarm time, Alarm tone and Priority. -
Page 79: Tip Calculator
In Idle mode, press Menu Enter the first number using the numeric keys. Use the Navigation keys to select the calculation method, according to the illustration on the display. Enter the second number using the numeric keys. Note: Press the Left soft key to insert a decimal point, or press it multiple times to create brackets. Press less-than sign, or press to enter the greater-than sign. -
Page 80: Converter
Press Options Add to create a new time zone. ➔ Press the Left or Right Navigation key until the desired GMT time zone displays in the field. Press the Down Navigation key and press applicable). Press OK to confirm your settings. Converter The conversion menu provides the following conversion categories: –... -
Page 81: Stopwatch
Press when you are finished. Stopwatch This feature allows you to use a stopwatch. Press Reset to erase all previously recorded stopwatch times. Press to start the stopwatch. Press Stop to stop recording the lap time. Press Lap to start a new lap time. You can view up to 50 lap times. -
Page 82: Section 10: Web
This section outlines the web features available on your phone. Browser Your phone is equipped with a browser, which provides you wireless access and navigation to the Web using your phone. Press Menu Web and press the Select soft key or ➔... - Page 83 When you are prompted to enter text, the currently active text input mode is indicated on the screen. The following modes are available: A Eng (ABC): this mode allows you to enter letters by pressing the key labeled with the corresponding letter. •...
-
Page 84: Enter Url
– Forward: pages forward one page. – Go to: navigates to the URL address, Homepage, Bookmarks, History, or Saved page. – Save: allows you to save the Image or Page. – Add to bookmarks: adds the current URL to Bookmarks. –... -
Page 85: Saved Pages
• Set as homepage: displays the current homepage URL Address. Press the Change soft key or Select and save the desired bookmark. Select a URL and press Go. Your browser displays the site. Saved Pages This option displays a list of the pages that were saved while navigating the browser. History This option provides you with a list of the most recently visited web sites. - Page 86 At the Delete cookies? prompt press Yes. Preferences The Preferences option allows you to set browser preferences such as Run JavaScript, Display images, Play sound, and View mode. About Browser About Browser displays information about the browser such as the type and version.
-
Page 87: Section 11: Camera
This section explains how to use the built-in camera and camcorder on your phone to take photographs and record videos. Using the Camera Using the camera module in your phone, you can take photos of people or events while on the move. Additionally, you can send these photos to other people in a Picture Messaging message or set a wallpaper or picture ID image. -
Page 88: Configuring Camera Options
• Delete: allows you to delete this image. • Set as: allows you to set this image as Picture D or Wallpaper. • Edit: allows you to edit your image attributes such as: Effects, Adjust, Transform, Crop, Insert, Set as, Send via, or Print via Bluetooth printer. -
Page 89: Photos
– Options include: None, Black and white, Sepia, Negative, or Watercolor. • Timer : allows you to set a time delay before the camera takes the photo. Select the length of delay you want (Off, 2 seconds, 5 seconds, or 10 seconds). When you press the Camera key time has elapsed. -
Page 90: Record Video
To view the photos on the full screen, press Press the Options soft key to use the following options: • Send via : allows you to send the selected photo as a Message or to a Bluetooth enabled device. • Set as : allows you to set the photo as Picture D or as Wallpaper. •... -
Page 91: Camcorder Options
Note: Press to switch to Camcorder mode. This is also available in the Camera preview. Before filming the video, press Menu to access camcorder options (see next page). Adjust the image by aiming the camera at the subject. Press to begin recording the video. Press the Stop key to stop the recording and save the video file to your Videos folder. -
Page 92: Videos
Camcorder Shortcuts Shortcut keys allow you to change options using your keypad, Navigation keys, and Volume key in capture mode. The following options are available: shoots video. Left and Right navigation keys zoom in and out (landscape mode). Up and Down navigation keys adjust the image brightness (landscape mode). switches the handset between camcorder and camera mode. - Page 93 • Create folder : allows you to create a new folder to contain your videos. • Sort by : allows you to sort and view videos by Date, Type, Name, or Size. • Bluetooth visibility : allows you to enable the Selected video or Multiple videos so they are visible to other Bluetooth devices. •...
-
Page 94: Section 12: Bluetooth
This section describes how to activate Bluetooth and configure it so other Bluetooth devices can see your device by name. Bluetooth About Bluetooth Bluetooth is a short-range wireless communications technology capable of exchanging information over a distance of about 30 feet without requiring a physical connection. Unlike infrared, you do not need to line up the devices to beam information with Bluetooth. -
Page 95: Security Mode
My visibility When the Bluetooth Visibility is turned on, your phone is wirelessly transmitting its phone name and status. This can be useful if you are attempting to connect additional Bluetooth devices. Allowing your phone to promote its visibility can pose a security risk and incite unauthorized connection. This feature should be paired with a Bluetooth security option. -
Page 96: Remote Sim Mode
Remote SIM mode This mode allows you to turn On or Off Remote SIM Mode. Remote SIM mode, when set to On, allows the Bluetooth phone car kit to access the contact information stored on the SIM card. In Idle mode, press Menu Select Remote SIM mode and press the Select soft key or Press On or Off from the Remote SIM mode field. -
Page 97: Section 13: Changing Your Settings
This section explains the sound and phone settings for your phone. It includes such settings as: display, security, memory, and any extra settings associated with your phone. Ringer settings You can customize your ringer settings. In Idle mode, press Menu The following options display: •... -
Page 98: Dialing Display
Press Back to return to the Display settings menu. Dialing display This menu allows you to select the type, size, and color of your dialing font and the background color. To change the type of the font: In Idle mode, press Menu From the Display settings menu, highlight Dialing display and press the Select soft key or Select the Font type option and press the Select soft key or Use the Left or Right Navigation key to select between: Normal 1 or Normal 2 and press Save. -
Page 99: Backlight Time
Highlight the Background color option and press the Select soft key or Use the Left or Right Navigation key to select between 16 different colors. Press Save to save your change. Otherwise, press the Back soft key. Brightness You can adjust the display brightness to see it better in different lighting conditions. In Idle mode, press Menu Press the Left or Right Navigation keys to adjust the level (from 1-5). -
Page 100: Time And Date
In Idle mode, press Menu Highlight the Set time field and press the Right Navigation key to select Use at custom time. Highlight the After time field and enter the time you want the keypad to come on. (example, after 5:00pm) Highlight the Until time field and enter the time you want the keypad to shut off. -
Page 101: Phone Settings
• Time zone: Highlight the option and press Yes to save your changes or No to cancel. • Time: Highlight the option and edit the text field to enter the required time. For more information, refer to “Using Numeric Mode” on page 33. •... -
Page 102: Lock Phone
Select one of the following USB modes: • Samsung PC studio: sets PC Studio to launch as the default application when a USB connection is detected. • Ask on connection: requires the phone to display a message which requires you to assign a default USB application. -
Page 103: Lock Applications
The following options are available: – Disable: the phone connects directly to the network when you switch it on. – Enable: you must enter the P N each time the phone is switched on. Lock applications Using this menu, you can lock your media contents, such as messages, images, and sounds. Once you lock the contents, you must enter the phone’s password to access the associated menus. -
Page 104: Bluetooth
Change PIN code This feature allows you to change your current PIN, provided that the Check PIN code feature is enabled. You must enter the current PIN before you can specify a new one. Once you enter a new PIN, you are asked to confirm the PIN number by re-entering it. Change PIN2 code The Change PIN2 feature allows you to change your current PIN2 to a new one. -
Page 105: Answering Mode
• Call history management: allows you to manage your call history. Answering mode The Answer Options menu allows you to select how your phone answers incoming calls. In Idle mode, press Menu Press key to save your selection. Options include: •... -
Page 106: Call Forwarding
Call forwarding This network service enables incoming calls to re-route to a secondary number that you specify. Example: You may want to forward your business calls to a colleague while you are on holiday. To set your call forwarding options: In Idle mode, press Menu Select a call forwarding option then press the Select soft key or The following options are available:... -
Page 107: Call Waiting
Call barring (SIM Card Dependent) Call Barring allows you to restrict specific types of incoming and outgoing calls on your phone. This is useful if you allow someone to use your phone for a short period of time. Call waiting This network service informs you when someone is trying to reach you during another call. -
Page 108: Call History Management
In Idle mode, press Menu Highlight the Activation field and press the Right Navigation key to turn the Activation On. Press the Down Navigation key and enter a reply message in the Reply to send field. Press Options Save to save your selection. ➔... -
Page 109: Application Settings
Application settings The Application Settings feature allows you to configure the functional parameters for most of the on-board applications. These applications are described in more detail within other sections of this manual. Messaging • Music player • Calendar • Manage Contacts •... -
Page 110: Language
Memory Card Settings From this menu you can view details about the memory card, format the memory card, rename the memory card, or turn Bluetooth visibility on or off. In Idle mode, press Menu key or Select one of the following options and press •... -
Page 111: Network Selection
Select one of the following options and press OK. • English • Français Press Save to confirm your selections. Network selection The Network selection feature enables you to automatically or manually select the network used when roaming outside of your home area. Note: You can select a network other than your home network only if there is a valid roaming agreement between the two. -
Page 112: Software Update
Sound settings: only sound settings are returned to default values. • To reset your settings: In Idle mode, press Menu Highlight one of the options or highlight All and press Press Reset enter your password and press Confirm. At the Reset settings? prompt, select Yes to confirm or No to cancel. Software update The Software Update feature enables you to use your phone to connect to the network and upload any new phone software directly to your phone. -
Page 113: Section 14: Health And Safety Information
Section 14: Health and Safety Information Getting the Most Out of Your Reception Keeping Tabs on Signal Strength The quality of each call you make or receive depends on the signal strength in your area. Your phone informs you of the current signal strength by displaying a number of bars next to the signal strength icon. -
Page 114: Maintaining Safe Use Of And Access To Your Phone
• Avoid exposing your phone and accessories to rain or liquid spills. If your phone does get wet, immediately turn the power off and remove the battery. If it’s inoperable, return it to a dealer store or call Customer Support for service. Note: For the best care of your phone, only authorized personnel should service your phone and accessories. -
Page 115: Turning Off Your Phone Before Flying
RF signals may affect improperly installed or inadequately shielded electronic operating systems and/or entertainment systems in motor vehicles. Check with the manufacturer or their representative to determine if these systems are adequately shielded from external RF signals. Also check with the manufacturer regarding any equipment that has been added to your vehicle. -
Page 116: Caring For The Battery
The guidelines listed below help you get the most out of your battery’s performance. • Use only Samsung approved batteries and desktop chargers. These chargers are designed to maximize battery life. Using other batteries or chargers voids your warranty and may cause damage. -
Page 117: Acknowledging Special Precautions And Industry Canada No Ice
Note: For safety, do not handle a damaged or leaking LiIon battery. Acknowledging Special Precautions and Industry Canada Notice Cautions Any changes or modifications to your phone not expressly approved in this document could void your warranty for this equipment, and void your authority to operate this equipment. Only use approved batteries, antennas and chargers. The use of any unauthorized accessories may be dangerous and void the phone warranty if said accessories cause damage or a defect to the phone. -
Page 118: Owner's Record
What is important to remember is that each phone meets strict federal guidelines. Variations in SARs do not represent a variation in safety. All phones must meet the federal standard, which incorporates a substantial margin of safety. As stated above, variations in SAR values between different model phones do not mean variations in safety. -
Page 119: Section 15: Warranty Information
Limited Warranty does not cover any battery if: (i) the battery has been charged by a battery charger not specified or approved by SAMSUNG for charging the battery; (ii) any of the seals on the battery are broken or show evidence of tampering; or (iii) the battery has been used in equipment other than the SAMSUNG phone for which it is specified. - Page 120 Product and the sellers' name and address. To obtain assistance on where to deliver the Product, call Samsung Customer Care at 1-800- Samsung. Upon receipt, SAMSUNG will promptly repair or replace the defective Product. SAMSUNG may, at SAMSUNG's sole option, use rebuilt, reconditioned, or new parts or components when repairing any Product or replace Product with a rebuilt, reconditioned or new Product.
- Page 121 OR LOSS OF ANTICIPATED PROFITS OR BENEFITS, OR FOR DAMAGES ARISING FROM ANY TORT (INCLUDING NEGLIGENCE OR GROSS NEGLIGENCE) OR FAULT COMMITTED BY SAMSUNG, ITS AGENTS OR EMPLOYEES, OR FOR ANY BREACH OF CONTRACT OR FOR ANY CLAIM BROUGHT AGAINST PURCHASER BY ANY OTHER PARTY. SOME JURISDICTIONS DO NOT ALLOW THE EXCLUSION OR LIMITATION OF INCIDENTAL OR CONSEQUENTIAL DAMAGES, SO THE ABOVE LIMITATION OR EXCLUSION MAY NOT APPLY TO YOU.
- Page 122 This Limited Warranty allocates risk of Product failure between Purchaser and SAMSUNG, and SAMSUNG's Product pricing reflects this allocation of risk and the limitations of liability contained in this Limited Warranty. The agents, employees, distributors, and dealers of SAMSUNG are not authorized to make modifications to this Limited Warranty, or make additional warranties binding on SAMSUNG.
-
Page 123: Index
Index ABC mode using Airplane Mode Alarms Backlight settings Battery charging low indicator removing replacing Bluetooth about features phone name remote SIM mode searching for new devices security mode turn on/off visibility Browser bookmarks clear cache cookies enter URL entering text exiting history Calculator... - Page 124 editing Camcorder options record video shortcuts Camera accessing photos deleting photos options shortcuts take and send photos taking photos Charging battery Contacts adding new caller group copy all delete all dialing a number editing caller group finding a contacts entry managing save contacts searching for a number...
- Page 125 using the speakerphone Instant Messaging (IM) International Call Low battery indicator Memo Memory Card installing removing Memory Status Menu navigation scrolling shortcuts Messages broadcast message creating a text message delete by folder drafts icons inbox instant messages (IM) memory status missed messages tab my folders organizing with my folders...
- Page 126 Other Files Phone backlight camera view display screen features front view icons keys muting the microphone my number QWERTY keyboard side views switching on/off Photos deleting photos Picture message auto resize image creating creation mode default style outbox receiving options sending a template sending options viewing from inbox...
- Page 127 memory card memory status messaging network selection Phone phone reset settings ringer security show my number software update text message Time and Date time and date USB mode wallpaper Shortcuts SIM card installing Soft Keys options during call selecting options Sounds Speakerphone using...
- Page 128 settings speakerphone Voicemail accessing Wall charger Wallpaper Warranty Information browser World Clock...