Table of Contents
Advertisement
Quick Links
POWER VENTED GAS WATER HEATERS
300 Maddox Simpson Parkway
Lebanon, TN 37090
Phone: 615-889-8900 • Fax: 615-547-1000
Technical Services email: 2tech@lochinvar.com
www.lochinvar.com
WARNING: If the information in these instruc-
tions is not followed exactly, a fire or explosion
may result causing property damage, personal
injury or death.
- Do not store or use gasoline or other flam-
mable vapors and liquids in the vicinity of
this or any other appliance.
- WHAT TO DO IF YOU SMELL GAS:
• Do not try to light any appliance.
• Do not touch any electrical switch; do not
use any phone in your building.
• Immediately call your gas supplier from a
neighbor's phone. Follow the gas sup-
plier's instructions.
• If you cannot reach your gas supplier, call
the fire department.
- Installation and service must be performed by
a qualified installer, service agency or the
gas supplier.
ALL TECHNICAL AND WARRANTY QUESTIONS: SHOULD BE DIRECTED TO THE LOCAL DEALER FROM WHOM THE WATER HEATER WAS
PURCHASED. IF YOU ARE UNSUCCESSFUL, PLEASE CONTACT THE COMPANY LISTED ON THE RATING PLATE ON THE WATER HEATER.
KEEP THIS MANUAL IN THE POCKET ON HEATER FOR FUTURE REFERENCE
1808
WHENEVER MAINTENANCE ADJUSTMENT OR SERVICE IS REQUIRED.
Installation and Operating Manual
POWER VENTED GAS MODELS
CVN075075/CVL075075 SERIES 210/211
NOT FOR USE IN MANUFACTURED (MOBILE) HOMES
•
AN ODORANT IS ADDED TO THE GAS USED
BY THIS WATER HEATER.
WITH HOT SURFACE IGNITION
MODELS PVN/PVL 07575 and
WARNING
Read and understand instruction
manual and safety messages
before installing, operating or
servicing this water heater.
Failure to follow instructions and
safety messages could result in
death or serious injury.
Instruction manual must remain
with water heater.
•
For Your Safety
100221773_2000189439_Rev. 01
Advertisement
Table of Contents

Related Manuals for Lochinvar PVL 07575


Summary of Contents for Lochinvar PVL 07575
- Page 1 Installation and Operating Manual POWER VENTED GAS WATER HEATERS POWER VENTED GAS MODELS WITH HOT SURFACE IGNITION MODELS PVN/PVL 07575 and CVN075075/CVL075075 SERIES 210/211 NOT FOR USE IN MANUFACTURED (MOBILE) HOMES 300 Maddox Simpson Parkway Lebanon, TN 37090 Phone: 615-889-8900 • Fax: 615-547-1000 Technical Services email: 2tech@lochinvar.com...
-
Page 2: Table Of Contents
Venting ........26 Termination Clearances Sidewall Power Vent..27 Blower Assembly Installation....28 www. lochinvar .com 100221773_2000189439_Rev. 01... -
Page 3: Safe Installation, Use And Service
The gas supplier typically has responsibility for the inspection and code approval of gas piping up to and including the Natural Gas meter or Propane storage tank of a building. Many gas suppliers also offer service and inspection of appliances within the building. 100221773_2000189439_Rev. 01 www. lochinvar .com... -
Page 4: General Safety
• Use only gas shown on rating plate. • Maintain required clearances to combustibles. • Keep ignition sources away from faucets after extended period of non-use. Read instruction manual before installing, using or servicing water heater. www. lochinvar .com 100221773_2000189439_Rev. 01... - Page 5 • No vent damper installation is compatible with this power vented water heater. Breathing carbon monoxide can cause brain damage or death. Always read and understand instruction manual. FLAMMABLE 100221773_2000189439_Rev. 01 www. lochinvar .com...
-
Page 6: Introduction
It average maximum of 0.25% lead. also contains warnings throughout the manual that you must read and be aware of. All warnings and instructions are essential to proper operation of the www. lochinvar .com 100221773_2000189439_Rev. 01... -
Page 7: Installation Requirements For The Commonwealth Of Massachusetts
A copy of all installation instructions for all Product Approved side wall horizontally vented gas fueled equipment, all venting instructions, all parts lists for venting instructions, and/or all venting design instructions shall remain with the appliance or equipment at the completion of the installation. 100221773_2000189439_Rev. 01 www. lochinvar .com... - Page 8 & 780 CMR). 3.) PIPING LOOP BETWEEN WATER HEATER AND AIR HANDLER MUST BE INSTALLED IN COMPLIANCE WITH 248 CMR. † REQUIRED FOR MASSACHUSETTS. ‡ PIPING FROM THE TOP OF THE WATER HEATER WITH TEES IS ACCEPTABLE. www. lochinvar .com 100221773_2000189439_Rev. 01...
-
Page 9: Typical Installation
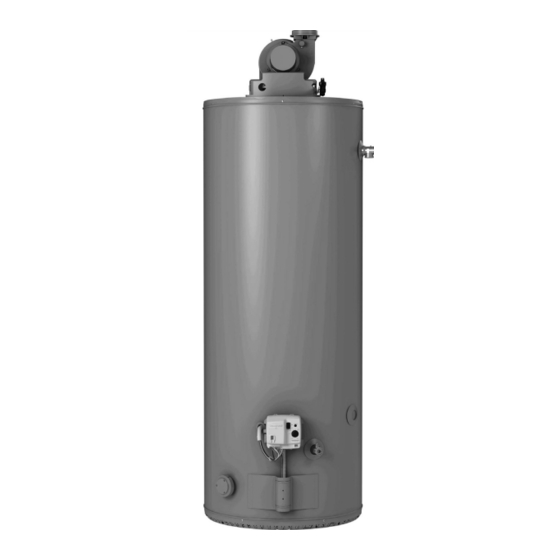
33 Anode (under cap) *, **, ***, **** see notes on following 34 Air Inlet Snorkel page 35 Flue Collector Blower Dilution Air Inlets Combustion Air Inlets Front View Rear View Figure 1. Figure 2. 100221773_2000189439_Rev. 01 www. lochinvar .com... -
Page 10: Replacement Parts And Deliming Products
13 in Figure 1 and see also Figure 8 & Figure 28). If the heater is to be operated without using the side taps these openings must be plugged with the two pipe plugs supplied with the heaters. Figure 5. www. lochinvar .com 100221773_2000189439_Rev. 01... -
Page 11: Water Piping - Mixing Valve Usage
WATER 6 in. MAX. RETURN AIR GAP* NON- TEMPERED WATER MASSACHUSETTS: INSTALL A VACUUM RELIEF IN COLD WATER LINE SUPPLY PER SECTION 19 MGL 142. Figure 8. TO HOT TO COLD OUTLET INLET Figure 10. 100221773_2000189439_Rev. 01 www. lochinvar .com... -
Page 12: Water Heater Operation
Consult a Qualified Installer or Service Agency. Follow mixing valve manufacturer’s instructions for installation of the valves. Before changing the factory setting on the Figure 11. thermostat, read the “Operating The Temperature Control System” section in this manual. www. lochinvar .com 100221773_2000189439_Rev. 01... -
Page 13: Electrical Requirements & Wiring Diagram
The electrical power may then be turned on. Verify proper operation after servicing. See Figure 13. also “Installation Checklist”. Figure 12. 100221773_2000189439_Rev. 01 www. lochinvar .com... -
Page 14: Safety Lockouts
If all sources of contamination have been removed and the system will not reset, the sensor will need to be replaced (see “Resetting The Heater Control”). www. lochinvar .com 100221773_2000189439_Rev. 01... -
Page 15: Locating The New Water Heater
1 in. greater than any point on the water heater’s outer jacket and must be piped to an adequate drain. The pan must have a maximum depth of 1.75 in. . 100221773_2000189439_Rev. 01 www. lochinvar .com... -
Page 16: Clearances To Combustibles
Failure to heed this warning may result in a fire hazard. Figure 16. www. lochinvar .com 100221773_2000189439_Rev. 01... -
Page 17: Insulation Jackets And Blankets
”Confined • Install water heater in accordance with the instruction manual and NFPA54. Space” section that follows. Breathing carbon monoxide can cause brain damage or death. Always read and understand instruction manual. 100221773_2000189439_Rev. 01 www. lochinvar .com... -
Page 18: Confined Space
(see for an unconfined space. The total input of all gas Figure 19). utilization equipment installed in the combined space shall be considered in making this determination. www. lochinvar .com 100221773_2000189439_Rev. 01... -
Page 19: Chemical Vapor Corrosion
If necessary, uncontaminated air should be obtained from remote or outside sources. The Limited Warranty is voided when failure of water heater is due to a corrosive atmosphere. See Limited Warranty for complete terms and conditions. 100221773_2000189439_Rev. 01 www. lochinvar .com... -
Page 20: Installing The New Water Heater
• Do not connect the water heater to any system or • Do not connect to non-potable water system. components previously used with non-potable water heating appliances when used to supply potable water. www. lochinvar .com 100221773_2000189439_Rev. 01... -
Page 21: Combo Heating
A. A fan coil/air handler (Figure 22). CONNECTED B. A hydronic baseboard (finned tube) loop/In floor SHOWN) heating (Figure 23). Figure 23. The following is a list of requirements for the installation of option A or B. 100221773_2000189439_Rev. 01 www. lochinvar .com... -
Page 22: Closed Water Systems
CAUTION Property Damage Hazard • Avoid water heater damage. • Install thermal expansion tank if necessary. • Do not apply heat to the water inlet and outlet connections. • Contact qualified installer or service agency. www. lochinvar .com 100221773_2000189439_Rev. 01... -
Page 23: Temperature-Pressure Relief Valve
To prevent bodily injury, hazard to life, or property damage, the relief valve must be allowed to discharge water in adequate quantities should circumstances demand. If the discharge pipe is not connected to a drain 100221773_2000189439_Rev. 01 www. lochinvar .com... -
Page 24: Temperature-Pressure Relief Valve And Pipe
6. Repeat steps 5 and 6 for the hot water (outlet) pipe. gas operating pressure does not exceed 14" water 7. Add additional sections of pipe insulation as needed. column. Failure to do so can result in death, explosion, or fire. www. lochinvar .com 100221773_2000189439_Rev. 01... -
Page 25: Sediment Traps
“National Fuel Gas Code”, ANSI Z223.1/NFPA 54. any pressure testing of that system at test pressures in excess of 1/2 psi. It should be isolated from the gas supply 100221773_2000189439_Rev. 01 www. lochinvar .com... -
Page 26: Filling The Water Heater
DO NOT vent into a common piping. Ensure any shut-off valves between the heater chimney. and the faucets are the open position. www. lochinvar .com 100221773_2000189439_Rev. 01... -
Page 27: Termination Clearances Sidewall Power Vent
‡ Permitted only if veranda, porch, deck, or balcony is fully open on a minimum of two sides beneath the floor. 100221773_2000189439_Rev. 01 www. lochinvar .com... -
Page 28: Blower Assembly Installation
Verify that correct material, as detailed in below, has been used, and that the minimum or maximum vent lengths and terminal location as detailed in this manual have been met. www. lochinvar .com 100221773_2000189439_Rev. 01... -
Page 29: Polypropylene Vent Systems
90° SHORT SWEEP ELBOW 90° LONG SWEEP ELBOW will flow from the end. Secure the tubing to the side of the (MORE RESTRICTIVE) (LESS RESTRICTIVE) heater. Prior to operating the water heater, make sure Figure 31. 100221773_2000189439_Rev. 01 www. lochinvar .com... -
Page 30: Important Notes And Warnings
These screens have been sized to ensure maximum energy efficiency of the vent system based on the “equivalent length” of the vent piping. CHOOSE ONLY the ONE SCREEN THAT MATCHES YOUR VENTING CONFIGURATION (see www. lochinvar .com 100221773_2000189439_Rev. 01... -
Page 31: Calculating Equivalent Feet
This coupling contains the condensate trap and is sized for the efficient flow of the exhaust gases. Failure to use the coupling can result in an unsafe operating condition and poor heater performance. 100221773_2000189439_Rev. 01 www. lochinvar .com... -
Page 32: Venting Instructions
Use only in well-ventilated areas and keep A CONDENSATE WINTER, ENSURE OUTLET IS INSTALLED ABOVE TEE). away from all sources of ignition. ANTICIPATED SNOW LEVEL. Note: DO NOT use solvent cement on polypropylene Figure 35. vent systems. www. lochinvar .com 100221773_2000189439_Rev. 01... -
Page 33: Vent Pipe Connection To Blower
THE FIRST 5’ OF coupling (see Figure 39). For heaters installed with VENTING. the option using the first 5 ft. being CPVC venting, the Figure 39. first elbow is in addition to the 5 ft. rule (see “Venting”). 100221773_2000189439_Rev. 01 www. lochinvar .com... -
Page 34: Blower Exhaust Direction
Take the time and effort to do a professional job. Shortcuts will only cause you problems and delays in start-up. By far, the majority of failures in PVC and CPVC systems are the result of shortcuts and/ or improper joining techniques. www. lochinvar .com 100221773_2000189439_Rev. 01... - Page 35 This process softens and prepares the PVC or CPVC for the solvent cementing step. Move quickly and without hesitation to the cementing procedure while the surfaces are still wet with primer. 100221773_2000189439_Rev. 01 www. lochinvar .com...
- Page 36 The fitting will have a tendency to slide back while the cement is still wet so hold the joint together for about 15 seconds. Figure 44. www. lochinvar .com 100221773_2000189439_Rev. 01...
-
Page 37: Installation Checklist
Lighting Instructions and Not obstructed in any way. proceed with lighting the heater. Venting properly supported and able to move freely for expansion and contraction. Condensate drain connected as required. 100221773_2000189439_Rev. 01 www. lochinvar .com... -
Page 38: Lighting Instructions
TO TURN OFF GAS TO APPLIANCE 1. Turn the thermostat counter-clockwise to the lowest setting. 2. Set the gas control switch to the “OFF” position. 3. Turn off electrical power to the appliance if service is to be performed. 323546-000 www. lochinvar .com 100221773_2000189439_Rev. 01... -
Page 39: Operating The Temperature Control System
Mixing valves are available at plumbing supply or hardware stores (see Figure 8 & Figure 9). Follow manufacturer’s instructions for installation of the valves. Before changing the factory setting on the thermostat, in this manual, see Table 5. 100221773_2000189439_Rev. 01 www. lochinvar .com... -
Page 40: Gas Control Valve/Thermostat (160°)
.com 100221773_2000189439_Rev. 01... -
Page 41: For Your Information
There must be no smoking or open flame near the faucet at the time it is open. 100221773_2000189439_Rev. 01 www. lochinvar .com... -
Page 42: Periodic Maintenance
The blower will still be connected to chemicals, calcium and sodium chloride, waxes, bleach the junction box so exercise care not to stress the and process chemicals are typical compounds which are wiring. potentially corrosive. www. lochinvar .com 100221773_2000189439_Rev. 01... -
Page 43: Burner Operation And Inspection
FLUE VIEWPORT COLLECTOR HOOD Figure 49. DRAIN PORT BLUE TIPS LIGHT BLUE INNER INCORRECT CONES ARE FLAME LAZY SATISFACTORY YELLOW CORRECT FLAME SOFT BLUE Figure 50. BLOWER DILUTION MOUNTING AIR INTAKES BLOWER PLATE Figure 48. 100221773_2000189439_Rev. 01 www. lochinvar .com... -
Page 44: Combustion Chamber And Burner Cleaning
Figure 51. Certain water conditions will cause a reaction between the anode rod and the water. The most common complaint associated with the anode rod is a “rotten egg smell” www. lochinvar .com 100221773_2000189439_Rev. 01... -
Page 45: Temperature-Pressure Relief Valve Test
“Draining And Flushing” section. Replace the T&P valve with a properly rated/sized new one, see “Temperature-Pressure Relief Valve” for instructions on replacement. 100221773_2000189439_Rev. 01 www. lochinvar .com... -
Page 46: Draining And Flushing
Note: If the water heater is going to remain shut down and empty for an extended period, the drain valve should be left open with hose connected allowing water to terminate to an adequate drain. www. lochinvar .com 100221773_2000189439_Rev. 01... -
Page 47: Leakage Checkpoints
Water in the water heater bottom may be from condensation, loose connections, or the relief valve. DO NOT replace the water heater until a full inspection of all possible water sources is made and necessary corrective steps taken. Figure 54. 100221773_2000189439_Rev. 01 www. lochinvar .com... -
Page 48: Reference Parts Listing
12 Gas Valve Electronic Control Module And Cover (Honeywell) the primary water inlet and outlet connections. See “Combo Heating Inlet And Outlet Side Taps”. Blower Dilution Air Inlets Combustion Air Inlets Front View Rear View Figure 55. Figure 56. www. lochinvar .com 100221773_2000189439_Rev. 01... - Page 49 Note: † For Natural gas models the Flare Nut has Right- hand thread. For Propane models the Flare Nut has Left-hand thread. Figure 57. Propane (LP) main burner with igniter assembly (item 17 in Figure 55). Flare Nut † Figure 58. Figure 59. 100221773_2000189439_Rev. 01 www. lochinvar .com...
-
Page 50: Troubleshooting Guidelines
(Do Not plug T&P valve) 5. Check venting for proper vent termination screen. Check valves in loop system stuck or missing. GAS CONTROL VALVE/ 1. Defective gas control valve/thermostat 1. Replace gas control valve/thermostat THERMOSTAT FAILS TO SHUT OFF www. lochinvar .com 100221773_2000189439_Rev. 01... - Page 51 5. Disconnected or loose wire 3. Replace air pressure switch NOT START 6. Control locked out 4. Replace blower 5. Repair and reconnect wires 6. Refer to “Resetting The Heater Control” – determine cause of lockout 100221773_2000189439_Rev. 01 www. lochinvar .com...
-
Page 52: Resetting The Heater Control
Note: Should an over-temperature condition occur, restart the water heater and verify the LED flash sequence. If the 4 flash sequence is observed, slide the “ON/OFF” switch to the “OFF” position. Turn Main Gas Supply “OFF”. Replace the gas control valve\thermostat. www. lochinvar .com 100221773_2000189439_Rev. 01... -
Page 53: Ignition State And Timing
Detected the problem before attempting corrective action. See also Eight-Three Flash, “Flammable Vapor Sensor”. Electronics Fault Detected three second pause Eight-Four Flash, Valve Fault Detected three second pause Hardware Fault Indefinite Lockout 100221773_2000189439_Rev. 01 www. lochinvar .com... -
Page 54: Reading The Led Flash Sequence
5. Turn the power “OFF” for 10-20 seconds then “ON” again to clear the fault code. 6. Flame rod not properly seated in flame, reposition rod. 7. Clean flame sensor rod with fine steel wood to avoid lock-out. 8. Replace the control if the fault code persists. www. lochinvar .com 100221773_2000189439_Rev. 01... - Page 55 1. Turn the power “OFF” for 10-20 seconds then “ON” again to clear the fault code. 2. Replace the control if the fault code persist. 1. Control has failed. If resetting the control does not clear the fault code, replace the control. 100221773_2000189439_Rev. 01 www. lochinvar .com...
- Page 56 300 Maddox Simpson Parkway Lebanon, TN 37090 • Phone: 615-889-8900 • Fax: 615-547-1000 Technical Services email: 2tech@lochinvar.com www.lochinvar.com Copyright © 2018 Lochinvar LLC. All rights reserved.