
Related Manuals for True TC400


Summary of Contents for True TC400
- Page 1 *Assembly Guide & Warranty Card Included C400 TREADMILL OWNER’S MANUAL Transcend Console Escalate Console Emerge Console Revision 052418...
- Page 2 C400 TREADMILL OWNERS MANUAL IMPORTANT: All Products shown are prototype. Actual product delivered may vary. Product specifications, features & software are subject to change without notice. For the most up to date owner’s manual please visit www.truefitness.com. For documents in additional languages please visit www.truefitness.com/document-library/29/international-manuals IMPORTANTE: Todos los productos mostrados son prototipos.
- Page 3 The proud manufacturing tradition of quality and the culture of innovation at TRUE have given rise to a full line of truly extraordinary treadmills, indoor cycles and elliptical cross-trainers. As a result, people all over the world are benefiting from the TRUE experience.
-
Page 4: Table Of Contents
C400 TREADMILL OWNERS MANUAL TABLE OF CONTENTS : Chapter 1: Safety Instructions Safety Instructions Use of Safety Key Space Requirements Grounding Instructions Power Requirements Warning Decals Compliances Chapter 2: Assembly Instructions Pre-Assembly Check List Treadmill Assembly Steps Chapter 3: Product Overview Treadmill Overview Chapter 4: Care &... -
Page 5: Chapter 1: Safety Instructions
45, smokes, has high cholesterol, is obese or has not exercised regularly in the past year. Additionally, TRUE recommends consulting a fitness professional on the correct use of this product. - Page 6 To disconnect, turn power OFF at the ON/OFF switch if applicable, then remove plug from electrical outlet. • Never operate a TRUE product if it has a damaged power cord or electrical plug, or if it has been dropped, damaged, or even partially immersed in water. Contact TRUE Customer Service for a replacement.
- Page 7 CHAPTER 1: SAFETY INSTRUCTIONS CAUTION (continued): • Use correct ergonomic positioning while running on treadmill. • Do not allow animals on or near the equipment while in operation. • Use the side handrails whenever additional stability is required. In case of emergency, such as tripping, the side handrails should be grabbed and the user should place his/her feet on the side platforms.
-
Page 8: Use Of Safety Key
CHAPTER 1: SAFETY INSTRUCTIONS USE OF SAFETY KEY (E-STOP): • Attach the safety clip to your clothing before each workout and when treadmill is in use. (See Fig 2) • Attach the magnetic key to the treadmill console assembly. Space Requirements: ASTM (USA) and EN (European) regulations require a minimum of 20”... -
Page 9: Grounding Instructions
CHAPTER 1: SAFETY INSTRUCTIONS GROUNDING INSTRUCTIONS: This product must be grounded, if it should malfunction or breakdown, grounding provides a path of least resistance for electric current to reduce the risk of electric shock. This product is equipped with a cord having an equipment-grounding conductor and a grounding plug. -
Page 10: Power Requirements
CHAPTER 1: SAFETY INSTRUCTIONS Truefitness.com / 800.426.6570 / 636.272.7100... -
Page 11: Warning Decals
CHAPTER 1: SAFETY INSTRUCTIONS WARNING DECALS: WARNING: Replace warning labels that may be worn, damaged or missing. To replace any worn or missing warning decals contact TRUE FITNESS by visiting www.truefitness.com or contact customer service at 800-883-8783. COMPLIANCES: This equipment complies with all applicable codes and regulations. For a complete list of compliances, please visit www.truefitness.com. -
Page 12: Chapter 2: Assembly Instructions
Important Electrical Requirements – 120V: Your TRUE treadmill requires a dedicated 120 volt, alternating current (AC), 20 amp grounded outlet circuit. This means nothing else can be plugged into the same circuit. Most power circuits are rated for this 120V AC 20 amp requirement, but you must ensure the treadmill does not share the circuit with anything else. -
Page 13: Pre-Assembly Check List
CHAPTER 2: ASSEMBLY INSTRUCTIONS PRE-ASSEMBLY CHECK LIST: Frame Components: Item Description Console Rack Frame Pedestal (L) Pedestal (R) Handrail (L) Handrail (R) Shoulder Cover-Top (L) Shoulder Cover-Top I) Shoulder Cover – Bottom (L) Shoulder Cover – Bottom (R) Power Cord Console Cover Truefitness.com / 800.426.6570 / 636.272.7100... - Page 14 Hex Key – 5mm Various NOTE: Consult your TRUE Fitness TCS400 Treadmill Owner’s Manual for information related to item (h) Tread Belt Lubricant for Tread Belt lubrication procedure and item (i) T-Spanner – 8mm for Tread belt Adjustment. Tool Requirements: •...
-
Page 15: Treadmill Assembly Steps
CHAPTER 2: ASSEMBLY INSTRUCTIONS TREADMILL ASSEMBLY STEPS: STEP 1: Remove Motor Cover: a) Remove two screws (l) and two Motor Decoration Covers from Frame. b) Remove seven screws (m) and Motor Cover from Frame. c) Set hardware to the side for use in step 4. - Page 16 CHAPTER 2: ASSEMBLY INSTRUCTIONS TREADMILL ASSEMBLY STEPS (continued): STEP 3-1: Frame Cable Connections: a) Route the COAX, AUXPS, I/O, and COMM cables to the front of the treadmill frame. Connect AUXPS Cable Here Connect COMM Cable Here Connect COAX Cable Here Connect I/O Cable Here b) Connect the COMM cable to the...
- Page 17 CHAPTER 2: ASSEMBLY INSTRUCTIONS TREADMILL ASSEMBLY STEPS (continued): Step 3-3 Power Inlet Assembly-220V (Optional): a) Remove any power cords that might be attached to the unit. Note: This step can be performed without removing the motor cover. The power inlet assembly can safely be pulled out about 4 inches.
- Page 18 CHAPTER 2: ASSEMBLY INSTRUCTIONS TREADMILL ASSEMBLY STEPS (continued): STEP 4: Console Rack and Motor Cover Installation: a) Install Console Rack (A) onto Pedestals R & L by resting Console Rack tubing on top of Pedestal tubing cradles. b) Using 5 mm Hex Key, install but do not tighten, 8 Shoulder Plates (g), 8 Bolts-M8 x 40mm (f) and 8 internal tooth washers (d) through Console...
- Page 19 CHAPTER 2: ASSEMBLY INSTRUCTIONS TREADMILL ASSEMBLY STEPS (continued): STEP 5: Console Rack Cable Connections: a) Connect the COAX, AUXPS, COMM and I/O cables coming from the right pedestal to the corresponding wires in the console rack. NOTE: All four connections are made for any Console model.
- Page 20 CHAPTER 2: ASSEMBLY INSTRUCTIONS TREADMILL ASSEMBLY STEPS (continued): STEP 8: Bottom Shoulder Covers: a) Using a Phillips screwdriver, install Shoulder Cover Bottom pieces Left (I) and Right (J) with five Screws M4 x 10mm (c) on each side as shown. CAUTION: Make sure cabling is NOT pinched during installation.
- Page 21 CHAPTER 2: ASSEMBLY INSTRUCTIONS TREADMILL ASSEMBLY STEPS (continued): STEP 9A Console Mast Assembly: Place the two bottom console mounting screws inside the bottom keyholes on the console mast assembly. Partially thread the two top console mounting screws into the console. Fully tighten all four console mounting screws.
- Page 22 OFF position (O), and then rocking the power switch back to the ON position (-). If it does not reset, or the Circuit Breaker operates again udner normal use, contact True Fitness at 1-800-883-8783. 110V 220V Truefitness.com / 800.426.6570 / 636.272.7100...
- Page 23 CHAPTER 2: ASSEMBLY INSTRUCTIONS TREADMILL ASSEMBLY STEPS (continued): STEP 11: Unit Leveling (if needed): a) Ensure treadmill incline rack wheels and rear feet are resting on the floor and not on cardboard, packaging, etc. b) Using a 15/16 inch open end wrench, loosen nut A on Right Rear Foot (only side adjustable).
-
Page 24: Chapter 3: Product Overview
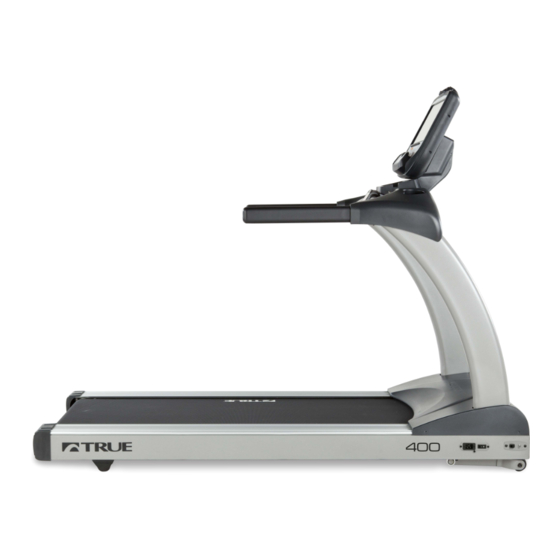
CHAPTER 3: PRODUCT OVERVIEW TREADMILL OVERVIEW: Quick Access Keys Contact Heart Contact Heart Console Assembly Rate Pad Rate Pad Safety (E-Stop) Straddle Covers Belt Belt Adjustment Bolts Leveling Feet On/Off Switch, Circuit Breaker, and Power Cord Truefitness.com / 800.426.6570 / 636.272.7100... - Page 25 CHAPTER 3: PRODUCT OVERVIEW TREADMILL OVERVIEW (continued): Console Assembly: The console allows the user to set up a workout program and control the treadmill during a workout (For console overview and operation instructions refer to chapter 4). Quick Access Keys: Allows the user to quickly start, stop and wake the treadmill or make fast, convenient adjustments to the incline level or speed of the treadmill.
-
Page 26: Chapter 4: Care & Maintenance
CAUTION: Do not use any acidic cleaners. Doing so will weaken the paint or powder coatings and may void the TRUE Fitness Warranty. Never pour water or spray liquids on any part of the treadmill. Allow the treadmill to dry completely before using. -
Page 27: Running Belt Alignment
If you hear any chafing or the running belt appears to be getting damaged, stop the running belt immediately by pressing the STOP key. Contact the TRUE Service Department. Walk around to the rear of the unit and observe the belt for a few minutes. -
Page 28: Tensioning The Running Belt
Turn the treadmill on and start the belt and check if the slipping continues. Repeat the above steps if additional adjustment is necessary. TREADMILL LUBRICATION: For commercial use over 20 hours per week, TRUE recommends lubricating every three months. • Loosen the belt adjustment bolts in the rear end caps. •... -
Page 29: Leveling The Treadmill
OTHER SCHEDULED PREVENTIVE MAINTENANCE: TRUE recommends that quarterly scheduled maintenance be performed by a qualified service technician. Please contact your dealer or visit www.truefitness.com to contact a local TRUE authorized service technician. Scheduled Preventive Maintenance: Record time, distance and hours from the console. -
Page 30: Chapter 5: Customer Service
HOURS OF OPERATION: 8:30 A.M. - 5:00 P.M. CST E-MAIL: service@truefitness.com CONTACTING SALES: Interested in TRUE Products? Please contact us with any sales or product inquires so that we may direct you to the appropriate sales representative to answer your questions. TRUE FITNESS HOME OFFICE 865 HOFF ROAD ST. -
Page 31: Reporting Freight Claims Or Parts Damage
Severe Damage: Obvious damage to external packaging / internal product. Please refuse the shipment and it will be returned to TRUE Fitness by the carrier. Contact the TRUE Fitness customer support team by calling 800.883.8783 or sales support team by calling 800.426.6570 Monday-Friday during normal business hours to notify us that the shipment has been refused. -
Page 32: Chapter 6: Additional Information
This troubleshooting guide is intended to assist in diagnostics only and is not all inclusive. Technical specifications, error codes and programming are subject to change without notice. TRUE accepts no liability for any damage or loss suffered by persons whom rely wholly or in part on any description or statement contained within this manual. Please visit www.TRUEfitness.com to obtain the most recent version of all manuals and contact the TRUE Service Department at 800-... - Page 33 Corrupted brainboard Corrupted Re-install Console configuration - fails integrity Firmware and software Console software/firmware check versions are not Configuration Contact dealer or TRUE compatible service Console Configure Power cycle incorrectly Re-configure console Fault CN01: Re-install Console Math error - software...
- Page 34 CHAPTER 6: ADDITIONAL INFORMATION TROUBLESHOOTING GUIDE (continued): Fault CN03: Membrane Key stuck Membrane key is Contact dealer or TRUE Console Stuck Key down/closed damaged service Power cycle Loose Cable Fault CN04: Check cable connections Lower Board Brainboard fails to receive timely...
- Page 35 CHAPTER 6: ADDITIONAL INFORMATION TROUBLESHOOTING GUIDE (continued): Lubricate treadbelt High Belt Deck Friction Contact dealer or TRUE service Fault SP01: Belt Tread motor rpm is below target Check drive belt and Speed High belt tension Under Speed walking belt Tension...
- Page 36 Run incline calibration Incline Incline operating range - may indicate Max/Min that it is disconnected. Incline Potentiometer Contact dealer or TRUE value out of range service Fault A101: Power cycle Motor AC MCB 2.5 VDC Ref Status Motor Control Board...
- Page 37 CHAPTER 6: ADDITIONAL INFORMATION TROUBLESHOOTING GUIDE (continued): Dirty or misaligned Contact dealer or TRUE speed sensor service Fault A111: Lubricate treadbelt Motor AC MCB Illegal Speed Command High Belt Deck Friction Contact dealer or TRUE Controller Fault service Low Line Voltage...
- Page 38 TROUBLESHOOTING GUIDE (continued): Loose Cable Connection Check cable connections Fault A121: Motor AC MCB Phase A High Gate Driver Fault Drive Motor Contact dealer or TRUE Controller Fault service Loose Cable Connection Check cable connections Fault A122: Motor AC MCB Phase B High Gate Driver Fault...
-
Page 39: Wiring Diagrams
CHAPTER 6: ADDITIONAL INFORMATION WIRING DIAGRAMS: Truefitness.com / 800.426.6570 / 636.272.7100... - Page 40 CHAPTER 6: ADDITIONAL INFORMATION WIRING DIAGRAMS: Truefitness.com / 800.426.6570 / 636.272.7100...
-
Page 41: Warranty Information
Product. The frame is warranted for labor and freight (for parts dealer, then TRUE Limited Warranty service may be obtained shipped from TRUE) for two years from date of purchase. * This by contacting TRUE directly at: limited warranty on structural frame does not include paint or TRUE Fitness, Service Department coatings. - Page 42 NOTE TO AUTHORIZED WARRANTY LABOR PROVIDERS: TRUE within 30 days of purchaser’s receipt of this Product. The Warranty labor reimbursement or warranty parts rights may serial number must be intact on the Product for this Limited not be transferred to, reassigned to, a third party without the Warranty to be valid.
- Page 43 C400 Treadmill Thank you for purchasing a TRUE product. To validate the TRUE product warranty the fast and easy way, please go on-line now to truefitness.com/support and register your product. The information you provide will never be distributed to any other individuals or agencies for any purpose.