Table of Contents
Advertisement
Your new trimmer has been engineered and manufactured to Ryobi's high standard for dependability, ease of
operation and operator safety. Properly cared for, it will give you years of rugged, trouble-free performance.
WARNING:
To reduce the risk of injury, the user must read and understand the operator's manual.
Thank you for buying a Ryobi trimmer.
SAVE THIS MANUAL FOR FUTURE REFERENCE
OPERATOR'S MANUAL
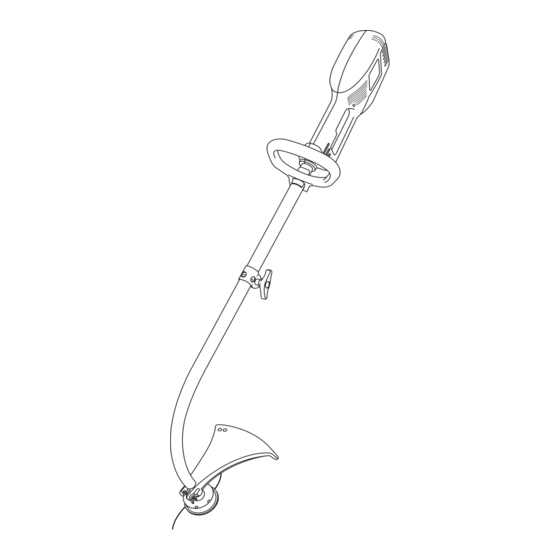
15 in. (381 mm)
String Trimmer
RY41002
Series
EL15
(RY41002)
Advertisement
Table of Contents

Related Manuals for Ryobi RY41002 Series


Summary of Contents for Ryobi RY41002 Series
- Page 1 Your new trimmer has been engineered and manufactured to Ryobi’s high standard for dependability, ease of operation and operator safety. Properly cared for, it will give you years of rugged, trouble-free performance. WARNING: To reduce the risk of injury, the user must read and understand the operator’s manual.
-
Page 2: Table Of Contents
Customer Service Information ... 18 Your trimmer has many features that make using this product more pleasant and enjoyable. We have given safety, performance, and dependability top priority in the design of this product, making it easy to maintain and operate. -
Page 3: General Safety Rules
Never operate the product without the grass deflector in place and in good condition. Maintain a firm grip on both handles while trimming. Keep the trimmer head below waist level. Never cut with the trimmer head over 30 in. (76 cm) or more above the ground. Page 3... - Page 4 SPECIFIC SAFETY RULES ELECTRICAL SAFETY RULES Make sure the cord is located so that it will not be stepped on, tripped over, or otherwise subjected to damage or stress. Do not abuse the power cord. Never carry the product by the cord.
-
Page 5: Symbols
Some of the following symbols may be used on your tool. Please study them and learn their meaning. Proper interpretation of these symbols will allow you to operate the tool more safely and effectively. SYMBOL NAME Safety Alert Ricochet Eye Protection Keep Bystanders Away 50' 15m No Blade... -
Page 6: Symbols
The following signal words and meanings are intended to explain the levels of risk associated with this product. SYMBOL SIGNAL MEANING DANGER: Indicates an imminently hazardous situation, which, if not avoided, will result in death or serious injury. WARNING: Indicates a potentially hazardous situation, which, if not avoided, could result in serious injury. -
Page 7: Specifications
MOTOR Motor Type ... 120 V AC Operating RPM ... 7500 Amperes ... 6 amps DRIVE SHAFT AND CUTTING HEAD Drive Shaft ... 1/4 in. Flex Shaft Cutting Head ... Bump Line Release Cutting Path Diameter ... 15 in. (381 mm) Drive Shaft Housing ... -
Page 8: Features
The trimmer includes a grass deflector that helps protect you from flying debris. ERGONOMIC DESIGN The design of the trimmer provides for easy handling. It is designed for comfort and ease of grasp when operating in different positions and at different angles. -
Page 9: Assembly
Follow these steps to remove the attachment from the upper shaft. Release the trigger and allow the trimmer to coast to a stop. Unplug the trimmer. Loosen the locking knob by turning it counterclock- wise. - Page 10 EXTENSION CORD RETAINER An extension cord retainer is located on the bottom of the trimmer. This provides strain relief for the cord, preventing unwanted disconnects. Note: To reduce the disconnection of the power cord from the extension cord during operation, use the extension cord retainer described below.
-
Page 11: Operation
NOTE: Keep a firm grip with both hands during opera- tion. Place the trimmer on the right side of your body with the engine behind and away from your body. Press the trigger to start the trimmer. - Page 12 Follow these steps to advance the cutting line manually. Release the trigger and allow the trimmer to coast to a stop. Unplug the trimmer. Pull sharply on the line while pushing down on the retaining cap.
-
Page 13: Operation
CUT OFF BLADE This trimmer is equipped with a cut-off blade on the grass deflector. For best cutting, advance string until it is trimmed to length by the cut-off blade. Advance string whenever you hear the engine running faster than normal. This will maintain best performance and keep string long enough to advance properly. -
Page 14: Maintenance
WARNING: Use only identical Ryobi replacement parts when ser- vicing this product. Use of any other parts may create a hazard or cause product damage. CLEANING THE TRIMMER Release the trigger, allow the trimmer to coast to a stop, and unplug the trimmer before cleaning. -
Page 15: Maintenance
Insert the lines into the eyelets in the trimmer head. Place the spool on the drive shaft. NOTE: To install the spool, you may need to rotate it slightly. -
Page 16: Troubleshooting
Screw threads are dirty or dam- aged. Grass wraps around the Cutting tall grass at ground level. attachment shaft and the trimmer head assembly TROUBLESHOOTING SOLUTION 1. Lubricate with a silicone spray. 2. Install more line (Refer to “Replacing the Cutting Line”... -
Page 17: Accessories
Retaining Cap (RH thread)... DA98866A Retaining Cap (Power Care™) ... AP04106 OPTIONAL ATTACHMENTS Expand-It Tiller Attachment...UT15550A Expand-It Edger Attachment... UT15518E Expand-It Straight Shaft Trimmer Attachment ...UT15522E UT15550A UT15518E WARNING: The use of attachments or accessories not listed above could result in serious personal injury. -
Page 18: Customer Service Information
The model number of this tool is found on a plate attached to the motor housing. Please record the serial number in the space provided below. HOW TO ORDER REPAIR PARTS • When ordering repair parts, always give the following information: RY41002 (EL15) • Model No. • Serial No.