Table of Contents
Advertisement
Available languages
Available languages
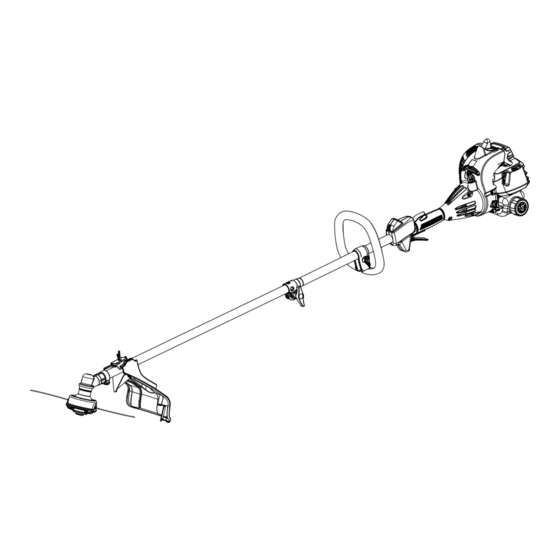
OPERATOR'S MANUAL
MANUEL D'UTILISATION
MANUAL DEL OPERADOR
26
STRING TRIMMERS
CC
TAILLE-BORDURES À LIGNE DE 26
RECORTADORAS DE HILO 26
ALL VERSIONS
TOUTES LES VERSIONS
TODAS LAS VERSIONES
Your trimmer has been engineered and manufactured to our high standard for dependability, ease of operation, and opera-
tor safety. When properly cared for, it will give you years of rugged, trouble-free performance.
WARNING:
To reduce the risk of injury, the user must read and understand the operator's manual before using
this product.
Thank you for your purchase.
SAVE THIS MANUAL FOR FUTURE REFERENCE
Ce taille-bordures a été conçu et fabriqué conformément à
nos strictes normes de fiabilité, simplicité d'emploi et sécurité
d'utilisation. Correctement entretenu, cet outil vous donnera des
années de fonctionnement robuste et sans problème.
AVERTISSEMENT :
blessures, l'utilisateur doit lire et veiller à bien comprendre le
manuel d'utilisation avant d'employer ce produit.
Merci de votre achat.
CONSERVER CE MANUEL POUR
FUTURE RÉFÉRENCE
CC
Pour réduire les risques de
CC
Su nueva recortadora ha sido diseñado y fabricado de conformidad
con nuestras estrictas normas para brindar fiabilidad, facilidad de
uso y seguridad para el operador. Con el debido cuidado, le brindará
muchos años de sólido funcionamiento y sin problemas.
ADVERTENCIA:
el usuario debe leer y comprender el manual del operador antes
de usar este producto.
Le agradecemos su compra.
GUARDE ESTE MANUAL PARA
FUTURAS CONSULTAS
CS26
RY28020
SS26
RY28040
Para reducir el riesgo de lesiones,
Advertisement
Table of Contents

Related Manuals for Ryobi CS26 RY28020


Summary of Contents for Ryobi CS26 RY28020
- Page 1 TOUTES LES VERSIONS TODAS LAS VERSIONES Your trimmer has been engineered and manufactured to our high standard for dependability, ease of operation, and opera- tor safety. When properly cared for, it will give you years of rugged, trouble-free performance. WARNING: To reduce the risk of injury, the user must read and understand the operator’s manual before using...
- Page 2 C - Coupler (coupleur, acoplador) D - Power head shaft (arbre du bloc moteur, eje del cabezal motor) E - Knob (bouton, perilla) F - Positioning hole (trou de positionnement, orificio de posicionamiento) G - Trimmer attachment (accessoire taille- bordures, aditamento para recortar)
- Page 3 Fig.4 A - Button (bouton, botón) B - Secondary hole (trou secondaire, orificio secundario) C - Hole (trou, orificio) D - Hanger cap (capuchon de suspension, tapa de suspensión) Fig. 5 A - Bolt (boulon, perno) B - Front handle (poignée avant, mango delantero) C - Washer (rondelle, arandela) D - Wing nut (écrou papillon, tuerca de...
-
Page 4: Cutting Tips
à arbre droit, cuchilla de corte de hilo de la recortadora de eje recto) B - Curved shaft trimmer cut-off blade (lame de sectionnement de ligne du taille-bordures à arbre courbe, cuchilla de corte de hilo de la recortadora de eje recto) Fig. -
Page 5: Installing Line In Fixed Line String
Fig. 19 A - Pull strings (tirer vers l’extérieur, tira del hilo) Fig. 20 A - String head housing (boîtier de tête de coupe, alojamiento del cabezal de hilo) B - Spool (bobine, carrete) C - Spool retainer (retenue de bobine, retén del carrete) Fig. -
Page 6: Table Of Contents
TABLE DES MATIÈRES / ÍNDICE DE CONTENIDO Introduction ... 2 Introduction / Introducción General Safety Rules ... 3 Règles de sécurité générales / Reglas de seguridad generales Specific Safety Rules ... 4 Règles de sécurité particulières / Reglas de seguridad específicas Symbols ... -
Page 7: General Safety Rules
WARNING: Read and understand all instructions. Failure to follow all instructions listed below may result in electric shock, fire and/or serious personal injury. READ ALL INSTRUCTIONS For safe operation, read and understand all instructions before using this product. Follow all safety instructions. Failure to follow all safety instructions listed below, can result in serious personal injury. -
Page 8: Specific Safety Rules
Do not use any other cutting attachment. To install any other brand of cutting head to this string trimmer can result in serious personal injury. Never operate unit without the grass deflector in place and in good condition. -
Page 9: Symbols
The following signal words and meanings are intended to explain the levels of risk associated with this product. SYMBOL SIGNAL DANGER: WARNING: CAUTION: CAUTION: Some of the following symbols may be used on this product. Please study them and learn their meaning for safe operation of this product. -
Page 10: Features
TAP ADVANCE SYSTEM ™ The Reel-Easy Tap Advance System allows easy line ad- ™ vance during trimmer operation. TOP-MOUNTED MOTOR The top-mounted motor improves balance and is located away from the dust and debris of the cutting area. ASSEMBLY PACKING LIST... - Page 11 Loosen the knob on the coupler of the power head shaft and remove the hanger cap from the attachment. Push in the button located on the trimmer attachment. Align the button with the guide recess on the power head coupler and slide the two shafts together.
-
Page 12: Assembly
(commonly referred to as E15) are acceptable. E85 is not. STARTING AND STOPPING See Figures 8 - 10. Trimmer should be on a flat, bare surface for starting. To start a cold engine: Slowly press the primer bulb 10 times. - Page 13 Avoid hot surfaces by always keeping the tool away from your body. (Proper operating position shown in figure 11.) Keep the trimmer tilted toward the area being cut; this is the best cutting area. The curved shaft trimmer cuts when passing the unit from right to left.
-
Page 14: Spool/Line Replacement
Rotate the spool clockwise as necessary to align the arrows on the spool with the eyelets in the string head housing. Cut one piece of trimmer line 10 ft. long. Insert the line into the eyelet on the string trimmer housing. Push until the end of the line comes out the other side of the string head. -
Page 15: Cleaning Air Filter Screen
SPARK PLUG REPLACEMENT This engine uses a Champion RCJ-6Y, NGK BPMR7A, or Ryobi AC00160 spark plug with .025 in. electrode gap. Use an exact replacement and replace annually. STORING THE PRODUCT Clean all foreign material from the product. Store idle unit indoors in a dry, well-ventilated area that is inaccessible to children. -
Page 16: Troubleshooting
5. Advance line at full throttle. 1. Clean threads and lubricate with grease - if no improvement, replace the spool retainer. 1. Cut tall grass from the top down to prevent wrapping. 2. Operate trimmer at full throttle. -
Page 17: Warranty
5 Hours Every 25 Hours or Yearly CALL US FIRST For any questions about operating or maintaining your product, call the Ryobi Your product has been fully tested prior to shipment to ensure your complete satisfaction. 13 — English Clean Every... -
Page 18: Limited Warranty Statement
Blower Fans, Blower and Vacuum Tubes, Vacuum Bag and Straps, Guide Bars, Saw Chains Techtronic Industries North America, Inc., reserves the right to change or improve the design of any RYOBI outdoor product without assuming any obligation to modify any product previously manufactured. -
Page 19: Warranty
Where a warrantable condition exists, Techtronic Industries North America, Inc., will repair your non-road or small off-road engine at no cost to you, including diagno- sis, parts, and labor performed at an authorized service center for RYOBI outdoor products. MANUFACTURER’S WARRANTY COVERAGE: This product’s emissions control system is warranted for three years. - Page 20 NOTES / NOTAS...
- Page 21 NOTES / NOTAS...
- Page 22 RÈGLES DE SÉCURITÉ GÉNÉRALES AVERTISSEMENT : Lire et veiller à bien comprendre toutes les instructions. Le non respect des instructions ci-dessous peut entraîner un choc électrique, un incendie et / ou des blessures graves. LIRE TOUTES LES INSTRUCTIONS Pour travailler en toute sécurité, lire et veiller à bien comprendre toutes les instructions avant d’utiliser ce produit.
- Page 23 RÈGLES DE SÉCURITÉ PARTICULIÈRES RÈGLES DE SÉCURITÉ PARTICULIÈRES À L’UTILISATION DU TAILLE-BORDURES Inspecter l’outil avant chaque utilisation. Remplacer les pièces endommagées. S’assurer que toutes les pièces de boulonnerie sont en place et bien serrées. S’assurer de l’absence de fuites de carburant. ...
- Page 24 Les termes de mise en garde suivants et leur signification ont pour but d’expliquer le degré de risques associé à l’utilisation de ce produit. SYMBOLE SIGNAL DANGER : AVERTISSEMENT : ATTENTION : ATTENTION : Certains des symboles ci-dessous peuvent être utilisés sur le produit. Veiller à les étudier et apprendre leur signification pour assurer la sécurité...
-
Page 25: Fiche Technique
FICHE TECHNIQUE Poids - (sans carburant) CS26 ... 4,7 kg (10,3 lb) SS26 ... 5,4 kg (11,8 lb) Largeur de coupe avec ligne CS26 ...432 mm (17 po) SS26 ...457 mm (18 po) Cylindrée ...26 cc Diamètre de coupe : Avance de la ligne de coupe à... - Page 26 AVERTISSEMENT : Si des pièces manquent ou sont endommagées, ne pas utiliser ce produit avant qu’elles aient été remplacées. Le fait d’utiliser ce produit même s’il contient des pièces endommagées ou s’il lui manque des pièces peut entraîner des blessures graves. AVERTISSEMENT : Ne pas essayer de modifier ce produit ou de créer des accessoires non recommandés pour la produit.
- Page 27 INSTALLATION DU DÉFLECTEUR D’HERBE D’ARBRE DROIT – SS26 Voir la figure 7. Retirer la vis à oreilles du déflecteur d’herbe. Insérer la languette du support de montage dans la fente du déflecteur d’herbe. AVERTISSEMENT : Ne pas laisser la familiarité avec le produit faire oublier la prudence.
- Page 28 Mettre le volet de départ en position d’étranglement FULL CHOKE (complètement ouvert). Appuyer sur le bouton de verrouillage de la gâchette et tirer sur le cordon du lanceur jusqu’à ce que le moteur essaie de démarrer. Ne pas tirer le cordon plus de quatre (4) fois. NOTE : Tenir la gâchette enfoncée à...
- Page 29 AVERTISSEMENT : Utiliser exclusivement des pièces d’origine pour les réparations. L’usage de toute autre pièce pourrait créer une situation dangereuse ou endommager l’outil. AVERTISSEMENT : Toujours porter une protection oculaire certifiée conforme à la norme ANSI Z87.1 ainsi qu’un protection auditive. Si cette précaution n’est pas prise, des objets peuvent être projetés dans les yeux et d’autres lésions graves.
-
Page 30: Remplacement De La Bougie
REMPLACEMENT DE LA BOUGIE Ce moteur utilise une bougie Champion RCJ-6Y, NGK BPMR7A ou Ryobi AC00160 avec un écartement d’électrode de 0,63 mm (0,025 po). La bougie doit être remplacée annuellement par une bougie identique. REMISAGE LE PRODUIT ... - Page 31 SI LES PRÉSENTES SOLUTIONS NE RÉSOLVENT PAS LE PROBLÈME, CONTACTER LE CENTRE DE RÉPARATIONS AGRÉÉ. PROBLÈME CAUSE POSSIBLE Le moteur ne démarre pas 1. Pas d’étincelle. 2. Pas de carburant. 3. Moteur noyé. 1. V é r i f i e r Le moteur ne parvient pas au régime ma ximum et 2.
- Page 32 NOUS APPELER D’ABORD Pour toute question concernant l’utilisation ou l’entretien utiliser ce produit , appeler le service d’assistance téléphonique Ryobi Le taille-bordures à été entièrement testé avant expédition pour assurer la complète satisfaction de l’utilisateur. 13 — Français Remplacer toutes Reemplácelo cada...
- Page 33 ® agréé). Le produit, y compris toutes les pièces défectueuses devront être retournés à un centre de réparations Ryobi agréé, avant expiration de la période de garantie. Les frais d’expédition au centre de réparations pour les travaux sous garantie et de retour au propriétaire du produit seront assumés par le...
- Page 34 Si une telle pièce (y compris les pièces qui doivent seulement être inspectées régulièrement) s’avère défectueuse, elle sera réparée ou remplacée gratuitement dans un centre de réparations agréé RYOBI Toute pièce réparée ou remplacée dans le cadre ce cette garantie sera garantie pour le reste de la durée de la garantie.
- Page 35 REGLAS DE SEGURIDAD GENERALES ADVERTENCIA: Lea y comprenda todas las instrucciones. El incumplimiento de las instrucciones señaladas abajo puede causar descargas eléctricas, incendios y lesiones corporales serias. LEA TODAS LAS INSTRUCCIONES Para utilizar este producto de una forma segura, lea y entienda todas las instrucciones antes de usarlo.
- Page 36 REGLAS DE SEGURIDAD ESPECÍFICAS REGLAS DE SEGURIDAD ESPECÍFICAS PARA EL USO DE LA RECORTADORA Inspeccione el producto cada vez antes usarlo. Reemplace toda pieza dañada. Asegúrese de que todos los tornillos y demás elementos de unión estén en lugar y bien firmes. Revise la herramienta para ver si tiene fugas de combustible.
- Page 37 Las siguientes palabras de señalización y sus significados tienen el objeto de explicar los niveles de riesgo relacionados con este producto. SÍMBOLO SEÑAL PELIGRO: ADVERTENCIA: PRECAUCIÓN: PRECAUCIÓN: Es posible que se empleen en este producto algunos de los siguientes símbolos. Le suplicamos estudiarlos y aprender su signifi- cado para mayor seguridad al manejar este producto.
- Page 38 ESPECIFICACIONES DEL PRODUCTO Peso - (sin combustible) CS26 ... 4,7 kg (10,3 lb.) SS26 ... 5,4 kg (11,8 lb.) Anchura del corte del hilo CS26 ...432 mm (17 pulg.) SS26 y BC26 ...457 mm (18 pulg.) Cilindrada del motor...26 cc Diámetro del hilo Mecanismo de avance de hilo Reel-Easy™...2,4 mm (0,095 pulg.) Inserto para cabezal del hilo con línea fija Dual Spool™...
-
Page 39: Montaje Del Mango Delantero
ADVERTENCIA: Si falta o está dañada alguna pieza, no utilice este producto sin haber reemplazado la pieza. Usar este producto con partes dañadas o faltantes puede causar lesiones serias al operador. ADVERTENCIA: No intente modificar este producto ni hacer accesorios no recomendados para la misma. - Page 40 PARA MONTAR EL DEFLECTOR DE PASTO PARA EJE RECTO - SS26 Vea la figura 7. Retire el tornillo de mariposa del deflector de pasto. Introduzca la orejeta del soporte de montaje en la ranura del deflector de pasto. ADVERTENCIA: No permita que su familarización con este producto le vuelva descuidado.
- Page 41 Tire del mango del arrancador hasta que empiece a funcionar el motor. No tire del mango del arrancador más de seis (6) veces. NOTA: Si el motor no arranca, ponga el anegador en “FULL CHOKE” (anegación máxima) y repita los pasos. Permita que el motor funcione 10 segundos y después ponga la palanca del anegador en la posición RUN (funcionamiento).
- Page 42 ADVERTENCIA: Al dar servicio a la unidad, sólo utilice piezas de repuesto idénticas. El empleo de piezas diferentes puede causar un peligro o dañar el producto. ADVERTENCIA: Siempre utilice protección ocular con protección lateral con la marca de cumplimiento de la norma ANSI Z87.1, como así también protección auditiva cuando utilice este equipo.
-
Page 43: Ajuste De La Marcha Lenta
INSTALACIÓN DEL HILO EN EL CABEZAL DEL HILO CON LÍNEA FIJA DUAL SPOOL™ Vea la figura 21. Use únicamente hilo monofilar de 2,4 mm a 2,7 mm. (0,095 pulg. a 0,105 pulg.) de diámetro. Detenga el motor y desconecte el cable de la bujía. Tome dos de los tramos precortados del hilo de la recortadora suministrados o corte dos piezas de hilo de la recortadora en tramos de 279,4 mm (11 pulg.). - Page 44 SOLUCIÓN DE PROBLEMAS SI CON ESTAS SOLUCIONES NO SE RESUELVE EL PROBLEMA, COMUNÍQUESE CON EL CONCESIONARIO DE SERVICIO AUTORIZADO DE SU PREFERENCIA. PROBLEMA CAUSA POSIBLE El motor no arranca 1. No hay chispa. 2. No hay combustible. 3. Está ahogado el motor. E l m o to r n o a l c a n z a l a 1.
- Page 45 LLÁMENOS PRIMERO Si tiene preguntas sobre el funcionamiento o el mantenimiento este producto,llame al teléfono de atención al consumidor de Ryobi La recortadora ha sido probada enteramente antes de embarcarse para asegurar la satisfacción del consumidor. 13 — Español Limpiar cada Reemplácelo cada...
- Page 46 RYOBI sin cargo alguno al comprador por concepto de piezas y mano de obra (Centro de Servicio Autorizado Ryobi).
- Page 47 Todo trabajo de diagnóstico que se realice en un Centro de Servicio Autorizado de RYOBI para el propietario si mediante dicho trabajo se determina que una pieza garantizada está...
- Page 48 Ryobi est une marque déposée de Ryobi ® Limited utilisée sous licence. Ryobi es una marca comercial registrada ® de Ryobi Limited y es empleada mediante autorización. 987000-875 8-24-10 (REV:03) OPERATOR’S MANUAL MANUEL D’UTILISATION / MANUAL DEL OPERADOR STRING TRIMMERS TAILLE-BORDURES À...