Table of Contents
Advertisement
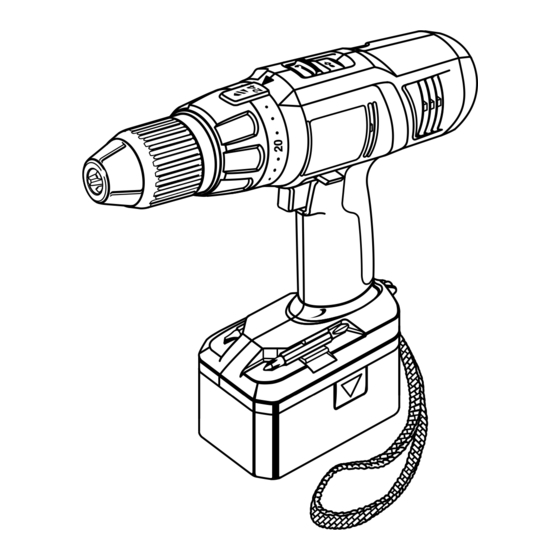
THANK YOU FOR BUYING A RYOBI CORDLESS DRILL-DRIVER.
Your new cordless drill-driver has been engineered and manufactured to Ryobi's high standard for dependability, ease of
operation, and operator safety. Properly cared for, it will give you years of rugged, trouble-free performance.
CAUTION: Carefully read through this entire operator's manual before using your new cordless drill-driver.
Pay close attention to the Rules for Safe Operation, Warnings, and Cautions. If you use your cordless drill-driver properly
and only for what it is intended, you will enjoy years of safe, reliable service.
Thank you again for buying Ryobi tools.
SAVE THIS MANUAL FOR FUTURE REFERENCE
OPERATOR'S MANUAL
CORDLESS DRILL-DRIVER
MODEL NOS. R10511/R10521/R10531
Advertisement
Table of Contents

Related Manuals for Ryobi R10511


Summary of Contents for Ryobi R10511
- Page 1 THANK YOU FOR BUYING A RYOBI CORDLESS DRILL-DRIVER. Your new cordless drill-driver has been engineered and manufactured to Ryobi’s high standard for dependability, ease of operation, and operator safety. Properly cared for, it will give you years of rugged, trouble-free performance.
-
Page 2: Table Of Contents
A. Battery Pack Preparation For Recycling ... 13 Service Information ... 14 CAUTION: Carefully read through this entire manual before using your new drill-driver. Look for this symbol to point out important safety precautions. It means attention!!! Your safety is involved. -
Page 3: Rules For Safe Operation
Servicing of a tool requires extreme care and knowledge of the system and should be performed only by a authorized service technician. For service we suggest you return the tool to your nearest Ryobi Authorized Service Center for repair. When servicing, use only identical Ryobi replacement parts. -
Page 4: Precautions On Using Your Cordless Tool
19. DO NOT USE TOOL IF SWITCH DOES NOT TURN IT ON AND OFF. Have defective switches replaced by an authorized Ryobi Service Center. 20. DRUGS, ALCOHOL, MEDICATION. Do not operate tool while under the influence of drugs, alcohol, or any medication. -
Page 5: Precautions Regarding The Use Of Charger And Battery
Do not operate charger if it has received a sharp blow, been dropped, or otherwise damaged in any way; take it to a Ryobi Authorized Service Center. Do not disassemble charger; take it to a Ryobi Authorized Service Center when service or repair is required. -
Page 6: Specifications
IMPORTANT INFORMATION FOR RECHARGING HOT BATTERIES USING CHARGER PART NUMBER 1400677 When using your drill-driver continuously, the batteries in your battery pack will become hot. You should let a hot battery pack cool down for approximately 30 minutes before attempting to recharge. When the battery pack becomes discharged and is hot, this will cause the red light on your battery charger to flash. -
Page 7: Charging The Drill-Driver
Green light on indicates battery pack is fully charged or in slow charging mode to maintain battery pack charge. Yellow light on and red light flashing indicates defective battery pack. Return battery pack to your nearest Ryobi Authorized Service Center for checking or replacing. Page 7... -
Page 8: Charging With Charger 1400666/1400656/1400667
LED FUNCTION OF CHARGER 1400677 LED WILL BE LIGHTED TO INDICATE STATUS OF CHARGER AND BATTERY PACK: Red LED Lighted = Fast Charging Mode. Green LED Lighted = Fully Charged Or In Slow Charging Mode To Maintain Battery Pack Charge. Red LED Flashing = Hot or Deeply Discharged Battery Pack. - Page 9 Your drill has a two-speed gear train designed for drilling or driving at LO (1) or HI (2) speeds. A slide switch is located on top of your drill to select either LO (1) or HI (2) speed. When using drill in the LO (1) speed range, speed will decrease and unit will have more power and torque.
- Page 10 KEYLESS CHUCK See Figure 7. A keyless chuck has been provided with your drill to allow for easy installation and removal of bits. As the name implies, you can hand tighten or release drill bits in the chuck jaws.
- Page 11 Open or close the chuck jaws to a point where the opening is slightly larger than the bit size you intend to use. Also, raise the front of your drill slightly to keep the bit from falling out of the chuck jaws.
- Page 12 If you are not prepared, this loss of control can result in possible serious injury. When drilling metals, use a light oil on the drill bit to keep it from overheating. The oil will prolong the life of the bit and increase the drilling action.
-
Page 13: Maintenance
CAUTION: Any repairs requiring disassembly should only be performed by a Ryobi Authorized Service Center. For the repair center nearest you, call 1-800-525-2579. Store and charge your batteries in a cool area. Temperatures above normal room temperature will shorten battery life. -
Page 14: Service Information
Please refer to the Service Center insert or call 1-800- 525-2579 in the United States or 1-800-265-6778 in Canada for your nearest Ryobi Authorized Service Center. You can also check our web site at www.ryobi.com for a complete list of Authorized Service Centers.